Sourdough Focaccia Recipe

This Spiced Italian Comfort Food is Excellent as an Appetizer, Side Dish, or Main Course

Photo of Kelly R. Smith   by Kelly R. Smith; © 2022

Sourdough focaccia in a skillet
index sitemap advanced

Ads we feature have been independently selected and reviewed. If you make a purchase using the links included, we may earn a commission, which helps support the site. Thank you for your support.

Sourdough focaccia is one of those wonderful Italian dishes that is enjoyed by itself as an appetizer or as a meal unto itself. In our home, we do either, depending on our mood, just like my guacamole recipe. With this recipe, it emerges with a delicious, chewy tang and a mouth-watering golden crust. It all starts with your beloved starter. Don’t have one yet? Here are three ways to get your sourdough starter going.

Is focaccia the same as pizza crust? No! However, it is thought to be a precursor of pizza when it was a flatbread known to Romans as panis focacius, to which toppings were then added. Modern pizza evolved from similar flatbread dishes in Naples, Italy, in the 18th or early 19th century.


Sourdough Focaccia Ingredient List

  • 1 cup sourdough starter
  • 1 cup warm water
  • 1 tablespooln honey
  • 1 teaspoon pink Himalayan salt
  • 3 tablespoons extra-virgin olive oil
  • 3/4 cup diced onion
  • Approximately 5 cups of flour


Preparation

  1. Mix the starter, honey, and water in a large mixing bowl. A cast iron skillet is perfect. It will look like a big blob, and that’s okay! Us your hands to pull the edges out to gently stretch them. Your dough should be about 1 1/2 inches tall. Don’t stretch any more. Let it rise in a warm spot. Cover it with another piece of cookware, upside down, so it has room to rise for 2-3 hours hours until it is puffy and very bubbly.
  2. Preheat oven to 425 degrees F.
  3. Drizzle the top of the dough with olive oil Press your fingertips using your whole hand into the risen dough. Your fingertips should go all the way down through the dough until you feel the pan.
  4. Put your pan in the oven on middle rack. Bake for 15 minutes. Remove it for a moment and brush the top with melted butter, garlic, and oregano. Turn your oven down to 400 degrees F. Bake it for another 10 or so minutes until the crust is golden brown and bounces back a wee bit when you press down on it. Let it cool for 15 minutes, cut. and enjoy.


Looking for more great content? Visit our main page or partner sites:

Considered Opinions Forum

I Can Fix Up My Home

The Green Frugal

Running Across Texas


As Featured On Ezine Articles

I offer article and blog-writing services. Interested? Contact me for a quote!


Did you find this article helpful? Millions of readers rely on information on this blog and our main site to stay informed and find meaningful solutions. Please chip in as little as $3 to keep this site free for all.


Visit Kelly’s profile on Pinterest.

About the Author:

Photo of Kelly R. SmithKelly R. Smith is an Air Force veteran and was a commercial carpenter for 20 years before returning to night school at the University of Houston where he earned a Bachelor’s Degree in Computer Science. After working at NASA for a few years, he went on to develop software for the transportation, financial, and energy-trading industries. He has been writing, in one capacity or another, since he could hold a pencil. As a freelance writer now, he specializes in producing articles and blog content for a variety of clients. His personal blog is at Considered Opinions Blog where he muses on many different topics.

No-Knead Skillet Focaccia

This Organic Italian Bread is Suitable for a Dipping Sauce or As-Is

Photo of Kelly R. Smith   by Kelly R. Smith
No-knead skillet focaccia
index sitemap advanced

Ads we feature have been independently selected and reviewed. If you make a purchase using the links included, we may earn commission, which helps support the site.

Focaccia is a flat oven-baked Italian bread similar in style and texture to pizza; in some places, it is called “pizza bianca”. Focaccia can be served as a side dish or as homemade sandwich bread.

This recipe is rich with olive oil (which keeps it extra moist), topped with fragrant lemon zest, Parmesan cheese, and rosemary, and baked in a skillet to give it a perfectly golden, crispy crust.

You will be using an oven-safe skillet for this recipe. A cast iron skillet is best for achieving a super-crispy crust (and an effort-free way of getting a bit more iron into your diet)), but any oven-proof skillet will work.

Focaccia Ingredient List

Note: Use organic ingredients whenever possible.

  • 2 cups whole wheat flour
  • 1/2 teaspoon pink or Himalayan salt
  • 1/2 cup flaxseed meal
  • 1 package Fleischmann’s RapidRise yeast (or comparable)
  • 1 cup lukewarm water
  • Extra-virgin olive oil, as needed
  • 2 teaspoons coarsely chopped fresh rosemary leaves (straight from my herb garden)
  • 2 teaspoons fresh lemon zest (I just picked one off my Improved Meyer Lemon tree in my garden)
  • 1/2 cup Parmesan cheese, shredded
  • Chopped fresh basil to taste, if desired


Preparation Steps

  1. If you have a food processor, put the flour, salt, and yeast in it, fitted with the blade attachment, and pulse to combine. Add the water and 2 tablespoons of the oil. Pulse until a rough ball of dough forms, about 15 (2-second) pulses. If you don’t have one, mix by hand in a mixing bowl.
  2. Drizzle 2 teaspoons oil in a large bowl. Flour your hands, scoop the dough out of the food processor, and form into a smooth ball. Put the ball of dough in the oiled bowl and turn it so it’s coated on all sides. Cover the bowl with plastic wrap or a kitchen towel and let it sit at warm room temperature for 2 to 3 hours.
  3. Drizzle 1 teaspoon of the oil into your cast iron or other ovenproof skillet and rub it well over the bottom and sides. Punch down the dough and place the dough in the skillet. Coax and stretch the dough to cover the bottom of the skillet until it reaches all the way to the edges. Cover with plastic wrap or a kitchen towel and let it rest at warm room temperature for 30 to 40 minutes. Meanwhile, arrange a rack in the middle of the oven and heat to 450°F.
  4. Lightly dimple the surface of the dough with 2 knuckles. Drizzle the remaining 1 tablespoon of oil over the dough so that it pools in some of the indentations and lightly coats the rest of the surface. Sprinkle with the rosemary, lemon zest, Parmesan cheese, basil if you opted for it, and a bit more salt if desired. Of course, if you have high blood pressure, don’t.
  5. Place your skillet in the oven and immediately turn the heat down to 400°F. Bake until lightly golden-brown. Start checking at 20 to 25 minutes but it may take longer than that.
  6. Remove your skillet from the oven and cool for at least 15 minutes before slicing and serving. Focaccia is best eaten when warm, but is also good at room temperature. If the crust gets too soft, reheat in a 350°F oven to crisp it up.


See, making no-knead skillet focaccia is a breeze, although it sounds very ooh-la la and exotic. The grocery store certainly prices it that way. But, throw off your consumer price shackles and make your own. Don’t be afraid to modify and experiment.

More Recipes and Cooking Tips


Did you find this article helpful? Millions of readers rely on information on this blog and our main site to stay informed and find meaningful solutions. Please chip in as little as $3 to keep this site free for all.


Visit Kelly’s profile on Pinterest.

About the Author:

Photo of Kelly R. SmithKelly R. Smith is an Air Force veteran and was a commercial carpenter for 20 years before returning to night school at the University of Houston where he earned a Bachelor’s Degree in Computer Science. After working at NASA for a few years, he went on to develop software for the transportation, financial, and energy-trading industries. He has been writing, in one capacity or another, since he could hold a pencil. As a freelance writer now, he specializes in producing articles and blog content for a variety of clients. His personal blog is at I Can Fix Up My Home Blog where he muses on many different topics.

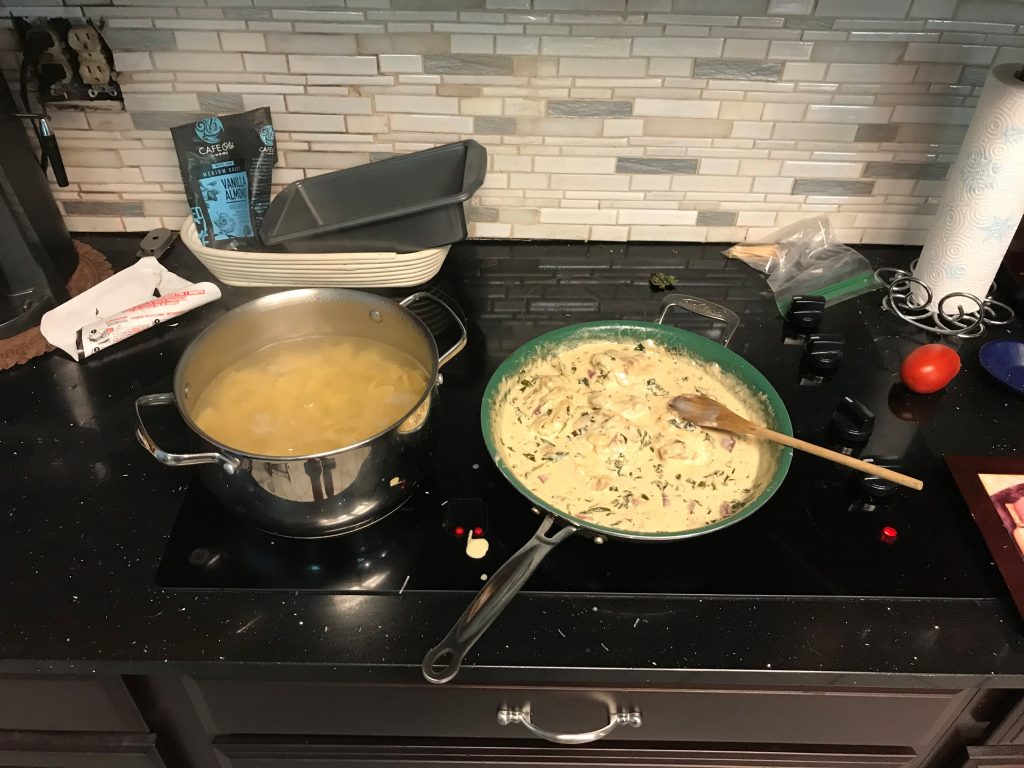
Creamy Parmesan Basil Chicken Recipe

This Satisfying Dish is a Favorite Comfort Food. Easy to Make and Nutritious, Your Whole Family Will Love It!

Photo of Kelly R. Smith   by Kelly R. Smith

Creamy Parmesan Basil Chicken
Creamy Parmesan basil chicken being prepared
index sitemap advanced

Ads we feature have been independently selected and reviewed. If you make a purchase using the links included, we may earn commission, which helps support the site.

This article was updated on 03/26/21.

I made this tasty dish last weekend and it was a huge hit! All three of my basil plants are going gangbusters right now so if I’m not making pesto, spaghetti carbonara, or something else, I’m looking to be creative. I mention this because one of the keys to growing basil all season is to keep it trimmed back. If you let the flowers and seeds get out of hand you won’t be encouraging leaf growth.

This recipe is so easy and quick to make. I only spent about 45 minutes preparing it. It serves 4. Here’s how:

Creamy Parmesan Basil Chicken Ingredient List

  • 4 large chicken breasts (Whole, sliced in half, or cut into strips)
  • 1 box of pasta, your choice
  • 3 tablespoons butter (not margarine)
  • 4 large garlic cloves, minced
  • 1 1/2 cups heavy cream
  • 1/2 onion, finely minced (I prefer red onions but use what you like)
  • 3-4 ounces roasted red peppers, thinly sliced
  • black pepper to taste
  • salt to taste
  • 2 to 3 cups packed fresh basil leaves, cut up (quantity is a personal preference)
  • 1/4 teaspoon crushed red pepper flakes
  • 1 1/2 cups fresh grated Parmesan cheese
  • 1/2 cup white wine or chicken stock

Preparation

  • In a large non-stick pan on medium high heat, melt 2 tablespoons of the butter. Season chicken with salt and pepper, then sear, 4 to 5 minutes on each side, until just cooked. Remove the chicken from the pan and set aside.
  • Start the pasta cooking while continuing with the sauce; cook until al dente.
  • Add the remaining 1 tablespoon of butter to the pan. Toss in the onion, garlic, peppers, paprika, red chili pepper flakes, salt, and pepper. Saute for about five minutes, just until onions and peppers become soft.
  • Reduce heat to medium. Add wine or chicken stock to de-glaze the pan. Adjust heat as needed to bring to a gentle simmer until reduced by half.
  • Lower the heat to medium low. Add the cream to the pan. Stir it until a creamy sauce forms. Add in the Parmesan cheese and stir until it is melted into sauce. Stir in the basil and simmer until just wilted, 1-2 minutes.
  • Add the chicken back to the pan and allow to warm up. It’s done! Serve over the pasta.

You Might also Enjoy…

Looking for more great content? Visit our main site I Can Fix Up My Home and our partner sites:

The Green Frugal

Running Across Texas


As Featured On Ezine Articles

I offer article and blog-writing services. Interested? Hire Me!


Did you find this article helpful? Millions of readers rely on information on this blog and our main site to stay informed and find meaningful solutions. Please chip in as little as $3 to keep this site free for all.


Visit Kelly’s profile on Pinterest.

About the Author:

Photo of Kelly R. SmithKelly R. Smith is an Air Force veteran and was a commercial carpenter for 20 years before returning to night school at the University of Houston where he earned a Bachelor’s Degree in Computer Science. After working at NASA for a few years, he went on to develop software for the transportation, financial, and energy-trading industries. He has been writing, in one capacity or another, since he could hold a pencil. As a freelance writer now, he specializes in producing articles and blog content for a variety of clients. His personal blog is at I Can Fix Up My Home Blog where he muses on many different topics.

No-Fry Eggplant Parmesan Recipe

index sitemap advanced
Breading Eggplant Parmesan

Although eggplant is often considered to be a vegetable, it is actually a berry by botanical definition. I know, I know; I don’t get it either. Health-wise, it’s got a lot going for it. According to naturalremediescenter.com, ” It is said that eggplant may have effects in preventing and treating high blood pressure, high blood sugar and high cholesterol. Eggplant is rich in phenols which may inhibit an enzyme tied to high blood pressure. Thus eggplant may do your body some favors in lower high blood pressure.” And it tastes great. So what’s to lose?

This recipe is a meatless dish so if you are the kind of person who opts for a soybean-based burger rather than traditional beef, you can’t go wrong here.

Ingredient List

  • 1 large eggplant, sliced 1/4 inch rounds
  • Salt
  • Freshly ground black pepper
  • 12 oz. Marinara or tomato sauce of your choice
  • 1/2 cup finely chopped fresh basil (add other herbs as desired)
  • 1 1/2 cups panko breadcrumbs, regular or your choice of flavor
  • 1 cup grated Parmesan cheese (more is fine)
  • 2 eggs, beaten
  • 1 cup shredded mozzarella cheese (more is fine)
  • Optional: hot sauce to taste, added to the tomato sauce

Eggplant Parmesan Preparation

  • The first step is to “sweat” the eggplant rounds. Since eggplant absorbs so much water by itself, it is important to remove as much moisture from the rounds as possible. Do this by salting both sides and then placing them in a colander in the sink. Two colanders should work for one eggplant. Let them sweat for at least 2 hours. More is better; just like the rising you allocate for homemade bread.
  • Rinse the salt off and press dry with paper towels.
  • Preheat the oven to 425°F.
  • Apply olive oil to a large baking sheet pan.
  • Whisk the eggs in a small bowl.
  • Spread some panko on a dish.
  • One at a time, dredge the rounds in the egg, coat both sides liberally with panko, and arrange on the baking sheet.
  • Bake 9 minutes, flip the rounds, bake another 9 minutes.
  • Remove from oven and allow them to cool.
  • Lower oven temperature to 350°F.
Layering Eggplant Parmesan
  • Stir the basil into the sauce.
  • Spread a thin layer of sauce on the bottom of an 8″ X 8″ Pyrex baking dish.
  • Lay out a layer of rounds in the dish. Since they are round you can cut one up to fill the “gaps.”
  • Sprinkle with both kinds of cheese; the amount is up to you.
  • Top with another layer of rounds.
  • Spread sauce and sprinkle with cheese.
  • Keep layering in this fashion until you run out of rounds. The top layer should have sauce and cheese.
  • Bake for 35 minutes.
  • Enjoy!

That’s all there is to it! Of course, you can try different kinds of cheese. This really is a bonus if you are feeding picky kids. This no-fry eggplant Parmesan is very versatile for the adventurous cook. You might pair it with a Tuscan kale salad or homemade low-carb egg noodles.

Looking for more great content? Visit our partner sites:

The Green Frugal

Running Across Texas


As Featured On Ezine Articles

I offer article and blog-writing services. Interested? Hire Me!


Did you find this article helpful? Thanks for supporting this free site with a small donation!


Visit Kelly’s profile on Pinterest.


About the Author:

Photo of Kelly R. SmithKelly R. Smith is an Air Force veteran and was a commercial carpenter for 20 years before returning to night school at the University of Houston where he earned a Bachelor’s Degree in Computer Science. After working at NASA for a few years, he went on to develop software for the transportation, financial, and energy-trading industries. He has been writing, in one capacity or another, since he could hold a pencil. As a freelance writer now, he specializes in producing articles and blog content for a variety of clients. His personal blog is at I Can Fix Up My Home Blog where he muses on many different topics.

How to Make Sauce Cling to Your Pasta

This Cooking Tip Will Give You Enjoyable Restaurant-Style Results

Photo of Kelly R. Smith   by Kelly R. Smith

Cooking pasta with the  emulsion method.
Cooking pasta with the emulsion method
index sitemap advanced

This article was updated on 04/29/21.

Ads we feature have been independently selected and reviewed. If you make a purchase using the links included, we may earn a commission, which helps support the site. Thank you for your support.

Who doesn’t like pasta? Spaghetti Carbonara, ravioli, elbow, penne, and so much more. It’s comfort food, just like tater tots and cheeseburgers. But have you ever wondered why the sauce clings so well to restaurant pasta but when you make it at home it slides right off and puddles on you plate? The secret is the concept of emulsion. The good news is that you can easily make it happen in your own kitchen!

What is this emulsion anyway? In a nutshell, it’s when two or more liquids that normally won’t mix are forced to come together. For example, mayonnaise is an oil in water emulsion that is stabilized by the lecithin in egg yolk. That’s why you don’t have to stir it up. Peanut butter is another good example (except for the kind that you do need to stir). Now let’s learn how to apply emulsion to home-cooked pasta.

Easy Steps to Making Sauce-Clinging Pasta

  • Bring heavily salted water to a boil in an appropriately-sized pot. I like using “pink” or Himalayan salt. Regular table salt has all the minerals stripped out of it.
  • Add the pasta.
  • Do not cook it to the al dente stage; leave it a bit undercooked because it will finish in the sauce.
  • When you go to drain the pasta, reserve a cup of the water. Set the pasta aside.
  • Add your sauce to the now-empty pot. For every 3 ounces of dry pasta that you cooked, use 1/2 cup of sauce.
  • Heat the sauce to a simmer.
  • Add in any extra vegetables that you enjoy.
  • Toss in 1/2 tablespoon of butter (I like Kerrygold Irish butter but it’s your call). Stir in until it melts. Repeat until you can run a spoon through it and see all the way to the bottom of the pot without the sauce quickly seeping back to fill the gap.
  • Add the drained pasta directly to the pot. Mix vigorously. This will further emulsify and thicken your sauce by grabbing bits of starch from the pasta; mixing your pasta and sauce directly in your pot instead of pouring sauce over the pasta is the key finishing step to achieve that restaurant quality. Different kinds of pasta interact with different sauces differently. Some soak up more liquid than others. If your sauce is too thick, this is where you can mix some of your reserved pasta water back in, just a wee bit at a time.
  • Serve and enjoy!

I like to serve it with a side of Tuscan kale salad. Go ahead and experiment with making sauce cling to your pasta. Different kinds of pasta, different kinds of sauce; it’s an adventure. Of course, it also works in low-carb noodles recipes.

Trending Recipes


Looking for more great content? Visit our main page or partner sites:

I Can Fix Up My Home

The Green Frugal

Running Across Texas


As Featured On Ezine Articles

I offer article and blog-writing services. Interested? Contact me for a quote!


Did you find this article helpful? Millions of readers rely on information on this blog and our main site to stay informed and find meaningful solutions. Please chip in as little as $3 to keep this site free for all.


Visit Kelly’s profile on Pinterest.

About the Author:

Photo of Kelly R. SmithKelly R. Smith is an Air Force veteran and was a commercial carpenter for 20 years before returning to night school at the University of Houston where he earned a Bachelor’s Degree in Computer Science. After working at NASA for a few years, he went on to develop software for the transportation, financial, and energy-trading industries. He has been writing, in one capacity or another, since he could hold a pencil. As a freelance writer now, he specializes in producing articles and blog content for a variety of clients. His personal blog is at Considered Opinions Blog where he muses on many different topics.

Low-Carb Spaghetti Carbonara Recipe

Carbonara spaghetti may sound exotic but it is really a simple dish. This recipe is a variation on the typical one as it is made with a low-carb diet in mind. One of the things I like about this recipe is that it is open to modification if you feel like adding more spices, using a different species of cheese, etc.

Low-carb black bean spaghetti carbonara

I for one love Italian food. Homemade pizza always goes over big here and one of our favorites is Pizza Margherita. Of course there is always that debate over crispy or thick crust. That’s a battle I have yet to win, yet in the pursuit of domestic tranquility…

Speaking of low-carb Italian dishes, have you tried your hand at making egg noodles? Zero carbs with plenty of nutritional value is a good thing.

Ingredient List

  • 16 oz black bean spaghetti (this is what makes the dish low-carb; if that is not important to you use any kind of past you prefer)
  • 4 eggs
  • 1 cup onions, chopped
  • 10 slices chopped bacon (nitrate free if possible)
  • 1 1/2 cup grated parmesan cheese
  • 30 fresh basil leaves, chopped
  • 16 oz black bean spaghetti
  • Chopped parsley (you decide how much)
Balanceuticals Specials - Additional 10% off on Balanceuticals Products

Directions

  • Whisk the eggs thoroughly in a large mixing bowl.
  • Whisk in the basil.
  • Whisk in the cheese.
  • Put the spaghetti in a large pan, cover with water, and bring to a boil; stir occasionally.
  • Start cooking the bacon in a skillet or sauce pan; add the onion when the bacon is half-way done; set the pan aside when the bacon is done. There is no need to drain it.
  • When the spaghetti is al dente begin adding it to the egg mixture. Add a bit at a time while mixing.
  • Mix in the bacon/onion mixture.
  • Serve and top with more cheese and parsley if desired.

Did you make any interesting and tasty tweaks to this low-carb spaghetti carbonara recipe? If so, share with our fellow foodies in the comment section below.


Looking for more great content? Visit our partner sites:

The Green Frugal

Running Across Texas


As Featured On Ezine Articles

I offer article and blog-writing services. Interested? Hire Me!


Did you find this article helpful? Thanks for supporting this free site with a small donation!


Visit Kelly’s profile on Pinterest.


Widget is loading comments…
close

Enjoy this blog? Please spread the word :)

RSS
Follow by Email
Twitter
Follow Me
Tweet
Pinterest
Pinterest
Pinterest
Instagram
LinkedIn
Share