Ads we feature have been independently selected and reviewed. If you make a purchase using the links included, we may earn commission, which helps support the site.
I know, you are probably looking at this and saying, “What? Chicken jerky for dog treats? Is that not just a wee bit indulgent?” Sure you’re right, but hear me out. It’s all about the money and the nutrition. Dog treats are like mattresses; the mark-up on them is outrageous for such a common commodity. Why? Because they can get it. And the nutrition? Just look at the ingredient list on the box. Now look at the ingredient list on a package of raw chicken pieces. No contest.
I have tested this out on our four rescue dogs Eddie, Frankie, Maggie, and Sammie. Why do their names all end with “ie?” I don’t know; another mystery of the universe. Anyway, offering them a commercial treat in one hand and a homemade one in the other, they choose my cuisine every time. Not to pat myself on the back, of course.
What You Need to Make Chicken Jerky
This is fairly easy. You will need a food dehydrator. Depending on the size of your dehydrator you will need skinless chicken pieces. For example, I use an Ivation 6-Tray Food Dehydrator. It’s a commercial version, but reasonably priced. It holds about 2 pounds of chicken. Or beef. Or lots of sliced apples. You get the idea. Yes, this is most likely a model that a prepper or homesteader would invest in. You will also need a very sharp knife and a large cutting board.
Making the Jerky
The process here is straightforward. In fact, it is the same as my teriyaki beef jerky recipe, omitting the marinade overnight step. Of course, if you are making it for you, knock yourself out. Better still, make 3 trays for Fido and 3 for you. That’s called humane, I believe.
Make the slices about 1/4 inch thick. As far as length of the strips go, 3 inches is good. Dogs are more into the dog treat itself, not the specific size. Arrange slices on your dehydrator trays, allowing some space between pieces for air circulation. Set the timer for 8 hours but begin checking it at 6 hours. You will know when it is done but the longer you go the crunchier it will be. That’s up to you and your furry friend. The picture below is our “done.” Compare it to the raw picture at the top of this page.
Dehydrated chicken jerky, preserved and ready to eat
That’s about all there is to making chicken jerky for dog treats. Store them in the refrigerator and be generous. Your pup may even deign to share with you… if you’re a good human.
Did you find this article helpful? Millions of readers rely on information on this blog and our main site to stay informed and find meaningful solutions. Please chip in as little as $3 to keep this site free for all.
A lot of people will tell you that this dish originated in Columbus, Ohio, but it is safe to say that no group of people have enjoyed it as much as Zonians. Some variations on the name are Marzetti and Marzotti, but whatever you call it, it’s just the thing to wash down with a bottle Cerveza Panama (or Balboa or Atlas if you prefer; people seem to be polarized on this).
Following is my list the traditional ingredients, but when I put some things in parentheses, that just means that these are substitutions I have experimented with and enjoyed. You are encouraged to do the same. You won’t be the first or the last, and there are many variations out there. Who knows what old Johnny would say about that?
List of Ingredients (Organic where Possible)
3/4 lb. grated cheddar cheese (or mix it up; I last experimented with half cheddar and half asiago)
1 1/2 pounds lean ground beef
1 large green bell pepper (or yellow or red)
1 large onion, chopped (I like red onions)
As much minced garlic as you like
1 16 oz. can of tomato sauce (or Pace Picante Sauce, hot or mild)
2 celery stalks, chopped
1 can of Arturo Sauce if you can find it; Amazon has it, (otherwise, 8 oz. can of tomato sauce)
1 can of mushrooms (I prefer bulk shrooms; shiitake, baby bella, or portobello)
1 8 oz. can of tomato paste
Black and/or green olives, with or without the juice, about 7 oz. total
Optional: Hot peppers! (I said Panama, right? Aji chombo or habaneros works for me.)
Directions
Preparing Johnny Mazetti
Cook the ground beef and vegetables in a large skillet.
Add in all the sauces.
Pre-heat your oven to 350 F.
Add the olives and mushrooms.
Remove from heat and cook the noodles.
Mix it all together and place it in a 9” X 13” glass baking dish.
Spread the cheese on top.
Bake for 1 hour.
Remove and enjoy.
This batch of Johnny Mazetti this size will serve 6 to 8 people, depending on appetite. This is a particularly good dish as a recovery food after a long run or after a hard workout. It is also one of those foods that gets better when reheated after being frozen or refrigerated; something about the flavors mingling together. It’s best served with cold beer or wine. Enjoy!
Did you find this article helpful? Millions of readers rely on information on this blog and our main site to stay informed and find meaningful solutions. Please chip in as little as $3 to keep this site free for all.
Kelly R. Smith is an Air Force veteran and was a commercial carpenter for 20 years before returning to night school at the University of Houston where he earned a Bachelor’s Degree in Computer Science. After working at NASA for a few years, he went on to develop software for the transportation, financial, and energy-trading industries. He has been writing, in one capacity or another, since he could hold a pencil. As a freelance writer now, he specializes in producing articles and blog content for a variety of clients. His personal blog is at I Can Fix Up My Home Blog where he muses on many different topics.
Ads we feature have been independently selected and reviewed. If you make a purchase using the links included, we may earn a commission, which helps support the site. Thank you for your support.
The weather is starting to cool off and that means two things — it is time for a flu shot and comfort food is the order of the day. This recipe for shepherd’s pie fills the bill nicely. Easy, frugal meals are just what we need as we spend more time at home because of the COVID-19 pandemic or inclement weather. One good thing about this meal is its flexibility. There is any number of substitutions and additions you can make. Customize your vegetables or add hot peppers So, let’s get started.
Shepherd’s Pie Ingredients
1 pound ground beef
1 box Beef Pasta Hamburger Helper (or the flavor of your choice); tonight I’m going to use the “cheesy enchilda” flavor.
Hot water/milk called for on Hamburger Helper box
1 1/2 cups frozen mixed vegetables, thawed
Hungry Jack mashed potatoes for 6 servings
Water and butter called for on mashed potatoes box for 6 servings
1/2 cup shredded Cheddar cheese
Chopped parsley (amount to taste)
Preparation Steps
Using a 10-inch skillet, cook beef over medium-high heat for 5 – 7 minutes, stirring often, until brown. Drain the grease. Stir in hot water, milk, sauce mix, uncooked pasta (from the Hamburger Helper box), and thawed vegetables. Heat to boiling, stirring frequently.
Reduce the heat. Cover and simmer about 10 minutes, stirring frequently, until the pasta and vegetables are tender. As you do this, make the mashed potatoes as directed on box for 6 servings. Remove the skillet from heat.
Spoon and gently spread mashed potatoes over the pasta mixture. Sprinkle with the cheese. Cover; let stand about 5 minutes or until cheese is melted. Sprinkle with parsley and serve.
That’s all there is to the shepherd’s pie skillet recipe. You can substitute a different type of cheese, type of Hamburger Helper, and add additional spices. It’s all good.
Got a blog or website? Want more revenue? Monetize it!
Did you find this article helpful? Millions of readers rely on information on this blog and our main site to stay informed and find meaningful solutions. Please chip in as little as $3 to keep this site free for all.
Everywhere we turn nowadays we hear about probiotics. But what about prebiotics and synbiotics? Actually, they all work hand in hand. Here’s the rundown.
Probiotics. WebMD says, “Probiotics are live bacteria and yeasts that are good for you, especially your digestive system. We usually think of these as germs that cause diseases. But your body is full of bacteria, both good and bad. Probiotics are often called ‘good’ or “helpful” bacteria because they help keep your gut healthy.” When you lose the “good” bacteria that inhabit your gut, after you take antibiotics for example, probiotics can help replace them. The two main types are lactobacillus and bifidobacterium. You can get them through dairy and supplements.
Prebiotics. The Mayo Clinic tells us, “Prebiotics are specialized plant fibers. They act like fertilizers that stimulate the growth of healthy bacteria in the gut.” They are found in a variety of fruits and vegetables, mostly those that are rich complex carbohydrates, such as fiber and resistant starch. These carbs aren’t digestible by your body, so they pass through the digestive system to become food for the bacteria and other microbes. When your balance is off it can affect your metabolism.
Synbiotics. ScienceDirect says, “Synbiotics are a combination of prebiotics and probiotics that are believed to have a synergistic effect by inhibiting the growth of pathogenic bacteria and enhancing the growth of beneficial organisms.” Evidence suggests that synbiotics influence the microbial ecology in our intestines. This is true in both humans and animals and synbiotics play a role in alleviating various illnesses.
Knowing what we know about prebiotics, probiotics, and synbiotics it becomes clear that we should maintain our diet with various types of foods in mind, organic whenever possible. This includes milk, cheese, fermented foods like kimchi and kombucha, whole grains, miso, fruits, and vegetables.
Benefits of Probiotics
Improves immune function. They assist in the treatment and/or prevention of many common conditions. Some of these include diarrhea, irritable bowel syndrome, ulcerative colitis, and Crohn’s disease.
Protects against hostile bacteria to prevent infection. Under normal (balanced) conditions, your friendly bacteria in your gut outnumber the unfriendly ones. Probiotics stand duty as gut-beneficial bacteria that create a physical barricade against legions of unfriendly bacteria.
Improves digestion and absorption of food and nutrients.
Counters the negative effects of antibiotics. When you contract a bacterial infection, antibiotics are most often prescribed to as the immediate solution. That’s a Godsend, but unfortunately, nothing good comes free, and antibiotics kill bacteria arbitrarily, decimating both good and bad bacteria in your intestinal tract. By eliminating beneficial bacteria, your body is susceptible to a number digestive issues. Myself, when I go to the grocery store to have an antibiotic prescription filled, I also stock up on yogurt with active cultures.
Boosts heart health.
Lowers cholesterol. Probiotics contain bacteria that are effective in lowering total and LDL (bad) cholesterol. Taylor Francis Online says, “Numerous clinical studies have concluded that BSH-active probiotic bacteria, or products containing them, are efficient in lowering total and low-density lipoprotein cholesterol.”
Kelly R. Smith is an Air Force veteran and was a commercial carpenter for 20 years before returning to night school at the University of Houston where he earned a Bachelor’s Degree in Computer Science. After working at NASA for a few years, he went on to develop software for the transportation, financial, and energy-trading industries. He has been writing, in one capacity or another, since he could hold a pencil. As a freelance writer now, he specializes in producing articles and blog content for a variety of clients. His personal blog is at I Can Fix Up My Home Blog where he muses on many different topics.
I love beef jerky and I suspect that I am not alone in that respect. But, there are three issues that I have with the commercial variety:
It’s too expensive.
The texture tends to be to hard.
God only knows what kind of chemicals and preservatives are used.
And that is one reason why I invested in a food dehydrator. Now I can make my own marinades and control the texture. I made a batch yesterday so my new appliance is paying for itself already. Next, I’m going to run a batch of apples. But here is the simple jerky recipe.
Beef Jerky Ingredients
1 3/4 pounds of thin round sirloin tip. Any lean cut will do. Organic grass-fed is preferable. If you’ve got deep pockets, substitute bison. I know my sister will. That woman knows her food.
1 12 oz. bottle of Lawry’s Teriyaki with Pineapple juice.
Slice the meat thin. I prefer about 1/4″. Remember that the meat will shrink as it cooks. As for length, about 6″ is what I like but take into account the geometry and size of your food dehydrator. You will likely end up with some irregular pieces, but that’s OK; it’s jerky after all.
Put the slices in a container. The Pyrex dish you see above worked well.
Pour the marinade over the beef and mix it up well to ensure a thorough coating.
Put in in the refrigerator overnight. Some recipes only call for a few hours but the way I see it, I’m already in it this far. Do it up good. I know Perry’s smokes their famous pork chops for several days. If you’ve had one you know that patience is a good habit.
Stir it all up every few hours. I get up sporadically during the night for a bodacious swallow of ice water so no problemo, friend.
Pat the slices on paper towels to remove excess marinade.
Arrange slices on your dehydrator trays. Allow space for air circulation.
Set the temperature for 160 degrees F.
Set the timer for 4 hours.
Check it every so often for your desired degree of done-ness. Mine was perfection at 3 1/2 hours. Turn off the unit.
Leave it in the dehydrator until it cools.
Enjoy!
Beef jerky properly spaced on the dehydrator tray
That’s all there is making your own teriyaki beef jerky. Of course, any other marinade works just as well. Buy your favorite or make your own.
I offer article and blog-writing services. Interested? Hire Me!
Did you find this article helpful? Thanks for supporting this free site with a small donation! We depend on our readers rather than a bothersome paywall to keep the lights on here in the shop.
Kelly R. Smith is an Air Force veteran and was a commercial carpenter for 20 years before returning to night school at the University of Houston where he earned a Bachelor’s Degree in Computer Science. After working at NASA for a few years, he went on to develop software for the transportation, financial, and energy-trading industries. He has been writing, in one capacity or another, since he could hold a pencil. As a freelance writer now, he specializes in producing articles and blog content for a variety of clients. His personal blog is at I Can Fix Up My Home Blog where he muses on many different topics.
There are many ways to cook and preserve food. In recent years the increasing number of homesteaders and preppers have made canning and dehydrating popular again. Processing food with a food dehydrator is great for storing food in the home and keeping the nutritional value while reducing weight for campers, hikers, or just going on a road trip with family and friends.
I was motivated to buy the Ivation 6-tray dehydrator pictured above, I won’t lie, because I love beef jerky. Well, to be honest, my daughter is crazy for the jerky from Buc-ee’s. So I called her and asked, “What flavor?” She said, “Teriyaki beef jerky.” So I shopped. There are many out there but led me to choose this one was size, materials, and the fact that it’s commercial-grade. In for a dime, in for a dollar, I always say.
By the way, if you were wondering when looking at the picture above, the dehydrator is set up on one of the work benches in my wood shop. No sense in heating up the kitchen during the Texas summer.
Features of the Ivation Dehydrator
Six trays. These trays measure 13” X 12”. Plenty of room for processing an assortment of food.
Rear-mounted automatic fan. The fan circulates warm air with 600W of heating power. This ensures that the food is evenly dried from all angles.
Easy to clean. The 6 stainless steel trays as well as the drip tray are all removable. Just slide them out and wash as you would anything else in your kitchen.
Stainless steel body and trays. All parts are BPA-free, this means they are safe and durable.
Digital temperature and timer. The temperature range is 95ºF to 167ºF. You can set the timer to automatically shut off your unit at the time you specify. Set it in 30-minute increments for up to 24 hours.
Conclusion
Despite the fact that this Ivation 6-tray food dehydrator is a commercial-grade appliance, it is very easy to use; the controls are simple, it is easy to clean, and the heavy-duty fan is properly placed to do its job evenly. I recommend it.
Looking for more great content? Visit our partner sites:
Kelly R. Smith is an Air Force veteran and was a commercial carpenter for 20 years before returning to night school at the University of Houston where he earned a Bachelor’s Degree in Computer Science. After working at NASA for a few years, he went on to develop software for the transportation, financial, and energy-trading industries. He has been writing, in one capacity or another, since he could hold a pencil. As a freelance writer now, he specializes in producing articles and blog content for a variety of clients. His personal blog is at I Can Fix Up My Home Blog where he muses on many different topics.
This very-familiar comfort food is just as well known as Pizza Margherita but the following recipe for Potato Gratin is my take on it and I find it superior to the mainstream version. The name sounds fancy but in reality, gratin just means ” a dish with a light browned crust of breadcrumbs or melted cheese.”
Potato Gratin Ingredient List (use organic when possible)
Cooking spray such as Pam
1 cup heavy whipping cream
1/4 cup mayo (I use the kind made with olive oil because it is more heart-healthy)
1 tsp Himalayan or pink salt
Black pepper to taste
3/4 cup shredded cheddar cheese
1 1/2 pounds russet potatoes (I leave the skins on for the nutrition)
1/2 cup shredded Parmesan cheese
1/4 cup chopped parsley
3/4 cup chopped basil
Preparation Steps
Creamy Potato Gratin Preparation
Preheat oven to 350 degrees F.
Spray the bottom of a 9″ X 9″ glass baking dish with the cooking spray.
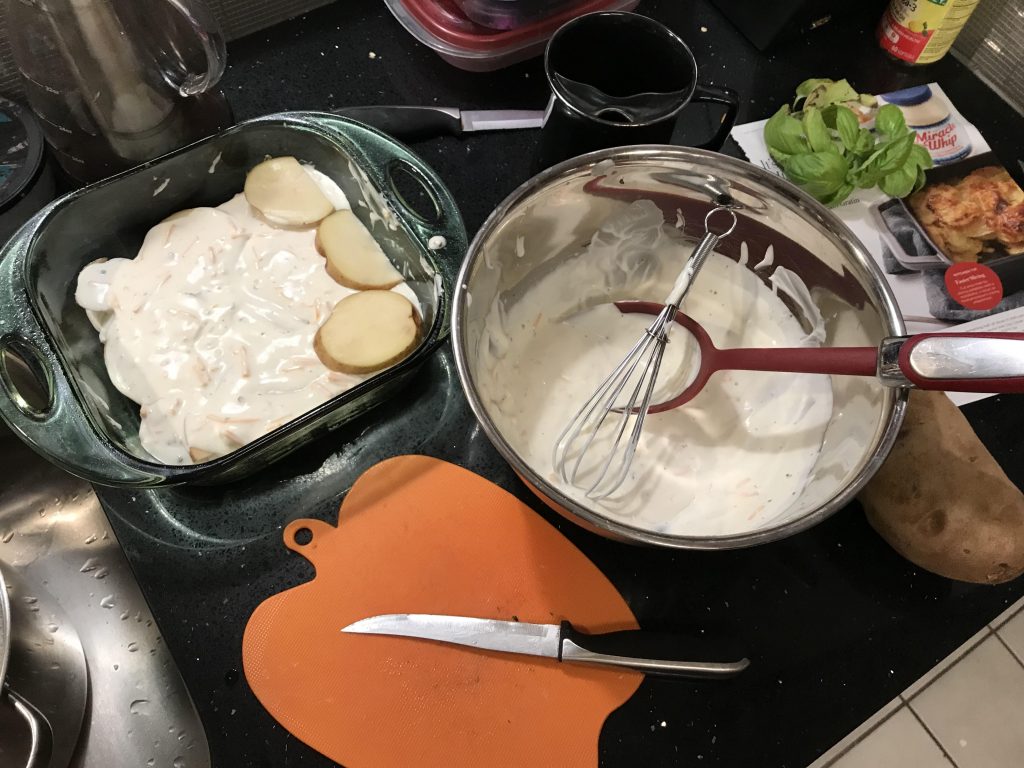
In a mixing bowl, whisk the mayo, pepper, salt, cream, and cheddar cheese.
Wash and slice potatoes 1/8″ thick.
Arrange potato slices in the baking dish, spread on a layer of the cream sauce, and sprinkle on some parsley and basil.
Repeat layers as needed (you might have some potato left over).
Cover with foil and bake for 1 hour.
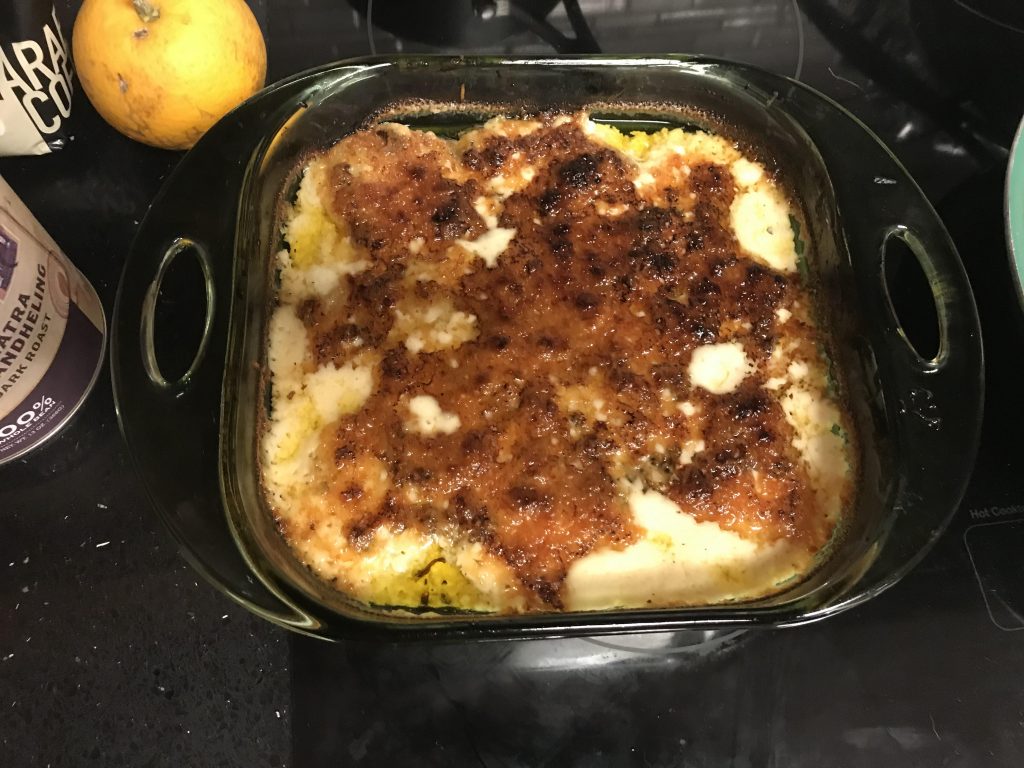
Remove foil, sprinkle the Parmesan cheese on top, and broil until the top is lightly browned, about 2-5 minutes.
That’s all there is to it. Creamy potato gratin is suitable for a side or a main dish by itself. Give it a try; if you have any interesting ingredients to add, let our readers know in the comment section. Feel free to pass this recipe along to your friends and social media.
Looking for more great content? Visit our partner sites:
I offer article and blog-writing services. Interested? Hire Me!
Did you find this article helpful? Please consider supporting this free site with a small donation! We rely on our readers rather than a paywall to keep the lights on and the info flowing.
Kelly R. Smith is an Air Force veteran and was a commercial carpenter for 20 years before returning to night school at the University of Houston where he earned a Bachelor’s Degree in Computer Science. After working at NASA for a few years, he went on to develop software for the transportation and financial and energy trading industries. He has been writing, in one capacity or another, since he could hold a pencil. As a freelance writer now, he specializes in producing articles and blog content for a variety of clients. His personal blog is at I Can Fix Up My Home Blog where he muses on many different topics.
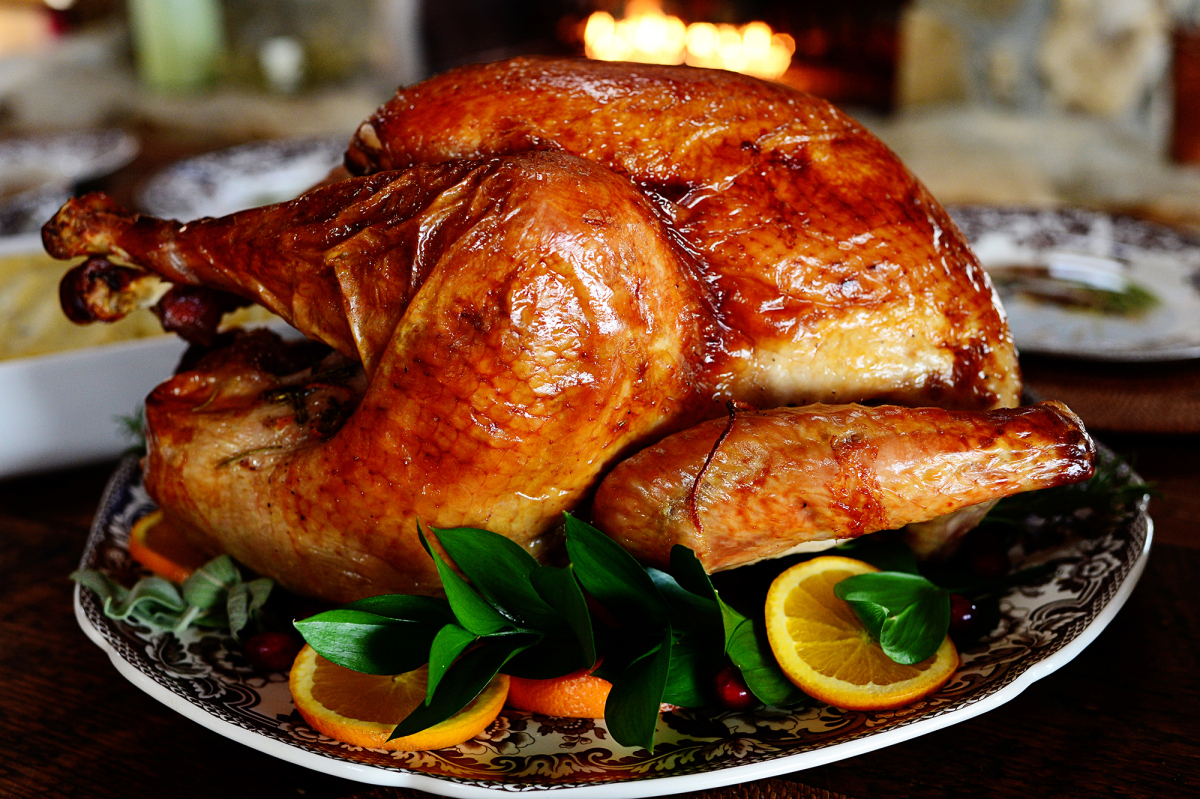
It’s fair to say that there is nothing quite as emblematic of Thanksgiving and Christmas dinner as that prince of birds — the turkey. It didn’t make it to be the national bird though Ben Franklin lobbied for it, but it did make it to being the savory symbol of two of our favorite national holidays.
That said, the preparation can cause severe anxiety just as holiday season loneliness can. It’s far too easy to get it wrong; too dry, undercooked, or overcooked. Let’s look at 10 common turkey cooking mistakes.
Not Thawing the Turkey Long Enough
This is a very common mistake, especially for those first-timers. This mistake will lead to forehead slapping and a mad attempt to finish the thawing process in a sink full of warm or cool water. Now which was it again?
As a rule of thumb, allow one day in the refrigerator for each 4 pounds of turkey. Using this rule it is easy to determine approximately how long you need to let it defrost before getting busy cooking your turkey. Taking this into consideration, be sure you have enough room in your fridge before you go shopping.
Over-Brining the Bird
Many recipes call for brining — soaking in a solution of salt and spice which is a snap to do with an herb brine kit. However, many of the most available commercially-produced turkeys, such as frozen Butterball birds, have already been pre-treated with a solution of salt and spices. This is done in order to stretch out the shelf life, not necessarily to please your palate. That’s why the brine kit is a better idea; it’s specially prepared for flavor, not storage.
If you do this again (just because the recipe says so), you will end up with a salty bird indeed. Just check the label before you proceed. On the one hand, if the producers have already done it, you have less work to do albeit while sacrificing some flavor. On the other hand, it’s a real chore hand-pick your favorite spices.
Not Drying the Turkey Sufficiently
If your aim is a crispier skin on the outside you’ll want to thoroughly pat the bird down using paper towels before it goes in the oven. Drying the inside cavity of the turkey is also important but not doing so is also a common mistake. Generally speaking, having a well dried turkey inside and outside will yield a more evenly-cooked and flavorful bird.
Cooking the Stuffing Inside the Cavity
Whatever Grandma told you, this is not the best of ideas. The main problem here is that to cook the stuffing through fully and guarantee that all of the bacteria inside the raw bird has been eliminated, you will need to cook the turkey for a longer period of time. The result? Dry, overcooked meat. Embarrassing, Chef.
The obvious answer is to make the stuffing from scratch or use one of those basic boxed delicacies. I like to bake a loaf using my oatmeal flax seed bread recipe ahead of time and make it from that. Super healthy. Either way, cook it outside the bird. We won’t tell if you don’t.
Trussing the Legs too Tightly
It makes sense when you think about it; closing off the cavity means longer roasting time and possibly uneven cooking. Your only real limitation is the width of your roasting pan. If you are going to buy one of those disposable roasting pans at the store, buy it at the same time that you buy your turkey to be sure you have a good fit.
Not Investing in a Real Meat Thermometer
Sure, it’s tempting to rely on that little pop-up button thingamajiggy that the poultry farmers embed in the bird’s hide, but these are notoriously unreliable. These may be faulty and pop up when the meat is already overcooked. Since you’ve only got one shot at this, go ahead and invest in a real meat thermometer. You will get more accurate results and as a bonus, you dinner guests will regard you as a professional.
Cooking at the Wrong Oven Temperature
We all know some cooks that recommend blasting the turkey at high heat (425°F) for about 30 minutes first and then lower the temperature. However, a low, steady temperature of 325°F from beginning to end is preferable.
Certainly, the initially high-heat method may take 30 to 90 minutes off your total cooking time, but remembering to reduce the temperature is just one more thing to remember on what is already very busy day.
Not Allowing Your Bird to Rest
No, we’re not talking about letting the turkey take a break. Resting simply means taking it out of the oven when it’s done and simply letting it sit there. This should be done with all meats actually. With a turkey the recommended resting time is 15 minutes.
Why do we do this you might ask? Resting time allows the juices inside the turkey to soak back into the meat, instead of dripping out as soon as you you slice into it. This results in a moister bird. More bang for your buck. It’s still important to keep the turkey warm so tent it with foil until carving time arrives.
Not Preparing the Surface of the Turkey Properly
It’s not clear whether the Pilgrims did this step (some history revisionists even claim that there wasn’t even a turkey present) or not but things have changed since then. It’s not a difficult step; just rub the turkey all over with olive oil or melted clarified butter. The main reason for this is to ensure that the turkey browns evenly. Aesthetics is important; just ask any chef.
Not Inserting the Thermometer in the Correct Spot
You can’t just spear the bird willy-nilly and expect to get the result that you want. Your target is in the thickest part of the thigh, right smack-dab in the crease where it meets the breast. If your bird weighs in at 18 pounds or less, monitor the temperature beginning at 2.5 hours and every 15 minutes following that. For a turkey above 18 pounds, start checking at 3 hours.
Avoid these 10 common turkey cooking mistakes and you and your guests won’t have to be confronted with a foul fowl.
It’s true that stuffing is the most traditional side dish and that’s fine. But if you like to step out of the box and add a very non-traditional dish, you won’t go wrong with Spaghetti Carbonara.
If you are worried that your guests are getting too hungry due to the extra preparation time it takes to do it just right, why not put out an appetizer? I’ve found that Panamanian-Style Ceviche hits the mark rather well.
Did you find this article helpful? Millions of readers rely on information on this blog and our main site to stay informed and find meaningful solutions. Please chip in as little as $3 to keep this site free for all.
Kelly R. Smith is an Air Force veteran and was a commercial carpenter for 20 years before returning to night school at the University of Houston where he earned a Bachelor’s Degree in Computer Science. After working at NASA for a few years, he went on to develop software for the transportation, financial, and energy-trading industries. He has been writing, in one capacity or another, since he could hold a pencil. As a freelance writer now, he specializes in producing articles and blog content for a variety of clients. His personal blog is at I Can Fix Up My Home Blog where he muses on many different topics.


 Kelly R. Smith is an Air Force veteran and was a commercial carpenter for 20 years before returning to night school at the University of Houston where he earned a Bachelor’s Degree in Computer Science. After working at NASA for a few years, he went on to develop software for the transportation, financial, and energy-trading industries. He has been writing, in one capacity or another, since he could hold a pencil. As a freelance writer now, he specializes in producing articles and blog content for a variety of clients. His personal blog is at


 Kelly R. Smith is an Air Force veteran and was a commercial carpenter for 20 years before returning to night school at the University of Houston where he earned a Bachelor’s Degree in Computer Science. After working at NASA for a few years, he went on to develop software for the transportation and financial and energy trading industries. He has been writing, in one capacity or another, since he could hold a pencil. As a freelance writer now, he specializes in producing articles and blog content for a variety of clients. His personal blog is at