Valentine’s Day Outdoor Space Ideas

Romantic Gestures That Keep on Giving (Unlike Cut Flowers)


Photo of Kelly R. Smith   by Kelly R. Smith
Lilies blooming in the flower bed
index sitemap advanced

This post was updated on 01/19/22.

Ads we feature have been independently selected and reviewed. If you make a purchase using the links included, we may earn a commission, which helps support the site.

Valentine’s Day is a perfect example of a holiday that inspires us to redesign spaces inside and outside our homes. Designing an outdoor space for a Valentine’s Day gift or parties and celebrations can be a lasting surprise for someone that you care about pleasing. Many gardeners remind us that Valentine’s Day is the time to trim our rose bushes so that choice makes perfect sense.

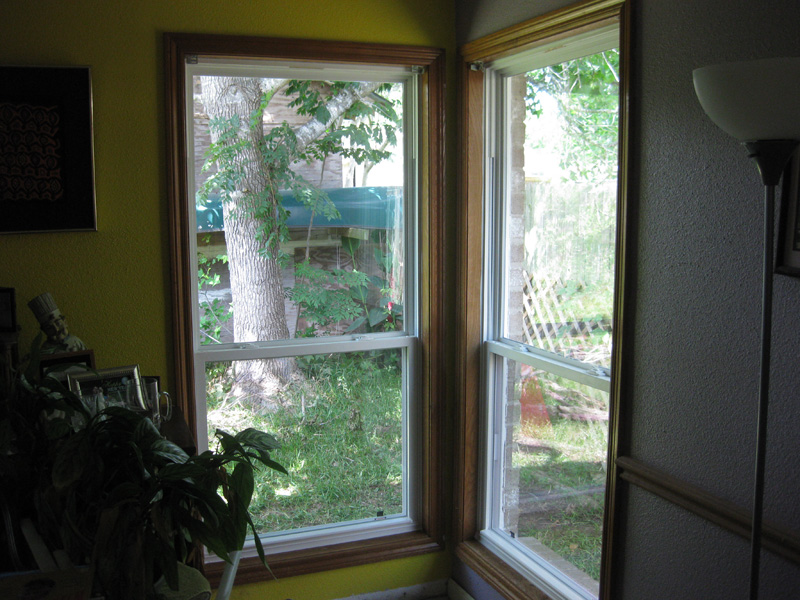
Any climate-appropriate plants are a great way to improve the look of your yard, flower bed, garden, or outdoor living space. Here are a few plant, seating, and lighting ideas that can help you design the space of your dreams at this time of year when nature is just busting out. Just think of it as the opportunity to tackle that list of new year’s DIY projects!

Choosing the Perfect Flower

Almost every woman that I’ve ever met loves to get flowers on Valentine’s Day, and some would far rather receive something living that will bloom on more than just that one day. After all, why limit yourself to a wilting bouquet when you can have cut flowers on a regular basis?


Many of us don’t mind caring for the flower or floral arrangement minimally, either, especially during the mild spring and fall months. Annuals, such as the coriopsis below, are very hardy and come back year after year once established. Our bird friends help to distribute the thistle seeds so keep those bird feeders full.

Coriopsis flowers in full bloom

It goes without saying that the perfect flower species should be designed to suit your climate, sunlight requirements, and of course, soil conditions. If you are unsure of this type of information, talk to someone in a garden center, nursery, or plant retailer for more details. If your community is lucky enough to have a Master Gardener group, they are very knowledgeable about local plants and are generally very free with their information. Most even conduct indigenous plant and tree sales in the spring.

One useful tip is to find out her favorite color, and keep in mind how much time and energy will need to be devoted to caring for the plant. Design your outdoor Valentine’s Day surprise with this basic information in mind, so that you can be sure that your significant other will appreciate what you have created.

Find accents and accessories for the space in the favorite color if you cannot find in-season plants that are blooming for this special occasion, such as lighting, flags, decorations, water features (ponds, fountains), and similar items designed for outdoor use. These all are animal-friendly and count towards your nature-conservation efforts.

Choosing Outdoor Seating Arrangements

If the space is large enough, why not consider adding seating to your outdoor space to create the romantic environment this day is known for inspiring.

A great garden bench is a wonderful idea, so that two can sit comfortably, but be sure that any seating arrangement you choose is intended for use outdoors, including fabric choices. Marketing claims are not always what they seem. If you have a homeowners association, check to ensure that your project falls under their (often unreasonable) guidelines. A garden bench with storage such as the one shown below, doubles as a spot to keep your gardening tools.

High-quality and functional furniture will ensure that your gift lasts much longer, and the durable and beautiful addition will add monetary and aesthetic value to your home. We can’t say enough about home equity, can we?

Your seating needs to strike a balance; make it comfortable without presenting health risks. Select fabrics that are specifically designed and treated for outdoor use, so that the fabric does not mildew or mold after the first hint of condensation or dew.


Choosing Exterior Lighting

You may or may not be spending a significant amount of time in your space outdoors after the sun sets, but adding exterior lighting changes that parameter and gives you that opportunity should you desire to sit, entertain, and relax after the sun has gone down. A simple lantern, LED spotlight, or a couple of Tiki torches for the space is ideal for most arrangements.

The right combination and choice of illumination will add that perfect touch of light for a romantic rendezvous, this Valentine’s Day and into the foreseeable future. Certain lighting resembles candlelight, which is the most popular lighting for romance, so you can’t go wrong with a hint of light that doesn’t cost you an abundance of time, energy, or money to purchase or install.

Finally, if you really want to go big when you consider Valentine’s Day outdoor space ideas, think about a relaxing backyard deck. Springtime and income tax returns are coming; hint, hint.


Did you find this article helpful? Millions of readers rely on information on this blog and our main site to stay informed and find meaningful solutions. Please chip in as little as $3 to keep this site free for all.


Visit Kelly’s profile on Pinterest.

About the Author:

Photo of Kelly R. SmithKelly R. Smith is an Air Force veteran and was a commercial carpenter for 20 years before returning to night school at the University of Houston where he earned a Bachelor’s Degree in Computer Science. After working at NASA for a few years, he went on to develop software for the transportation, financial, and energy-trading industries. He has been writing, in one capacity or another, since he could hold a pencil. As a freelance writer now, he specializes in producing articles and blog content for a variety of clients. His personal blog is at Considered Opinions Blog where he muses on many different topics.

Window Blind DIY Wand Replacement

Why Settle for Replacement Blind Components? Put Your Woodworking Skills to Work.

by Kelly R. Smith

DIY Venetian blinds wand crafting and replacement
index sitemap advanced

Ads we feature have been independently selected and reviewed. If you make a purchase using the links included, we may earn commission, which helps support the site.

Things like window blind wands get a lot of use. Not rough use usually but they are usually made very cheaply and are bound to break at some point. You’ve got two choices. First and easiest is to buy a replacement blind wand. My preferred choice is to make my own. That way I know it is sturdy and I can match the finish to the window casing. So, consider this short tutorial just another woodworking tip.

The wand usually connects to the blind assembly via a small plastic nub with a hole in it. The wand has a hook on the end that fits through the hole. I have worked two possible scenarios.

  • The plastic nub is intact.
  • The plastic nub broke.

Use a Wooden Dowel for the New Wand

Dowels are available in all hardware stores as far as I know. At Home Depot they are available in pine and oak, in various diameters. I usually go for the pine; it is cheaper and I’m going to stain it anyway. These dowels are smooth finished so all you need to do is cut it to your desired length and sand the ends and smooth out the sharp end edges.

To work on the dowel, I use a Bessey drill press vise with a rag wrapped around the dowel so as not to mar it. The crosshairs on the end of the dowel are for drilling the connection hole.

Dowel in the Bessey drill press vise


Finishing and Attaching the Connector

When the plastic nub is intact, you just need a cup hook or simply make a hook out of wire (like a metal coat hanger) using needle-nosed pliers. If the plastic nub is broken off you will need to drill a hole in the end of the dowel and glue it into the nub. I used Locktite GO 2 Repair Xtreme. While the glue is setting up I kept everything together with a piece of electrical tape. This is why I didn’t use polyurethane Gorilla Grip glue; the foaming, expansive curing action would push things apart. Regular wood joinery techniques don’t really apply here.

Use the finish of your choice. Here I used Minwax Penetrating Stain. Later, after a couple of days I’ll apply a high-quality furniture wax.

Finishing with Minwax Penetrating Stain


Blinds wand with a hook connector

That’s about all there is a window blind DIY wand replacement. It doesn’t even have to be broken. It is a good way to give your window dressing a custom look on a budget and a little spare time.

Others are Reading:


Did you find this article helpful? Millions of readers rely on information on this blog and our main site to stay informed and find meaningful solutions. Please chip in as little as $3 to keep this site free for all.


Visit Kelly’s profile on Pinterest.

About the Author:

Photo of Kelly R. SmithKelly R. Smith is an Air Force veteran and was a commercial carpenter for 20 years before returning to night school at the University of Houston where he earned a Bachelor’s Degree in Computer Science. After working at NASA for a few years, he went on to develop software for the transportation, financial, and energy-trading industries. He has been writing, in one capacity or another, since he could hold a pencil. As a freelance writer now, he specializes in producing articles and blog content for a variety of clients. His personal blog is at I Can Fix Up My Home Blog where he muses on many different topics.

What is Covered by Standard Homeowners Insurance?

by Kelly R. Smith

index sitemap advanced
Home damage from Hurricane Harvey in Seabrook, Texas

Homeowners insurance is essential for all homeowners. It doesn’t matter if you own outright or still hold a mortgage. Dictionary.com gives the origen of the word mortgage as, “Old French mortgage, equivalent to mort ‘dead’ (from Latin mortuus ) + gage ‘pledge.’” That’s about as morbid as it gets. It’s certainly not a witty phrase, is it? But I digress; what is covered by standard homeowners insurance?

Coverage for Your Personal Belongings

Your personal belongings include things such as sports equipment, clothing, furniture, appliances, ect. You get the idea. They are covered in the event that they are stolen or destroyed by insured disasters such as fire, hurricane, and others. Generally, the coverage is going to be 50% to 70% of the insurance you carry on the structure of your home, depending on the company that carries your policy.

The preferred way to determine if this is enough coverage is to conduct a home inventory. Take pictures, make entries in a database, etc. The more detailed, the better. Your belongings coverage includes items that you store away from your residence; this means that you have coverage anywhere in the world. There are some companies that limit the amount to 10% of the amount of insurance you have for your possessions. You may also have up coverage for unauthorized use of any credit cards.

Items on the higher end such as jewelry, furs, art, collectibles, and silverware are covered, but usually there is a monetary limit if they are stolen. There is a way to insure these items for their full value; buy a special personal property endorsement (or floater) and insure the items for their officially-appraised value.

Coverage for Your Home’s Structure

Your homeowners policy will pay to renovate or rebuild your home in the case that it is damaged or destroyed by incidences of fire, hurricane, hail, lightning, or other disasters that are enumerated in your policy. Most policies cover detached structures as well, such as your tool shed, garage, or a gazebo. In most cases, for about 10% of the amount of insurance you have on the structure of your home. A good rule of thumb is this–buy enough coverage to rebuild your home. Revise this yearly.

Liability protection

What does liability cover? It protects you from lawsuits citing bodily injury or property damage that you or family members cause to others. Additionally, it covers damage caused by your pets.

In many cases, limits begin at around $100,000. That being said, it’s prudent to palaver with your agent whether you should purchase a higher level of protection. You may have significant assets and therefore need more coverage than is available under your policy. If this is the case, consider purchasing an umbrella or excess liability policy, which provides broader coverage and higher liability limits.

Your policy also provides no-fault medical coverage. If one of your friends or a neighbor is injured in your home, he or she can submit the medical bills to your insurance company. So, expenses can be paid bypassing a liability claim being filed against you. Note that it doesn’t pay any of these bills for you or your family.

Additional living expenses (ALE)

This is for the the additional expenses of residing away from your home if you can’t live there because of the damage from a disaster that is insured. It covers restaurant meals, hotel tabs, and other miscellaneous costs that are over and above your normal living expenses. These are paid while your house is being restored. ALE is not open-ended; it has time and cost limits.

Other Circumstances

Your standard homeowners insurance policy will not pay for damage caused by an earthquake, flood, or routine wear and tear. These all require separate policies. Let me use myself as an example. During Hurricane Harvey, we flooded due to the city mismanaging drainage issues. We got about 2 feet of water inside the house.

Flood water rising in the street

Luckily, we have always carried flood insurance ever though the mortgage company did not require it since we are not in the flood plain (or zone if you will). But, as I tell my wife, “God doesn’t care about those maps.” So we ended up getting 100% on personal belongings and what the insurance adjuster estimated for structure. That only paid for material, not labor. That’s like getting 50 cents on the dollar. So, the majority of the reconstruction became a DIY project for me.

Neighbors without flood insurance just got the bare minimum from FEMA, and let me tell you, that ain’t much. Let that be a lesson–invest in appropriate insurance policies.

References:


Looking for more great content? Visit our partner sites:

The Green Frugal

Running Across Texas


As Featured On Ezine Articles

I offer article and blog-writing services. Interested? Hire Me!


Did you find this article helpful? Thanks for supporting this free site with a small donation! We depend on our readers rather than a bothersome paywall to keep the lights on here in the shop.


Visit Kelly’s profile on Pinterest.


About the Author:

Photo of Kelly R. SmithKelly R. Smith is an Air Force veteran and was a commercial carpenter for 20 years before returning to night school at the University of Houston where he earned a Bachelor’s Degree in Computer Science. After working at NASA for a few years, he went on to develop software for the transportation, financial, and energy-trading industries. He has been writing, in one capacity or another, since he could hold a pencil. As a freelance writer now, he specializes in producing articles and blog content for a variety of clients. His personal blog is at I Can Fix Up My Home Blog where he muses on many different topics.

Paint Like a Pro with These 10 Tips

by Kelly R. Smith

search tips advanced search
Prepping a home for painting.
Prepping a home for painting

This article was updated on 09/27/20.

Nothing enhances the exterior of a home like a fresh coat of paint. Although the job seems straightforward enough, there are things you can do to make the job easier, faster, and more efficient. One thing you should know at the outset — older homes might have lead-based paint. Have yours tested before embarking on this job. That being said, read on for 10 tips to paint like a pro.

  • Scrape and sand all surfaces prior to washing. Although some painters like to wash first and then sand and scrape, this can leave behind dust that prevents the new paint from sticking as well as it should.
  • When power washing, keep the setting on low. High pressure from a power washer will force water into the wood. Even when the outer surface seems dry, it may have moisture trapped inside. What should you wash with? I like to use a tablespoon of dish soap with a mixture of TSP (trisodium phosphate) and bleach. The dish soap helps the solution to cling to the siding and trim rather than running off the house. This is the same principle as using a bit of soap as a surfactant when spraying garden plants.
  • Cover plants, cars, exterior lighting, and anything else that might be affected. Like most situations, an ounce of prevention is worth a pound of cure. Use breathable drop cloths for plants so they can breath. Protect lights, doors, and windows, with Cling Cover plastic.
  • Use a high-quality primer. Always prime bare spots before painting. If the home has oil-based paint that is peeling and cracking and complete removal is not a good option, use a product such as XIM Peel Bond primer.
  • Use the right tools. This should be obvious but many beginning painters and weekend warriors just try to “get by” with what they have on hand. You get what you pay for. Go for the pricier brushes, rollers, and sprayers. They might set you back a bit in the beginning but the finished job will be more professional.
  • Wear knee pads when working on a ladder. There’s always a rung where your knees are, right? Without knee pads to cushion your kneecaps, they will be squealing at you by the end of the day and tomorrow won’t be any better.
  • Plan to spend more time to paint window trim. Painting in the field might be a breeze, but window trim is confoundingly time-confusing. The devil is in the details and the time to apply painter’s tape and sanding really adds up.
  • Don’t paint into the evening. The main issue in the evening is that condensation forms on the surface of the paint when the sun goes down, particularly during the spring and summer. On wet paint, this causes the water-soluble components to break down and rise to the surface. This is called surfactant leaching. After the water evaporates, you’re left with a waxy-looking area. It may go away but there’s no need to take a chance to begin with. In the late afternoon, stop painting and do prep work for the next day.
  • Prevent sticky windows and doors. Where two dry surfaces painted with latex meet, they want to stick to each other. You have most likely noticed it yourself, even on drawers and garage doors. It is completely normal and is called blocking. You can prevent it with a thin coat of furniture wax.
  • Finally, don’t forget on-going maintenance. You might think you’re done, but that is just an illusion. Things like repairing caulking and touching-up paint should be done on a regular basis. Always write down all the details of the kind of paint, sheen, and color of paint that you used.

I hope these 10 tips to paint like a pro will make your painting adventure the best it can be. Doing it yourself can save you a lot of money if you have the time and inclination. Any specialized equipment like a spray rig might be available for renting.


Looking for more great content? Visit our main site I Can Fix Up My Home or our partner sites:

The Green Frugal

Running Across Texas


As Featured On Ezine Articles

I offer article and blog-writing services. Interested? Hire Me!


Did you find this article helpful? Objective journalism is becoming harder to find all the time. Please help with a small donation of $3 or more to keep this site free for all. Thank you!


Visit Kelly’s profile on Pinterest.


About the Author:

Photo of Kelly R. SmithKelly R. Smith is an Air Force veteran and was a commercial carpenter for 20 years before returning to night school at the University of Houston where he earned a Bachelor’s Degree in Computer Science. After working at NASA for a few years, he went on to develop software for the transportation, financial, and energy-trading industries. He has been writing, in one capacity or another, since he could hold a pencil. As a freelance writer now, he specializes in producing articles and blog content for a variety of clients. His personal blog is at I Can Fix Up My Home Blog where he muses on many different topics.

10 DIY New Year Projects to Tackle–Part 2

index sitemap advanced

See the Previous 5 DIY New Year Projects

Install a Pre-hung Door

An Exterior  Pre-hung Door
An Exterior Pre-hung Door

Some things in life just get easier. Hanging doors is one of those things thanks to the pre-hung doors available at home improvement stores. No mortising, no muss, no fuss. To make things even easier, hardware clips called The Quick Door Hanger are available to eliminate shimming the door jamb in the rough opening. Basically, all you need is a 4′ level or plumb bob, a measuring tape, a pencil, and a cordless drill with a Phillips bit. I’ve gotten to where I can hang a door in about 15 minutes. Life is good.

Frame Out Your Basement

Wood framing in a basement

Basements are often basically unused, wasted spaces. This is really a shame because framing and finishing it out expands your living space and boosts your home equity. I mean, that space is included in your property taxes anyway, right? This is a great project that can be put on your schedule for any time of the year. Learn the basics of framing a basement and some of the options that are available to you. Yes, this is a DIY project but you might need to pull some building permits. Always check your local building code.

Dieting is One of the Most Popular New Years Resolutions

Healthy food for weight loss

Exercising, putting down the cigarettes, and going on a diet; these are the big 3 New Years resolutions. But there are a plethora of choices when choosing a diet. Which one is right for you? Which one can you realistically stick to? Inform yourself with these 10 most popular diets today.

Give Your Walls a Face Lift On a Budget

Colorful walls & energy efficient windows

Upgrading the look of your walls is a great way to give your living space a fresh look on a shoestring budget. You can add a bolder texture, hang wallpaper, or choose paint colors that give the illusion of more space or higher ceilings. You can even paint over that dark paneling that looked so cool back in the 60s. Which wall improvement is right for your home? Learn about wall options here. Some people hate painting but that’s the wrong way to look at it. It is one job where you can see the results of your labors in a very short time. Some BEHR paint has the primer built in which basically cuts your time in half.

Install Radiant Barrier Foil in Your Attic

Energy Q Radiant Energy Barrier Foil In the Attic
Energy Q Radiant Energy barrier Foil In the Attic

Sure, everybody knows about maxing out the recommended amount of insulation in the attic (according to location) but that only represents about half the money you could be saving on energy costs. Why not install radiant barrier energy foil over the insulation? The savings are two-fold–it keeps the heat out in the summer but keeps it in during the winter. I can tell you from experience that the colder months are the perfect time for this project. I did mine in March a few years back and it more than paid for itself during the first summer. If you use your attic and it has flooring, there’s no reason you can’t tack it to the underside of the roof sheathing. Or conversely, use the radiant barrier paint.

I certainly hope these 10 DIY New Years projects (the first 5 are on this page) have inspired you. If so, I would appreciate you sharing these pages with your friends. Have a great New Year and thanks for visiting!


Looking for more great content? Visit our partner sites:

The Green Frugal

Running Across Texas


As Featured On Ezine Articles

I offer article and blog-writing services. Interested? Hire Me!


Did you find this article helpful? Thanks for supporting this free site with a small donation!


Visit Kelly’s profile on Pinterest.


10 DIY New Year Projects to Tackle

index sitemap advanced

The clock is ticking down to the new year. That means many things but here are two to consider. Since spring will soon be here it’s time to start planning new year projects. After all, it is a time of new beginnings. Also, right around the temporal corner is income tax refund time to fund those new projects. This may be good news for many–under President Trump’s tax bill, the marriage penalty is mostly gone and the standard deduction is vastly improved.

With those considerations in mind, consider these 10 home improvement and personal improvement projects.

Start Exercising More

A healthy runner is a happy runner.

Pick your sport. For me that means running. Worried about the cold weather? Don’t. It’s not a problem with these cold weather running tips. Other activities are good candidates and one bit of good news is that many are quite inexpensive. Walking and running really only requires comfortable clothing and the right shoes. Cycling is great but requires a heavier investment. Swimming is good if you have access to a pool or open water such as a lake or a beach.

Install a Rainwater Collection Barrel

A Rainwater Harvesting Barrel

Rainwater collection or rainwater harvesting as it is sometimes called is becoming increasingly popular. The idea is simple; as you can see in the above photo, you just install the barrel under the downspout from your rain gutter. A screen on the top keeps leaves and other debris out. The black overflow tube at the top can be directed wherever you like and the spigot at the bottom is threaded to accept a garden hose. It works on the gravity feed principle and provides water for your garden or flower bed. Need more water? Link the overflow tube to another barrel. Using this water not only saves money on your water bill, but plants prefer the pH of rain as opposed to tap water.

Install an A/C Condenser Coil Misting System

Cool-N-Save A/C condenser misting paddle

This simple innovation will really save on your electrical bill during the summer heat. When the compressor kicks on, the upward breeze from the fan lifts the paddle. This opens the valve allowing cool water to flow to the four misting nozzles. This lowers the ambient air temperature which reduces the amount of work the condenser coils must do. This inexpensive tweak saves money and installation requires only about 30 minutes and some basic hand tools.

Make Needed Roofing Repairs

A new roof with a dormer

Having a solid, secure roof is critical. They can really take a beating during the winter. They should be inspected, and repaired if needed, twice a year. Minor repairs such as replacing individual shingles or flashing can be done on an individual DIY basis. For more extensive work, hire a roofing contractor.

Build a Walk-In Kitchen Pantry

A Walk-In Kitchen Pantry

If your home is anything like ours, there’s just not enough storage space in the kitchen. My solution? I built a walk-in kitchen pantry. As you can see in the photo, the back door in the kitchen opened into the garage. I just “stole” some space from the garage and installed the walls (with insulation), turned the existing door into a case opening, and added an energy-efficient door into the rest of the garage. If you are comfortable with framing, hanging drywall, and laying ceramic tile, this is a great weekend DIY project. Follow the link for details.

I certainly hope these DIY New Years projects have inspired you. If so, I would appreciate you sharing these pages with your friends. Have a great New Year and thanks for visiting!

See the Next 5 DIY New Year Projects Here


Looking for more great content? Visit our partner sites:

The Green Frugal

Running Across Texas


As Featured On Ezine Articles

I offer article and blog-writing services. Interested? Hire Me!


Did you find this article helpful? Thanks for supporting this free site with a small donation!


Visit Kelly’s profile on Pinterest.


Choosing the Right Trees

Tree Selection Depends on Purpose; Fruit-Bearing, Ornamental, Privacy, or Shade

Photo of Kelly R. Smith   by Kelly R. Smith

U.S. Hardiness Zone Map
index sitemap advanced

This article was updated on 05/23/21.

Ads we feature have been independently selected and reviewed. If you make a purchase using the links included, we may earn a commission, which helps support the site. Thank you for your support.

Trees in our yards serve many purposes. Some are ornamental, some, like avocado trees, bear fruit, some are for privacy, and some provide shade which reduces energy bills. With that in mind, when choosing the right trees you must ask yourself what purpose they will serve.

How to Choose Fruit Trees

Many people want their own fruit trees and why not? Free food is great. Also, for some of us it’s that nice, fuzzy feeling that comes with the assurance that the fruit is truly organic. I myself fall into that category; I once made the commitment to plant one fruit tree per year. Now, I’ve about run out of real estate.

The mistake many people make is neglecting to research the required chill hours the trees need. I see it all the time; people buying trees at the local big box store. They plant them and wait. No fruit cometh forth. The map at the top of this page will show you the zone you live in and the corresponding temperature range. You might pay more for trees at a nursery but you will know what you are getting.


I’m here in South Texas and I’ve got a peach tree, two fig trees, a plum tree, and an Improved Meyer Lemon tree. I lost two orange trees and a couple of palm trees in the unprecedented freeze of 2021. Still, any kind of citrus tree is a good choice for my family. Another factor when choosing fruit (as well as vegetable garden plants) is vitamin and mineral content.

Republic of Texas Orange Tree
My Republic of Texas Orange Tree

Choosing Shade Trees

Shade trees are very beneficial. They help to maximize your energy efficiency. When they shade your house from the sun, you save money.  Basically, the southern side of your home will receive up to three times more sunlight than the western and eastern facing sides in the wintertime, and just one-third as much during the hot summertime. Deciduous trees are a better choice than evergreens because they lose their leaves in the wintertime when you benefit from the warming sun. Weather plays a big part in your energy consumption.

Planting trees with this in mind is called a passive solar concept. One note of caution–do not plant them too close to the house or you risk root damage to your foundation, which can be especially expensive and intrusive to repair if you have a concrete slab. Large trees should be no closer than thirty feet away and small ones no closer than eight feet away. As a preventative measure, install root barriers.

Choosing Privacy Trees

Privacy trees keep those pesky peeping neighbors at bay and deter crooks from seeing what property you have on your property. Some good candidates are Thuja Green Giant, Leyland Cypress, Emerald Green Arborvitae, and Italian Cypress. Since they are relatively fast growing, the benefits arrive quickly.

A Row of Privacy Trees

Trees are not only helpful; they also add a lot of equity to your home. Select and plant them properly and they’ll take care of you. Remember to care for them with pruning and a fertilization schedule and your investment in your home equity will be protected for years to come.


More Trending Articles


Looking for more great content? Visit our main page or partner sites:

I Can Fix Up My Home

The Green Frugal

Running Across Texas


As Featured On Ezine Articles

I offer article and blog-writing services. Interested? Contact me for a quote!


Did you find this article helpful? Millions of readers rely on information on this blog and our main site to stay informed and find meaningful solutions. Please chip in as little as $3 to keep this site free for all.


Visit Kelly’s profile on Pinterest.

About the Author:

Photo of Kelly R. SmithKelly R. Smith is an Air Force veteran and was a commercial carpenter for 20 years before returning to night school at the University of Houston where he earned a Bachelor’s Degree in Computer Science. After working at NASA for a few years, he went on to develop software for the transportation, financial, and energy-trading industries. He has been writing, in one capacity or another, since he could hold a pencil. As a freelance writer now, he specializes in producing articles and blog content for a variety of clients. His personal blog is at Considered Opinions Blog where he muses on many different topics.

Choosing and Maintaining Residential Fences

index sitemap advanced
A partially-completed privacy picket fence.

This article was updated on 07/29/20.

Almost all homes will benefit from a backyard fence. They offer privacy, they let your children and pets romp without running off, and they serve as a deterrent to would-be thieves and vagrants (the fence is security for the back, the Ring Doorbell works for the front). If the home contractor did not install a fence during construction, it is up to you as the homeowner to take care of it.

Even if you already have a fence, it may be old and in extreme disrepair. Or perhaps you just don’t like the look of it and want a different style. Either way a new fence is a great home improvement project.

Types of Fences

But that is not a bad thing. There are many types to choose from. In fact, there are at least 10 types of popular residential fences. Just choose the one that fits your style and budget. Consider these:

  • Chain link. Not the most attractive but affordable, durable, and porous in those high wind areas.
  • Vinyl-coated chain link. This is a bit of an upgrade that allows for a wide range of durable colors.
  • Fence slat. A modification of chain link where plastic slats are inserted through the openings in the fence, offering privacy, security, and protection from the wind.
  • Aluminum fencing. Its benefits include low-maintenance and weather-resistance.
  • Wooden pickets. Very popular because they are easy to install and are attractive.
  • Post and rail. This will give your property a more country look, similar to the split rail type fence.
  • Decorative lattice. If you are going for an attractive style that you can train climbing roses on this might be the one for you.

Maintaining Your Fence

Seeing as how your fence lives outdoors in the elements, it will require some maintenance from time to time. Some types require painting, some require pressure washing and some require picket replacement periodically. Picket life can be extended by spraying a water-repellent or sealing coat on them.

If you have to repair or replace a section that intersects at a corner, you might wonder how to do it right. Not to worry; here is a detailed explanation on how to construct the section and tie a picket fence in at a 90° angle.

Fence gates can also be an issue. Not only are they subjected to the elements but they also get a lot or wear and tear from opening and closing. I found an easy solution to replacing my own gate recently using an Adjust-A-Gate Steel Frame No Sag Gate Building Kit.

In short, when it comes to residential fence choice and maintenance, you have decisions to make!


Looking for more great content? Visit our partner sites:

The Green Frugal

Running Across Texas


As Featured On Ezine Articles

I offer article and blog-writing services at reasonable rates. Interested? Hire Me!


Looking for more great content? Visit our partner sites:

The Green Frugal

Running Across Texas


As Featured On Ezine Articles

I offer article and blog-writing services. Interested? Hire Me!


Did you find this article helpful? Thanks for supporting this free site with a small donation!


Visit Kelly’s profile on Pinterest.


About the Author:

Photo of Kelly R. SmithKelly R. Smith is an Air Force veteran and was a commercial carpenter for 20 years before returning to night school at the University of Houston where he earned a Bachelor’s Degree in Computer Science. After working at NASA for a few years, he went on to develop software for the transportation, financial, and energy-trading industries. He has been writing, in one capacity or another, since he could hold a pencil. As a freelance writer now, he specializes in producing articles and blog content for a variety of clients. His personal blog is at I Can Fix Up My Home Blog where he muses on many different topics.


close

Enjoy this blog? Please spread the word :)

RSS
Follow by Email
Twitter
Follow Me
Tweet
Pinterest
Pinterest
Pinterest
Instagram
LinkedIn
Share