Biscuit Joiner; Why You Need One for Woodworking

by Kelly R. Smith

index sitemap advanced
A Ryobi biscuit joiner on a router table

Granted that the biscuit joiner is not a power tool that you use everyday on your woodworking projects. It falls into the category of go-to tools when nothing else will do the job so well. On projects that require mating planks, this tool is invaluable. On some projects, just gluing them up and clamping them is sufficient but on others a stronger bond is required. And why not err on the side of caution? The right tool is just as important as adequate shop lighting.

For years I relied on dowels to do the job. That worked, but getting that precision can be difficult. Drilling the holes at the exact angle and in the exact location can be dicey, especially when using a hand-held drill rather than your drill press. This is where the biscuit joiner comes into its own.

Using Your Biscuit Joiner

For the sake of argument, let us assume that we are joining several boards to make up a table top.

  • Biscuits can “telegraph.” This means that as the glue dries, it can warp the surface plank wood down towards the biscuit. To avoid this minor imperfection in the end product (you’re the only one who will notice, but still), don’t cut your biscuit slot in the exact center of the planks, rather, a bit lower towards the bottom of the finished product.
  • Biscuits don’t add a lot of strength. So the argument goes. Some carpenters use biscuits simply to assure themselves that the planks will stay aligned as the glue dries. I’m from the other camp that believes that they do add a lot of strength, especially when the end product comes under stress because the length of the biscuit distributes the load better than a cylindrical dowel..
  • You can add biscuits for additional strength after the glue-up on 45 degree corners. Use your joiner as a plunge tool after the glue has dried. For example, you might do this on the underside of a picture frame after you remove your 45 degree clamps or spring clamps. Plunge the slot, glue-up and add the biscuit, and use your belt sander to level it up later.
  • Bring the motor up to full-speed before engaging the joiner. Easy, cowboy.

So, do you really need a biscuit joiner for your woodworking projects? The short answer is “no,” but the long answer is, “yes, because it will make your life so much better and your range of carpentry skills broader.”

Related Articles


Looking for more great content? Visit our partner sites:

The Green Frugal

Running Across Texas


As Featured On Ezine Articles

I offer article and blog-writing services. Interested? Hire Me!


Did you find this article helpful? Thanks for supporting this free site with a small donation!


Visit Kelly’s profile on Pinterest.


About the Author:

Photo of Kelly R. SmithKelly R. Smith is an Air Force veteran and was a commercial carpenter for 20 years before returning to night school at the University of Houston where he earned a Bachelor’s Degree in Computer Science. After working at NASA for a few years, he went on to develop software for the transportation, financial, and energy-trading industries. He has been writing, in one capacity or another, since he could hold a pencil. As a freelance writer now, he specializes in producing articles and blog content for a variety of clients. His personal blog is at I Can Fix Up My Home Blog where he muses on many different topics.

Tips for Woodworking Glue-Up

Most DIY Carpentry Requires an Adhesive − Essential Techniques

Photo of Kelly R. Smith   by Kelly R. Smith

Wood glue, band saw, and drill press
index sitemap advanced

Ads we feature have been independently selected and reviewed. If you make a purchase using the links included, we may earn a commission, which helps support the site. Thank you for your support.

No woodshop is complete without at least one type of woodworking glue and a variety of clamps. Can’t have too many clamps, I always say. There are many varieties and brand names of glue on the market today. We all have our favorites. Some are better suited to some purposes than others. For example, you need rice glue to work with washi bamboo paper. Let’s look at some woodworking tips.

Glue Tips

  • Always dry-fit your pieces and plan where your clamps will be going before even thinking of dragging out your glue bottle.
  • Squeeze-out is almost always inevitable. I like to protect work surfaces with wax paper.
  • Clamp your work well and securely, but usually there’s no need to overdo it. You want the joints to be tight but you don’t any warping. I like Irwin clamps.
  • Use cauls made with softer wood than the workpiece. Cauls prevent indentations that you only notice after removing the clamps, resulting in a self-inflicted slap to the forehead moment.
  • Take your time during the glue-up. This should be obvious but I suspect we’ve all rushed a job or two. After all, most of us have more time on our hands in the midst of the COVID-19 pandemic.
  • Flux brushes are available in the plumbing department of hardware stores and home centers and they are are just right for applying and spreading glue on smaller surfaces like dovetail joints. On large surfaces, an inexpensive notched plastic trowel is great.
  • The sooner you apply glue after the wood is cut, the better. This makes for a stronger joint.
  • After the squeezed-out glue has been removed, there’s always a chance that some is hiding. Find it now or you’ll see it later when you apply stain or finish. Spraying some warm water near glue joints will make any hidden glue more visible.
  • Allowing the glue to set up a half to a full hour makes it easier to scrape off squeeze out with a sharp chisel.
  • A synthetic abrasive pad, dampened with water, works perfectly to remove the remaining glue. Much better than a paper towel or a rag.
  • After applying glue and beginning to set your clamps, some pieces slip and slide. One solution is to use your finish nailer with a couple of brads to hold things together.

Use Glue to Make a Color-Perfect Wood Putty

Types of Woodworking Glue

  • Elmer’s glue, as pictured above, is the old standby. It is priced right and comes in a variety of formulations. There is white and yellow glue is for interior use but the some yellow can be used for exterior applications. It will be labeled as such.
  • Exterior yellow glue is labeled water resistant or exterior. Titebond II is one brand that I like.
  • Polyurethane glue is a completely waterproof glue. It can also be used on metal and some plastics.
  • Contact cement has its uses such as applying plastic laminate (Formica) to plywood.
  • Hide glue was around long before woodworkers had so many choices. When refinishing antiques it should be used to maintain the historical value. It’s still used in making certain musical instruments because it is easy to take apart for repairs.
  • Epoxy is used to fill gaps and and offers great strength. Gorilla is a good brand.

I hope these tips for glue-up on woodworking projects have made your craft more inspired. If you have any tips of your own, share them with our readers in the comment section. You might also be interested in reading about the benefits of a woodshop dust-collector.


Related Content

Looking for more great content? Visit our main page or partner sites:

I Can Fix Up My Home

The Green Frugal

Running Across Texas


As Featured On Ezine Articles

I offer article and blog-writing services. Interested? Contact me for a quote!


Did you find this article helpful? Millions of readers rely on information on this blog and our main site to stay informed and find meaningful solutions. Please chip in as little as $3 to keep this site free for all.


Visit Kelly’s profile on Pinterest.

About the Author:

Photo of Kelly R. SmithKelly R. Smith is an Air Force veteran and was a commercial carpenter for 20 years before returning to night school at the University of Houston where he earned a Bachelor’s Degree in Computer Science. After working at NASA for a few years, he went on to develop software for the transportation, financial, and energy-trading industries. He has been writing, in one capacity or another, since he could hold a pencil. As a freelance writer now, he specializes in producing articles and blog content for a variety of clients. His personal blog is at Considered Opinions Blog where he muses on many different topics.

Ryobi 18V ONE+ Power Tools Review

by Kelly R. Smith

index sitemap advanced
A selection of Ryobi 18V ONE+HP power tools

There are many tool companies that offer a selection of battery-operated power tools. You can choose between Ryobi, Milwaukee, Porter Cable, Makita, and many others. Now that the battery technology has improved so much (lithium), these tools are more practical. Let’s look at some of the Ryobi 18V ONE+ power tools in their lineup. Their site tells us they offer over 175 different tools in this family. I’ve been using 10 on a regular basis so I’ll focus on them. As an aside, I also use their 40V lawnmower. I also have one of their AM/FM radios that uses the same battery, but that’s not technically a tool, is it?

Ryobi 18V Power Tools

Note that some of these tools come with batteries and chargers and with some it’s just the tool, so the prices reflect that fact.

  • The AirStrike brad nailer. I use this nailer for various woodworking projects and trim installation. Reliable and easy to adjust.
  • 1/2″ drill/driver Kit. Lightweight and features a two-speed gearbox and a 24-position clutch for maximum control. No chuck key required.
  • Reciprocating saw. Their version of the famous Sawzall. For larger jobs I drag out my Makita corded version but this one is ideal for things like tree limbs up to 3″ in diameter.
  • 1/4″ impact driver or 3/8″ impact wrench. It’s handy for those tight jobs. The wrench has an auto mode to prevent over-tightening.
  • Compact brushless cut-off tool. Cuts metal, plastic, drywall, tile, and wire shelving. The base fits flat to the work surface for inhanced cutting accuracy. That’s a nice engineering touch. Cuts at up to 19,500 RPM.
  • 3/8” right angle drill. Ryobi claims this is the industry’s most compact model. It’s also good for those tight situations.
  • Hand-held belt sander. The front pommel handle adjusts to 5 different positions for individual comfort. The tool-free belt-tracking feature makes adjustment on the fly easy.
  • Variable speed jig saw. Very lightweight and portable.
  • Circular saw. Another reason for battery operation. When I was installing baseboards not long ago, I took rough measurements before going to Home Depot. I took my saw with me and dealt with those super long pieces right there in the parking lot (the Tacoma bed doesn’t like 15′ floppy stock.
  • Hand-held router. While I love my router table in the shop, it’s not very convenient to lug around.

Those are the Ryobi 18V ONE+ power tools that I have personal experience with. Overall I’m extremely satisfied. I’ve found them dependable, price-competitive, and offering some innovative features. I like the fact that they have brushless motors. The battery chargers run at a reasonable rate. The batteries are non-fade, meaning that they don’t begin to lag when they are running out of juice.


Looking for more great content? Visit our partner sites:

The Green Frugal

Running Across Texas


As Featured On Ezine Articles

I offer article and blog-writing services. Interested? Hire Me!


Did you find this article helpful? Thanks for supporting this free site with a small donation!


Visit Kelly’s profile on Pinterest.


About the Author:

Photo of Kelly R. SmithKelly R. Smith is an Air Force veteran and was a commercial carpenter for 20 years before returning to night school at the University of Houston where he earned a Bachelor’s Degree in Computer Science. After working at NASA for a few years, he went on to develop software for the transportation, financial, and energy-trading industries. He has been writing, in one capacity or another, since he could hold a pencil. As a freelance writer now, he specializes in producing articles and blog content for a variety of clients. His personal blog is at I Can Fix Up My Home Blog where he muses on many different topics.

Top 10 Table Saw Safety Tips

by Kelly R. Smith

index sitemap advanced
Craftsman woodworking table saw

This article was updated on 10/14/20.

By its very nature, woodworking is a dangerous hobby and profession. There are 720,000 injuries each year associated with woodworking projects and about 42% of these occur on the table saw. No surprise here; almost every project needs stock ripped or crosscut. How can we do better? Let’s look at these top 10 table saw safety tips.

  • Using your blade guard. Yes, they come from the factory installed and recommended but who actually uses them? Ahem, yeah, I thought so. I use a push stick or another woodworking jig to get the job done. Should I use the guard? Yeah, but usually… no. Still, I recommend it.
  • Table saw blade selection. It is tempting to use the same table saw blade for every job, but should you? No. You need a separate blade for cross-cutting and one for ripping Why? A crosscut blade makes the rip cut much more difficult. It can burn and bind.
  • Use a zero-clearance insert. Yes, there are two schools of thought on this one. Safety says a supported piece is a safer piece.
  • Woodworking dust collection. If your table saw offers a port, use it. You will guard your health, keep your wood shop clean, and lower fire risks. Wood dust not only irritates your throat and nose, but some species can be poisonous. Keeping a clean and clutter-free work area is important.
  • Use your PPE (Personal Protective Equipment). Yeah this stuff is front and center because of the Covidid-19 Pandemic but truth be told, it was always a big deal. Use safety glasses and ear protection. Gloves? Personal decision.
  • Keep your hands out of harm’s way. Use push sticks, push blocks and other safety devices to help guide and control work pieces.
  • Don’t stand directly in front of or in back of the blade. Always stand to one side or the other. Even with the guard in place, the odd chunk of wood might kick back.
  • Make adjustments before powering up. Make all adjustments with your blade stopped, with the single exception of changing the speed. Never try to change the configuration of the table or the power plant before the machine has stopped.
  • Keep your hands safe. Do not reach under the table to make adjustments, remove scrap, or make adjustments while the blade is turning.
  • Use your accessories. Make use of your miter gauge or rip fence to guide your work. Free-hand cuts are very dangerous, inaccurate and not recommended. For larger pieces, such as plywood, use table saw extensions or rollers. Ideally, you should have a helper, but realistically that’s not always going to happen.

Keep these 10 table saw safety tips in mind each and every time you enter your shop. It is easy to become complacent with this and other tools. None of us came with spare body parts.


Looking for more great content? Visit our partner sites:

The Green Frugal

Running Across Texas


As Featured On Ezine Articles

I offer article and blog-writing services. Interested? Hire Me!


Did you find this article helpful? Thanks for supporting this free site with a small donation! We depend on our readers rather than a bothersome paywall to keep the lights on here in the shop.


Visit Kelly’s profile on Pinterest.


About the Author:

Photo of Kelly R. SmithKelly R. Smith is an Air Force veteran and was a commercial carpenter for 20 years before returning to night school at the University of Houston where he earned a Bachelor’s Degree in Computer Science. After working at NASA for a few years, he went on to develop software for the transportation, financial, and energy-trading industries. He has been writing, in one capacity or another, since he could hold a pencil. As a freelance writer now, he specializes in producing articles and blog content for a variety of clients. His personal blog is at I Can Fix Up My Home Blog where he muses on many different topics.

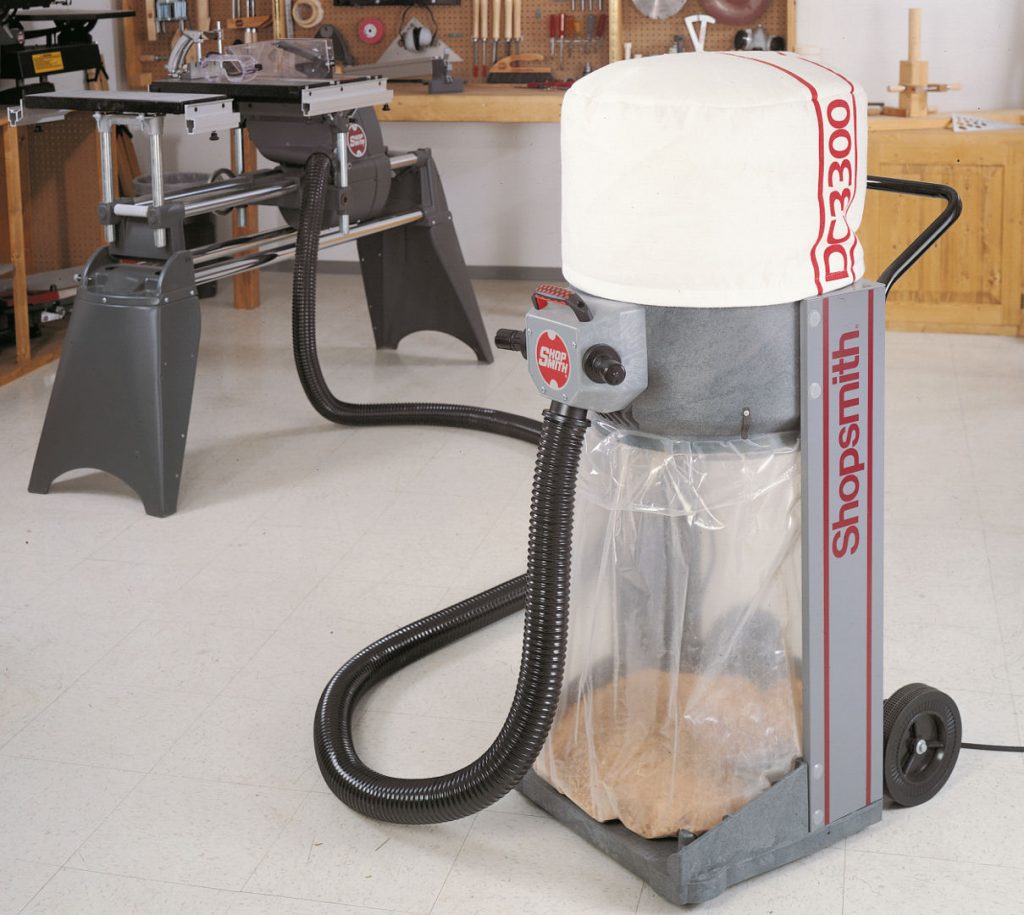
5 Benefits of a Wood Shop Dust Collector

index sitemap advanced
A Shopsmith wood shop dust collector

When most beginning woodworkers are setting up shop or experienced ones are upgrading, what first comes to mind? Tools, benches, and fixtures. But here’s a woodworking tip for you; it pays to first consider an investment in a wood shop dust collector system. Here are 10 of the most important reasons.

  • Sawdust is a royal pain. Shavings, dust, and chips accumulate very quickly. Fine dust fills the air until it settles somewhere, such as the surface of your current project that you are putting a finish coat on, applying putty to, or gluing up. And it goes without saying that you won’t make any points with your spouse when you inevitably track it into the house.
  • Sawdust is a definite fire hazard. It only takes one spark from your grinder to get things going. And if you are not storing your flammables properly you are compounding the problem. Even fine dust that sifts on top of lighting fixtures and electrical boxes has the potential to light up your day — and not in a good way!
  • Sawdust is a great candidate for recycling. Having the dust collector consolidate it while you work on your table saw, band saw, or other piece of equipment takes half the effort out of the process. It can be used to make sweeping compound (which you can use or barter). Hardwood is a great soil amendment for your garden because as it breaks down it feeds the soil with beneficial nutrients.
  • Fine sawdust is a health hazard without a dust collector. It can hover in the air for hours where it enters your sinuses and lungs. You can end up with allergy issues and congestion. The effects accumulate over time meaning that they can build up over the course of years even if you don’t notice a problem for a while. Exotic woods can be outright toxic. I had an x-ray several years ago and they picked up a spot in one lung. Turns out it was a “calcified nodule” which results when you breath something in and your lung isolates it by coating it, much as an oyster creates a pearl from a grain of sand over time. Was it from woodworking? Quite possible after 20 years as a carpenter.
  • Dust collection extends the life of your power tools. If chips or even dust is removed immediately, friction on moving parts is reduced greatly. When sanding, your paper will take longer to clog, saving time and money. It figures that sawdust from any wood containing moisture or sap will gum up a heated machine fairly quickly.

These are just 5 important benefits of a wood shop dust collection system. Yes, it is an expense but in the long run it will save you time, money, and your health.

Looking for more great content? Visit our partner sites:

The Green Frugal

Running Across Texas


As Featured On Ezine Articles

I offer article and blog-writing services. Interested? Hire Me!


Did you find this article helpful? Thanks for supporting this free site with a small donation!


Visit Kelly’s profile on Pinterest.

About the Author:

Photo of Kelly R. SmithKelly R. Smith is an Air Force veteran and was a commercial carpenter for 20 years before returning to night school at the University of Houston where he earned a Bachelor’s Degree in Computer Science. After working at NASA for a few years, he went on to develop software for the transportation, financial, and energy-trading industries. He has been writing, in one capacity or another, since he could hold a pencil. As a freelance writer now, he specializes in producing articles and blog content for a variety of clients. His personal blog is at I Can Fix Up My Home Blog where he muses on many different topics.

Top 10 Woodworking Tips for Projects

Various woodworking tools
index sitemap advanced

This article was updated on 01/12/21.

Ads we feature have been independently selected and reviewed. If you make a purchase using the links included, we may earn commission, which helps support the site.

Whether you’re a professional carpenter or a hobbyist woodworker in the evenings or on the weekends, one thing is certain. You can’t have too many woodworking tips. They might make completion of your project easier, or more precise, or just save time. In this sense, tips are a lot like woodworking jigs. Let’s take a look at some of these tips.

  1. Make your own wood putty. Using wood putty is often inevitable. The problem with store-bought products is that it is difficult to get a good color match. The manufacturers can only replicate so many shades and the store can only dedicate so much shelf space. The solution for a perfect match at almost zero cost is surprisingly simple. Check out how to make homemade wood putty.
  2. Keep your work bench clean with wax paper. We’ve all done it — glued up and begin clamping all or part of a project only to see glue oozing out and dripping on your work surface. Clean-up will not be fun. The solution? Put wax paper under your project before you start. It’s cheap and disposable.
  3. Invest in a pneumatic nailer or two. There will be times when these tools come in handy. Say, if you are doing a repetitive task that requires fastening with nails, either 2″ ones or very small 23 – gauge pins this is much easier than the hammer-and-nail set approach. In fact, driving the smallest with a hammer is impractical. They bend; you curse. The solution is a battery-operated pin nailer.
  4. Know your lumber grades. Every project is somewhat unique. Most people go shopping for lumber and base their selection on straightness, no warping, no checking, no knots, etc. They don’t also evaluate by National Hardwood Lumber Association lumber grades and so sometimes overbuy. For example, if only one side of the project is going to be visible, your best choice might be FAS 1F or F1F.
  5. Select the right finish. Varnish or “polyurethane varnish” is only for interior use. It will not stand up to outdoor elements. Spar varnish on the other hand is excellent for for outdoor furniture, boats and exterior doors. It dries slowly and so it stays more supple. Because of this it accommodates the movement of the wood so it is not likely to crack and fail. Tung oil is also suitable for exterior use.
  6. Draw a line on a long board with your combination square. Drill a 1/16″ hole in the middle of your combination square at the 1″ mark. Now you can set your square so that the hole lines up with where you want the line to be. Insert a sharpened pencil tip into the hole and draw down the length of the board.
  7. Use the 3-4-5 method for squaring. There will be times when laying out large projects and it is not practical or accurate to use small tools. In this case you can use the 3-4-5 method for squaring. It’s quite simple and accurate as it’s based on the Pythagorean Theorem. Remember that from math class?
  8. Hassle-free screw insertion. In many cases it is a good idea to pre-drill screw holes to minimize the chance of splitting the wood. However, the further the screw has to penetrate, the higher the possibility that the screw will stall or the slot (standard or Phillips) will strip out. My favorite solution is to rub the screw threads on a bar of soap first. This lubrication minimizes insertion issues.
  9. Remove the plug from a holesaw with ease. The holesaw is a great invention. The drawback is getting that darn plug out after you cut the hole. Here’s a workaround. First, drill a pilot hole completely through the work piece with a twist bit the same size as the diameter of your holesaw’s drill bit. Next, insert your holesaw’s bit into that hole and cut more than halfway through the work piece. Next, pull out your holesaw, flip over your work piece, and saw the hole from this side, using the pilot hole to guide your second cut. After completing the cut and pulling out your holesaw, the plug will be sticking halfway out of the saw, giving you something to hold onto, making it a snap to remove.
  10. Cutting small pieces on your tablesaw. This can be a major hassle at a minimum. Altogether too often the piece either flies away or splinters up. Save yourself the hassle. Set you blade just shy of the thickness of the wood so you don’t saw all the way through. Now just finish the cut using your chisel.

Looking for more great content? Visit our partner sites:

The Green Frugal

Running Across Texas


As Featured On Ezine Articles

I offer article and blog-writing services. Interested? Hire Me!


Did you find this article helpful? Millions of readers rely on information on this blog and our main site to stay informed and find meaningful solutions. Please chip in as little as $3 to keep this site free for all.


Visit Kelly’s profile on Pinterest.

About the Author:

Photo of Kelly R. SmithKelly R. Smith is an Air Force veteran and was a commercial carpenter for 20 years before returning to night school at the University of Houston where he earned a Bachelor’s Degree in Computer Science. After working at NASA for a few years, he went on to develop software for the transportation, financial, and energy-trading industries. He has been writing, in one capacity or another, since he could hold a pencil. As a freelance writer now, he specializes in producing articles and blog content for a variety of clients. His personal blog is at I Can Fix Up My Home Blog where he muses on many different topics.

Types and Benefits of Mulch

Soil Improvement and Water Conservation in Garden and Landscaping

index sitemap advanced
Cypress "Nofloat" mulch
Cypress “Nofloat” mulch

Mulch is an integral part of ornamental and vegetable gardens and landscaping beds. If you think about it, in most cases nature abhors bare soil, and as gardeners so should we. While mulch provides aesthetic qualities, the “under-the-hood” benefits are numerous. During the Coronavirus pandemic everyone has time to improve their garden.

  • It conserves water.
  • It reduces weeds.
  • It keeps the soil surface cooler and that benefits earthworms, microorganisms, and plant roots. Earthworms are essential for many reasons but particularly because they keep your soil aerated when they tunnel, allowing water and fertilizers to enter. Unfortunately, when homeowners put pesticides on their lawn they kill the earthworms. The two things that should go on your lawn are organic fertilizer and beneficial nematodes.

Types of Mulch

  • Cypress: When mulch breaks down it feeds your soil. Cypress does not break down well but when shredded properly it will not float off in the rain.
  • Recycled plant material: This includes organic material from your own property — leaves, twigs, dead plants, spent buds, bark, flowers, and other plant debris. I’ve even used spent grains from my beer-brewing days!
  • Shredded hardwood bark: A very good choice. It breaks down well to feed your soil, looks good, and is readily available. My favorite for mint and basil plants.
  • Pine needles: This is often an easy resource if you or a neighbor have pine trees. You will notice that needles make a fine bed in the forest? Same thing for your yard.
  • Any kind of dyed mulch: Let me be clear–NO, NO, NO. Yes, your landscaper may be a pusher for this stuff, you might be trying to complement the color of your siding, or your homeowner association might want you to “conform”, but NO. Do you know what chemicals are in the dye? Nope, me neither. Whatever it is they don’t list it on the bag; you do not want it in the veggies you put on the table. Or, getting down into the water table.
  • Pine bark: This may be one of the most popular mulches on the market but it is far from the best. It looks great but it tends to float away in heavy rain and turns to mush as it dries. Yuck.
  • Shredded rubber: I shouldn’t have to say this but NO, NO, NO! This is for the local high school track, not for your garden.

Other Mulching Gardening Considerations

  • Do not use plastic sheets or weed blocking materials. They may take a bit of the workload off you, but they stop the biologic process and cook the roots of your target plants.
  • Even if you don’t use cedar as a mulch, shred some on your table saw or with some other tool and add it into your mulch; it will keep many insects at bay in an organic way.
  • When you mulch a tree, make a “volcano” not a “plateau”. No need to introduce root rot when trying to help the tree, right?

Knowing the types and benefits of mulch can make it or break it in your gardening plan. It may seem like a minor issue but like other things in life, the devil is in the details. Happy gardening as we have time to do it in pandemic times.

Looking for more great content? Visit our partner sites:

The Green Frugal

Running Across Texas


As Featured On Ezine Articles

I offer article and blog-writing services. Interested? Hire Me!


Did you find this article helpful? Thanks for supporting this free site with a small donation!


Visit Kelly’s profile on Pinterest.

About the Author:

Photo of Kelly R. SmithKelly R. Smith is an Air Force veteran and was a commercial carpenter for 20 years before returning to night school at the University of Houston where he earned a Bachelor’s Degree in Computer Science. After working at NASA for a few years, he went on to develop software for the transportation, financial, and energy-trading industries. He has been writing, in one capacity or another, since he could hold a pencil. As a freelance writer now, he specializes in producing articles and blog content for a variety of clients. His personal blog is at I Can Fix Up My Home Blog where he muses on many different topics.

Trim Nailers & Finish Nailers

A Guide to Choosing the Right Wood Trim Finishing Tools

Photo of Kelly R. Smith   by Kelly R. Smith

Ryobi 18-gauge brad nailer
index sitemap advanced

Ads we feature have been independently selected and reviewed. If you make a purchase using the links included, we may earn commission, which helps support the site.

This article was updated on 02/28/21.

Whether you call them finish nailers or trim nailers, the end result is the same. These guns deliver nails of various sizes (tool-dependent) with the help of an air compressor or an airless system. The Ryobi AirStrike brad nailer pictured above is battery-powered. I use it for projects like door trim and baseboard.

Why use a nailer vs the old hammer and nail set method? For me the answer is two-fold. First, It is just faster and easier with less chance of marring the soft or hardwood surface. Secondly, you get to a point as your nail size diminishes where you just can’t hammer it without it bending. For example, brads are almost impossible (at least for me).

Which Pneumatic-Trim-Nailer is Right for You?

Ideally, you would own the entire spectrum of nail-size guns. But in reality, unless you make a living as a trim carpenter or cabinet-maker, you’ll most likely have to compromise and pick one or two. First, choose whether you want to drag a compressor hose or periodically re-charge batteries. For my purposes, being highly mobile is key so I do batteries. So what about sizes? Actually, I’ve stuck to all rechargeable Ryobi 18-Volt battery tools, even the electric mower (40-Volts).

  • Brad Nailers. These 18-gauge nails are up to 2 inches long. Since the nails are thinner in the cross section, they leave a smaller hole and are so they are less likely to split narrow wood trim and molding. This could be your choice for stop and cove moldings or baseboard shoe molding, or crown molding trim.
  • Pin Nailers. These 23-gauge nails come in both the headless and the slight-headed models; they are just what the doctor ordered for attaching delicate trim pieces; this makes them a hands-down favorite among certain hobbyists. The hole they leave are almost small enough to disregard under a coat of paint, or blend with the grain of a piece of wood. However, they don’t offer a lot of shear or withdrawal strength so these fasteners are best used for wood-to-wood connections and it’s really advisable to strengthen your connection with wood glue.
  • 15- and 16-Gauge Nailers. These two tools fire nails up to 2-1/2 inches long, and they are considered as the most versatile for interior carpentry applications. They also have a lot of overlap in terms of application which makes them good go-to tools for the DIY folks. Both are widely used for installing baseboard, chair rail, door and window casing, crown molding, as well as prehung door frames.

This overview of trim nailers and finish nailers should help you to decide where to invest your money, depending on your goals.

Further Reading

Looking for more great content? Visit our main page or partner sites:

I Can Fix Up My Home

The Green Frugal

Running Across Texas


As Featured On Ezine Articles

I offer article and blog-writing services. Interested? Hire Me!


Did you find this article helpful? Millions of readers rely on information on this blog and our main site to stay informed and find meaningful solutions. Please chip in as little as $3 to keep this site free for all.


Visit Kelly’s profile on Pinterest.

About the Author:

Photo of Kelly R. SmithKelly R. Smith is an Air Force veteran and was a commercial carpenter for 20 years before returning to night school at the University of Houston where he earned a Bachelor’s Degree in Computer Science. After working at NASA for a few years, he went on to develop software for the transportation, financial, and energy-trading industries. He has been writing, in one capacity or another, since he could hold a pencil. As a freelance writer now, he specializes in producing articles and blog content for a variety of clients. His personal blog is at I Can Fix Up My Home Blog where he muses on many different topics.


How to Make Homemade Wood Putty

index sitemap advanced
Homemade Wood Putty
How to make homemade wood putty

In a perfect world our woodworking projects wouldn’t require wood putty, filler, or grain filler. But wood is a natural product so some defects are inherent and as woodworkers we are prone to small mistakes. That’s where this homemade wood putty (and wood filler) comes in.

And if you are concerned, this is a small way to build green since you already have the sawdust and you are not paying for the production and shipping of little metal putty cans.

What You Need to Make Wood Putty

This is a simple procedure and the results are more accurate and less expensive than commercial putty and filler products. Here is what you will need.

  • Sawdust from your woodworking project
  • Elmer’s glue
  • Popsicle stick or something similar to mix with
  • A piece of scrap cardboard

The Process

This short video demonstrates the process; it’s not complicated and you just have to work the mixture until you achieve the desired consistency.

I hope this woodworking tip on homemade wood putty has helped you. Feel free to leave any comments that improve the process or just prove helpful.


Looking for more great content? Visit our partner sites:

The Green Frugal

Running Across Texas


As Featured On Ezine Articles

I offer article and blog-writing services. Interested? Hire Me!


Did you find this article helpful? Thanks for supporting this free site with a small donation!


Visit Kelly’s profile on Pinterest.


Tips for Your Wood Shop or Hobby Area

index sitemap advanced
Various Wood Working Tools

Do you have a wood shop or hobby area? Most people locate theirs in the garage, basement, or external building. One thing I’ve learned over the years is that is never any lack of tips to improve your work flow and end product. Here, in no particular order are some of my favorites.

  • Know your lumber grades. Too many people over-spend needlessly. The go-to guys in the industry is the National Hardwood Lumber Association.
  • Make a water level. This simple device does things that a four or two foot level can’t do, like transferring benchmarks around corners.
  • Use the right wood glue for the job. They’re not all the same. They are very specialized today.
  • Explore the wide world of metal and hardwood for woodworking jigs. There are a million jigs out there to make your projects easier, safer, and more accurate.
  • Learn about all the methods of woodworking joinery. Some work better than others for specific job. Some are more decorative than others. One of my favorites is the dovetail joint.

These are just a few wood shop tips to make your projects more enjoyable and productive. Got any of your own? Share them in the comment section!
Looking for more great content? Visit our partner sites:

The Green Frugal

Running Across Texas

I offer blog-writing services. Interested? Hire Me!


Did you find this article helpful? Thanks for supporting this free site with a small donation!


Visit Kelly’s profile on Pinterest.


close

Enjoy this blog? Please spread the word :)

RSS
Follow by Email
Twitter
Follow Me
Tweet
Pinterest
Pinterest
Pinterest
Instagram
LinkedIn
Share