8 Benefits of Hibiscus Tea

And How to Grow Hibiscus for Tea at Home

by Kelly R. Smith
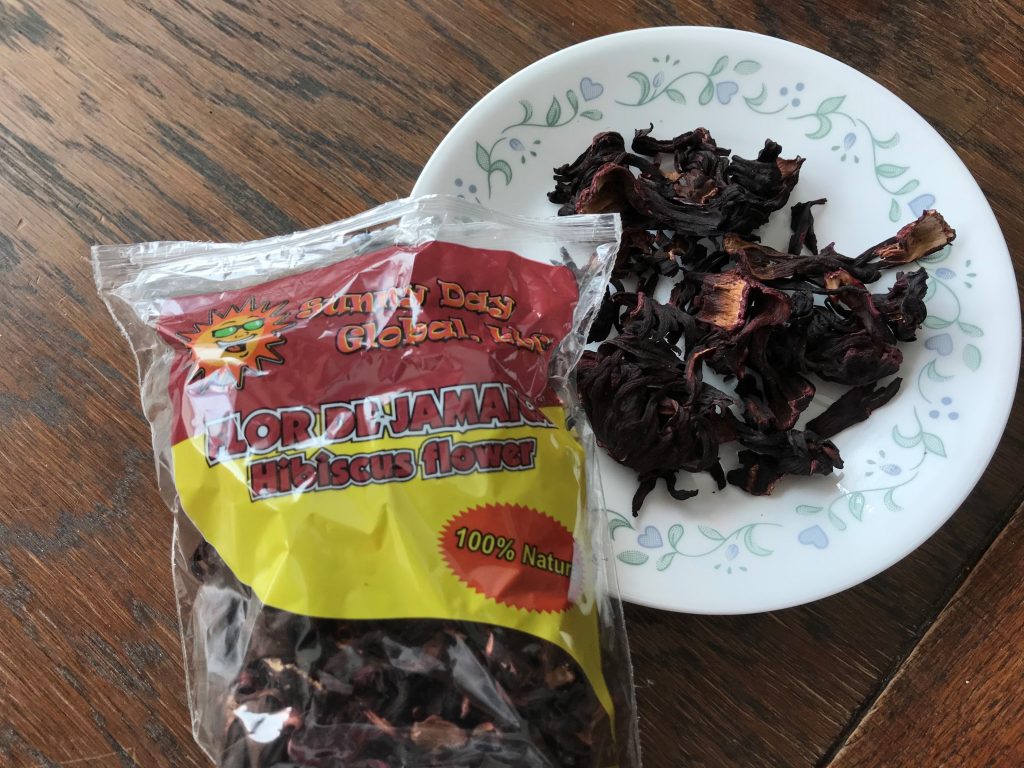
Dried hibiscus flowers for healthy tea
index sitemap advanced

Ads we feature have been independently selected and reviewed. If you make a purchase using the links included, we may earn commission, which helps support the site.

Hibiscus tea (sometimes called “sour tea”) might not be so well known in the USA but it certainly is in other parts of the world. I’ve been drinking it for a few years now, both for the taste and the health benefits; it’s another item in my toolbox to keep my blood pressure in a reasonable range.. I add it to the grounds of my cold brew coffee maker, sometimes with fresh mint from my garden. Yeah, I know; wild, living on the edge. There are several hundred species of hibiscus plants that vary by the location and climate they are grown in, but Hibiscus sabdariffa or roselles is most commonly used to make hibiscus tea. As a bonus, they are stunning in tropical landscape plantings. But we are here to talk about the health benefits of hibiscus tea.

Health Benefits of Hibiscus Tea

  • It lowers blood pressure. This is a big one for me. All blood pressure medications have side effects. For me, I take lisinopril, an ACE inhibitor. It causes coughing and the feeling of being lethargic. Rebekah Edwards says, “A 2013 review by the University of Arizona discovered that hibiscus tea is used in 10 or more countries as a normal hypertension treatment without any reported adverse events or side effects — except in extremely high doses.”1
  • It’s packed with antioxidants. What are antioxidants? They are molecules that help fight compounds we call free radicals, which inflict damage to your cells. The National Library of medicine noting their study says, “Hibiscus anthocyanin extract has reducing power that is approximately 2-fold that of the synthetic antioxidant, butylated hydroanisole.”2 Other than hibiscus, many other foods contain them; tart cherries are a good example.


  • It supports healthy cholesterol and triglycerides. Dyslipidemia is a type of disorder that is characterized by noticeable changes in plasma lipids or lipoproteins, including two you are probably familiar with: cholesterol and triglycerides. As with blood pressure, hibiscus tea’s ability to reduce high “blood lipids” also extends to those with diabetes. A 2009 study had diabetes patients drink hibiscus tea two times a day for a full month and they found a significant increase in HDL (good) cholesterol and a marked decrease in total cholesterol, LDL (bad) cholesterol and triglycerides.
  • It may help to lower blood fat levels. The National Library of medicine citing a study of sour tea (ST) and black tea (BT) says, “The results of the present study showed that ST has a significant effect on blood lipid profile in patients with diabetes.”3 Many studies have shown that hibiscus tea reduces blood cholesterol and triglycerides in people suffering from diabetes and metabolic syndrome. That said, other studies have shown conflicting results. Obviously, more research is needed in the general population.
  • It prevents oxidative stress. Like most healthy teas on the market, hibiscus is chock full of antioxidants that combat free radical damage caused by substandard nutrient diets and frequent exposure to dangerous chemicals. These antioxidants are found primarily in the anthocyanins of the plant, the natural pigments that give this flower its brilliant red color.
  • It may boost liver health. Your liver is essential to your overall health. Some of its jobs include producing proteins, secreting bile, and breaking down fat. One small human research study found that supplementing with hibiscus tea raised the antioxidant load in the bloodstream as well as reducing compounds that contribute to oxidative stress that damages cells.
  • It shows promise in fighting certain cancers. Although this idea is only starting to gain traction, there is already some evidence to support hibiscus tea’s anticancer power. It has been shown that hibiscus extracts cause apoptosis, or cell death, in leukemia cells. Although the exact mechanisms behind this aren’t clear as of yet, this could be a promising step in the ever-going fight against leukemia, which affects about a quarter of the children and adolescents currently struggling with cancer.
  • It reduces obesity and related risks. How? Human and animal studies have found a link between hibiscus tea and an elevated metabolism. Hibiscus extract may even inhibit you from absorbing as much starch and sucrose as you might from a typical meal. One study in particular gave 36 overweight participants either hibiscus extract or a placebo. After 12 weeks, hibiscus extract reduced body weight, body fat, body mass index and hip-to-waist ratio


Growing and Preparing Hibiscus for Tea at Home

Test your soil pH in a well-draining area that receives full sun at least six months before planting if possible, and, if needed, amend it using elemental sulfur or dolomitic lime to adjust the pH to between 6.1 and 7.8. The do best in humus-rich soil and full sunlight.

Harvest your flowers after they have bloomed. You want the calyxes (the main body of the flower). They should snap right off. Once you have your harvest, complete the steps to prepare and dry them. This video explains it in detail.

How to process hibiscus flowers for tea

Can you benefit from hibiscus tea? Of course! There’s something for everybody and if you grow your own supply you will save money and be certain it is organic.

Others are Reading

Reference

  1. .Rachael Link, Dr. Axe, Hibiscus Tea: The Antioxidant ‘Therapeutic Agent’ You Should Be Drinking, https://draxe.com/nutrition/hibiscus-tea/
  2. Taofeek O Ajiboye, et al, National Library of medicine, Antioxidant and drug detoxification potentials of Hibiscus sabdariffa anthocyanin extract, https://pubmed.ncbi.nlm.nih.gov/21314460/
  3. Hassan Mozaffari-Khosravi, et al., National Library of medicine, Effects of sour tea (Hibiscus sabdariffa) on lipid profile and lipoproteins in patients with type II diabetes, https://pubmed.ncbi.nlm.nih.gov/19678781/


Did you find this article helpful? Millions of readers rely on information on this blog and our main site to stay informed and find meaningful solutions. Please chip in as little as $3 to keep this site free for all.


Visit Kelly’s profile on Pinterest.

About the Author:

Photo of Kelly R. SmithKelly R. Smith is an Air Force veteran and was a commercial carpenter for 20 years before returning to night school at the University of Houston where he earned a Bachelor’s Degree in Computer Science. After working at NASA for a few years, he went on to develop software for the transportation, financial, and energy-trading industries. He has been writing, in one capacity or another, since he could hold a pencil. As a freelance writer now, he specializes in producing articles and blog content for a variety of clients. His personal blog is at I Can Fix Up My Home Blog where he muses on many different topics.

Indoor Gardening: Basic Hydroponic Tools and Equipment

index sitemap advanced
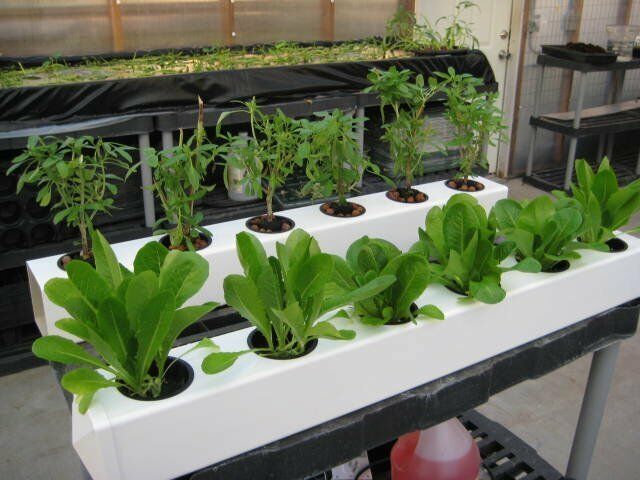
Indoor hydroponic gardening

It is no secret that commercial growers have been using hydroponic tools and equipment for indoor gardening for years. Like other businesses, these farmers need to generate revenue and provide a product to customers year-round. What if you want to become more self-sufficient during the COVID-19 lock-down? What about the average person that wants to do it on a smaller scale? The good news is that you can. Let’s look at what you need to get started.

Light for Photosynthesis

Dictionary.com defines photosynthesis thus, “the complex process by which carbon dioxide, water, and certain inorganic salts are converted into carbohydrates by green plants, algae, and certain bacteria, using energy from the sun and chlorophyll.”

Yeah, yeah, yeah; what you really need to know is that your plants need light to grow. Of course, sunlight is optimal; it provides the full spectrum of visible and non-visible light. It’s offered to us for free and is the best way to provide light for hydroponics. Many vegetable plants and herbs like mint and basil do best on at least six hours of direct light each day. Southern-facing windows and greenhouses have the potential to provide this amount of sunlight.

But what if that’s not in the cards? You’ll be best investing in grow lights. Look for ones from 4,000 to 6,000 kelvin to insure that they deliver both cool (blue) and warm (red) light.

Substitute Substrate for Soil

This is where the hydro part comes in. The water and nutrients circulate through the substrate which is a material such as pea gravel, sand, coconut fiber, peat moss, expanded clay pellets, etc.

Water

Clean water is critical. The water of choice is treated by reverse osmosis (RO). This purification process results in water that is 98% to 99% pure and your plants will thank you for it. You will also have to keep an eye on the water pH (a measure of alkalinity or acidity. For example, if you are growing tomatoes, they prefer a pH of 6.0 to 6.8 on a scale where 7.0 is considered neutral. Mint plants prefer 6.5 to 7.5. Growing beets? Shoot for 6.0 to 6.8. Knowing these numbers is important as you consider companion plants for your garden.

As far as fertilizer goes, you’ll want to buy a hydroponic premix because it will contain all the nutrients needed. I suppose you could cobble together your own but the expense/work ratio doesn’t make sense to me. Of course, it wouldn’t hurt to add foliar feeding every couple of weeks.

Types of Hydroponic Systems

As you might suspect, there is a range of systems to choose from.

  • Water culture. Uses a non-submersible air pump, air hose, floating platform, rope wicks, and grow tray.
  • Nutrient film. Uses non-submersible air pump, air hose, submersible pump, air stone, overflow tube, and grow tray.
  • Wick system. Uses non-submersible pump, air stone, air hose, rope wicks, and grow tray.
  • Ebb and flow. Submersible air pump, air hose, timer, overflow tube, and grow tray.
  • Aeroponic. Subersible pump, mist nozzles, air hose, and short-cycle timer.
  • Drip system. Non-submersible air pump, submersible pump, air hose, timer, drip lines, overflow tube, drip manifold, grow tray.

There are your basic hydroponic tools and equipment for indoor gardening. Whether you approach it as a hobby, as a serious farmer who is going off the grid, there are numerous benefits. The produce will be fresh, as organic as you make it, and available year-round.


Looking for more great content? Visit our partner sites:

The Green Frugal

Running Across Texas


As Featured On Ezine Articles

I offer article and blog-writing services. Interested? Hire Me!


Did you find this article helpful? Thanks for supporting this free site with a small donation!


Visit Kelly’s profile on Pinterest.


About the Author:

Photo of Kelly R. SmithKelly R. Smith is an Air Force veteran and was a commercial carpenter for 20 years before returning to night school at the University of Houston where he earned a Bachelor’s Degree in Computer Science. After working at NASA for a few years, he went on to develop software for the transportation, financial, and energy-trading industries. He has been writing, in one capacity or another, since he could hold a pencil. As a freelance writer now, he specializes in producing articles and blog content for a variety of clients. His personal blog is at I Can Fix Up My Home Blog where he muses on many different topics.

Foliar Feeding with Medina Hasta Gro Plant Food

index sitemap advanced
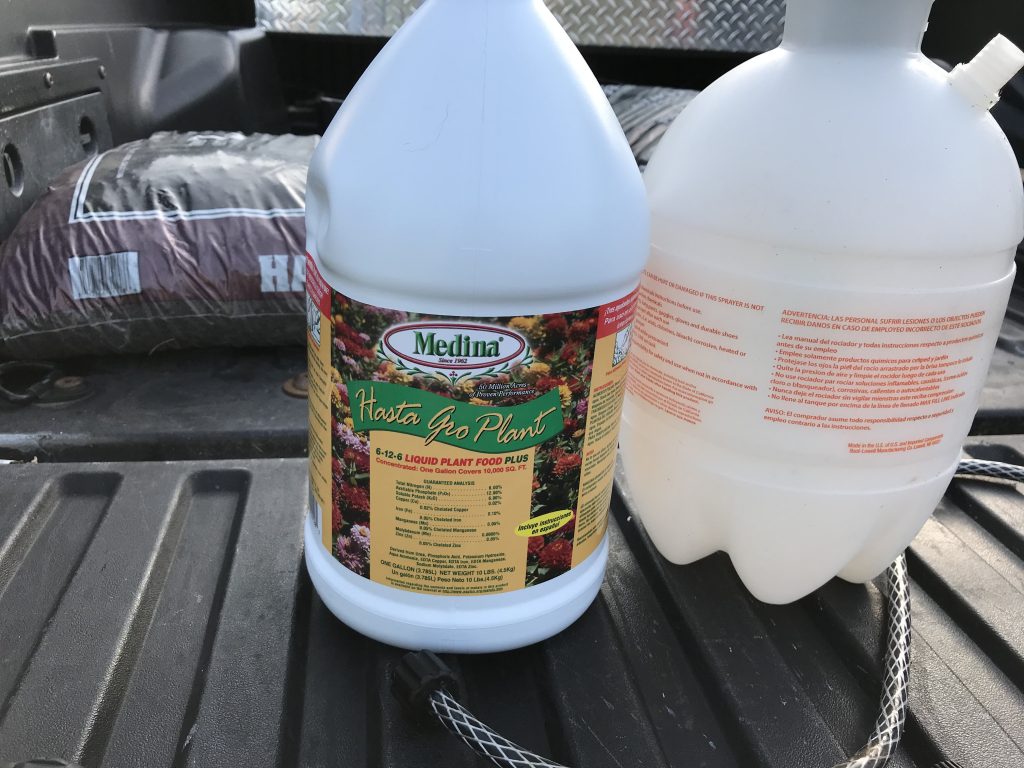
Medina Hasta Gro Plant Food Plus and a pump-up sprayer.
Medina Hasta Gro Plant Food Plus and a pump-up sprayer

If you have any kind of garden — vegetables with their recommended companion plants, ornamental, or fruit trees, you know that fertilizing is key to healthy plants and a good yield. But did you know that in addition to ground fertilizer (not those little stakes), foliar feeding is important. Dictionary.com defines foliar as, “of, relating to, or having the nature of a leaf or leaves.” I do my foliar feeding with Medina Hasta Gro Liquid Plant Food.

Make-Up of Medina Hasta Gro

Fertilizers may use any number of ingredients but what you want to look for is the N-P-K ratio. For this product I use 6-12-6.

  • N = nitrogen. This is responsible for leaf growth and development. Its role relates to the plant’s coloring and chlorophyll. Nitrogen depletion may present as leaf yellowing in typically green plants often indicates a lack of nitrogen. In the case of Medina it is is derived from clean urea sources and has humic acid added into the mix.
  • P = phosphorus. This component targets root growth and flower and fruit development.
  • K = potassium. Potassium also plays a part in root growth as well as in stem development.

Foliar Fertilizer Application

This fertilizer is remarkably inexpensive. The jug in the photo at the top of the page contains one gallon of concentrate. It’s mixed at the ratio of 1/2 liquid ounce (about one tablespoon) per gallon of water. That is enough to do my small vegetable garden, my herbs (mint, rosemary, parsley, basil, etc.), two fig trees, one orange tree, and a sapling Don Juan Avocado tree.

To apply, just mix the concentrate and water in the sprayer, pump it up, and spray the leaves. Try to apply it on both the tops and bottoms of the leaves. How much? Enough so that you can see it dripping off. The best time of day for application is early morning or evening when it’s not too hot. Don’t wash the spray off the foliage. If you have any left over in your sprayer, don’t hesitate to spray your lawn or mulch. Waste not; want not.

I’ve had great results with Foliar Feeding with Medina Hasta Gro Plant Food on my garden this year. Applying it every couple of weeks works very well. I’ve seen better results at a better price than when I’ve used compost tea. Give it a try and happy gardening!


Looking for more great content? Visit our partner sites:

The Green Frugal

Running Across Texas


As Featured On Ezine Articles

I offer article and blog-writing services. Interested? Hire Me!


Did you find this article helpful? Thanks for supporting this free site with a small donation!


Visit Kelly’s profile on Pinterest.


About the Author:

Photo of Kelly R. SmithKelly R. Smith is an Air Force veteran and was a commercial carpenter for 20 years before returning to night school at the University of Houston where he earned a Bachelor’s Degree in Computer Science. After working at NASA for a few years, he went on to develop software for the transportation, financial, and energy-trading industries. He has been writing, in one capacity or another, since he could hold a pencil. As a freelance writer now, he specializes in producing articles and blog content for a variety of clients. His personal blog is at I Can Fix Up My Home Blog where he muses on many different topics.

Checklist of Must-Have Tools for Living Off the Grid

by Kelly R. Smith

index sitemap advanced
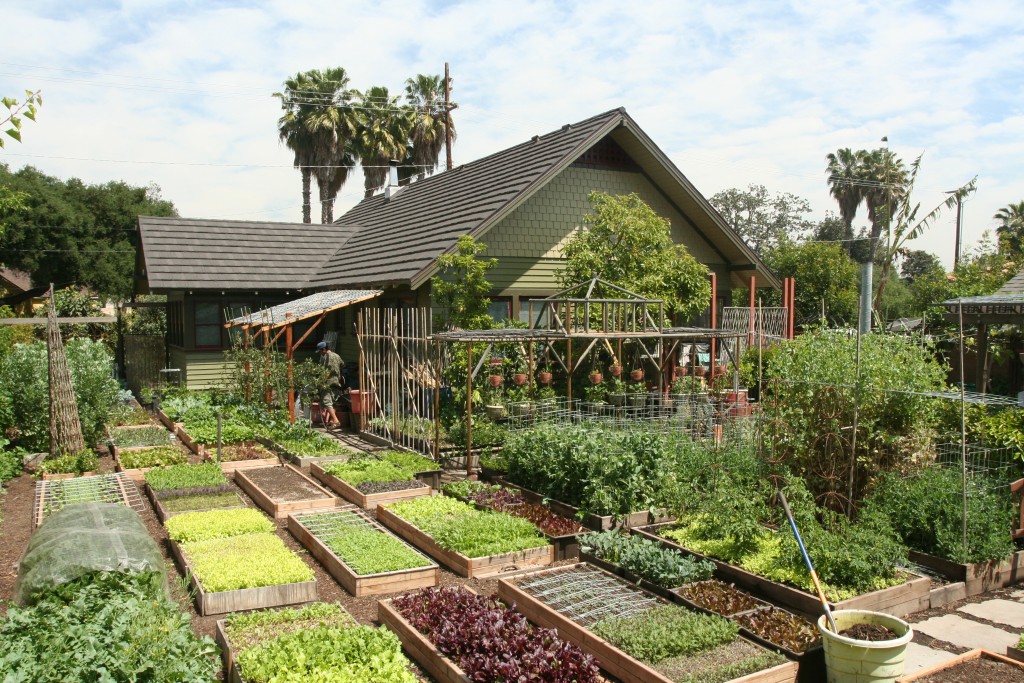
An urban homestead with vegetable garden.
An urban homestead with vegetable garden

Ads we feature have been independently selected and reviewed. If you make a purchase using the links included, we may earn commission, which helps support the site.

This article was updated on 10/06/20.

Homesteading has become a buzzword du juor and an increasingly-popular lifestyle. But what is it exactly? Dictionary.com gives this somewhat legal definition, “a dwelling with its land and buildings, occupied by the owner as a home and exempted by a homestead law from seizure or sale for debt.”

More popular usage means living in a self-sufficient manner as much as possible. This means growing your own food, keeping livestock and fowl, and living off-the-grid in as many ways as you can. This includes generating your own electricity with wind turbines or solar panels, etc. This also means acquiring some must-have tools and supplies for living off the grid. Here are some essentials.

General Repair Tools

  • Duct tape. You already know — a million different uses. My Grandpappy swore by Scotch tape but I prefer to go industrial-grade.
  • Heavy-duty scissor car jack. Not just for changing flats anymore. This all-around tool will be a willing helper that won’t talk back or complain.
  • Belt sander. When building or repairing/refinishing furniture this is an invaluable tool.
  • An assortment of rope and tie-down straps. These will find a use on a day-to-day basis on your homestead.
  • Cordless drill, sawzall, circular saw, etc. Cordless is the way to go because you won’t always be working where an outlet is available. Just be sure to buy all your cordless tools from the same family (manufacturer) of tools so the batteries are interchangeable and you only have to keep up with one charger. I use and recommend Ryobi but Milwaukee and Makita are good as well. I literally use my Ryobi cordless drill at least 3 times a week.
  • Chainsaw. Useful for clearing brush, cutting up firewood, and heck, your artistic endeavors, if you are into that kind of thing.

Gardening/Farming Tools

  • A set of gardening tools. This comprehensive set should ideally be kept in a container that can be transported to to the garden/field as one unit so you won’t be making multiple trips. It should contain at least a kneeling mat if you use one, a shovel, gloves, limb trimmer, a basket to carry your daily harvest, and pruning shears.
  • Rotary tiller. If you have a good sized plot of land to work, this tool is essential for good root growth. You can rent one but it will be more cost-effective to buy your own in the long run.
  • A bucket or two. This is a multiple use tool, as simple as it is. I usually use one for mixing soil and amendments when planting.
  • Rain barrels. While a rain harvesting system might not technically thought of as a “tool,” it is essential for irrigating your crops close to the house. In general, plants prefer the pH (a figure expressing the acidity or alkalinity) of rainwater to tap water. And what would happen if your public water supply is cut off or contaminated? Get a rain harvesting barrel, or better still, two. The can daisy chain.

Health-Related Tools and Supplies

  • Tweezers. Handy for close work and removing splinters. Keep one in your medicine cabinet and another in the glove box of your truck.
  • Antiseptics. You will need to apply this lickety-split, quick, and in a hurry when you get any cut or abrasion.
  • Bandaids. Keep an assortment of sizes and shapes on hand.
  • Moleskin. Take care of those inevitable blisters on your feet.
  • Safety glasses. This is one that many people ignore but do yourself a favor. The good Lord only gave you two eyes; replacements not currently available.
  • Soap. Yes, we’ve all got some but do we use it often enough? It should be a habit with the onset of COVID-19 pandemic or the Coronavirus as it is also called, but you can also pick up undesirable things in your soil and mulch in your vegetable garden.
  • Hearing protection. Save your hearing! The ones I use are headphones with a built-in AM/FM radio.
  • Fire extinguishers. Keep one in the kitchen, one in your pantry, one in your wood shop (next to your wood shop dust collector is a good spot), and one in your truck. They are cheap; there’s no excuse.

Self-defense and protecting your homestead, family, and possessions is a critical issue. I won’t go into the thorny issue of supporting the 2nd amendment or not; that is a topic for another article. But grasp reality, my friend. When things go sideways and you are well-prepared and others are not, you WILL be targeted. Be armed. I recommend at least a shotgun and at least one handgun. I have the Glock .40 caliber because of the stopping power. A shotgun is also great for small game. A 410 is great.

This is not an exhaustive list of must-have tools for living off the grid in the homesteading mode but it’s a good start. When the SHTF you will be glad that you prepared in advance. And you don’t have to live out in the country; we have a modest 1,200 square foot home but over the years I’ve surrounded us with fruit trees and my vegetable garden and my herbs for cooking and medicinal purposes. My latest addition is a Don Juan Avocado tree.

References:

Looking for more great content? Visit our partner sites:

The Green Frugal

Running Across Texas


As Featured On Ezine Articles

I offer article and blog-writing services. Interested? Hire Me!


Did you find this article helpful? Millions of readers rely on information on this blog and our main site to stay informed and find meaningful solutions. Please chip in as little as $3 to keep this site free for all.


Visit Kelly’s profile on Pinterest.

About the Author:

Photo of Kelly R. SmithKelly R. Smith is an Air Force veteran and was a commercial carpenter for 20 years before returning to night school at the University of Houston where he earned a Bachelor’s Degree in Computer Science. After working at NASA for a few years, he went on to develop software for the transportation, financial, and energy-trading industries. He has been writing, in one capacity or another, since he could hold a pencil. As a freelance writer now, he specializes in producing articles and blog content for a variety of clients. His personal blog is at I Can Fix Up My Home Blog where he muses on many different topics.

Growing Mint: An Herb Garden Staple

index sitemap advanced
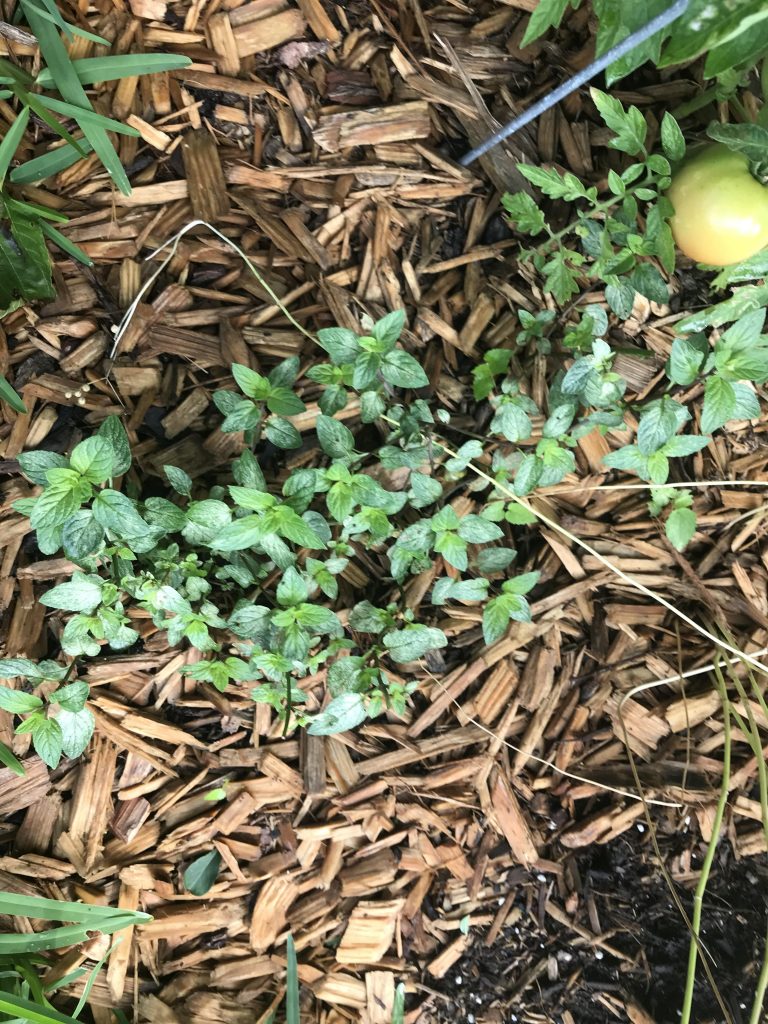
Chocolate mint in the garden next to tomato plant

Mint is a perennial herb with very fragrant, toothed leaves and tiny purple, pink, or white flowers. It has a fruity, aromatic taste and offers many health benefits. There are many varieties so you have a wide range to select from. One thing is certain — mint, grown organically, is an herb garden and kitchen staple, much as basil is.

The Many Varieties of Mint

The number of mint flavors can be a bit overwhelming; I like to keep at least two of them growing. An odd thing is the way you can identify it other than the smell. If you look close, the stem is actually square. The oddities of nature, yes? Anyway, pick your favorites from this list:

  • Chocolate. Yes, it really does look and taste like the real thing. My favorite additive to go into my dark-roast coffee grounds in the morning. None of those artificial chemical flavors for me.
  • Apple/Pineapple.
  • Spearmint. Was this your favorite chewing gum flavor as a kid?
  • Pennyroyal.
  • Citrus Mint. Just the thing for iced tea on a summer afternoon.
  • Corsican. This is one of the strongest tasting of mints and it is also the smallest; growing tight-knit it makes a good ground cover in semi-shady areas. Unlike most mints it can be difficult to grow. It likes to be well-watered. It makes a good companion plant for things like chives and tomatoes.
  • Peppermint. For adding a bit of candy flavor without all the sugar.
  • Banana.
  • Orange. Also good in tea and cold brew coffee.

Planting and Care of Mint

  • First, consider that mint spreads rapidly. This means growing it in a container or enclosed within some kind of root barricade to rein in the horizontal runners and underground rhizomes.
  • Mint likes light soil with good drainage; its native habitat is along stream banks.
  • Most varieties prefer some shade; check the exact requirements of your favorite variety/s.
  • It likes a thin layer of compost or organic fertilizer every few months.
  • Keep the area covered with a layer of hardwood mulch to retain moisture. Do NOT use any colored mulch. Those color chemicals and dyes are not your friends, especially if you intend to consume the leaves.
  • Other than watering, a light top-dressing with compost, some mulch, and occasional organic fertilizer, these are easy plants to grow.
  • Prune them back regularly. the smaller, younger leaves are the most flavorful… but, where you let them flower, the butterflies will thank you!

Nutritional Benefits

  • Aids in digestion.
  • Eases dizziness and nausea.
  • Helps with nasal congestion.
  • Boosts dental health.
  • Improves blood circulation.
  • Boosts immunity. That’s not a bad thing during the CORVID-19 pandemic.

By now you can see why growing mint in your garden or containers is a good idea. It’s healthy, tasty, nutritious, and importantly to many of us, easy to grow.

Looking for more great content? Visit our partner sites:

The Green Frugal

Running Across Texas


As Featured On Ezine Articles

I offer article and blog-writing services. Interested? Hire Me!


Did you find this article helpful? Thanks for supporting this free site with a small donation!


Visit Kelly’s profile on Pinterest.

About the Author:

Photo of Kelly R. SmithKelly R. Smith is an Air Force veteran and was a commercial carpenter for 20 years before returning to night school at the University of Houston where he earned a Bachelor’s Degree in Computer Science. After working at NASA for a few years, he went on to develop software for the transportation, financial, and energy-trading industries. He has been writing, in one capacity or another, since he could hold a pencil. As a freelance writer now, he specializes in producing articles and blog content for a variety of clients. His personal blog is at I Can Fix Up My Home Blog where he muses on many different topics.

Enjoying Cold Brew Coffee Makers

Soulhand Cold Brew Coffee Maker
index sitemap advanced

“Cold brew coffee” is a trendy item nowadays but the term itself is different from what it was back in the day. My mother used to drink it, but back then it was percolator-brewed coffee that had gone cool and then had ice added.

It’s something quite different today. It’s trendy and gourmet, in other words, pricey. Since it has been going mainstream in local grocery stores in the refrigerated section, and was so expensive, I had to try it. I mean, I’m a coffee fiend, right? Just see my post on making the perfect cup of coffee.

How Cold Brew Coffee Differs from Hot Brew

The first observable difference is that cold brew takes so much longer to make. It’s slow but if you are going to enjoy it on the drive to work, or sitting around in the home office, just start it before you go to bed the night before.

The next thing to note is that it can be strong and caffeine-heavy without the bitterness of a hot brew. This is because the grounds haven’t been hot-water “burned” which results in a cuppa where you can really get the true taste of the beans. It’s slow but the drip is just about one per second so the ice water really does have time to extract all the goodness.

How Much Does Cold Brew Coffee Cost?

The short answer is: whatever you want it to. What I mean to say is that if you have a quality burr-grinder and use whole beans anyway, your day-to-day expense is going to be the same. You should always grind whole beans as you need them because the essential oils that yield the flavor begin to degrade as soon as the grinding is done. This is why commercial ground coffee is vacuum-sealed. But, how long ago? How long has it sat on the grocery store shelf? With all this being said, I drink and recommend Black Rifle Coffee. It’s roasted in small batches, only when you order it.

As far as the cold brew coffee maker is concerned, the cost is all over the place. The functional parts are negligent price-wise but it goes up from there. I suppose some people like to showcase their brewer as a work of kitchen art (and I can appreciate that as a woodworker) but I just want a good cup of Joe. So as a reference, the one I use (pictured above) is thirty-some-odd dollars, but the fancy tall wooden-frame ones with artistic looking flasks get into the hundreds of dollars. I’m currently using the Zulay cold brew coffee maker and I like it very much.

What Coffee Blend to Use?

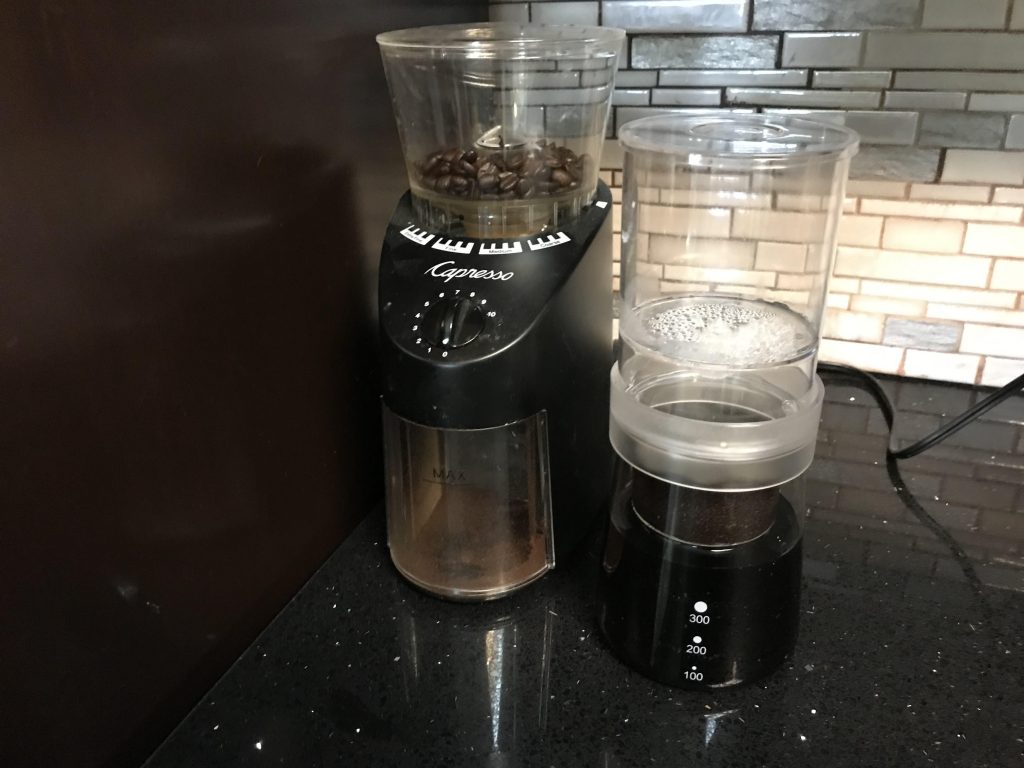
That’s up to individual taste and I would suggest experimenting. For myself, I use dark or espresso beans and set the coffee grinder to fine. I have experimented with pre-flavored beans. I have also added ground cinnamon and/or chocolate extract. I commonly add some fresh mint from my herb garden which is the perennial part of my raised bed garden.

Keep in mind that additives don’t always have to be just for flavor. Many also offer health benefits. The cinnamon and mint are good examples but I am planning to try some fresh-grated ginger in the near future.

The bottom line is that if you enjoy your coffee, a cold brew coffee maker could be just the thing during the hot summer months. For my experience, buying it off the shelf at the grocers is just wrong, financially. And doing it myself I can customize it as I like.


Looking for more great content? Visit our partner sites:

The Green Frugal

Running Across Texas


As Featured On Ezine Articles

I offer article and blog-writing services. Interested? Hire Me!


Did you find this article helpful? Thanks for supporting this free site with a small donation!


Visit Kelly’s profile on Pinterest.


About the author:

Photo of Kelly R. SmithKelly R. Smith is an Air Force veteran and was a commercial carpenter for 20 years before returning to night school at the University of Houston where he earned a Bachelor’s Degree in Computer Science. After working at NASA for a few years, he went on to develop software for the transportation and financial and energy trading industries. He has been writing, in one capacity or another, since he could hold a pencil. As a freelance writer now, he specializes in producing articles and blog content for a variety of clients. His personal blog is at I Can Fix Up My Home Blog where he muses on many different topics.


Companion Planting Guide for Your Veggie Garden

index sitemap advanced
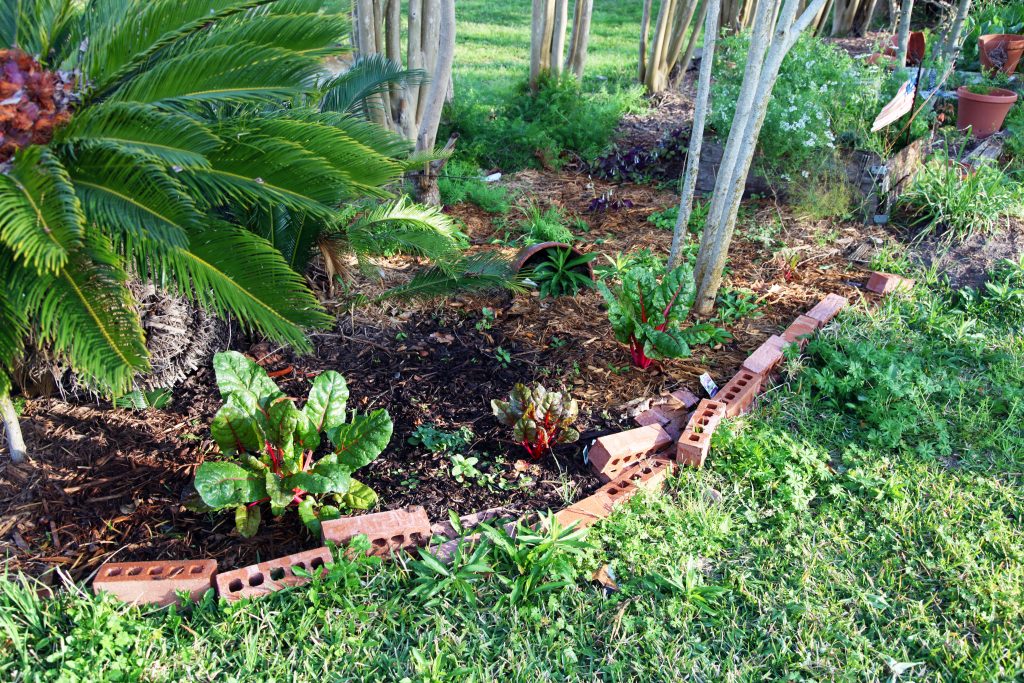
Swiss Chard Garden
Swiss Chard Garden

This article was updated on 03/01/20.

Many people put in their vegetable gardens every year and do their best to do the proper fertilization, watering, and weeding. Yet, no bounty for the table. It might be that the neighboring plants are the wrong types.

Some vegetable plants will benefit their neighbors; others will hinder their growth and yield. The answer is to plant correctly paired species. Sometimes even certain flowers will provide great benefits. This applies to both traditional and raised bed gardens.

First, Plan Your Garden

To take advantage of companion agriculture in order to get more bang for your buck, you first need to choose which vegetables and then mate them up with something else you want to bring to the table.

Personally, I choose the things that I love to eat but are either hard to find or expensive. For example, so far this year I’ve put in tomatoes, basil, strawberries, Brussels sprouts, rosemary, and chocolate mint (goes great in my espresso grounds).

As a side note, it never hurts to have fruit trees. When they are blossoming, that means more bees which will also pollinate your vegetables. My “mini-orchard” contains two fig trees, a plum tree, a Republic of Texas orange, a mandarin orange, a Sam Houston peach, a mulberry tree, and an improved Meyer lemon. All organic.

Recommended Companion Plants

There are a lot of popular plants that have plant friends. Let’s look at some of the most popular.

Asparagus. Good with basil, tomatoes, and parsley. Asparagus in the home garden is a good investment, it is low-maintenance, less expensive than at the store, and a bed will produce for years.

Basil. Good for most garden crops except rue. It improves the growth and flavor of many vegetables, especially tomatoes and lettuce.

Beets. Plant with broccoli, Brussels sprouts, cabbage bush beans, onions, cauliflower, chard, and kohlrabi.

Bush Beans. They like cauliflower, cucumbers, corn, beets, potatoes, carrots, cabbage, strawberries, catnip, marigolds, and savory. Why catnip if you don’t own a cat? It repels flea beetles.

Brussels Sprouts and Broccoli. Good friends of thyme, mint, chamomile, dill, hyssop, beets, buckwheat, onions, rosemary, sage, wormwood, marigolds, nasturtiums, calendula, carrots. But not strawberries.

Cantaloupe. Likes sunflowers and corn, but not potatoes.

Carrots. Plant near cabbage, chives, early potatoes, leeks, salsify, wormwood, peas, radishes, rosemary, lettuce, onions, and sage.

Corn. Compatible with early potatoes, melons, beans, cucumbers, soybeans, squash, peas, and pumpkins .

Cucumbers. Plant near cabbage, corn, radishes, sunflowers, early potatoes, and beans. Not compatible with late potatoes.

Eggplant. Pair up with beans and marigold. Avoid potatoes as companions.

Onions. They like the companionship of beets, carrots, strawberries, tomatoes, summer savory, and cabbage. Avoid beans and English peas.

Parsley. Great with asparagus and tomatoes.

Soybeans. The ideal plant. They work with and help anything.

Squash. Good with corn, radishes, marigolds, and nasturtium. Not friendly with Irish potatoes.

Tomatoes. Works well with onions, marigold, asparagus, cucumbers, basil, carrots, and parsley.

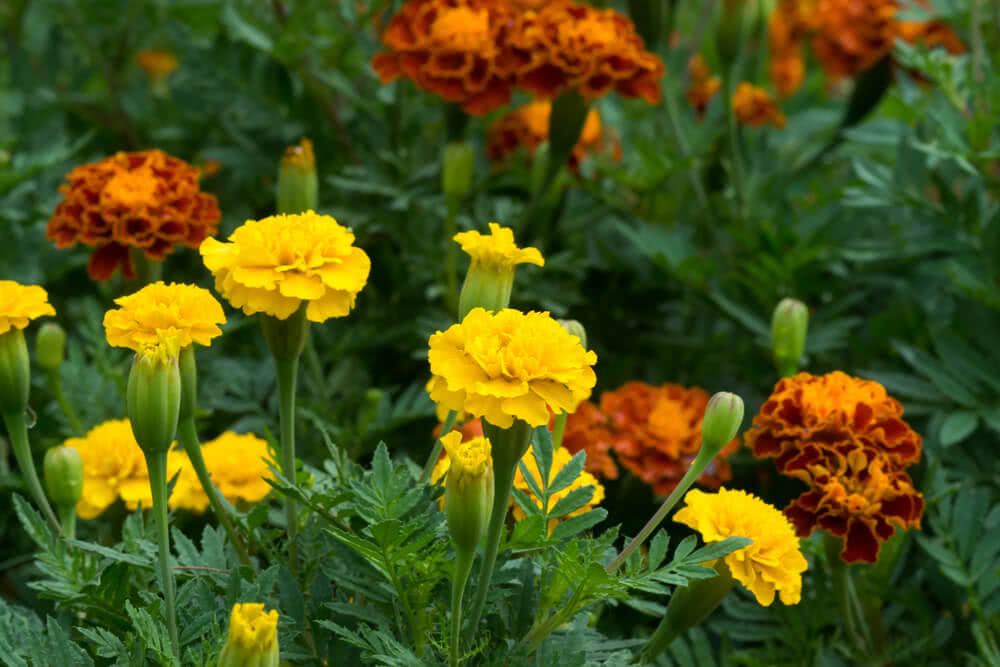
Use marigold flowers for pest control
Use marigold flowers for pest control and beneficial companionship

More gardening tips

There are many other things to tip a generous harvest in your favor. This spring I took up rainwater harvesting for garden and tree watering. There are two main reasons that this is a good idea in my humble opinion. First, rainwater is free. Secondly, plants prefer the Ph in rainwater as compared to tap water.

Another good tip is to apply beneficial nematodes to your lawn and garden during the spring. On your lawn they will eliminate fleas without using pesticides. In your garden they will organically control sod webworms, cutworms, maggots, various types of ants, and many more. Pesticides are a bad idea; they kill beneficial ladybugs. They will also kill the earthworms that keep your garden soil aerated. Also, pesticides are taken up by the plant roots and kill the microscopic microbes that keep the roots healthy. Eventually, those toxins will make their way to your dining room table.

Did this post on companion planting for your garden help you? If so, feel free to share the link with your friends and your social media contacts.


Looking for more great content? Visit our partner sites:

The Green Frugal

Running Across Texas


As Featured On Ezine Articles

I offer article and blog-writing services. Interested? Hire Me!


Did you find this article helpful? Thanks for supporting this free site with a small donation!


Visit Kelly’s profile on Pinterest.


About the author:

Photo of Kelly R. SmithKelly R. Smith is an Air Force veteran and was a commercial carpenter for 20 years before returning to night school at the University of Houston where he earned a Bachelor’s Degree in Computer Science. After working at NASA for a few years, he went on to develop software for the transportation and financial and energy trading industries. He has been writing, in one capacity or another, since he could hold a pencil. As a freelance writer now, he specializes in producing articles and blog content for a variety of clients. His personal blog is at I Can Fix Up My Home Blog where he muses on many different topics.


How to Build a Raised Garden Bed

index sitemap advanced
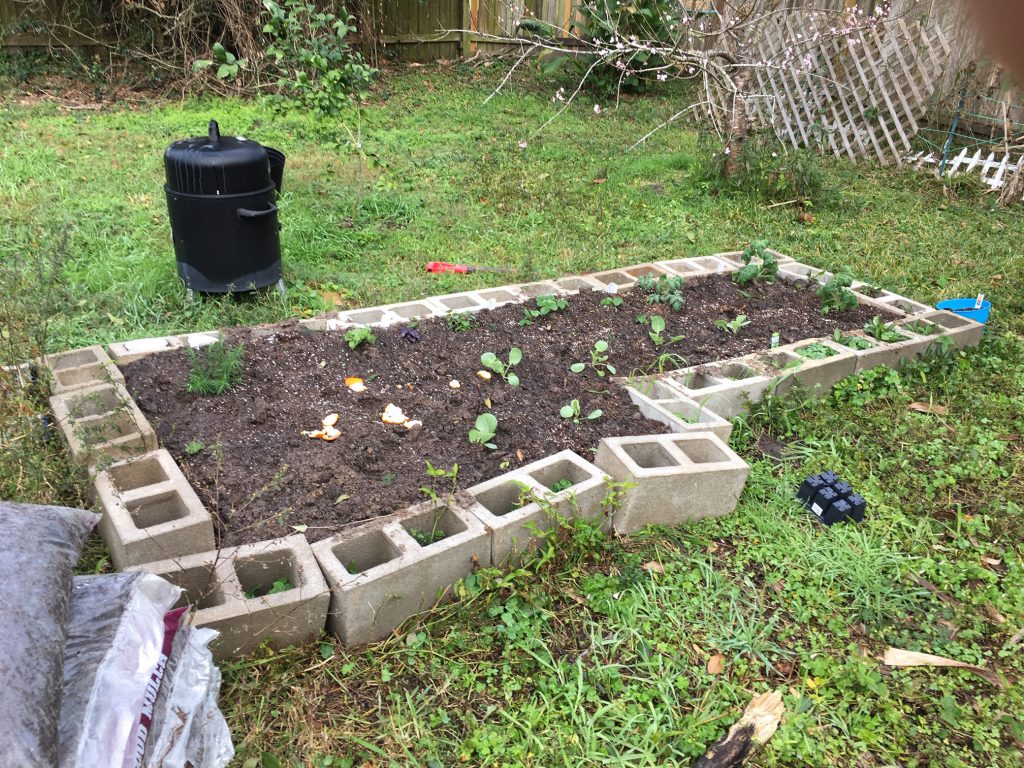
Raised Garden Bed
Raised Garden Bed

A raised garden bed (or raised bed garden if you prefer) is a great way to grow your own organic produce. It’s a simple weekend DIY project. The picture above shows the one I just built. It still needs a bit of tightening up but the basics are there.

Types of Raised Bed Gardens

The one I built was made using cinder blocks. The benefits are low cost of materials and the ability to expand easily. Kits are also available but they cost a bit more and not all are expandable. They can also be built using wood (cedar is a good choice) and stakes.

Height is also a consideration. The cinder block height works well for me but people with back problems do better with elevated garden kits. It’s all a matter of convenience and personal preference.

Preparing the Garden

A garden laid directly on the ground, like mine, will benefit from a layer of newspaper laid on the grass surface. This will inhibit grass and weeds from making their way up through the dirt.

On top of this goes your dirt with compost added in. It’s easy to mix using a hoe. What type of dirt? I have heard some gardeners swear by rose soil but in my experience regular garden soil works fine. If you already know what you are going to plant this is a good time to test the soil pH and adjust it using the appropriate soil amendments.

Planting Time!

You’ve got two choices–start your plants from seed or buy bedding plants. Seeds are less expensive but using plants will mean you can harvest sooner. I prefer plants. Just plant them at the recommended depth and water them in well.

Next add a couple of inches of mulch to the surface. There many varieties available. I prefer hardwood mulch because of the way it decomposes over time and feeds the soil. Whatever you do, do not use dyed mulch. That dye is chemical and you certainly don’t want roots to be taking it up!

Now toss out some organic fertilizer and some agricultural dried molasses. The molasses stimulates all the beneficial microbes and earthworms, both of which are important for the health of your soil. Microbes share a symbiotic relationship with plants. Worms will keep your soil aerated which helps in water distribution and root growth. Another consideration is spraying out some beneficial nematodes to control fleas and many other pests.

I hope you found this article on building a raised garden bed helpful. If so, please pass it along to your friends. Comments or ideas? Add them in the comment section below. Thanks for visiting and happy gardening!

About the Author:

Kelly R. Smith
Kelly R. Smith

Kelly R. Smith is an Air Force veteran and was a commercial carpenter for 20 years before returning to night school at the University of Houston where he earned a Bachelors Degree in Computer Science. After working at NASA for a few years, he went on to develop software for the transportation and financial and energy trading industries. He has been writing, in one capacity or another, since he could hold a pencil. As a freelance writer now, he specializes in producing articles and blog content for a variety of clients.


Looking for more great content? Visit our partner sites:

The Green Frugal

Running Across Texas


As Featured On Ezine Articles

I offer article and blog-writing services. Interested? Hire Me!


Did you find this article helpful? Thanks for supporting this free site with a small donation!


Visit Kelly’s profile on Pinterest.


Choosing the Right Trees

Tree Selection Depends on Purpose; Fruit-Bearing, Ornamental, Privacy, or Shade

Photo of Kelly R. Smith   by Kelly R. Smith

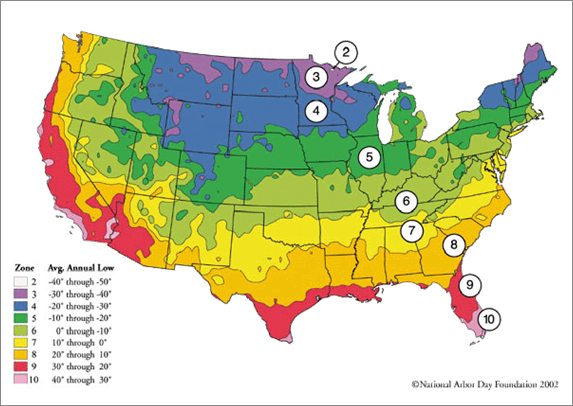
U.S. Hardiness Zone Map
index sitemap advanced

This article was updated on 05/23/21.

Ads we feature have been independently selected and reviewed. If you make a purchase using the links included, we may earn a commission, which helps support the site. Thank you for your support.

Trees in our yards serve many purposes. Some are ornamental, some, like avocado trees, bear fruit, some are for privacy, and some provide shade which reduces energy bills. With that in mind, when choosing the right trees you must ask yourself what purpose they will serve.

How to Choose Fruit Trees

Many people want their own fruit trees and why not? Free food is great. Also, for some of us it’s that nice, fuzzy feeling that comes with the assurance that the fruit is truly organic. I myself fall into that category; I once made the commitment to plant one fruit tree per year. Now, I’ve about run out of real estate.

The mistake many people make is neglecting to research the required chill hours the trees need. I see it all the time; people buying trees at the local big box store. They plant them and wait. No fruit cometh forth. The map at the top of this page will show you the zone you live in and the corresponding temperature range. You might pay more for trees at a nursery but you will know what you are getting.


I’m here in South Texas and I’ve got a peach tree, two fig trees, a plum tree, and an Improved Meyer Lemon tree. I lost two orange trees and a couple of palm trees in the unprecedented freeze of 2021. Still, any kind of citrus tree is a good choice for my family. Another factor when choosing fruit (as well as vegetable garden plants) is vitamin and mineral content.

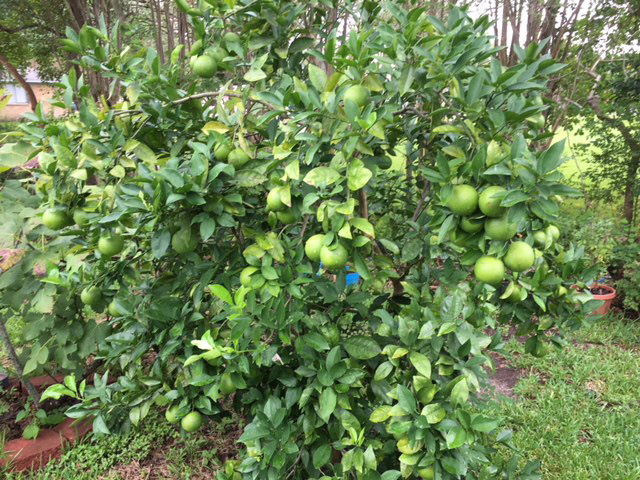
Republic of Texas Orange Tree
My Republic of Texas Orange Tree

Choosing Shade Trees

Shade trees are very beneficial. They help to maximize your energy efficiency. When they shade your house from the sun, you save money.  Basically, the southern side of your home will receive up to three times more sunlight than the western and eastern facing sides in the wintertime, and just one-third as much during the hot summertime. Deciduous trees are a better choice than evergreens because they lose their leaves in the wintertime when you benefit from the warming sun. Weather plays a big part in your energy consumption.

Planting trees with this in mind is called a passive solar concept. One note of caution–do not plant them too close to the house or you risk root damage to your foundation, which can be especially expensive and intrusive to repair if you have a concrete slab. Large trees should be no closer than thirty feet away and small ones no closer than eight feet away. As a preventative measure, install root barriers.

Choosing Privacy Trees

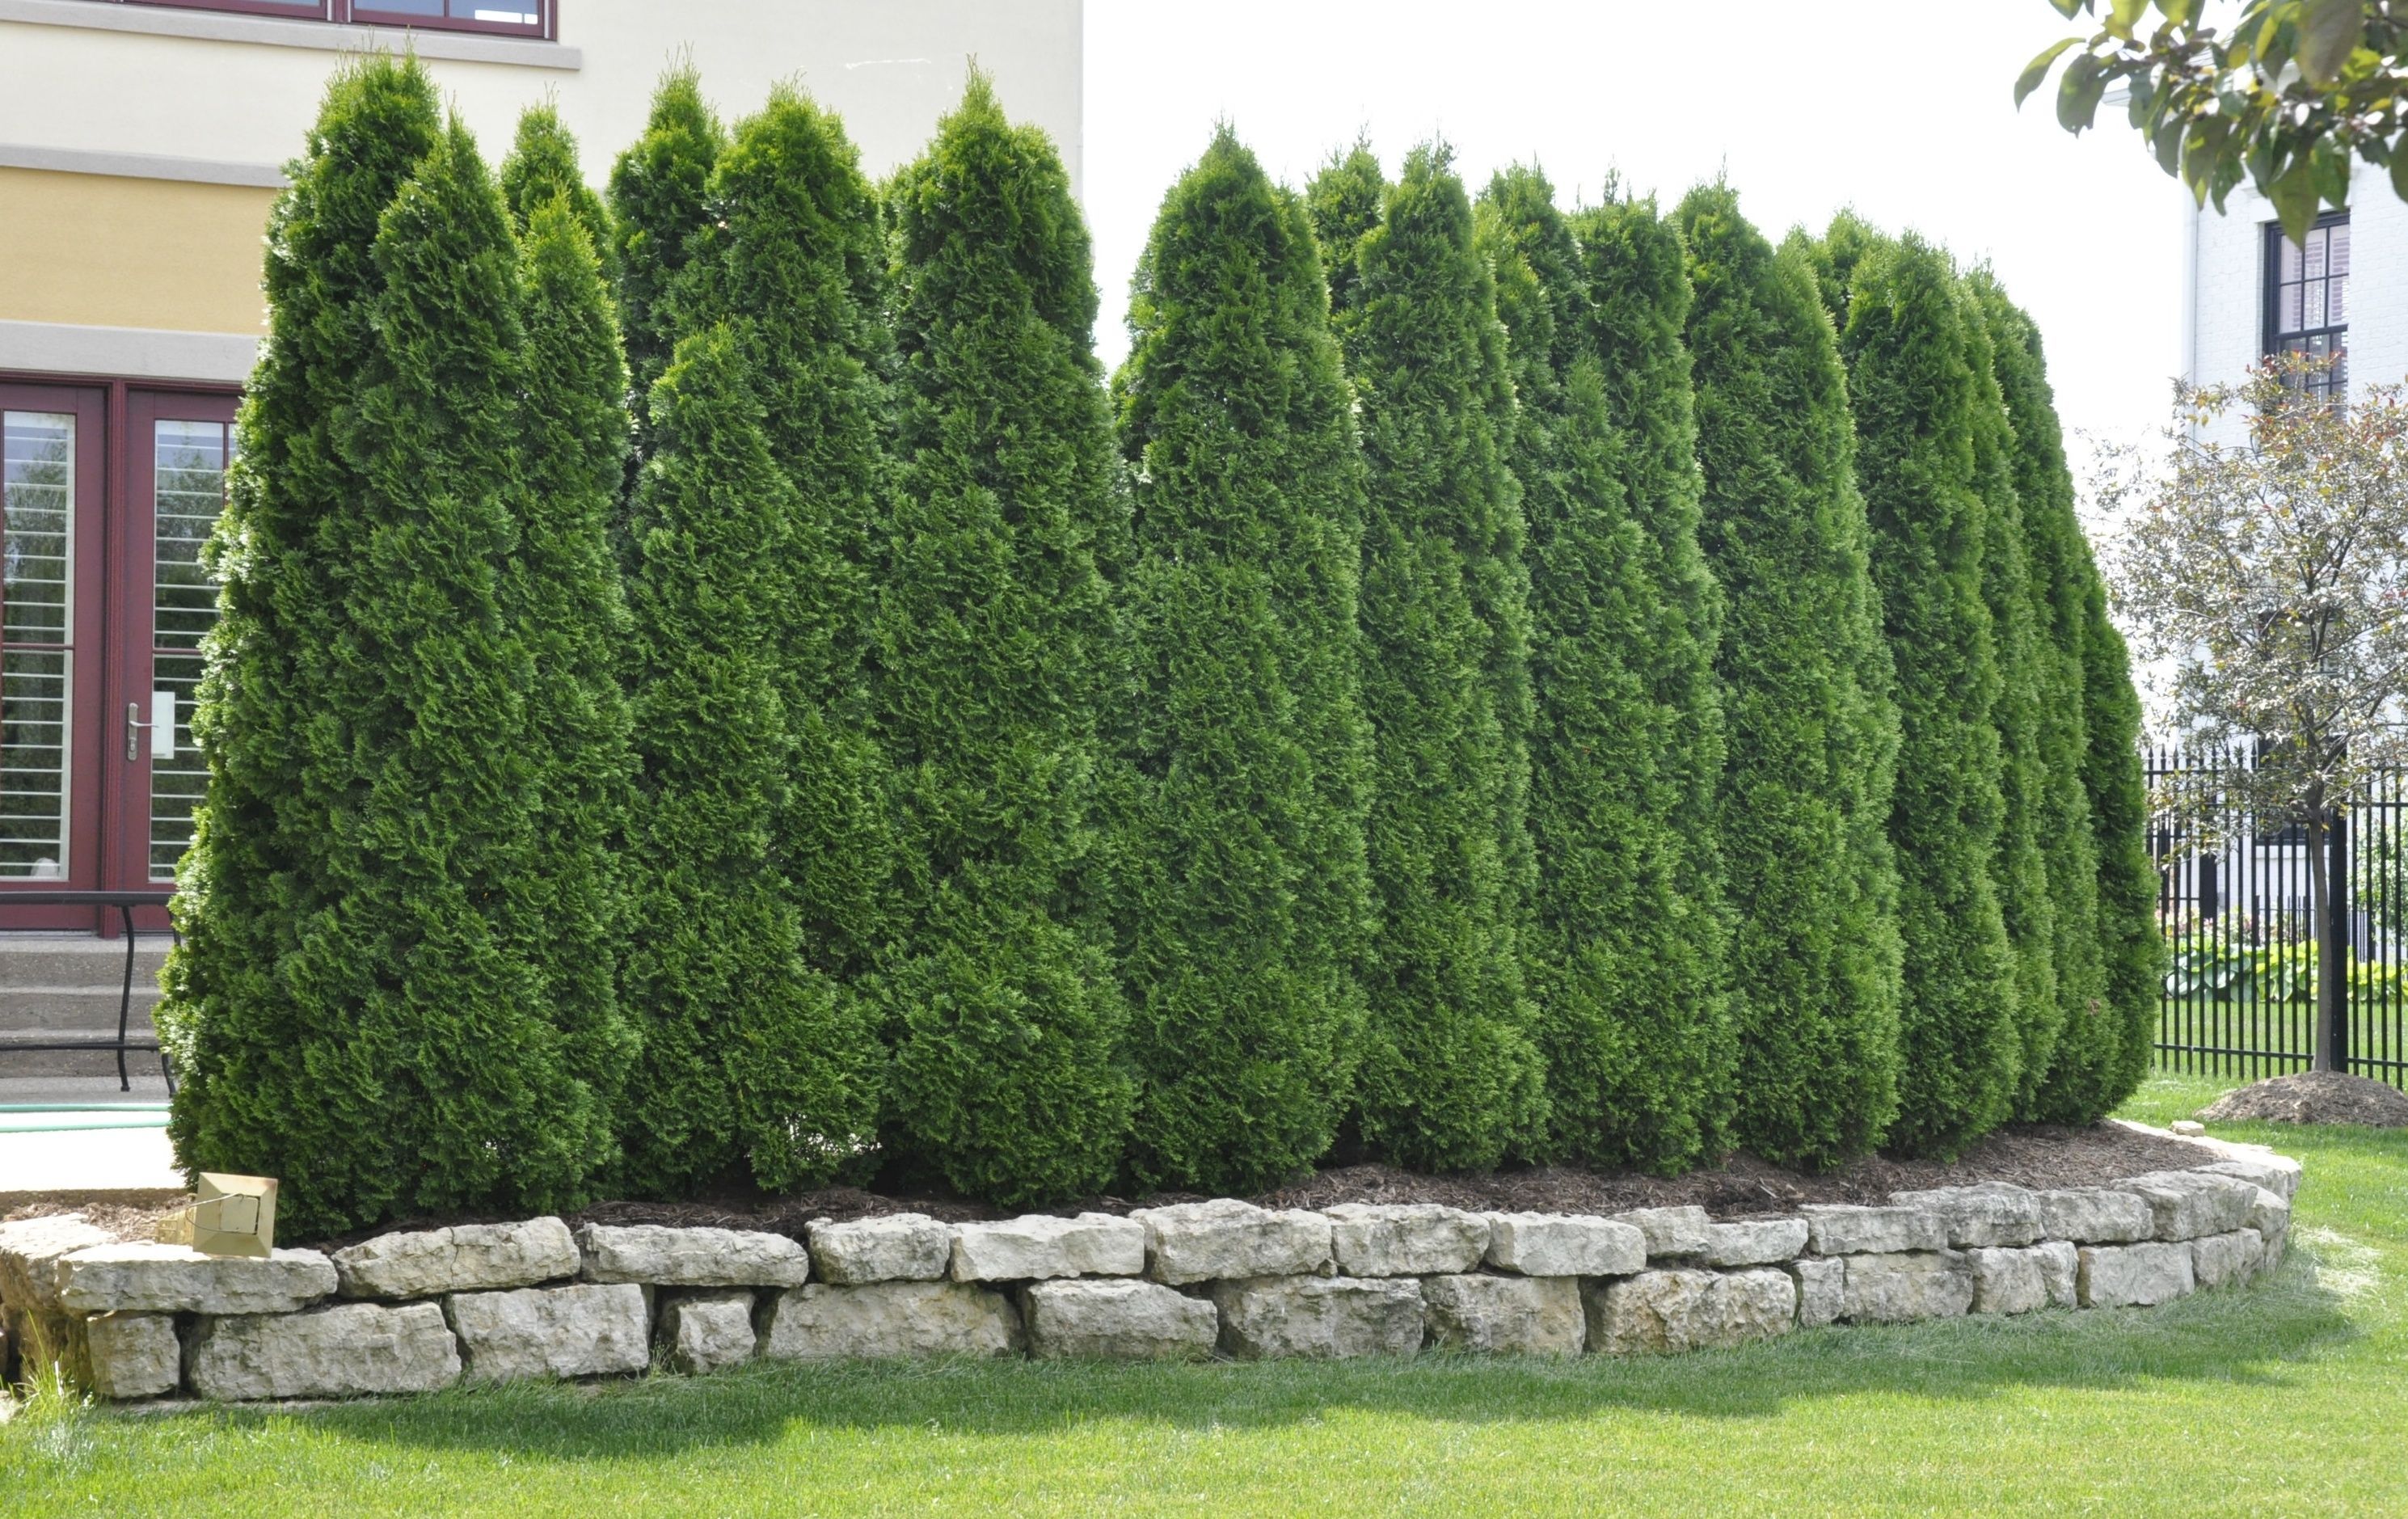
Privacy trees keep those pesky peeping neighbors at bay and deter crooks from seeing what property you have on your property. Some good candidates are Thuja Green Giant, Leyland Cypress, Emerald Green Arborvitae, and Italian Cypress. Since they are relatively fast growing, the benefits arrive quickly.

A Row of Privacy Trees

Trees are not only helpful; they also add a lot of equity to your home. Select and plant them properly and they’ll take care of you. Remember to care for them with pruning and a fertilization schedule and your investment in your home equity will be protected for years to come.


More Trending Articles


Looking for more great content? Visit our main page or partner sites:

I Can Fix Up My Home

The Green Frugal

Running Across Texas


As Featured On Ezine Articles

I offer article and blog-writing services. Interested? Contact me for a quote!


Did you find this article helpful? Millions of readers rely on information on this blog and our main site to stay informed and find meaningful solutions. Please chip in as little as $3 to keep this site free for all.




Visit Kelly’s profile on Pinterest.

About the Author:

Photo of Kelly R. SmithKelly R. Smith is an Air Force veteran and was a commercial carpenter for 20 years before returning to night school at the University of Houston where he earned a Bachelor’s Degree in Computer Science. After working at NASA for a few years, he went on to develop software for the transportation, financial, and energy-trading industries. He has been writing, in one capacity or another, since he could hold a pencil. As a freelance writer now, he specializes in producing articles and blog content for a variety of clients. His personal blog is at Considered Opinions Blog where he muses on many different topics.
Beneficial Nematodes for Organic Flea Control


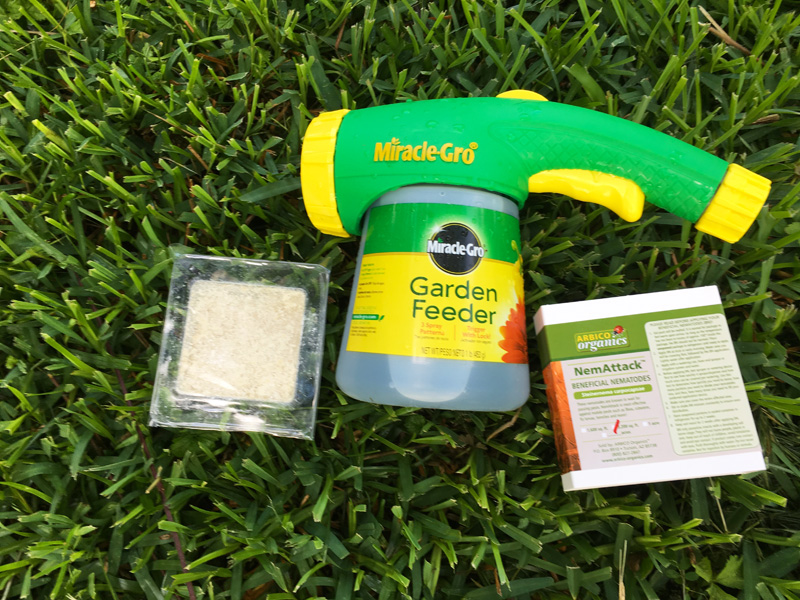
Beneficial nematodes for pest control; photo by Kelly Smith

Do you have pets? Do you have a yard? Do you try to stay organic? If you answered yes, you need to know about beneficial nematodes because they’ve got your back. They will solve your flea and tick problem without having to resort to toxic pesticides.

Toxic pesticides kill all the beneficial critters like ladybugs and earthworms. Products like Roundup and Weed & Feed do more damage than good. If you lose your earthworms you lose your soil aeration. Lose your ladybugs and praying mantis and you’ll have to buy more toxic chemicals to control pests.

What are Beneficial Nematodes and How do They Work?

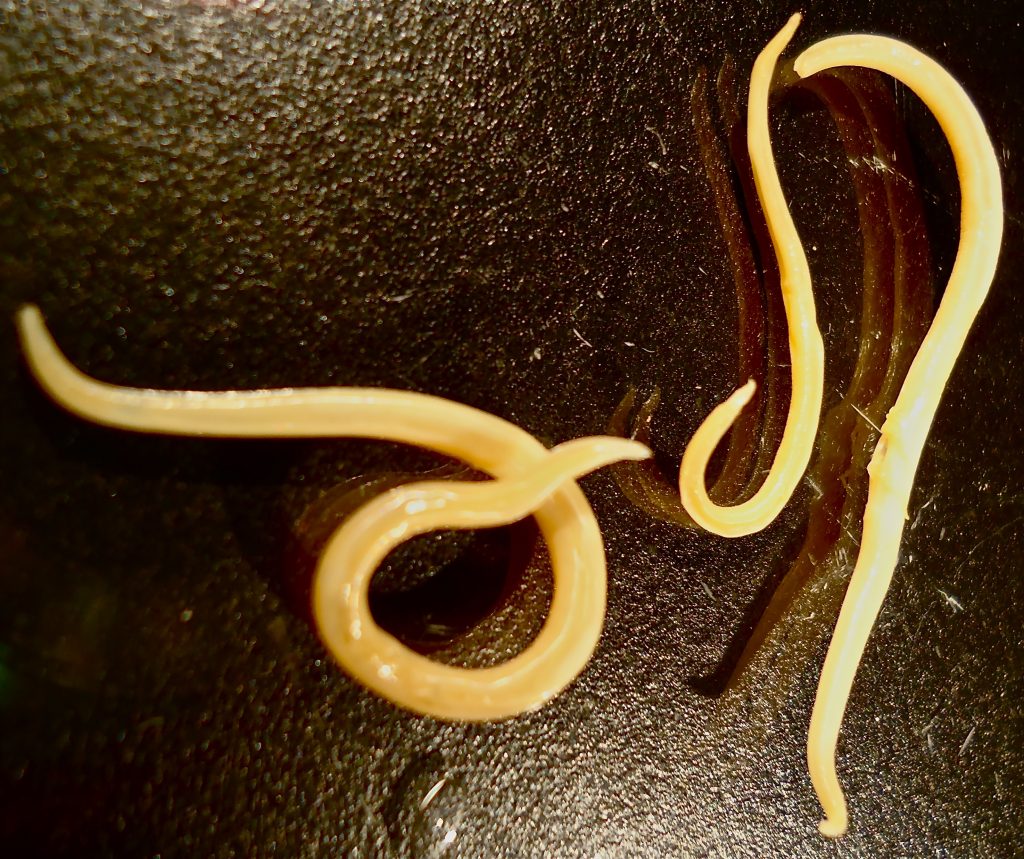
In a nutshell, they are non-segmented, microscopic roundworms. You might not have heard of them but they occur naturally all over the world. Well, perhaps not Antarctica.

They are predators of tick and flea larvae in the soil. These may be your primary concerns but they also control sod webworms, cutworms, maggots, various types of ants and many more. They work by first finding a suitable host.

Highly-magnified nematodes

Next they enter through an appropriate body opening or through the body wall. Once they have taken up residence they produce a bacteria and inject it int the host’s blood, which kills the host. Finally the search for the next host begins.

How are they Applied to Your Lawn?

Since the nematodes arrive at your home in a seemingly powder form, they can easily be applied in a variety of ways. Small areas can be applied with a watering can.  Large lawns are candidates for hose-end sprayers like the one I used this morning. It’s a good deal since it comes with  loaded with fertilizer.

You won’t likely find nematodes at your local store but they are easy to find on-line. Every spring I order mine from Arbico Organics. High-quality products and quick delivery. For my front and back yard I order the 10 million size (rated for 3,200 square feet). A bit of overkill perhaps, but after the flood from Hurricane Harvey who knows what’s lurking below the soil?

If you have friends that might be interested in organic pest control using beneficial nematodes, share this article with them. Leave a comment below!


Looking for more great content? Visit our partner sites:

The Green Frugal

Running Across Texas


As Featured On Ezine Articles

I offer article and blog-writing services. Interested? Hire Me!


Did you find this article helpful? Thanks for supporting this free site with a small donation!


Visit Kelly’s profile on Pinterest.


Widget is loading comments…


close

Enjoy this blog? Please spread the word :)

RSS
Follow by Email
Twitter
Follow Me
Tweet
Pinterest
Pinterest
Pinterest
Instagram
LinkedIn
Share