11 Types of Woodworking Joints

Carpentry Joinery for Strength and Aesthetic Appeal
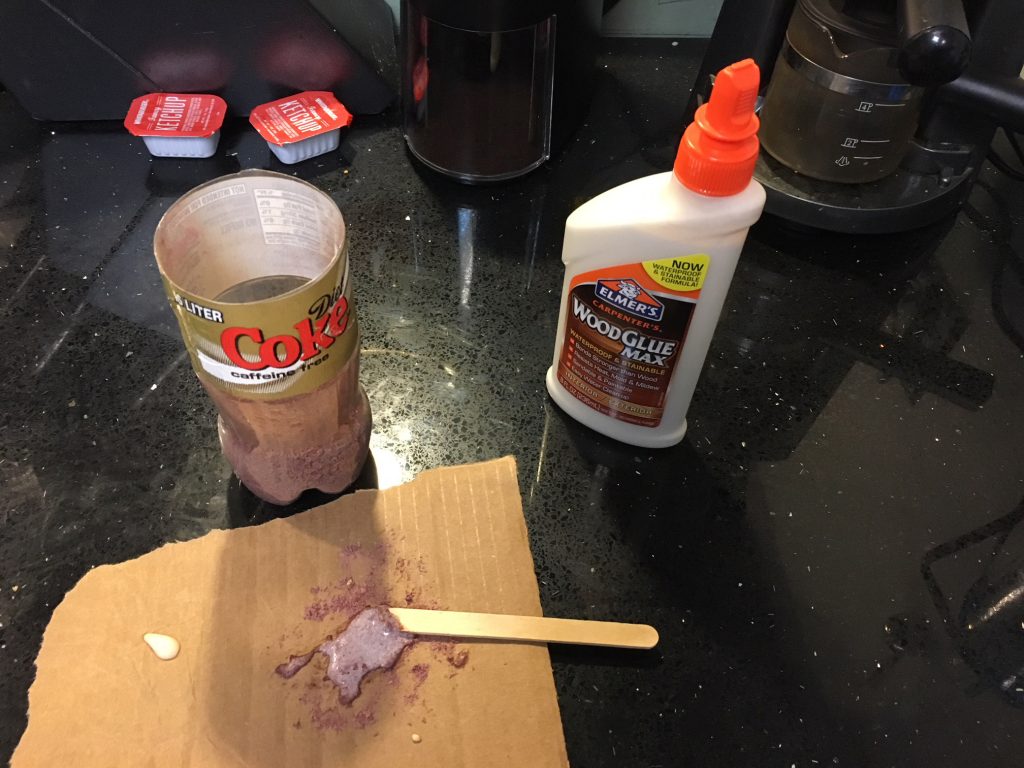
Photo of Kelly R. Smith   by Kelly R. Smith

Homemade woodworking putty
index sitemap advanced

Ads we feature have been independently selected and reviewed. If you make a purchase using the links included, we may earn a commission, which helps support the site. Thank you for your support.

There are many types of woodworking joints to choose from. Which to use on your current carpentry project? In my opinion, there are three main considerations.

  • Joint strength is the most important. Some things you build will be more subject to wear and tear than others.
  • Do you have the right shop tools and skills? Some joints, like the dovetail joint, can be made with a jig or with hand tools. Skills? You can always learn them.
  • Aesthetics, or the beauty of a particular joint should be considered after you have satisfied the first to points.

Types of Woodworking Joints

  • Pocket Hole Joinery. This is basically a butt joint with pocket hole screws.; it’s very popular for furniture building and repair. Two drilling steps are called for. First, counterbore the pocket hole itself. This is where the screw head is contained. Second, drill a pilot hole so the centerline is the same as the pocket hole. This allows the screw to go through one piece and into the adjoining piece. You use two different sized drill bits for this operation in most cases although step-bits are sometimes used. Kreg is the most popular brand of jig for this joint.
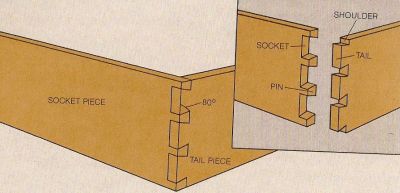
A dovetail joint
A dovetail joint

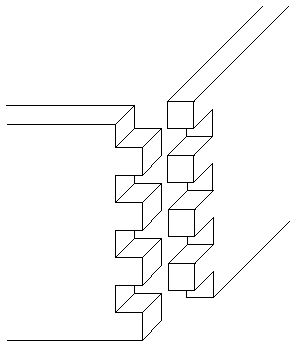
  • Dovetail Joint. This is a very strong woodworking joint. It’s known for tensile strength (resistance from pulling apart). The woodworking dovetail joint is often used to connect the sides of a drawer to the front. A number of pins are cut to extend from the end of one board and lock with a number of tails cut into the end of another board. These pins tails have a trapezoidal shape and can be cut by hand or with a jig. I use a Porter Cable dovetail jig. Once glued up, your joint is permanent without any mechanical fasteners. See the video below where I show you how to make glue that matches your project wood perfectly.
How to make homemade wood putty
A woodworking butt joint
  • Butt Joint. The Butt Joint is a simple woodworking joint. It joins two pieces of stock by just butting them together. The butt joint is the simplest joint to make so in that respect it might be the correct choice if you don’t have many tools at your disposal. It is also the weakest wood joint unless you use some form of reinforcement (like dowels, which can add a decorative touch). Otherwise, it depends upon glue alone to hold it together. Because of the orientation of the pieces, you have an end grain to long grain gluing surface. The resulting wood joint is weak, as you might expect because glue alone doesn’t provide much lateral strength.
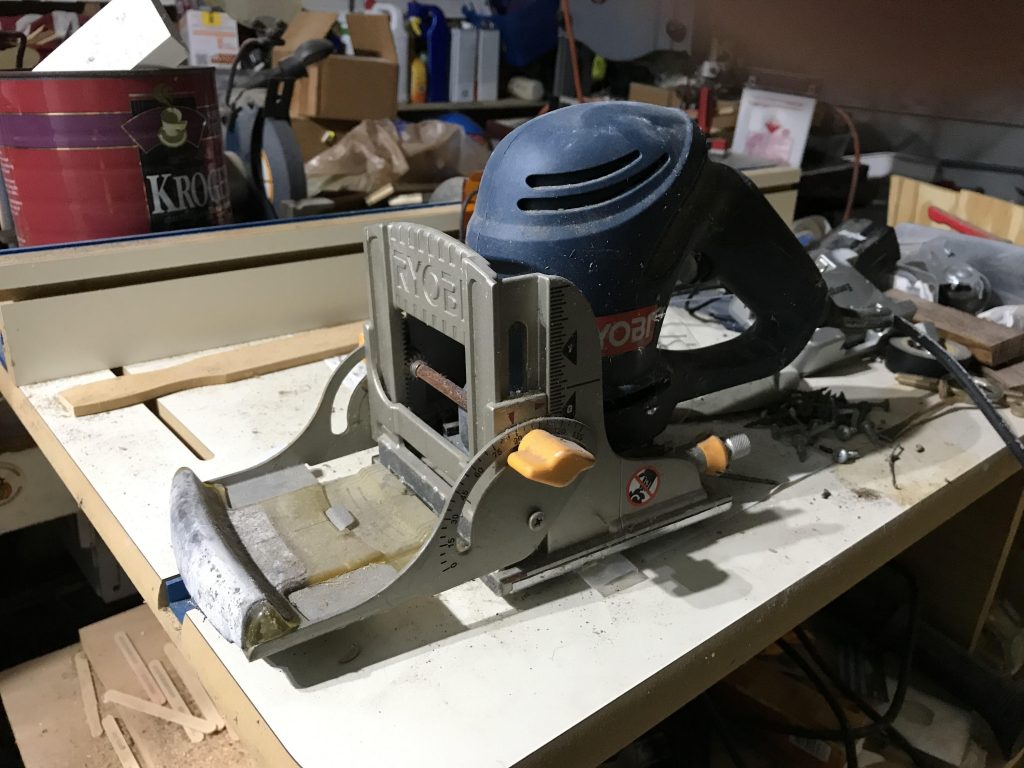
  • Biscuit Joint. A biscuit joint is nothing more than a reinforced Butt joint. The biscuit is an oval-shaped piece. Typically, a biscuit is made of dried and compressed wood, such as beech. You install it in matching mortises in both pieces of the wood joint. Most people use a biscuit joiner to make the mortises. Accuracy is important for the mortises. You design the biscuit joint to allow flexibility in glue-up.
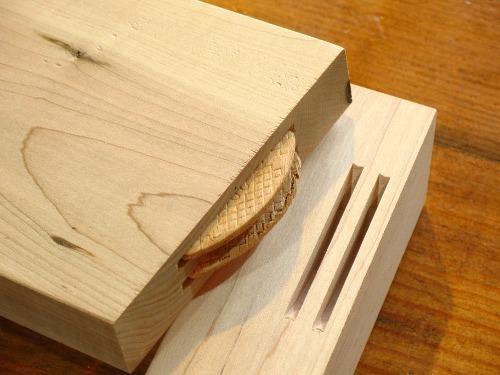
A double biscuit joint ready for glue-up
Biscuit joiner for woodworking
  • Bridle Joint. This is similar to a mortise and tenon; just cut a tenon on the end of one piece and a mortise into the other piece to receive it. Cut the tenon and the mortise to the full width of the tenon piece. The result is only three gluing surfaces so it is imperative to use a very high-quality woodworking glue. A mechanical fastener or some sort of through-pin is required.
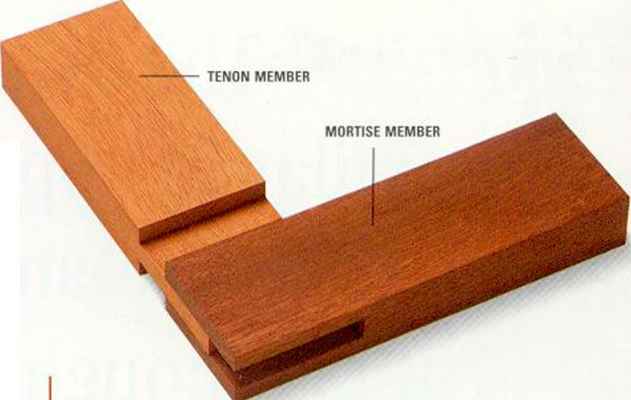
A bridal joint
A bridal joint
Finger joint or box joint
  • Finger or Box Joint. This one is much like a dovetail joint except that the pins are square and not angled. It is easy to make if you know how to use a table saw or a wood router with a jig. The Porter Cable 4216 12″ Deluxe Dovetail Jig Combination Kit comes with a box joint template. This finger/box joint was invented as a better way to construct simple boxes for produce from field to market. That, my friends, is capitalist ingenuity in action.
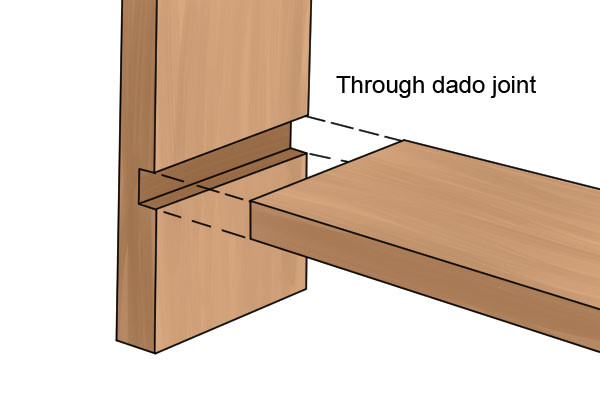
A dado joint
A dado joint
  • Dado Joint. OK, funny name but a dado is simply a slot cut into the surface of a piece of wood. When seen in a cross-section, the dado has three distinct sides. Cut a dado perpendicular to the grain of the wood. Technically, it’s different from a groove, which is cut parallel to the grain. This joint is a good choice for bookcase shelves.
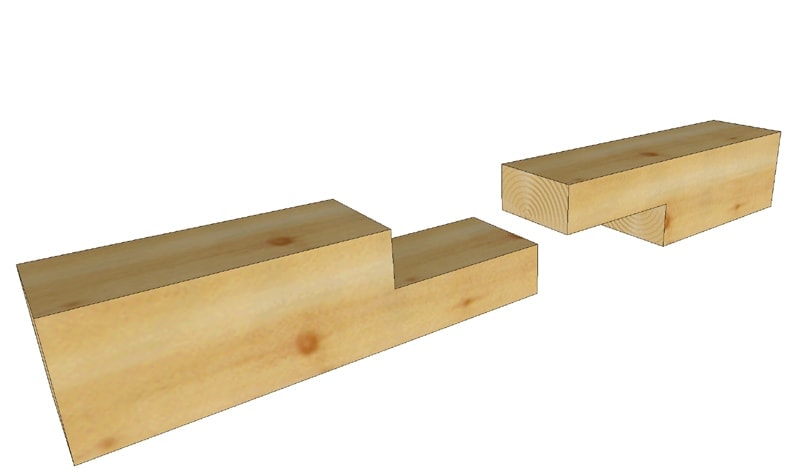
A typical lap joint
A typical lap joint
  • Half Lap Joint. With the half lap joint, remove material from each piece such that the finished joint results in the thickness of the thickest piece. But in the majority of half lap joints, both pieces are of the same thickness. Just remove half the thickness of each piece.
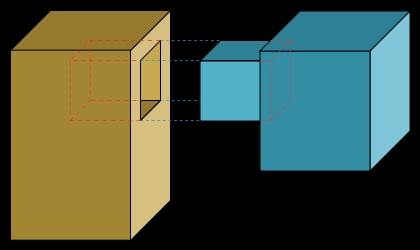
A mortise and tenon joint
  • Mortise and Tenon Joint. This is a very strong woodworking joint. In the majority of situations its used to join two pieces at a 90° angle. One end of a piece fits into a square hole in the other piece. The end of the first piece is the tenon; the hole in the second piece is the mortise. The tenon is glued in but if you require additional strength, you can also pin it. This is sometimes done for decorative reasons. It is a generally accepted practice to make the tenon about a 1/3 the thickness of the piece. The mortise can be cut by removing as much wood as possible with a plunge router then cleaning up the edges with a chisel.
A rabbet joint
A rabbet joint
  • Rabbet Joint. This a recess that’s cut into the edge of a board. Seen in a cross-section, the rabbet is two-sided and open to the end of the surface. It can be used in the back edge of a cabinet to allow the back to fit flush with the sides. It can also be used to insertion of a glass pane in a picture frame.
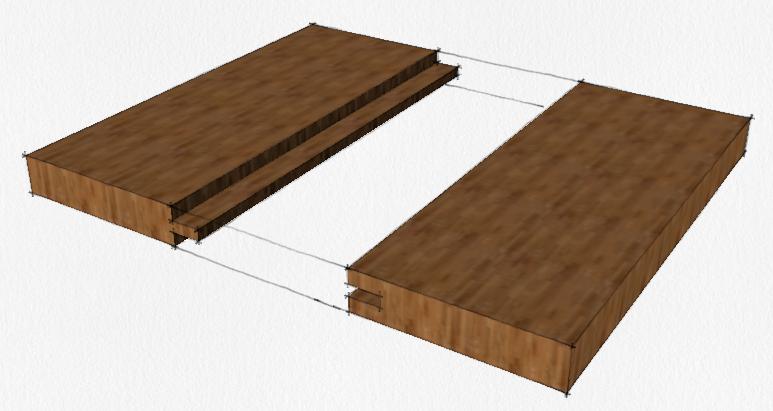
Tongue and groove joint
  • Tongue and Groove Joint. This is another very strong joint because of all the open grain on both pieces of wood. It’s used in many applications. For example, to make wide tabletops out of solid wood. Other uses include wood flooring, parquetry, paneling, etc. You can cut the tongue and groove in a number of ways. An effective way to make this joint is on a router table.

Knowing these 11 types of woodworking joints, you’ll most likely find one or more to fit the needs of your woodworking project.

Related Content


Looking for more great content? Visit our main page or partner sites:

I Can Fix Up My Home

The Green Frugal

Running Across Texas


As Featured On Ezine Articles

I offer article and blog-writing services. Interested? Contact me for a quote!


Did you find this article helpful? Millions of readers rely on information on this blog and our main site to stay informed and find meaningful solutions. Please chip in as little as $3 to keep this site free for all.


Visit Kelly’s profile on Pinterest.

About the Author:

Photo of Kelly R. SmithKelly R. Smith is an Air Force veteran and was a commercial carpenter for 20 years before returning to night school at the University of Houston where he earned a Bachelor’s Degree in Computer Science. After working at NASA for a few years, he went on to develop software for the transportation, financial, and energy-trading industries. He has been writing, in one capacity or another, since he could hold a pencil. As a freelance writer now, he specializes in producing articles and blog content for a variety of clients. His personal blog is at Considered Opinions Blog where he muses on many different topics.

Scroll Saw vs Band Saw

What’s the difference?

Photo of Kelly R. Smith   by Kelly R. Smith
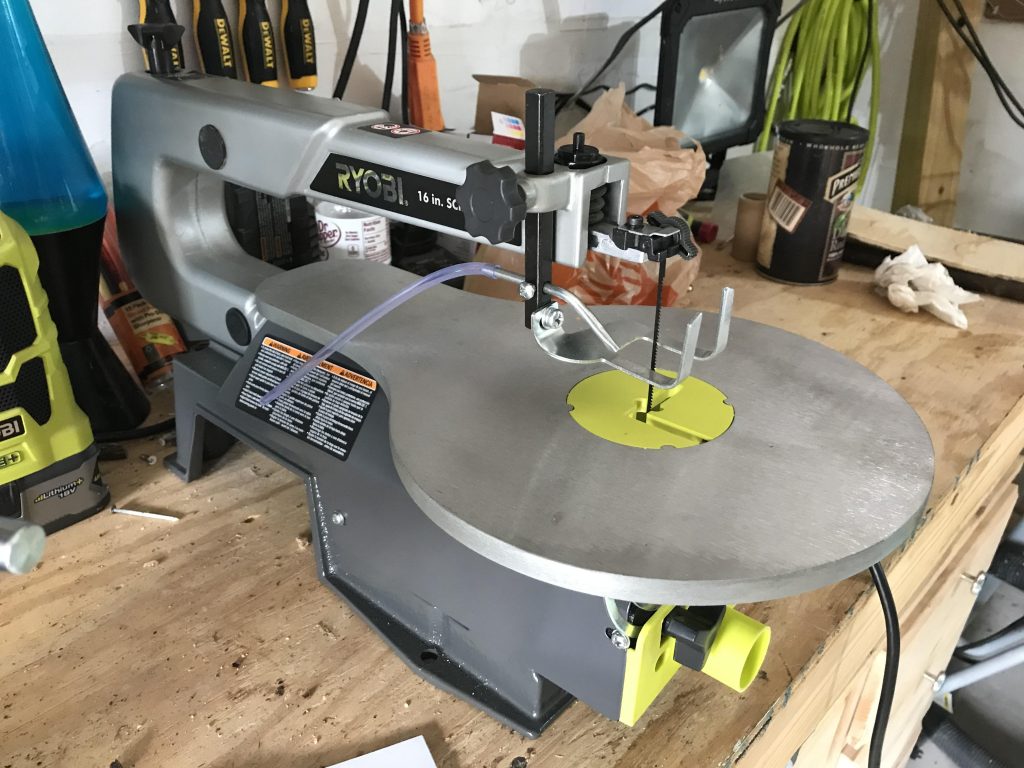
A Ryobi 16 in. scroll saw.
A Ryobi 16 in. scroll saw
index sitemap advanced

Ads we feature have been independently selected and reviewed. If you make a purchase using the links included, we may earn commission, which helps support the site.

This article was updated on 02/17/21.

We can’t have too many power tools in the shop. The extent of our acquisitions can be guided by 3 principles — budget, storage space, and frequency of use. There are exceptions. For example, you may not use your biscuit joiner often, but when you need it, nothing else will do. Some tools are similar enough that they can have almost overlapping functionality, when some ingenuity and/or woodworking jigs are used. You might assume that the scroll saw vs band debate saw falls into this camp. You would be partly correct but there are some important differences.

Benefits of a Scroll Saw

We’ll look at the scroll saw first. It has certain benefits for certain projects.

  • It can make internal cuts. All you have to do is drill an entry hole in your work piece, insert the blade, and cut away. Then you can clean up the internal edges with the sanding implement of your choice.
  • It is a better choice for small detailed work and parquetry and inlay work, as it cuts tighter than a band saw.
  • It can be used to cut the cheeks of a dovetail joint and to divide a wide tenon into two smaller ones.
  • It can make angled cuts up to 45 degrees.
  • They are available in various throat sizes. The throat size when it comes to the scroll saw is the distance between the blade and the rear part of the saw. A larger table surface handles larger projects.

Benefits of a Band Saw

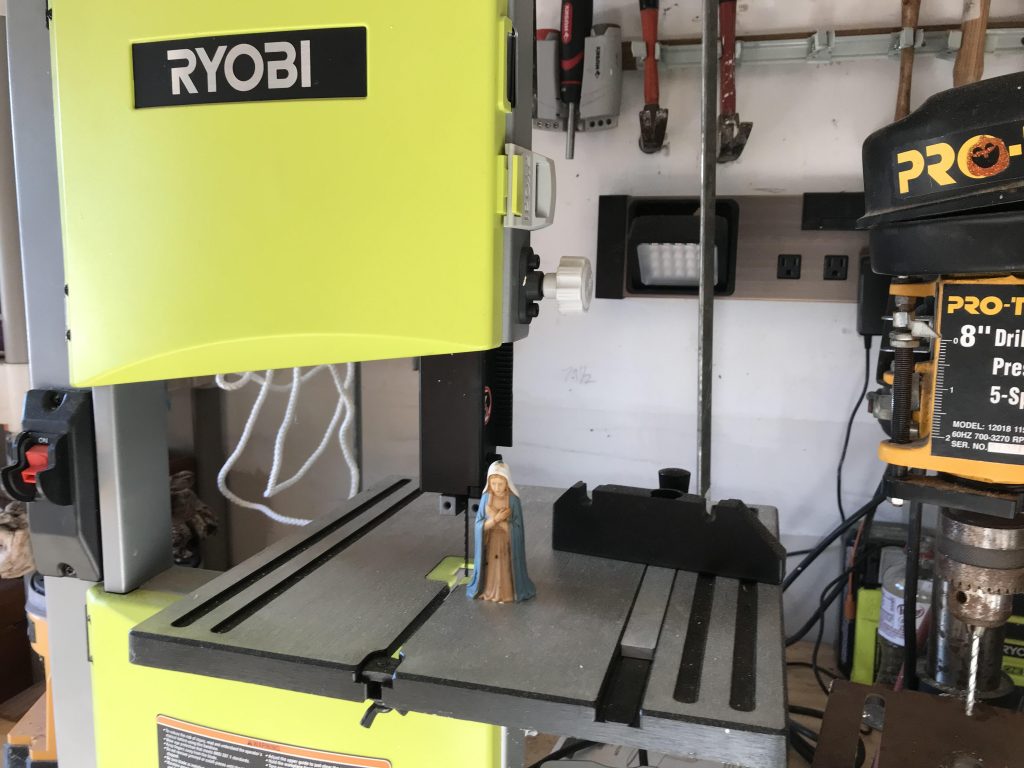
A Ryobi tabletop band saw
  • Like the scroll saw, it can make angled cuts up to 45 degrees.
  • It can cut much thicker stock than a scroll saw.
  • It’s more powerful than a scroll saw. Since the table is open on both ends, throat size is not so much of a consideration, although table size still is.
  • Using the right band saw blades you can even cut metal, but I never have so I offer no opinion on this point.

The Million Dollar Question: Should You Invest in a Scroll saw or a Band Saw?

In the spirit of full transparency, I own both. Why? Because it’s easier to use the right saw for the job. But if you are limited to one or the other, consider which will better fit your woodworking needs. Most of the tasks suited to a band saw can also be done on your table saw. Another consideration is your shop configuration. I have 2 large work benches, one stationary and one wheeled so I use a lot of bench-top tools and just swap them out as needed. Whichever saw/s you purchase, look for a reliable brand name and a heavy base.

You Might Also Enjoy:


Looking for more great content? Visit our main site I Can Fix Up My Home or our partner sites:

The Green Frugal

Running Across Texas


As Featured On Ezine Articles

I offer article and blog-writing services. Interested? Contact me for a quote!


Did you find this article helpful? Millions of readers rely on information on this blog and our main site to stay informed and find meaningful solutions. Please chip in as little as $3 to keep this site free for all.


Visit Kelly’s profile on Pinterest.

About the Author:

Photo of Kelly R. SmithKelly R. Smith is an Air Force veteran and was a commercial carpenter for 20 years before returning to night school at the University of Houston where he earned a Bachelor’s Degree in Computer Science. After working at NASA for a few years, he went on to develop software for the transportation, financial, and energy-trading industries. He has been writing, in one capacity or another, since he could hold a pencil. As a freelance writer now, he specializes in producing articles and blog content for a variety of clients. His personal blog is at I Can Fix Up My Home Blog where he muses on many different topics.

Biscuit Joiner; Why You Need One for Woodworking

by Kelly R. Smith

index sitemap advanced
A Ryobi biscuit joiner on a router table

Granted that the biscuit joiner is not a power tool that you use everyday on your woodworking projects. It falls into the category of go-to tools when nothing else will do the job so well. On projects that require mating planks, this tool is invaluable. On some projects, just gluing them up and clamping them is sufficient but on others a stronger bond is required. And why not err on the side of caution? The right tool is just as important as adequate shop lighting.

For years I relied on dowels to do the job. That worked, but getting that precision can be difficult. Drilling the holes at the exact angle and in the exact location can be dicey, especially when using a hand-held drill rather than your drill press. This is where the biscuit joiner comes into its own.

Using Your Biscuit Joiner

For the sake of argument, let us assume that we are joining several boards to make up a table top.

  • Biscuits can “telegraph.” This means that as the glue dries, it can warp the surface plank wood down towards the biscuit. To avoid this minor imperfection in the end product (you’re the only one who will notice, but still), don’t cut your biscuit slot in the exact center of the planks, rather, a bit lower towards the bottom of the finished product.
  • Biscuits don’t add a lot of strength. So the argument goes. Some carpenters use biscuits simply to assure themselves that the planks will stay aligned as the glue dries. I’m from the other camp that believes that they do add a lot of strength, especially when the end product comes under stress because the length of the biscuit distributes the load better than a cylindrical dowel..
  • You can add biscuits for additional strength after the glue-up on 45 degree corners. Use your joiner as a plunge tool after the glue has dried. For example, you might do this on the underside of a picture frame after you remove your 45 degree clamps or spring clamps. Plunge the slot, glue-up and add the biscuit, and use your belt sander to level it up later.
  • Bring the motor up to full-speed before engaging the joiner. Easy, cowboy.

So, do you really need a biscuit joiner for your woodworking projects? The short answer is “no,” but the long answer is, “yes, because it will make your life so much better and your range of carpentry skills broader.”

Related Articles


Looking for more great content? Visit our partner sites:

The Green Frugal

Running Across Texas


As Featured On Ezine Articles

I offer article and blog-writing services. Interested? Hire Me!


Did you find this article helpful? Thanks for supporting this free site with a small donation!


Visit Kelly’s profile on Pinterest.


About the Author:

Photo of Kelly R. SmithKelly R. Smith is an Air Force veteran and was a commercial carpenter for 20 years before returning to night school at the University of Houston where he earned a Bachelor’s Degree in Computer Science. After working at NASA for a few years, he went on to develop software for the transportation, financial, and energy-trading industries. He has been writing, in one capacity or another, since he could hold a pencil. As a freelance writer now, he specializes in producing articles and blog content for a variety of clients. His personal blog is at I Can Fix Up My Home Blog where he muses on many different topics.

Tips for Woodworking Glue-Up

Most DIY Carpentry Requires an Adhesive − Essential Techniques

Photo of Kelly R. Smith   by Kelly R. Smith

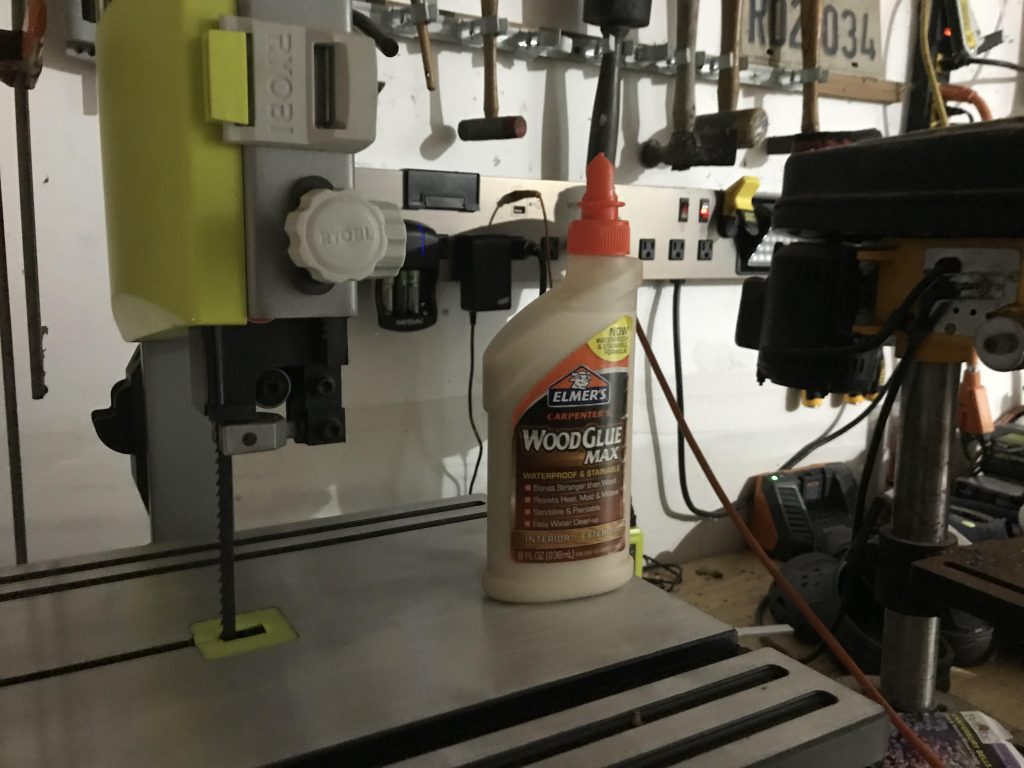
Wood glue, band saw, and drill press
index sitemap advanced

Ads we feature have been independently selected and reviewed. If you make a purchase using the links included, we may earn a commission, which helps support the site. Thank you for your support.

No woodshop is complete without at least one type of woodworking glue and a variety of clamps. Can’t have too many clamps, I always say. There are many varieties and brand names of glue on the market today. We all have our favorites. Some are better suited to some purposes than others. For example, you need rice glue to work with washi bamboo paper. Let’s look at some woodworking tips.

Glue Tips

  • Always dry-fit your pieces and plan where your clamps will be going before even thinking of dragging out your glue bottle.
  • Squeeze-out is almost always inevitable. I like to protect work surfaces with wax paper.
  • Clamp your work well and securely, but usually there’s no need to overdo it. You want the joints to be tight but you don’t any warping. I like Irwin clamps.
  • Use cauls made with softer wood than the workpiece. Cauls prevent indentations that you only notice after removing the clamps, resulting in a self-inflicted slap to the forehead moment.
  • Take your time during the glue-up. This should be obvious but I suspect we’ve all rushed a job or two. After all, most of us have more time on our hands in the midst of the COVID-19 pandemic.
  • Flux brushes are available in the plumbing department of hardware stores and home centers and they are are just right for applying and spreading glue on smaller surfaces like dovetail joints. On large surfaces, an inexpensive notched plastic trowel is great.
  • The sooner you apply glue after the wood is cut, the better. This makes for a stronger joint.
  • After the squeezed-out glue has been removed, there’s always a chance that some is hiding. Find it now or you’ll see it later when you apply stain or finish. Spraying some warm water near glue joints will make any hidden glue more visible.
  • Allowing the glue to set up a half to a full hour makes it easier to scrape off squeeze out with a sharp chisel.
  • A synthetic abrasive pad, dampened with water, works perfectly to remove the remaining glue. Much better than a paper towel or a rag.
  • After applying glue and beginning to set your clamps, some pieces slip and slide. One solution is to use your finish nailer with a couple of brads to hold things together.

Use Glue to Make a Color-Perfect Wood Putty

Types of Woodworking Glue

  • Elmer’s glue, as pictured above, is the old standby. It is priced right and comes in a variety of formulations. There is white and yellow glue is for interior use but the some yellow can be used for exterior applications. It will be labeled as such.
  • Exterior yellow glue is labeled water resistant or exterior. Titebond II is one brand that I like.
  • Polyurethane glue is a completely waterproof glue. It can also be used on metal and some plastics.
  • Contact cement has its uses such as applying plastic laminate (Formica) to plywood.
  • Hide glue was around long before woodworkers had so many choices. When refinishing antiques it should be used to maintain the historical value. It’s still used in making certain musical instruments because it is easy to take apart for repairs.
  • Epoxy is used to fill gaps and and offers great strength. Gorilla is a good brand.

I hope these tips for glue-up on woodworking projects have made your craft more inspired. If you have any tips of your own, share them with our readers in the comment section. You might also be interested in reading about the benefits of a woodshop dust-collector.


Related Content

Looking for more great content? Visit our main page or partner sites:

I Can Fix Up My Home

The Green Frugal

Running Across Texas


As Featured On Ezine Articles

I offer article and blog-writing services. Interested? Contact me for a quote!


Did you find this article helpful? Millions of readers rely on information on this blog and our main site to stay informed and find meaningful solutions. Please chip in as little as $3 to keep this site free for all.


Visit Kelly’s profile on Pinterest.

About the Author:

Photo of Kelly R. SmithKelly R. Smith is an Air Force veteran and was a commercial carpenter for 20 years before returning to night school at the University of Houston where he earned a Bachelor’s Degree in Computer Science. After working at NASA for a few years, he went on to develop software for the transportation, financial, and energy-trading industries. He has been writing, in one capacity or another, since he could hold a pencil. As a freelance writer now, he specializes in producing articles and blog content for a variety of clients. His personal blog is at Considered Opinions Blog where he muses on many different topics.

Ryobi 18V ONE+ Power Tools Review

by Kelly R. Smith

index sitemap advanced
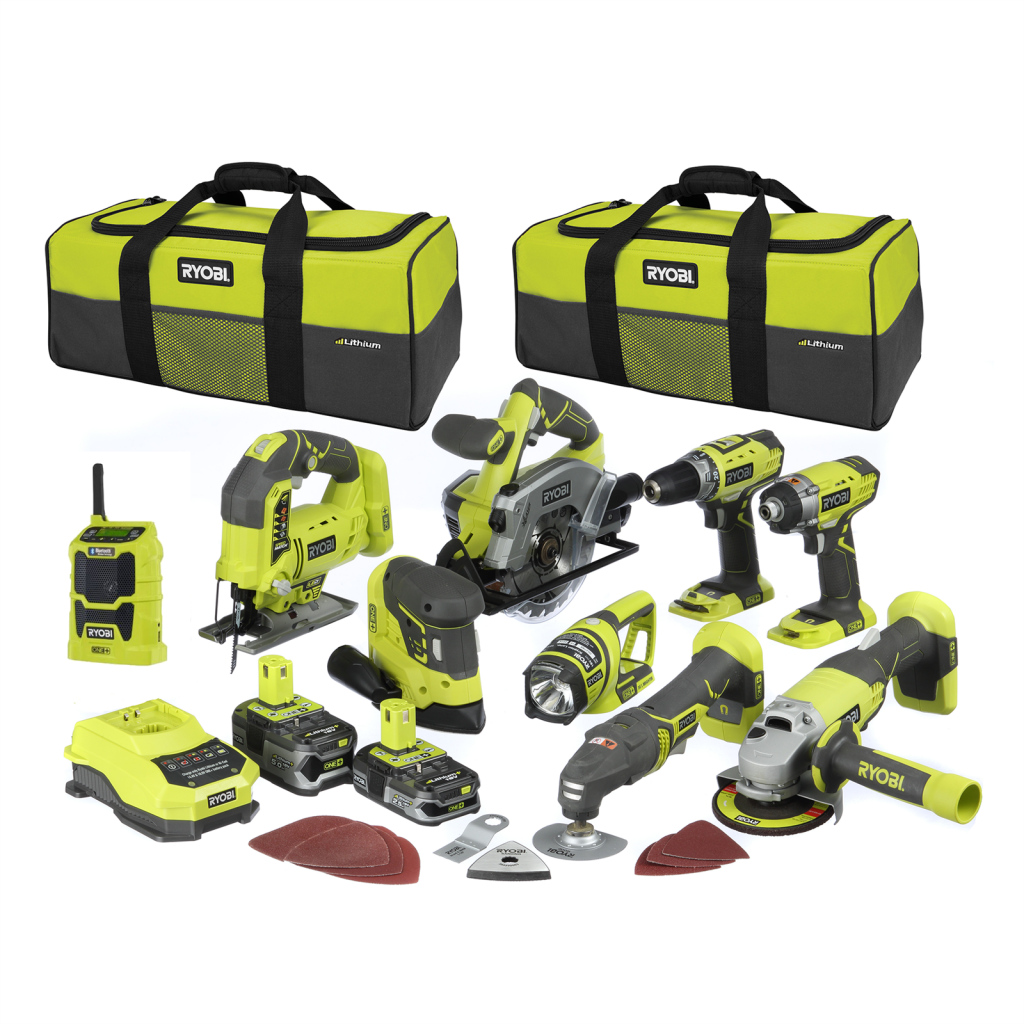
A selection of Ryobi 18V ONE+HP power tools

There are many tool companies that offer a selection of battery-operated power tools. You can choose between Ryobi, Milwaukee, Porter Cable, Makita, and many others. Now that the battery technology has improved so much (lithium), these tools are more practical. Let’s look at some of the Ryobi 18V ONE+ power tools in their lineup. Their site tells us they offer over 175 different tools in this family. I’ve been using 10 on a regular basis so I’ll focus on them. As an aside, I also use their 40V lawnmower. I also have one of their AM/FM radios that uses the same battery, but that’s not technically a tool, is it?

Ryobi 18V Power Tools

Note that some of these tools come with batteries and chargers and with some it’s just the tool, so the prices reflect that fact.

  • The AirStrike brad nailer. I use this nailer for various woodworking projects and trim installation. Reliable and easy to adjust.
  • 1/2″ drill/driver Kit. Lightweight and features a two-speed gearbox and a 24-position clutch for maximum control. No chuck key required.
  • Reciprocating saw. Their version of the famous Sawzall. For larger jobs I drag out my Makita corded version but this one is ideal for things like tree limbs up to 3″ in diameter.
  • 1/4″ impact driver or 3/8″ impact wrench. It’s handy for those tight jobs. The wrench has an auto mode to prevent over-tightening.
  • Compact brushless cut-off tool. Cuts metal, plastic, drywall, tile, and wire shelving. The base fits flat to the work surface for inhanced cutting accuracy. That’s a nice engineering touch. Cuts at up to 19,500 RPM.
  • 3/8” right angle drill. Ryobi claims this is the industry’s most compact model. It’s also good for those tight situations.
  • Hand-held belt sander. The front pommel handle adjusts to 5 different positions for individual comfort. The tool-free belt-tracking feature makes adjustment on the fly easy.
  • Variable speed jig saw. Very lightweight and portable.
  • Circular saw. Another reason for battery operation. When I was installing baseboards not long ago, I took rough measurements before going to Home Depot. I took my saw with me and dealt with those super long pieces right there in the parking lot (the Tacoma bed doesn’t like 15′ floppy stock.
  • Hand-held router. While I love my router table in the shop, it’s not very convenient to lug around.

Those are the Ryobi 18V ONE+ power tools that I have personal experience with. Overall I’m extremely satisfied. I’ve found them dependable, price-competitive, and offering some innovative features. I like the fact that they have brushless motors. The battery chargers run at a reasonable rate. The batteries are non-fade, meaning that they don’t begin to lag when they are running out of juice.


Looking for more great content? Visit our partner sites:

The Green Frugal

Running Across Texas


As Featured On Ezine Articles

I offer article and blog-writing services. Interested? Hire Me!


Did you find this article helpful? Thanks for supporting this free site with a small donation!


Visit Kelly’s profile on Pinterest.


About the Author:

Photo of Kelly R. SmithKelly R. Smith is an Air Force veteran and was a commercial carpenter for 20 years before returning to night school at the University of Houston where he earned a Bachelor’s Degree in Computer Science. After working at NASA for a few years, he went on to develop software for the transportation, financial, and energy-trading industries. He has been writing, in one capacity or another, since he could hold a pencil. As a freelance writer now, he specializes in producing articles and blog content for a variety of clients. His personal blog is at I Can Fix Up My Home Blog where he muses on many different topics.
Make a Round and Cylindrical Object Drilling Jig

index sitemap advanced
Woodworking jig to secure round, cylindrical while drilling

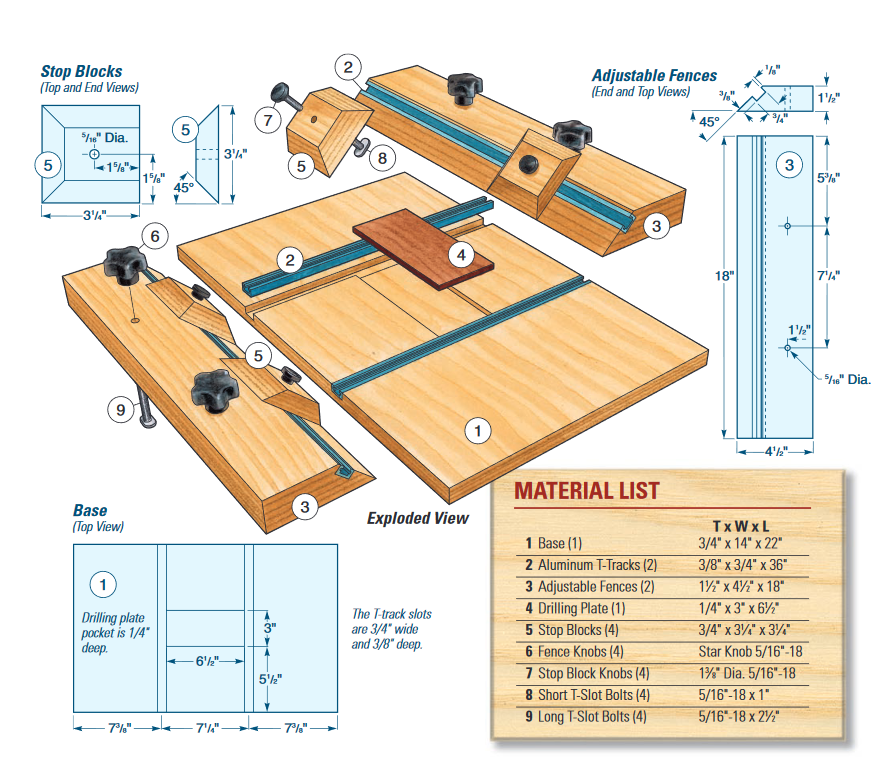
Holding round objects stable while drilling or otherwise working with them can be a sticky wicket. Holding them with your hand can lead to losing some skin and clamping them can mar the surface. One solution is to make this round and cylindrical object drilling jig. And who couldn’t use yet another woodworking jig?

Using the Jig

Once built, using the jig is straightforward. The adjustable fences slide in from the long sides and the stop blocks slide in the other direction. All movement and clamping of these components is done with the t-tracks, fence knobs, and t-slot bolts. The drilling plate serves to drill through, preventing splintering of the bottom of the object as the drill bit exits. You’ll find yourself using this woodworking jig over and over, with your drill press or independently.

Related Articles


Looking for more great content? Visit our partner sites:

The Green Frugal

Running Across Texas


As Featured On Ezine Articles

I offer article and blog-writing services. Interested? Hire Me!


Did you find this article helpful? Thanks for supporting this free site with a small donation!


Visit Kelly’s profile on Pinterest.


About the Author:

Photo of Kelly R. SmithKelly R. Smith is an Air Force veteran and was a commercial carpenter for 20 years before returning to night school at the University of Houston where he earned a Bachelor’s Degree in Computer Science. After working at NASA for a few years, he went on to develop software for the transportation, financial, and energy-trading industries. He has been writing, in one capacity or another, since he could hold a pencil. As a freelance writer now, he specializes in producing articles and blog content for a variety of clients. His personal blog is at I Can Fix Up My Home Blog where he muses on many different topics.
10 DIY New Year Projects to Tackle–Part 2

index sitemap advanced

See the Previous 5 DIY New Year Projects

Install a Pre-hung Door

An Exterior  Pre-hung Door
An Exterior Pre-hung Door

Some things in life just get easier. Hanging doors is one of those things thanks to the pre-hung doors available at home improvement stores. No mortising, no muss, no fuss. To make things even easier, hardware clips called The Quick Door Hanger are available to eliminate shimming the door jamb in the rough opening. Basically, all you need is a 4′ level or plumb bob, a measuring tape, a pencil, and a cordless drill with a Phillips bit. I’ve gotten to where I can hang a door in about 15 minutes. Life is good.

Frame Out Your Basement

Wood framing in a basement

Basements are often basically unused, wasted spaces. This is really a shame because framing and finishing it out expands your living space and boosts your home equity. I mean, that space is included in your property taxes anyway, right? This is a great project that can be put on your schedule for any time of the year. Learn the basics of framing a basement and some of the options that are available to you. Yes, this is a DIY project but you might need to pull some building permits. Always check your local building code.

Dieting is One of the Most Popular New Years Resolutions

Healthy food for weight loss

Exercising, putting down the cigarettes, and going on a diet; these are the big 3 New Years resolutions. But there are a plethora of choices when choosing a diet. Which one is right for you? Which one can you realistically stick to? Inform yourself with these 10 most popular diets today.

Give Your Walls a Face Lift On a Budget

Colorful walls & energy efficient windows

Upgrading the look of your walls is a great way to give your living space a fresh look on a shoestring budget. You can add a bolder texture, hang wallpaper, or choose paint colors that give the illusion of more space or higher ceilings. You can even paint over that dark paneling that looked so cool back in the 60s. Which wall improvement is right for your home? Learn about wall options here. Some people hate painting but that’s the wrong way to look at it. It is one job where you can see the results of your labors in a very short time. Some BEHR paint has the primer built in which basically cuts your time in half.

Install Radiant Barrier Foil in Your Attic

Energy Q Radiant Energy Barrier Foil In the Attic
Energy Q Radiant Energy barrier Foil In the Attic

Sure, everybody knows about maxing out the recommended amount of insulation in the attic (according to location) but that only represents about half the money you could be saving on energy costs. Why not install radiant barrier energy foil over the insulation? The savings are two-fold–it keeps the heat out in the summer but keeps it in during the winter. I can tell you from experience that the colder months are the perfect time for this project. I did mine in March a few years back and it more than paid for itself during the first summer. If you use your attic and it has flooring, there’s no reason you can’t tack it to the underside of the roof sheathing. Or conversely, use the radiant barrier paint.

I certainly hope these 10 DIY New Years projects (the first 5 are on this page) have inspired you. If so, I would appreciate you sharing these pages with your friends. Have a great New Year and thanks for visiting!


Looking for more great content? Visit our partner sites:

The Green Frugal

Running Across Texas


As Featured On Ezine Articles

I offer article and blog-writing services. Interested? Hire Me!


Did you find this article helpful? Thanks for supporting this free site with a small donation!


Visit Kelly’s profile on Pinterest.


10 DIY New Year Projects to Tackle

index sitemap advanced

The clock is ticking down to the new year. That means many things but here are two to consider. Since spring will soon be here it’s time to start planning new year projects. After all, it is a time of new beginnings. Also, right around the temporal corner is income tax refund time to fund those new projects. This may be good news for many–under President Trump’s tax bill, the marriage penalty is mostly gone and the standard deduction is vastly improved.

With those considerations in mind, consider these 10 home improvement and personal improvement projects.

Start Exercising More

A healthy runner is a happy runner.

Pick your sport. For me that means running. Worried about the cold weather? Don’t. It’s not a problem with these cold weather running tips. Other activities are good candidates and one bit of good news is that many are quite inexpensive. Walking and running really only requires comfortable clothing and the right shoes. Cycling is great but requires a heavier investment. Swimming is good if you have access to a pool or open water such as a lake or a beach.

Install a Rainwater Collection Barrel

A Rainwater Harvesting Barrel

Rainwater collection or rainwater harvesting as it is sometimes called is becoming increasingly popular. The idea is simple; as you can see in the above photo, you just install the barrel under the downspout from your rain gutter. A screen on the top keeps leaves and other debris out. The black overflow tube at the top can be directed wherever you like and the spigot at the bottom is threaded to accept a garden hose. It works on the gravity feed principle and provides water for your garden or flower bed. Need more water? Link the overflow tube to another barrel. Using this water not only saves money on your water bill, but plants prefer the pH of rain as opposed to tap water.

Install an A/C Condenser Coil Misting System

Cool-N-Save A/C condenser misting paddle

This simple innovation will really save on your electrical bill during the summer heat. When the compressor kicks on, the upward breeze from the fan lifts the paddle. This opens the valve allowing cool water to flow to the four misting nozzles. This lowers the ambient air temperature which reduces the amount of work the condenser coils must do. This inexpensive tweak saves money and installation requires only about 30 minutes and some basic hand tools.

Make Needed Roofing Repairs

A new roof with a dormer

Having a solid, secure roof is critical. They can really take a beating during the winter. They should be inspected, and repaired if needed, twice a year. Minor repairs such as replacing individual shingles or flashing can be done on an individual DIY basis. For more extensive work, hire a roofing contractor.

Build a Walk-In Kitchen Pantry

A Walk-In Kitchen Pantry

If your home is anything like ours, there’s just not enough storage space in the kitchen. My solution? I built a walk-in kitchen pantry. As you can see in the photo, the back door in the kitchen opened into the garage. I just “stole” some space from the garage and installed the walls (with insulation), turned the existing door into a case opening, and added an energy-efficient door into the rest of the garage. If you are comfortable with framing, hanging drywall, and laying ceramic tile, this is a great weekend DIY project. Follow the link for details.

I certainly hope these DIY New Years projects have inspired you. If so, I would appreciate you sharing these pages with your friends. Have a great New Year and thanks for visiting!

See the Next 5 DIY New Year Projects Here


Looking for more great content? Visit our partner sites:

The Green Frugal

Running Across Texas


As Featured On Ezine Articles

I offer article and blog-writing services. Interested? Hire Me!


Did you find this article helpful? Thanks for supporting this free site with a small donation!


Visit Kelly’s profile on Pinterest.


close

Enjoy this blog? Please spread the word :)

RSS
Follow by Email
Twitter
Follow Me
Tweet
Pinterest
Pinterest
Pinterest
Instagram
LinkedIn
Share