Ads we feature have been independently selected and reviewed. If you make a purchase using the links included, we may earn commission, which helps support the site.
I guess there’s no sugar-coating it; I do dote on my dogs. Which is not such a bad thing. Heck, I like dogs more than I like most humans. Cats? Not so much. But dogs? Yep. I am always looking for ways to make things better. Already I have gotten away from store-bought treats an make them chicken jerky in my food dehydrator.
So the next step? Well, She-Who-Must-Be-Obeyed read an article about all the bad stuff that goes into your favorite Kibbles-n-Bits type of commercial dog food. It’s pretty crazy. What the heck is a meat by-product anyway? If it is not meat, just say so. Well, long story short, a bit of research and imagination got me to this first stab at a homemade dog food recipe.
Homemade Dog Food Ingredients
This is my first take at the recipe and it is subject to change according to my ever-changing whims. Note however, there was nary a complaint when I served it up!
2 cups brown rice
1 lb. ground turkey
6 cups water
1 Tbsp fresh rosemary
2 lbs. broccoli, carrots, cauliflower (in a frozen bag or regular produce, your choice)
one chunk of ginger, grated, about as big as your thumb.
2 oz. olive oil
1 lb. chicken livers
omega 3 source, I just threw in a few capsules
pumpkin seeds, about 30 or so
Preparation
This is simple. Just put your very large sauce pan or Dutch oven on the stove and cook everything together. The dogs really don’t care but the meat should be well-done.
I hope you and your dogs will enjoy this homemade dog food recipe. As with all my culinary concoctions, feel free to adapt and make substitutions. Life is good. Appreciate the pups.
Did you find this article helpful? Millions of readers rely on information on this blog and our main site to stay informed and find meaningful solutions. Please chip in as little as $3 to keep this site free for all.
Ads we feature have been independently selected and reviewed. If you make a purchase using the links included, we may earn commission, which helps support the site.
Focaccia is a flat oven-baked Italian bread similar in style and texture to pizza; in some places, it is called “pizza bianca”. Focaccia can be served as a side dish or as homemade sandwich bread.
This recipe is rich with olive oil (which keeps it extra moist), topped with fragrant lemon zest, Parmesan cheese, and rosemary, and baked in a skillet to give it a perfectly golden, crispy crust.
You will be using an oven-safe skillet for this recipe. A cast iron skillet is best for achieving a super-crispy crust (and an effort-free way of getting a bit more iron into your diet)), but any oven-proof skillet will work.
If you have a food processor, put the flour, salt, and yeast in it, fitted with the blade attachment, and pulse to combine. Add the water and 2 tablespoons of the oil. Pulse until a rough ball of dough forms, about 15 (2-second) pulses. If you don’t have one, mix by hand in a mixing bowl.
Drizzle 2 teaspoons oil in a large bowl. Flour your hands, scoop the dough out of the food processor, and form into a smooth ball. Put the ball of dough in the oiled bowl and turn it so it’s coated on all sides. Cover the bowl with plastic wrap or a kitchen towel and let it sit at warm room temperature for 2 to 3 hours.
Drizzle 1 teaspoon of the oil into your cast iron or other ovenproof skillet and rub it well over the bottom and sides. Punch down the dough and place the dough in the skillet. Coax and stretch the dough to cover the bottom of the skillet until it reaches all the way to the edges. Cover with plastic wrap or a kitchen towel and let it rest at warm room temperature for 30 to 40 minutes. Meanwhile, arrange a rack in the middle of the oven and heat to 450°F.
Lightly dimple the surface of the dough with 2 knuckles. Drizzle the remaining 1 tablespoon of oil over the dough so that it pools in some of the indentations and lightly coats the rest of the surface. Sprinkle with the rosemary, lemon zest, Parmesan cheese, basil if you opted for it, and a bit more salt if desired. Of course, if you have high blood pressure, don’t.
Place your skillet in the oven and immediately turn the heat down to 400°F. Bake until lightly golden-brown. Start checking at 20 to 25 minutes but it may take longer than that.
Remove your skillet from the oven and cool for at least 15 minutes before slicing and serving. Focaccia is best eaten when warm, but is also good at room temperature. If the crust gets too soft, reheat in a 350°F oven to crisp it up.
See, making no-knead skillet focaccia is a breeze, although it sounds very ooh-la la and exotic. The grocery store certainly prices it that way. But, throw off your consumer price shackles and make your own. Don’t be afraid to modify and experiment.
Did you find this article helpful? Millions of readers rely on information on this blog and our main site to stay informed and find meaningful solutions. Please chip in as little as $3 to keep this site free for all.
Ads we feature have been independently selected and reviewed. If you make a purchase using the links included, we may earn commission, which helps support the site.
Hibiscus tea (sometimes called “sour tea”) might not be so well known in the USA but it certainly is in other parts of the world. I’ve been drinking it for a few years now, both for the taste and the health benefits; it’s another item in my toolbox to keep my blood pressure in a reasonable range.. I add it to the grounds of my cold brew coffee maker, sometimes with fresh mint from my garden. Yeah, I know; wild, living on the edge. There are several hundred species of hibiscus plants that vary by the location and climate they are grown in, but Hibiscus sabdariffa or roselles is most commonly used to make hibiscus tea. As a bonus, they are stunning in tropical landscape plantings. But we are here to talk about the health benefits of hibiscus tea.
Health Benefits of Hibiscus Tea
It lowers blood pressure. This is a big one for me. All blood pressure medications have side effects. For me, I take lisinopril, an ACE inhibitor. It causes coughing and the feeling of being lethargic. Rebekah Edwards says, “A 2013 review by the University of Arizona discovered that hibiscus tea is used in 10 or more countries as a normal hypertension treatment without any reported adverse events or side effects — except in extremely high doses.”1
It’s packed with antioxidants. What are antioxidants? They are molecules that help fight compounds we call free radicals, which inflict damage to your cells. The National Library of medicine noting their study says, “Hibiscus anthocyanin extract has reducing power that is approximately 2-fold that of the synthetic antioxidant, butylated hydroanisole.”2 Other than hibiscus, many other foods contain them; tart cherries are a good example.
It supports healthy cholesterol and triglycerides. Dyslipidemia is a type of disorder that is characterized by noticeable changes in plasma lipids or lipoproteins, including two you are probably familiar with: cholesterol and triglycerides. As with blood pressure, hibiscus tea’s ability to reduce high “blood lipids” also extends to those with diabetes. A 2009 study had diabetes patients drink hibiscus tea two times a day for a full month and they found a significant increase in HDL (good) cholesterol and a marked decrease in total cholesterol, LDL (bad) cholesterol and triglycerides.
It may help to lower blood fat levels.The National Library of medicine citing a study of sour tea (ST) and black tea (BT) says, “The results of the present study showed that ST has a significant effect on blood lipid profile in patients with diabetes.”3 Many studies have shown that hibiscus tea reduces blood cholesterol and triglycerides in people suffering from diabetes and metabolic syndrome. That said, other studies have shown conflicting results. Obviously, more research is needed in the general population.
It prevents oxidative stress. Like most healthy teas on the market, hibiscus is chock full of antioxidants that combat free radical damage caused by substandard nutrient diets and frequent exposure to dangerous chemicals. These antioxidants are found primarily in the anthocyanins of the plant, the natural pigments that give this flower its brilliant red color.
It may boost liver health. Your liver is essential to your overall health. Some of its jobs include producing proteins, secreting bile, and breaking down fat. One small human research study found that supplementing with hibiscus tea raised the antioxidant load in the bloodstream as well as reducing compounds that contribute to oxidative stress that damages cells.
It shows promise in fighting certain cancers. Although this idea is only starting to gain traction, there is already some evidence to support hibiscus tea’s anticancer power. It has been shown that hibiscus extracts cause apoptosis, or cell death, in leukemia cells. Although the exact mechanisms behind this aren’t clear as of yet, this could be a promising step in the ever-going fight against leukemia, which affects about a quarter of the children and adolescents currently struggling with cancer.
It reduces obesity and related risks. How? Human and animal studies have found a link between hibiscus tea and an elevated metabolism. Hibiscus extract may even inhibit you from absorbing as much starch and sucrose as you might from a typical meal. One study in particular gave 36 overweight participants either hibiscus extract or a placebo. After 12 weeks, hibiscus extract reduced body weight, body fat, body mass index and hip-to-waist ratio
Growing and Preparing Hibiscus for Tea at Home
Test your soil pH in a well-draining area that receives full sun at least six months before planting if possible, and, if needed, amend it using elemental sulfur or dolomitic lime to adjust the pH to between 6.1 and 7.8. The do best in humus-rich soil and full sunlight.
Harvest your flowers after they have bloomed. You want the calyxes (the main body of the flower). They should snap right off. Once you have your harvest, complete the steps to prepare and dry them. This video explains it in detail.
How to process hibiscus flowers for tea
Can you benefit from hibiscus tea? Of course! There’s something for everybody and if you grow your own supply you will save money and be certain it is organic.
.Rachael Link, Dr. Axe, Hibiscus Tea: The Antioxidant ‘Therapeutic Agent’ You Should Be Drinking, https://draxe.com/nutrition/hibiscus-tea/
Taofeek O Ajiboye, et al, National Library of medicine, Antioxidant and drug detoxification potentials of Hibiscus sabdariffa anthocyanin extract, https://pubmed.ncbi.nlm.nih.gov/21314460/
Hassan Mozaffari-Khosravi, et al., National Library of medicine, Effects of sour tea (Hibiscus sabdariffa) on lipid profile and lipoproteins in patients with type II diabetes, https://pubmed.ncbi.nlm.nih.gov/19678781/
Did you find this article helpful? Millions of readers rely on information on this blog and our main site to stay informed and find meaningful solutions. Please chip in as little as $3 to keep this site free for all.
Ads we feature have been independently selected and reviewed. If you make a purchase using the links included, we may earn commission, which helps support the site.
I know, you are probably looking at this and saying, “What? Chicken jerky for dog treats? Is that not just a wee bit indulgent?” Sure you’re right, but hear me out. It’s all about the money and the nutrition. Dog treats are like mattresses; the mark-up on them is outrageous for such a common commodity. Why? Because they can get it. And the nutrition? Just look at the ingredient list on the box. Now look at the ingredient list on a package of raw chicken pieces. No contest.
I have tested this out on our four rescue dogs Eddie, Frankie, Maggie, and Sammie. Why do their names all end with “ie?” I don’t know; another mystery of the universe. Anyway, offering them a commercial treat in one hand and a homemade one in the other, they choose my cuisine every time. Not to pat myself on the back, of course.
What You Need to Make Chicken Jerky
This is fairly easy. You will need a food dehydrator. Depending on the size of your dehydrator you will need skinless chicken pieces. For example, I use an Ivation 6-Tray Food Dehydrator. It’s a commercial version, but reasonably priced. It holds about 2 pounds of chicken. Or beef. Or lots of sliced apples. You get the idea. Yes, this is most likely a model that a prepper or homesteader would invest in. You will also need a very sharp knife and a large cutting board.
Making the Jerky
The process here is straightforward. In fact, it is the same as my teriyaki beef jerky recipe, omitting the marinade overnight step. Of course, if you are making it for you, knock yourself out. Better still, make 3 trays for Fido and 3 for you. That’s called humane, I believe.
Make the slices about 1/4 inch thick. As far as length of the strips go, 3 inches is good. Dogs are more into the dog treat itself, not the specific size. Arrange slices on your dehydrator trays, allowing some space between pieces for air circulation. Set the timer for 8 hours but begin checking it at 6 hours. You will know when it is done but the longer you go the crunchier it will be. That’s up to you and your furry friend. The picture below is our “done.” Compare it to the raw picture at the top of this page.
Dehydrated chicken jerky, preserved and ready to eat
That’s about all there is to making chicken jerky for dog treats. Store them in the refrigerator and be generous. Your pup may even deign to share with you… if you’re a good human.
Did you find this article helpful? Millions of readers rely on information on this blog and our main site to stay informed and find meaningful solutions. Please chip in as little as $3 to keep this site free for all.
Ads we feature have been independently selected and reviewed. If you make a purchase using the links included, we may earn commission, which helps support the site.
Who doesn’t like quiche? It’s easy to make, versatile, and works for any meal. How about after a long weekend workout or a post New Years Eve brunch? The ingredient list is easy to procure if you don’t already have it on hand. As far as ingredients and spices go, there’s no limit that I’ve found. All you really need are eggs and cheese. Heck, you don’t even need a crust if you are on a low-carb regimen like the Atkins diet. To explore a broad range of possibilities, check out a quiche cookbook. But I digress. Let’s jump into my ham and onion quiche recipe.
Quiche Ingredients
1 frozen pie crust, thawed, or make your own
6 large eggs
3/4 cup milk (whole milk is richer)
Kosher or pink salt to taste
Freshly-ground pepper to taste
1 1/2 cup chopped cooked ham
1 1/2 cup shredded cheese (I used Parmesan last night, but it’s your call.)
1 or 2 green onions, chopped (hint: reserve the root section with about 3/4 inch of the onion. Plant it in a pot or your herb garden, roots down, covered with 1/2 inch of soil. 99% chance it will sprout.)
Ham and onion quiche done!
Preparation Steps
Preheat oven to 375⁰ F.
Whisk together eggs, salt, pepper, and milk, in a mixing bowl.
In the crust, make 2 layers; each has half of the ham, half of the green onions, and 1/2 cup cheese.
Pour the egg mixture over it evenly.
Sprinkle the remaining cheese over it evenly. Note: as you see in the picture above, I used an oven-safe skillet to hold the pie tin because it was SO full. If you have egg mixture left over, that’s OK; cook it up separately. Waste not, want not.
I baked mine for an hour to perfection; I suggest you start checking after about 40 minutes. If the top jiggles when you shake it, it’s not done.
Remove, cool for a few minutes, and enjoy!
That’s all there is to this easy ham and onion quiche recipe. It may be fairly basic but it’s not hard to see the many possible variations you can come up with depending on your mood. I’m a big believer in experimentation in the kitchen.
Did you find this article helpful? Millions of readers rely on information on this blog and our main site to stay informed and find meaningful solutions. Please chip in as little as $3 to keep this site free for all.
Kelly R. Smith is an Air Force veteran and was a commercial carpenter for 20 years before returning to night school at the University of Houston where he earned a Bachelor’s Degree in Computer Science. After working at NASA for a few years, he went on to develop software for the transportation, financial, and energy-trading industries. He has been writing, in one capacity or another, since he could hold a pencil. As a freelance writer now, he specializes in producing articles and blog content for a variety of clients. His personal blog is at I Can Fix Up My Home Blog where he muses on many different topics.
Ads we feature have been independently selected and reviewed. If you make a purchase using the links included, we may earn commission, which helps support the site.
This article was updated on 04/03/22.
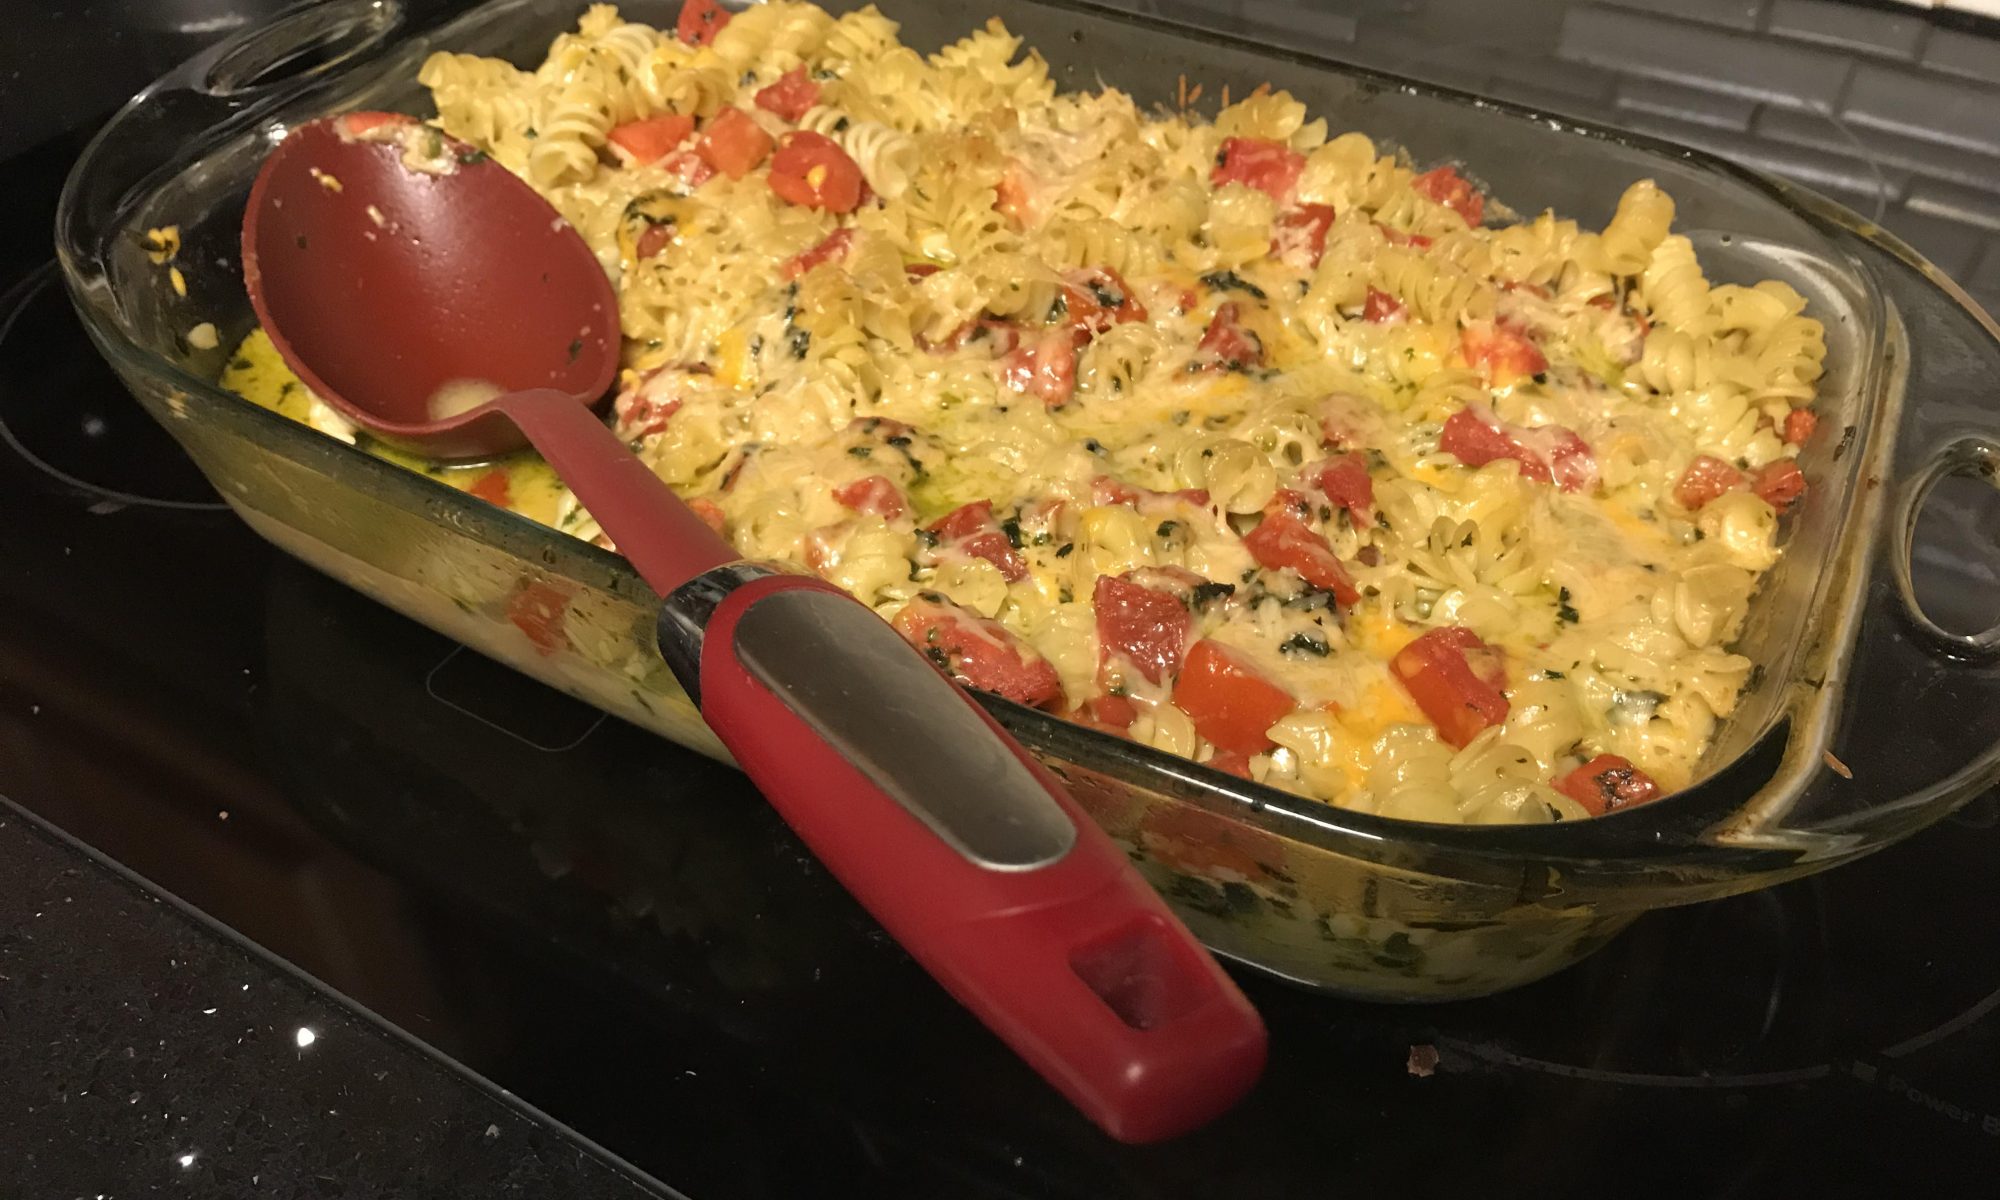
This Homemade mac and cheese is one of the favorite comfort foods in our humble abode, right up there with my ranch dressing cheeseburger. Even picky kids love it so you can slip in some vegetables if you like (hint, hint). It takes a little longer to make than that boxed stuff, but you have to ask, what is that yellow powder anyway? Soylent yellow? As with all recipes, I use as much organic ingredients as possible, and out of my own garden when possible.
Mac and Cheese Ingredients
1 lb. rigatoni or the pasta shape of your choice. I like the whole wheat variety but hey, you’ve got to get the kids to eat it, right?
2 cups of grated Parmigiano-Reggiano cheese if you can find it + a hand-full; I sometimes substitute shredded Swiss for the Reggiano
7 Roma tomatoes, diced
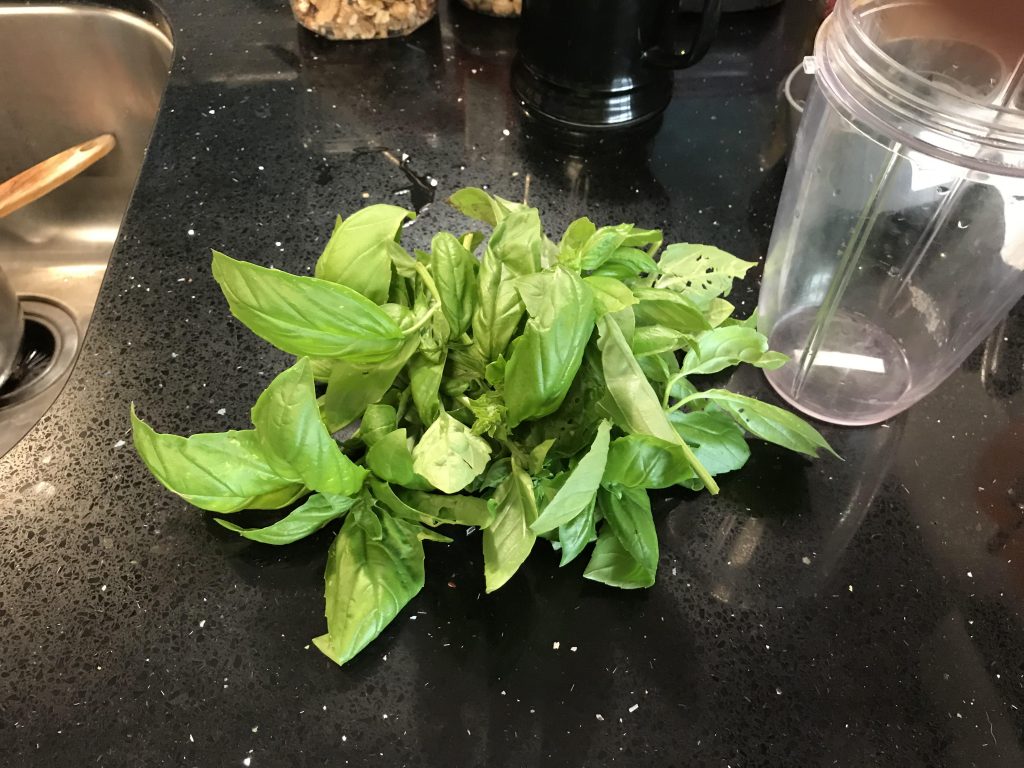
35 organic basil leaves, cut into strips, more or less according to your taste. This is just one more reason to keep an organic spice garden. If you don’t have, or can’t find, fresh basil, use basil paste.
Fresh organic basil leaves
Preparation
Cook your pasta to al dente texture.
Preheat your oven to 375 degrees.
Drain your pasta and rub organic butter liberally in a 9” X 13” Pyrex® baking dish and add the pasta.
In a saucepan, combine the mozzarella, 2 cups of Parmigiano-Reggiano, and Half-and-Half.
Simmer, stirring often, until it’s a nice gooey mess!
Add the salt and pepper to taste. Salt with caution if you have high blood pressure.
Turn off the heat; stir in the tomatoes and basil.
Pour the mixture all over the pasta and mix it in.
Top with the hand-full of Parmigiano-Reggiano.
Bake for 18 minutes, spoon it out, and enjoy!.
One of the things I like about this recipe is the fact that there a multitude of different ways to modify your ingredients, depending on the whims of you and your family. For example, how about changing up your cheese? Adding blue cheese will give the dish a funky edge that goes well with a red wine. The shape of the pasta? Adding in your favorite spices? It’s your call with this easy homemade mac and cheese recipe.
Did you find this article helpful? Millions of readers rely on information on this blog and our main site to stay informed and find meaningful solutions. Please chip in as little as $3 to keep this site free for all.
Kelly R. Smith is an Air Force veteran and was a commercial carpenter for 20 years before returning to night school at the University of Houston where he earned a Bachelor’s Degree in Computer Science. After working at NASA for a few years, he went on to develop software for the transportation, financial, and energy-trading industries. He has been writing, in one capacity or another, since he could hold a pencil. As a freelance writer now, he specializes in producing articles and blog content for a variety of clients. His personal blog is at I Can Fix Up My Home Blog where he muses on many different topics.
Ads we feature have been independently selected and reviewed. If you make a purchase using the links included, we may earn commission, which helps support the site.
Runners, cyclists, and other athletes for that matter, need extra protein in their diet plans compared to their sedentary counterparts. Protein is an essential component in repairing the muscles which break down when working out.
To compound this issue, many people have adopted vegan/vegetarian diets, whether for health, religious, or trendy reasons. This makes it problematic to include a full range of nutrients, proteins and other amino acids in their meals on a daily basis. Ample protein is just one of the health benefits of quinoa.
So, Eat Quinoa for Protein
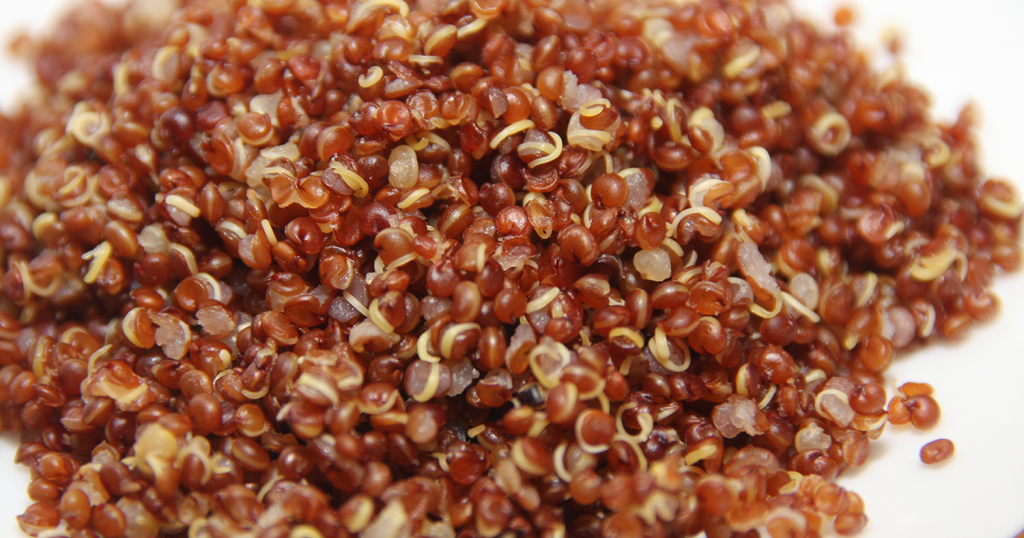
One of the simplest (and tastiest) ways to add essential amino acids (proteins) into your diet is to eat organic quinoa. This supergrain (pronounced keen-wa) is widely recognized as a “super food” by athletes, foodies, nutritionists, and others.
Quinoa (Chenopodium quinoa, or goosefoot) is not in actuality a true cereal grain, but rather a “pseudo-cereal”; it is a food that is cooked and eaten like grains and has a similar nutrient profile. But from a botanical point of view, quinoa is closer to beets, chard, and spinach, and in fact the leaves can be eaten as well as the grains.
This is an very easy food to cook, just like rice, in fact. It can be eaten by itself or in a variety of dishes. It has long been traditionally cultivated in the Andes mountains located in South America. Fora long time in the past, production dipped as the invading Spanish Conquistadors forced the indigenous Inca Indians to grow potatoes instead. Horses weren’t the only thing they brought to the New World.
Nutritional Overview of Quinoa
There are several varieties available and they average an impressive 16.2% protein. To make a comparison, rice averages a meager 7.5%. It also contains an impressive amount of Lysine (398mg), folate (19% RDA), thiamine (13%), Manganese (58%) and vitamin B6 (11%).
To make matters even better, it ranks 35 on the glycemic index. Now compare that with basmati white rice at 58. A lower ranking means it is a slower-burning food. This makes it a natural choice to fuel endurance sports such as distance running.
Lysine is Important for Active People
The University of Maryland Medical Center says, “Lysine is important for proper growth, and it plays an essential role in the production of carnitine, a nutrient responsible for converting fatty acids into energy. It also helps the body absorb and conserve calcium, and it plays an important role in the formation of collagen, a substance important for bones and connective tissues including skin, tendon, and cartilage.” It can promote wound healing by helping to create collagen.
Additionally, it may:
reduce anxiety by blocking stress response receptors.
protect against and treat cold sores by blocking arginine.
improve calcium absorption and retention.
How to Cook Quinoa
This grain is easy to cook; most varieties only take 10 to 20 minutes to cook. Just combine a 2 to 1 water/quinoa ratio. Check your package to make sure.
Bring the water to a boil.
Add the quinoa.
Reduce the heat to a simmer.
Eat it by itself, your recipe, or add it to a salad.
It is also very adaptable to baking. For example, as an ingredient when baking bread. Because of the health benefits of quinoa, it is under consideration as a strong contender for a crop in NASA’s Controlled Ecological Life Support System for long-duration human occupied spaceflights. It has been designated as a “super crop” by the United Nations because of its potential to feed the hungry masses across the globe.
Did you find this article helpful? Millions of readers rely on information on this blog and our main site to stay informed and find meaningful solutions. Please chip in as little as $3 to keep this site free for all.
Kelly R. Smith is an Air Force veteran and was a commercial carpenter for 20 years before returning to night school at the University of Houston where he earned a Bachelor’s Degree in Computer Science. After working at NASA for a few years, he went on to develop software for the transportation, financial, and energy-trading industries. He has been writing, in one capacity or another, since he could hold a pencil. As a freelance writer now, he specializes in producing articles and blog content for a variety of clients. His personal blog is at I Can Fix Up My Home Blog where he muses on many different topics.
Ads we feature have been independently selected and reviewed. If you make a purchase using the links included, we may earn commission, which helps support the site.
What are Dietary nutraceutical forms of consumables? From Dictionary.com, “a bioactive compound occurring as a food component, additive, or product, including vitamins, dietary fiber, herbal extracts, carotenoids, and probiotics: nutraceuticals are said to promote health and well-being, allegedly helping in the prevention and treatment of disease.”1
Well now, that’s a mouthful. The particular supplement we are interested in this article is L-Arginine. It may not be as commonplace as vitamin C or CoQ102 but the list of health benefits is impressive.
What is L-Arginine?
Under normal circumstances your body naturally produces L-arginine. You can also acquire additional L-arginine as part of your regular diet. But at times, your need for L-arginine may exceed your body’s ability to produce and/or consume it naturally. This nutrient deficiency is often the case for older adults or people with some medical conditions. This is when supplements are helpful, either prescribed or purchased over the counter.
In these cases, you might be prescribed artificial (lab-produced) L-arginine in the form of an oral medication, injections, or skin creams. A number of potential health conditions may benefit from a supplemental intake of L-arginine. It is generally considered safe in moderate and recommended doses, however too much L-arginine carries the potential for severe side effects, up to and including death. Therefore, it is key to consider how the supplement can interact with your body and with other medications prior to taking it. Always consult with your doctor before beginning a regimen.
The Benefits of L-Arginine
It offers two primary effects; First, it turns into nitric oxide and secondly it aids the body in building protein. According to Medical News Today, “These effects give L-Arginine an array of potential benefits that range from heart health and chest pain to helping to build muscles, repair wounds, and improve male fertility. Although there are many claims about the benefits of L-Arginine, not all of them are supported by scientific research studies.”3
However, the following benefits and uses of L-Arginine have been researched:
Growth hormone reserve test (a test used if a growth hormone deficiency is suspected.)
Easing inflammation of the digestive tract in premature infants
Controlling blood sugar in people with diabetes
The Side Effects of L-Arginine
Gout
Abdominal pain
Diarrhea
Blood abnormalities
Worsening of existing asthma condition
Bloating
Airway inflammation
Lowered blood pressure
Allergies
As with any drug or supplement, L-Arginine has its own benefits and side effects. It always pays to be in the know about what to expect. Additionally, the U.S. Food and Drug Administration (FDA) does not, nor does it claim to, monitor the safety or effectiveness of any supplements, so it is important to choose a reputable brand that you know and trust.
Kelly R. Smith, I Can Fix Up My Home Blog, Should Runners and Others Supplement with CoQ10?, http://www.icanfixupmyhome.com/WPBlog1/2018/12/05/should-runners-and-others-supplement-with-coq10/
Jenna Fletcher, Medical News Today, The benefits and side effects of L-arginine, https://www.medicalnewstoday.com/articles/318174#_noHeaderPrefixedContent
Did you find this article helpful? Millions of readers rely on information on this blog and our main site to stay informed and find meaningful solutions. Please chip in as little as $3 to keep this site free for all.
Kelly R. Smith is an Air Force veteran and was a commercial carpenter for 20 years before returning to night school at the University of Houston where he earned a Bachelor’s Degree in Computer Science. After working at NASA for a few years, he went on to develop software for the transportation, financial, and energy-trading industries. He has been writing, in one capacity or another, since he could hold a pencil. As a freelance writer now, he specializes in producing articles and blog content for a variety of clients. His personal blog is at I Can Fix Up My Home Blog where he muses on many different topics.
Ads we feature have been independently selected and reviewed. If you make a purchase using the links included, we may earn commission, which helps support the site.
When my daughter Shannon was very young, she had an appetite for oranges that the local grocery store markets as “cuties.” In reality, they are a type of Mandarin orange. Just easy to peel. This caused me to embark on a journey to plant one fruit tree each year. Year one was that Mandarin orange tree, planted in the back yard.
The next year it was a Republic of Texas orange tree (pictured below). In the photo above, you might notice that the rinds darkened a bit from a slight freeze, but the insides remain fine. This tree bears fruit in the summer and by early December it’s ready for picking. No rush though; the fruit will hang there in suspended animation for months.
Choosing Your Fruit Trees
Many people make the mistake of seeing a tree at Walmart, Home Depot, or some other big box store, buying it, planting it, and then wondering why they never get any fruit. Well, it’s because these trees are sold irrespective of customer location. What works in upstate New York does not work here in south Texas. It is all about the growing zone — how freeze-tolerant the tree is. For example, consider the avocado tree. It is a southern tree but some species do well in moderate freezes.
Republic of Texas orange tree
The best bet is to go to a local nursery, after you do your initial research. They have a vested interest in the community and will likely want to keep a customer base. There are other resources to consider. Here, we have Randy Lemon, graduate of Texas A&M, who does a local radio show. I’ve listened to his weekend show for years and I have to admit, I wasn’t totally onboard initially because he poo-pooed organic, but now that his advertisers have began offering organic products, it’s all good. Imagine.
The bottom line here (I know you’ve been waiting for it) is that it is always a good time to put in your own fruit trees. You might be a prepper or not. You might trust organic produce at the grocery store or not. You might just want to save money. Regardless, there is a lot to be said for self-sufficiency. And, if you’ve got the real estate, why not?
Did you find this article helpful? Millions of readers rely on information on this blog and our main site to stay informed and find meaningful solutions. Please chip in as little as $3 to keep this site free for all.
Kelly R. Smith is an Air Force veteran and was a commercial carpenter for 20 years before returning to night school at the University of Houston where he earned a Bachelor’s Degree in Computer Science. After working at NASA for a few years, he went on to develop software for the transportation, financial, and energy-trading industries. He has been writing, in one capacity or another, since he could hold a pencil. As a freelance writer now, he specializes in producing articles and blog content for a variety of clients. His personal blog is at I Can Fix Up My Home Blog where he muses on many different topics.
You might think, like many people, that losing fat weight is always about specific food deprivation and sticking to a banned list. Generally, the list consists of foods that you love the most. Strategies like intermittent fasting really do work; I’ve been doing it for a couple of months and have lost over 10 pounds. But frankly, it’s just not for everyone. But what if I told you about some delicious foods that are assumed by some to be on the banned list but shouldn’t be? Well, it’s true.
Make the Switch Back to Whole Milk
Dairy fat bad; 2% good. Right? So everyone says. In a study by the American Journal of Nutrition, they concluded that, “We observed that higher intakes of high-fat dairy products but not of low-fat dairy products were associated with less weight gain,which seemed to be driven by intakes of whole-fat milk and butter.”1 Why is that? Essential fatty acids are removed when the milk is skimmed. This is the component that can help you feel fuller more rapidly and stay full longer with full fat products, which cuts down on habitual, excessive overeating. Also, when individuals reduce the fat in their diets, they tend to replace it with sugary beverages and other refined carbohydrates.
Spreads Made From Nuts
Peanut butter, Nutella (chocolate hazelnut), and other nut-based favorites deliver healthy fats and an impressive amount of protein and fiber, as well. Peanut butter offers a blend of 8 grams of protein per 2 tablespoons along with 2 grams of fiber. The Harvard Gazette reported regarding a study, “The regular nut-eaters were found to be more slender than those who didn’t eat nuts, a finding that should alleviate fears that eating a lot of nuts will lead to overweight.”2 The best way to get nuts into your diet other than toast spreads for breakfast is snacking on a couple spoonfuls of nut butters in between meals to control your appetite. That’s good news for me!
Pasta Is Your Friend
Low-carb diets like the Atkins and Ketogenic diets will help you lose weight lightning-fast, but they have their own issues. They are not really “lifestyle” diets; they are restrictive and what about when you eat out? They rely on ketosis, a normal metabolic process that will cause even teetotalers to blow positive on a breathalyzer test. But whole grain pasta takes a long time to digest, leaving you with a steadier source of fuel to support energy levels.
Get Cracking With Eggs
They are high up there in high-quality protein, healthy fats, and essential vitamins and minerals. They are a low-calorie, nutrient-dense food when it comes to both snacks and meals, such as a big omelet. They come in at just 70 calories each so there’s no reason not to enjoy the whole egg, yolk and white combined (shell excluded of course). Yes, egg yolks are a significant source of your dietary cholesterol, but recent studies have now proven that dietary cholesterol has less of an effect on blood cholesterol than was once thought. The most recent evidence suggests that eating whole eggs (in moderation) is safe, and some studies even demonstrate that they may assist in your weight loss when they are eaten in lieu of refined carbohydrates.
Chicken on the Dark Side
You should remove the skin but dark meat poultry (leg and thigh) tends to be more tender, juicy, and rich in flavor than its white meat counterparts. This requires not only less butter or oil to cook it up with, but also less of your favorite sauce or creamy condiments that your breast meat requires. To make things even better, it’s a great source of lean protein that will leave you more satisfied at meal time, so you will be less likely to overeat later. Chicken also makes great jerky if you have a food dehydrator.
The Decadence of Dark Chocolate
One or two squares of this rich, satisfying chocolate will reduce your stress levels and help to curb cravings for other sugar-loaded treats as well. High stress levels has been known lead to cortisol hormone spikes. These increase your appetite and emotional eating behaviors. The desirable benefits of dark chocolate (not regular candy bars) are specific to the concentration of cocoa flavonoids. These have been shown in studies to have multiple health benefits, such as improving blood flow to the brain and reducing the risk of heart disease by lowering cholesterol levels, blood sugar and blood pressure. The higher the percentage of cacao, the greater the benefits.
References
Susanne Rautiainen, Lu Wang, I-Min Lee, JoAnn E Manson, Julie E Buring, Howard D Sesso, American Journal of Nutrition, Dairy consumption in association with weight change and risk ofbecoming overweight or obese in middle-aged and older women:a prospective cohort study, https://watermark.silverchair.com/ajcn118406.pdf
The Harvard Gazette, Research also shows people who eat nuts weigh less, https://news.harvard.edu/gazette/story/2013/11/eating-nuts-reduces-risk-of-death/
Did you find this article helpful? Millions of readers rely on information on this blog and our main site to stay informed and find meaningful solutions. Please chip in as little as $3 to keep this site free for all.
About the Author:
Kelly R. Smith is an Air Force veteran and was a commercial carpenter for 20 years before returning to night school at the University of Houston where he earned a Bachelor’s Degree in Computer Science. After working at NASA for a few years, he went on to develop software for the transportation, financial, and energy-trading industries. He has been writing, in one capacity or another, since he could hold a pencil. As a freelance writer now, he specializes in producing articles and blog content for a variety of clients. His personal blog is at I Can Fix Up My Home Blog where he muses on many different topics.


 Kelly R. Smith is an Air Force veteran and was a commercial carpenter for 20 years before returning to night school at the University of Houston where he earned a Bachelor’s Degree in Computer Science. After working at NASA for a few years, he went on to develop software for the transportation, financial, and energy-trading industries. He has been writing, in one capacity or another, since he could hold a pencil. As a freelance writer now, he specializes in producing articles and blog content for a variety of clients. His personal blog is at