4 Types of Sink Faucets

by Kelly R. Smith

index sitemap advanced
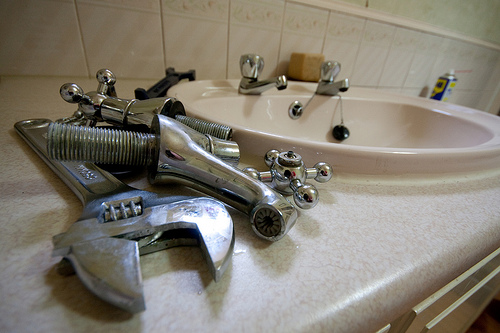
Disassembling a sink faucet for repair

Sink faucets — are they functional or decorative? A bit of both actually. But keep in mind that when purchasing a new one, don’t scrimp on the price. For one thing, if you want real long-lasting brass components, you are going to have to pay for it. Secondly, you want a big name brand so that replacement parts are easily accessible. There are 4 types of sink faucets to consider. If you are also installing a new sink/s, the drain may not match up with the sewage pipe. Here’s how I fixed a misaligned sink.

4 Types of Faucets to Consider

  • Ball faucets. This is considered a washerless faucet because of the absence of rubber or neoprene washers in its construction. It has a single handle that moves over a rounded ball-shaped cap that is right above the base of the faucet’s spout. The faucet has a single handle that controls a special plastic or metal ball inside the body of the faucet. The ball has chambers or slots in it, as well as rubber O-rings and spring-loaded rubber seals. Depending upon the ball’s position, the ball/lever assembly controls the flow and mixing temperature of the water coming out of the faucet. Because of the number of parts which make up this type of faucet, ball faucets tend to leak more than other washerless faucets such as the cartridge faucet or disc faucet. See my faucet repair article.
  • Disc (or disk, if you prefer) faucets. Another washerless type, ceramic disk faucets are the most recent development in emerging faucet technology. They are known by their single lever lording over a wide cylindrical body. This faucet mixes hot and cold water inside a mixing chamber that is referred to as a pressure balance cartridge. 2 ceramic disks located at the bottom of the chamber are engineered to raise and lower to control the volume of the water flow. The temperature is controlled by a side-to-side rotation of the handle. These faucets are known to be high-quality, very reliable, and do not need to be repaired often. That’s a good thing.
  • Cartridge faucet with 2 handles. Yet another washerless faucet, this one looks quite like a compression washer faucet. But, you can tell the difference by how the handles feel when they are operated. The compression faucet requires tightening down (or compress) the washer in order to staunch the water flow. With a cartridge faucet, the action is very smooth and consistent. With just a half turn, the handle goes from the off to the on position. It turns off without added pressure being required as with a compression faucet.
  • Compression washer faucet. This type has been with us since the beginning of on-demand indoor plumbing. You will find them in older properties, and updated versions are still found installed in utility sinks in newer homes to this very day. They are typically the cheapest to purchase but are the most prone to leaks and maintenance. Compression washer faucets are identified by their separate hot and cold water handles (H and C) and their action requiring you to tighten the handles down to close off the water flow. They work using a compression stem. This is a type of glorified screw with a washer at the end of it pressing against a valve seat.

So those are your choices of the 4 types of sink faucets. This article has described their functionality; it is up to you to choose the wow factor of the style. For the kitchen, I prefer a gooseneck style with a spray attachment, but hey, that’s just me.


Looking for more great content? Visit our partner sites:

The Green Frugal

Running Across Texas


As Featured On Ezine Articles

I offer article and blog-writing services. Interested? Hire Me!


Did you find this article helpful? Thanks for supporting this free site with a small donation! We depend on our readers rather than a bothersome paywall to keep the lights on here in the shop.


Visit Kelly’s profile on Pinterest.


About the Author:

Photo of Kelly R. SmithKelly R. Smith is an Air Force veteran and was a commercial carpenter for 20 years before returning to night school at the University of Houston where he earned a Bachelor’s Degree in Computer Science. After working at NASA for a few years, he went on to develop software for the transportation, financial, and energy-trading industries. He has been writing, in one capacity or another, since he could hold a pencil. As a freelance writer now, he specializes in producing articles and blog content for a variety of clients. His personal blog is at I Can Fix Up My Home Blog where he muses on many different topics.

Paint Like a Pro with These 10 Tips

by Kelly R. Smith

search tips advanced search
Prepping a home for painting.
Prepping a home for painting

This article was updated on 09/27/20.

Nothing enhances the exterior of a home like a fresh coat of paint. Although the job seems straightforward enough, there are things you can do to make the job easier, faster, and more efficient. One thing you should know at the outset — older homes might have lead-based paint. Have yours tested before embarking on this job. That being said, read on for 10 tips to paint like a pro.

  • Scrape and sand all surfaces prior to washing. Although some painters like to wash first and then sand and scrape, this can leave behind dust that prevents the new paint from sticking as well as it should.
  • When power washing, keep the setting on low. High pressure from a power washer will force water into the wood. Even when the outer surface seems dry, it may have moisture trapped inside. What should you wash with? I like to use a tablespoon of dish soap with a mixture of TSP (trisodium phosphate) and bleach. The dish soap helps the solution to cling to the siding and trim rather than running off the house. This is the same principle as using a bit of soap as a surfactant when spraying garden plants.
  • Cover plants, cars, exterior lighting, and anything else that might be affected. Like most situations, an ounce of prevention is worth a pound of cure. Use breathable drop cloths for plants so they can breath. Protect lights, doors, and windows, with Cling Cover plastic.
  • Use a high-quality primer. Always prime bare spots before painting. If the home has oil-based paint that is peeling and cracking and complete removal is not a good option, use a product such as XIM Peel Bond primer.
  • Use the right tools. This should be obvious but many beginning painters and weekend warriors just try to “get by” with what they have on hand. You get what you pay for. Go for the pricier brushes, rollers, and sprayers. They might set you back a bit in the beginning but the finished job will be more professional.
  • Wear knee pads when working on a ladder. There’s always a rung where your knees are, right? Without knee pads to cushion your kneecaps, they will be squealing at you by the end of the day and tomorrow won’t be any better.
  • Plan to spend more time to paint window trim. Painting in the field might be a breeze, but window trim is confoundingly time-confusing. The devil is in the details and the time to apply painter’s tape and sanding really adds up.
  • Don’t paint into the evening. The main issue in the evening is that condensation forms on the surface of the paint when the sun goes down, particularly during the spring and summer. On wet paint, this causes the water-soluble components to break down and rise to the surface. This is called surfactant leaching. After the water evaporates, you’re left with a waxy-looking area. It may go away but there’s no need to take a chance to begin with. In the late afternoon, stop painting and do prep work for the next day.
  • Prevent sticky windows and doors. Where two dry surfaces painted with latex meet, they want to stick to each other. You have most likely noticed it yourself, even on drawers and garage doors. It is completely normal and is called blocking. You can prevent it with a thin coat of furniture wax.
  • Finally, don’t forget on-going maintenance. You might think you’re done, but that is just an illusion. Things like repairing caulking and touching-up paint should be done on a regular basis. Always write down all the details of the kind of paint, sheen, and color of paint that you used.

I hope these 10 tips to paint like a pro will make your painting adventure the best it can be. Doing it yourself can save you a lot of money if you have the time and inclination. Any specialized equipment like a spray rig might be available for renting.


Looking for more great content? Visit our main site I Can Fix Up My Home or our partner sites:

The Green Frugal

Running Across Texas


As Featured On Ezine Articles

I offer article and blog-writing services. Interested? Hire Me!


Did you find this article helpful? Objective journalism is becoming harder to find all the time. Please help with a small donation of $3 or more to keep this site free for all. Thank you!


Visit Kelly’s profile on Pinterest.


About the Author:

Photo of Kelly R. SmithKelly R. Smith is an Air Force veteran and was a commercial carpenter for 20 years before returning to night school at the University of Houston where he earned a Bachelor’s Degree in Computer Science. After working at NASA for a few years, he went on to develop software for the transportation, financial, and energy-trading industries. He has been writing, in one capacity or another, since he could hold a pencil. As a freelance writer now, he specializes in producing articles and blog content for a variety of clients. His personal blog is at I Can Fix Up My Home Blog where he muses on many different topics.

10 Popular Home Renovation Trends

Photo of Kelly R. Smith   by Kelly R. Smith

Home floor and walls renovations.
Home floor and walls renovations
index sitemap advanced

This article was updated on 01/24/22.

Ads we feature have been independently selected and reviewed. If you make a purchase using the links included, we may earn a commission, which helps support the site. Thank you for your support.

Remodeling, whether done for contemporary style, preparation for sale, or just general repairs continues as usual. The most popular home renovation trends vary from year to year depending on a number of factors. Renovation budgets are always high on the list. Going green not only lowers your bills but helps the environment. Other factors can influence decisions but let’s look at some home renovation trends that stand the test of time.

Note: There are some specific requirements for disabled homeowner remodeling. These came about as a result of the Americans with Disabilities Act of 1990.

  • Floors, ceilings, and walls. Traditionally, these surfaces get a lot of attention and 2020 – 2022 is no exception. The Joint Center for Housing For Housing Studies says homeowners average $3,282 per year on these surfaces. Check out these 5 ways to refresh your walls on a budget.
  • Prioritizing on saving money. This trend is not specifically tied to aesthetics. Rather, it is focused on frugality. Migrating to lower operating-cost lighting like LED bulbs, for one. Beefing up attic insulation and adding radiant barrier foil may not boost curb appeal, but oh, what a difference when the power bills come due each and every month. Our electric bill averages $130/month during the dog days of summer here in South Texas (high 90℉ during the dog days of summer.
  • Slapping on another coat of paint. This is always one of the most popular weekend DIY projects. The cost of paint is reasonable and the outlay of cash for tools is minimal. You can even employ paint illusions to make a room look larger. Learn how to paint like a pro.
  • Be a DIY weekend warrior. This is the best way to stretch your budget. Plus, who doesn’t love that sense of pride? DIY varies in the level of difficulty but with the help of sites like this one, I Can Fix Up My Home, you might be surprised at what you can accomplish. The Senior Director of Customer Insights at Lowe’s, Amy Anthony, says, “Seventy-four percent [of consumers] do research to get as much information as possible before making a purchase.”
  • Preparing for climate change. Whether you are an ardent believer in global warming (now called climate change) or believe Al Gore is just out to make a buck preaching about it, there’s no doubt that the preparation steps saves money. So, apply weatherstrip, caulk, upgrade your windows; all home improvements are cumulative.
  • Home sanitation and wellness is moving up. This is understandable and goes hand in hand with many other home improvements because the topic of off-gassing is more well-known that ever. Forbes.com puts it this way, “Wellness-focused changes can include paint, flooring or cabinetry with non-toxic materials, touchless faucets that reduce germ spread, circadian lighting that improves sleep, water and air purification systems, bidet style toilets for enhanced hygiene, and many others.” Many people are now using UV lights on surfaces to guard against the COVID-19 virus. And all its unruly spawn.
  • Focus on lower budgets, bigger consequences. Smaller projects encompassing a big wow factor are becoming more popular and are expected to continue. For example, instead of gutting the bathroom and re-doing it, why not have your tub re-finished, update all faucets, put in a new recessed medicine cabinet, and re-paint?
  • Smaller brand names are becoming more competitive by adding luxury features. Kitchen cabinets are a good example of this. After Hurricane Harvey, when our home flooded, one of the things we needed to replace were our cabinets and granite countertops. Home Depot gave us a lot of modular options with freebies like self-closing doors and stainless steel sinks thrown in.
  • Home automation is going mainline. Once the purview of science fiction novels, it’s coming at us fast and furious now. I recently installed a Ring Doorbell. It not only responds when someone rings it, but also when someone just approaches it.
  • More services are becoming negotiable. When emergency repairs are called for instead of long thought out projects, it would seem that the repair person has you over the barrel. Not always the case. Since our economy has shifted to being service-based (some hands-on crafts still can’t be outsourced to China), the competition for your business has become fiercer. Good news for the homeowner.


These 10 popular home renovation trends for 2020 are likely to continue as the COVID-19 lock-down continues. It’s just the new-new. Many employers are not only accepting work-from-home staff, but embracing it. It saves on the overhead. And I might say, as a writer I am used to working from home but it has been really nice having my wife working from home rather than in her downtown high-rise office.

References:

Looking for more great content? Visit our partner sites:

The Green Frugal

Running Across Texas


As Featured On Ezine Articles

I offer article and blog-writing services. Interested? Hire Me!


Did you find this article helpful? Thanks for supporting this free site with a small donation! We stay in business from the generosity of our readers, not a paywall.


Visit Kelly’s profile on Pinterest.


About the Author:

Photo of Kelly R. SmithKelly R. Smith is an Air Force veteran and was a commercial carpenter for 20 years before returning to night school at the University of Houston where he earned a Bachelor’s Degree in Computer Science. After working at NASA for a few years, he went on to develop software for the transportation, financial, and energy-trading industries. He has been writing, in one capacity or another, since he could hold a pencil. As a freelance writer now, he specializes in producing articles and blog content for a variety of clients. His personal blog is at Considered Opinions Blog where he muses on many different topics.

7 Common Drywall-Taping Problems

index sitemap advanced
Drywall in new home construction

Drywall finishing, or taping and floating, is hardly rocket science. But it is more of an art and things can go wrong. The upside is that most of these things are easily corrected. The key thing is to prevent issues right from the get-go with this DIY project. Here are 7 common drywall-taping problems and how to deal with them.

Drywall Finishing Problems

  • Concave and crowned seams. The seams are where the drywall panels meet. There are tapered edges on the long side of the panel and square edges on the short side. Square seams are called butt-joints. Obviously tapered edges accommodate your drywall tape. Crowned seams happen when taping compound (mud) is applied too heavily and the center of the seam is left higher than the surface of the panels. This is more common on butt-joints. When light shines across the seams on your walls, they crowned seams are apparent. Catch these before painting, and sand them down with 120-grit or 150-grit paper or just use your widest floating knife to float it out wide. Concave seams are the opposite of crowned seams. To correct this just float the joint again.
  • Photographing. This happens when you apply glossy paint. The drywall and the joints and screws show up differently because they have different textures. To prevent this, either skim the entire surface with mud (drywall compound) or paint it with a sealer/primer. Applying a drywall texture with thinned-out joint compound will also help.
  • Bubbled tape. This happens when you have a poor bond between the tape and the mud. If the tape isn’t embedded well in the mud, it can easily loosen and form a bubble. It might be a round spot as small as 1/2 inch in diameter, or it may encompass the whole length of a seam. The solution? Smaller bubbles may be cut out with a utility knife and re-taped. For larger areas, you can remove the entire section of tape and embed new tape. Finally, apply a second and a third coat of mud. To avoid bubbled or loose tape to begin with, apply a thick enough layer of joint compound before you embed the tape and apply sufficient pressure with your taping knife to embed it properly. Or as I do, use mesh tape rather than paper; it’s much easier to work with.
  • Pitting. This looks like a number of small pits on the taped finished surface. They are small air bubbles that were either not properly filled or were exposed in the sanding process. Usually they are the result of over-mixing or under-mixing your mud or if insufficient pressure is applied when smoothing your mud. Much of your pitting can be covered up with these drywall texturing techniques.
  • Loose or cracked corner bead. When this happens, remove any cracked mud and re-apply. Be sure that there is a 1/2 inch gap between the bottom of the bead and the floor. If you use metal corner bead, reinforce the border with paper tape. This will reduce the chance of cracks developing.
  • Popped screws or nails. These don’t always show up until a few months or even years after the taping and floating, but they can show up before you paint your drywall. When you sand over screws or nails, your pole sander can apply a lot of pressure against the drywall panel. If the fastener hasn’t pulled the panel tight against your studs, the pressure can push the panel tight and pop the fasteners. This raises a bump on the surface or exposing the fastener head. Popped screws or nails are more likely with warped wood framing. Secure with new fasteners and re-float. I like to place screws or nails at 12 inch centers. Nails should be applied in pairs; one being a “helper” nail.
  • Shrinking or cracked drywall seams. Seams can develop drywall cracks during your taping process. This is most likely when your mud dries too quickly. This can happen because of direct high heat or sunlight. If your tape and mud are still solid, just re-tape the bad spots. Be sure that your seam is completely dry; use enough pressure to force the mud completely into the crack. If the tape is cracked or the compound is loose, you’ll have to remove the affected areas. Avoid this problem by keeping the heat low to extend your drying time. If the outdoor temperature is high, above 80°F, close the windows so the airflow won’t dry the compound too quickly.

These are the most common drywall-taping problems you are likely to encounter. The best approach is to take your time and prevent issues before they develop.

Looking for more great content? Visit our partner sites:

The Green Frugal

Running Across Texas


As Featured On Ezine Articles

I offer article and blog-writing services. Interested? Hire Me!


Did you find this article helpful? Thanks for supporting this free site with a small donation!


Visit Kelly’s profile on Pinterest.

About the Author:

Photo of Kelly R. SmithKelly R. Smith is an Air Force veteran and was a commercial carpenter for 20 years before returning to night school at the University of Houston where he earned a Bachelor’s Degree in Computer Science. After working at NASA for a few years, he went on to develop software for the transportation, financial, and energy-trading industries. He has been writing, in one capacity or another, since he could hold a pencil. As a freelance writer now, he specializes in producing articles and blog content for a variety of clients. His personal blog is at I Can Fix Up My Home Blog where he muses on many different topics.

2020 National Electrical Code Changes

National Electrical Code
index sitemap advanced

The National Electrical Code (NEC), or NFPA 70, is a regionally adoptable standard for the safest installation of electrical wiring and equipment, only in the United States, although of course other countries can follow it if they wish. The NEC is a part of the National Fire Code series published by the National Fire Protection Association (NFPA), which is a private trade association. Despite the use of the term “national”, it is not a federal law. It can be adopted as is by any state or municipality or adapted.

The 2020 version of the National Electric Code includes requirement updates in the following four significant areas: firemen’s disconnect, solar power, surge protection, and GFCI protection . To ensure providing the best, safest work possible, become familiar with the official NEC codes mandated by your state. Whether you are a professional or a DIY project person, a knowledge of electrical safety requirements is important.

Emergency Disconnects

  • Must function from outside dwellings
  • Applies to generators and energy storage systems (ESS)
  • Required for all single- and two-family dwellings
  • Must be readily accessible
  • Generators must be marked with one of the following: EMERGENCY DISCONNECT, METER DISCONNECT, NOT SERVICE EQUIPMENT, EMERGENCY DISCONNECT, SERVICE DISCONNECT, or EMERGENCY DISCONNECT, NOT SERVICE EQUIPMENT

Surge Protection

  • Must be part of service equipment or adjacent to it
  • New article (242) includes service lines to dwelling units
  • May be located at each level of downstream distribution as needed
  • As of 2020 applies to: replacements and service upgrades and line side and load side services 

Solar (Applies to California)

  • Solar panels on new construction (California requires solar photovoltaic systems for newly constructed healthcare facilities starting January 1, 2020)
  • Outdoor disconnect required for all energy storage units

Articles Removed from NEC 2017

  • Article 553 Floating Building
  • Article 285 SPDs 1,000V or less
  • Article 280 SPDs over 1,000V
  • Article 328 MV Cable Type MV

New Articles Added

  • Article 800 General Requirements for Communication Systems: consolidates the previous contents of 2017 NEC chapter 8 into one articles and addresses requirements for communication circuits, to include television and radio distribution antennae as well as network powered broadband systems.
  • Article 242 Overvoltage Protection: combines the two articles 280 and 285 and addresses surge protective requirements, devices and arresters.
  • Article 337 Type P Cable: covers 600V Type P cables that are used in industrial and hazardous areas and specifications.
  • Article 311 MV Connectors and Cable: Expands on the deleted article 328 and goes on to address medium voltage conductors and cables, their use, and their specifications.

Look for Updates Every 3 Years

The National Fire Protection Agency continues to publish official updates to the NEC every three years. These updates have run like clockwork since 1897, when the code was first introduced. 2020 NEC is the end result of more than 5,000 public inputs and comments, 18 panels, the annual NFPA meeting, and more than 2,000 revisions. Get ahead of the curve by learning about the 2020 National Electrical Code changes.

Looking for more great content? Visit our partner sites:

The Green Frugal

Running Across Texas


As Featured On Ezine Articles

I offer article and blog-writing services. Interested? Hire Me!


Did you find this article helpful? Thanks for supporting this free site with a small donation!


Visit Kelly’s profile on Pinterest.


About the Author:

Photo of Kelly R. SmithKelly R. Smith is an Air Force veteran and was a commercial carpenter for 20 years before returning to night school at the University of Houston where he earned a Bachelor’s Degree in Computer Science. After working at NASA for a few years, he went on to develop software for the transportation, financial, and energy-trading industries. He has been writing, in one capacity or another, since he could hold a pencil. As a freelance writer now, he specializes in producing articles and blog content for a variety of clients. His personal blog is at I Can Fix Up My Home Blog where he muses on many different topics.

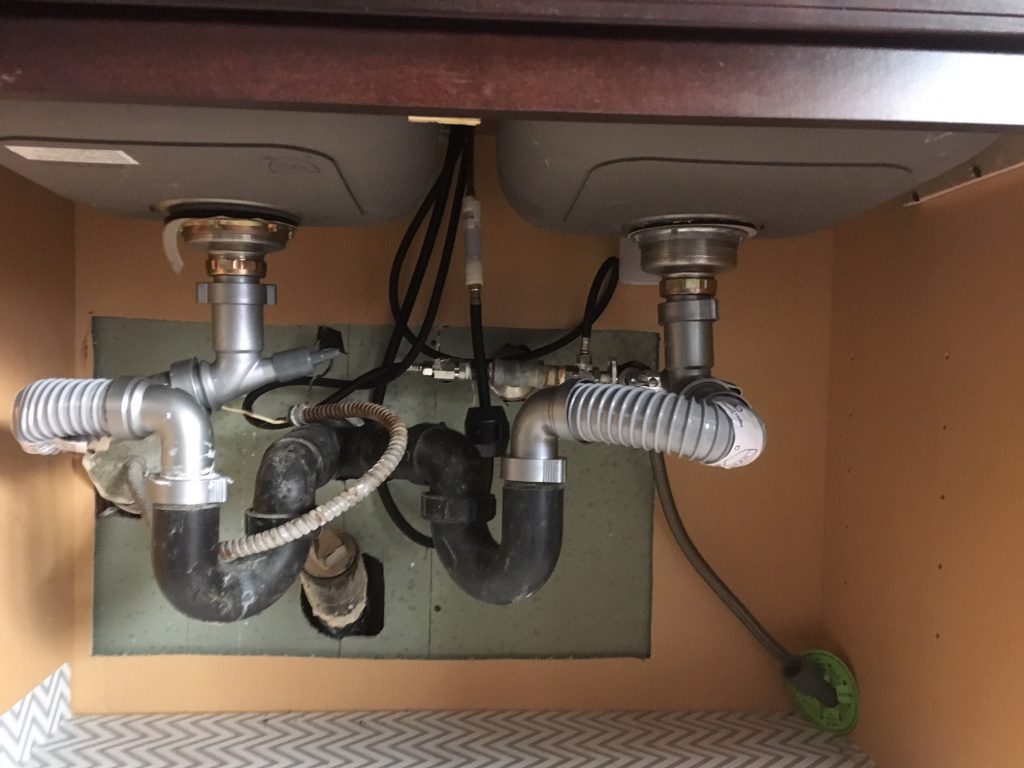
Best Way to Install a Misaligned Sink Drain During Remodeling


Snappy Trap sink drain

During new construction installing sink drains is easy-everything is configured to work together. During a kitchen or bathroom remodeling project it can be a completely different story. You can bet that things will not line up using new components.

Case in point: in the course of re-building in the aftermath of the flood due to Hurricane Harvey we’ve got new cabinets and sinks.  I needed to match up with the existing wall drainpipe. It came as no surprise that the hook-up was not the straight shot that the original was. I needed a solution.

A Flexible Solution for Connecting Drain Lines

After looking at a number of solutions I settled on the Snappy Trap. It seemed like the easiest to install and the price was right. It comes in several configurations-single sink, double-sink, etc.

In my case I used two single-sink kits since I have two drainpipe p-traps that converge into one drain. Of course, in a situation with a double-sink and one  drainpipe, the Snappy Trap 1 1/2″ all-in-one-drain kit for double bowl kitchen sinks will give the best results.

In any case, one of the important benefits over other systems is that with this product the flexible tube has a smooth interior. This prevents build-up and excessive odor.

The System is Dishwasher-Friendly

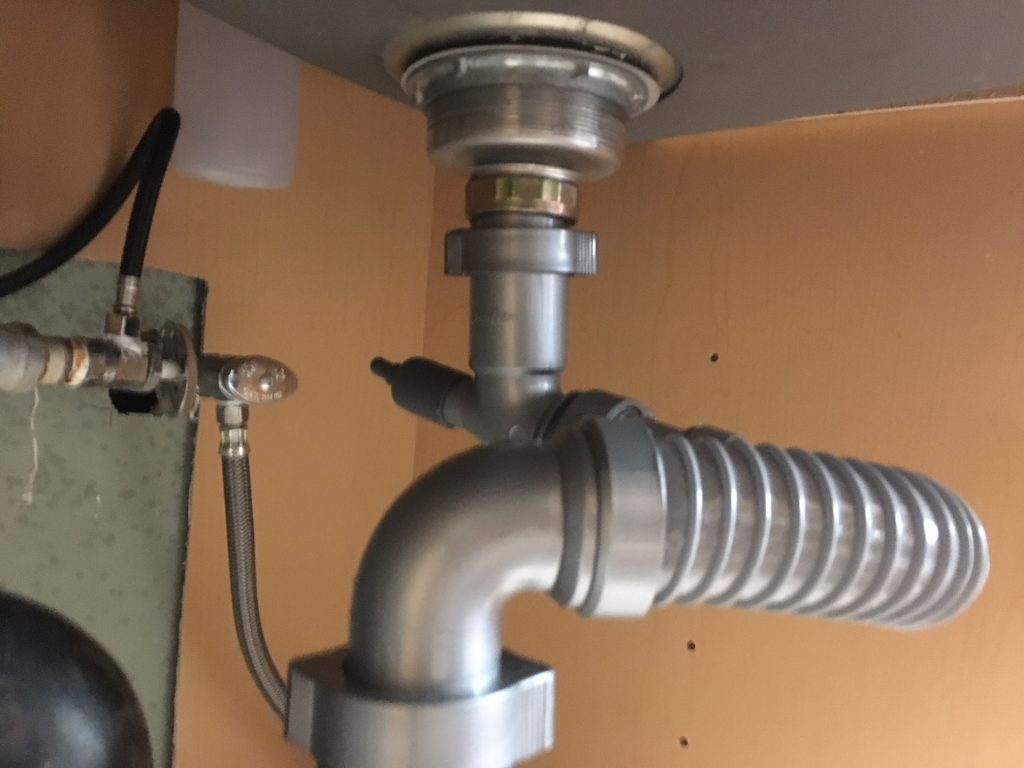
The elbow that connects to the sink strainer tailpipe has a dishwasher drain connection nipple that points up at an angle so that there will not be any back flow up into the sink (see the picture below).

Snappy Trap sink drain with dishwasher connector

This is a convenient option but if you don’t plan on connecting a dishwasher, simply leave the cap on and you’re good to go.

Installing a misaligned sink drain during remodeling without hiring an expensive plumber is a thing of the past. If you’ve got some basic tools and some DIY common sense, dive right in. The hardest part is crawling in the cabinet.


Looking for more great content? Visit our partner sites:

The Green Frugal

Running Across Texas


As Featured On Ezine Articles

I offer article and blog-writing services. Interested? Hire Me!


Did you find this article helpful? Thanks for supporting this free site with a small donation!


Visit Kelly’s profile on Pinterest.


Widget is loading comments…


How to Select a Roofing Contractor


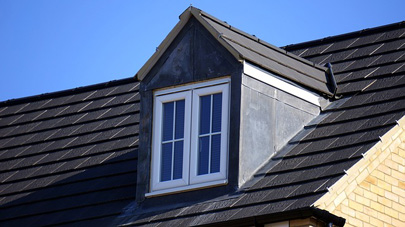
A new roof with a dormer

It’s simple. If you have a home you have a roof. Just as a residential fence protects your yard, your roof protects the interior of your home. Even renters need a roof although your landlord is generally liable for repairs like roofing and siding. But if you need to select a roofing contractor here are the things you need to know since a new roof is a rather large investment.

First, Decide on What Kind of Roofing Material You Want

You basically first have to choose between a metal or shingle roof. This is important because some contractors do it all but some simply focus on one kind of material. You don’t want a contractor to “practice” or “train new hires” on your dime.

Metal roofs will cost you more but they last longer and are very fire resistant. Consider this if your home is in the vicinity of fires spread by the Santa Ana winds.

Questions to Ask Potential Roofing Contractors

You can create a short list by going to a service like Angie’s List or Networx. You can also ask neighbors who have recently had roof service. After you have a short list it’s time to ask some questions.

  • Do you use nails or staples? Nails are far superior in windy conditions.
  • Have you ever had to deal with a mechanics lien? If so, it generally means he hadn’t paid his workers in a timely manner. Not a good thing.
  • Are you bonded? Do you carry Workers compensation and contractor’s liability insurance? The answer should be a resounding “yes.”
  • Are you willing to sign a binding contract? Life happens to all of us but nothing is worse than a roofing contractor pulling off the job halfway through to deal with something else.
  • How is your record with the BBB.

These are just some things you need to ask before signing on the dotted line. Protect yourself and your pocketbook.


Looking for more great content? Visit our partner sites:

The Green Frugal

Running Across Texas


As Featured On Ezine Articles

I offer article and blog-writing services. Interested? Hire Me!


Did you find this article helpful? Thanks for supporting this free site with a small donation!


Visit Kelly’s profile on Pinterest.


Widget is loading comments…


5 Ways to Refresh Your Walls on a Budget


by Kelly R. Smith

index sitemap advanced
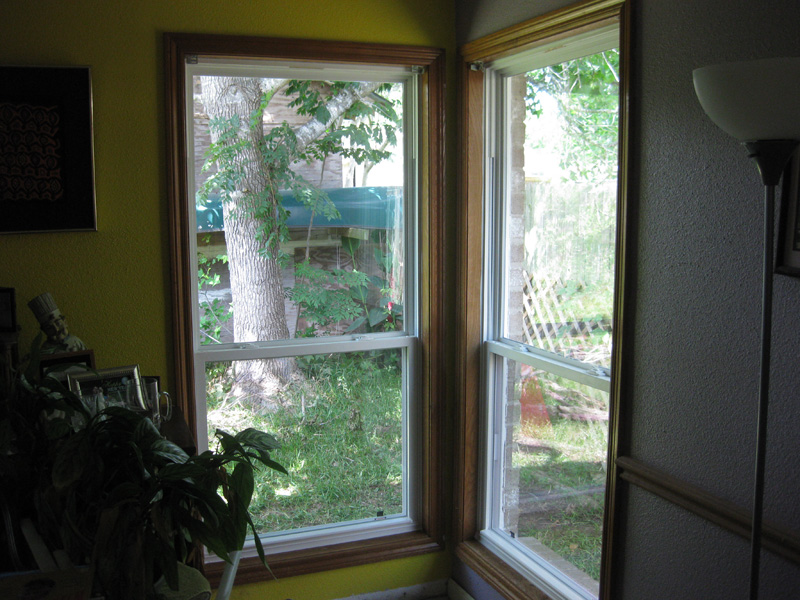
Colorful walls & energy efficient windows

This article was updated on 09/27/20.

Face it; contractor-built walls are just plain boring. There’s a reason for that. Actually, there are a couple of reasons. First, it is frugal to blast cheap texture through a spray gun texture hopper for a conventional orange peel texture. Secondly, that blah flat white paint? It is uninspiring but also frugal and allows for new homeowners to upgrade easily to a more attractive color and sheen.

Let’s take a look at some of the options we have for refreshing those tired, boring walls.

  1. Upgrade Your Texture

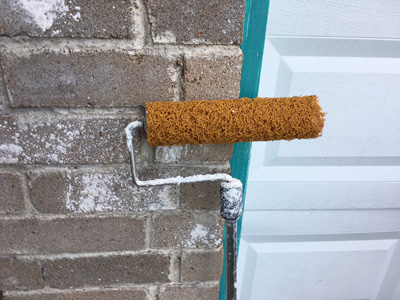
Contractor-applied texture is great for hiding drywall joints that were not properly finished but it is just a bit boring. Upgrading your wall texture is easy. I like to use a specialty roller like the one pictured below with watered down drywall compound (mud).

Use a drill and a ribbon mixer to thin the mud. It should easily drip off the mixer when the proper consistency is reached.

A texture roller
A texture roller

You can also used a regular paint roller with the nap of your choice for a less pronounced effect.

2  Paint Your Walls to Make Your Room Appear Larger

Not all homes are as large as we want them to be. Older homes can be notoriously small, especially stairways and halls; not a good thing for the claustrophobic among us. But rest assured that there are ways to open up that space.

Lighter color paint, especially in brighter sheens like eggshell and gloss create the illusion of more space. Wallpaper with vertical patterns give the illusion of more height.

3  Paint Over Old Paneling

Dark paneling may have been quite the thing in the 50s and 60s but today it looks old and dated. Removing it can be messy especially if adhesive was used. Luckily, it is easy enough to paint over wood paneling.

If it has vertical grooves, you will need to skim those with drywall compound and lightly sand the surface before texturing and painting.

4  Install Crown Molding

Polyurethane crown molding

Installing crown molding will give even the drabbest rooms a touch of class. You’re not limited to wood either. Today you can find it in polyurethane and PVC which makes it easy to work with.

Fancy door trim styles

5  Install New Door and Window Trim

Contractor-grade door and window trim is just boring. In just a few hours you can remove it and replace it with trim that will give your walls a shot of style and class.

Kits are available at stores like Home Depot. All you will need is:

  • Tape measure
  • Miter saw or radial arm saw
  • Stool or ladder
  • Finish nail gun or hammer and nails
  • Nailset
  • Spackling
  • Paint and brush
  • Painter’s tape


I hope the above tips on refreshing your walls on a budget proved inspirational and informative. Got any tips of your own? Share them with our readers in the comment box below.


Looking for more great content? Visit our main site I Can Fix Up My Home or our partner sites:

The Green Frugal

Running Across Texas


As Featured On Ezine Articles

I offer article and blog-writing services. Interested? Hire Me!


Did you find this article helpful? Objective journalism is becoming harder to find all the time. Please help with a small donation of $3 or more to keep this site free for all. Thank you!


Visit Kelly’s profile on Pinterest.


About the Author:

Photo of Kelly R. SmithKelly R. Smith is an Air Force veteran and was a commercial carpenter for 20 years before returning to night school at the University of Houston where he earned a Bachelor’s Degree in Computer Science. After working at NASA for a few years, he went on to develop software for the transportation, financial, and energy-trading industries. He has been writing, in one capacity or another, since he could hold a pencil. As a freelance writer now, he specializes in producing articles and blog content for a variety of clients. His personal blog is at I Can Fix Up My Home Blog where he muses on many different topics.
Widget is loading comments…


Glass, Ceramic, and Porcelain Floor and Wall Tile

by Kelly R. Smith

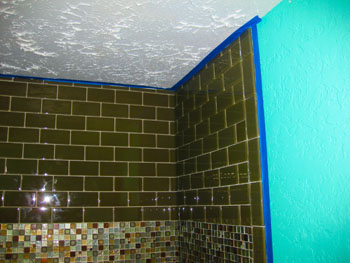
A glass tile wall with an accent strip

Article updated on 08/09/20

Tile is a very advantageous building material. It’s durable, inexpensive (usually), available in a huge range of styles, and easy to install with a few tools. Here are a few of the most common types of wall and floor tile that you are likely to encounter.

As with any new or remodeling construction project, it is important to approach it methodically and go in with a solid plan. Consider your construction budget, the living area and of course your style and tastes.

Glass Wall Tile

Glass tile is a great solution for shower walls and counter top  back splashes. The photo above is a bathroom shower glass tile installation that I recently did during a re-build following the Great Flood of ’18 (Hurricane Harvey).

This tile is clear glass with a colored paper backing which means it’s somewhat transparent at some angles and lighting conditions if the colors or marks on the underlying wall vary. Because of this it is important to apply a suitable white primer before applying the tile. Also, use white thinset as an adhesive.

Be aware that you will also need a special glass-cutting blade for your wet saw. Glass also chips easily so if you are making a narrow cut it is not only important to make a half cut and then flip it over and cut from the other direction but cut very slowly.

Ceramic and Porcelain Tile

Porcelain and ceramic tile is suitable for floor, kitchen back splash installation and wall applications. The difference between the two is susceptibility to water absorption due to content of materials and how they are fired and boiled.

The advantage of porcelain is that it resists moisture much better than ceramic so consider your application. It is also more costly in general.

Going Beyond the Ordinary; Tile Patterns

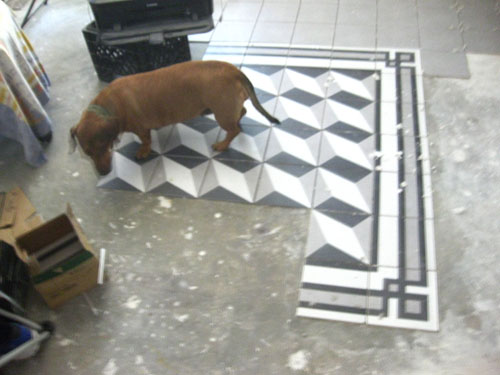
A 3D ceramic tile pattern

There is no reason that your tile installation project has to be bland. The photo above shows a 3D center area with a border tile pattern that I am currently working on. It is available through Home Depot and is the Twenties collection by Merola and the pieces are Diamond (for the 3D center), Corner, and Frame. And of course for the outside I’m using matching gray tile of the same size.

In my case they didn’t carry it at my local Home Depot store so I ordered online and picked it up there in a week or so. Free shipping!


Looking for more great content? Visit our partner sites:

The Green Frugal

Running Across Texas

As Featured On Ezine Articles


I offer article and blog-writing services. Interested? Hire Me!


Did you find this article helpful? Thanks for supporting this free site with a small donation!


Visit Kelly’s profile on Pinterest.


Should You Do Your Own Electrical Repairs or Upgrades?

index sitemap advanced


This can be a tricky issue. Usually it boils down to:

  • Are you competent to complete the task?
  • Does the local electrical building code specify a licensed electrician and building permits?
  • What is the scope of the remodeling project?

Regular Maintenance or Full-Blown Remodeling Project?

We all have situations where we are simply fixing small issues. These usually involve tasks such as replacing GFCI receptacles in the bathroom or kitchen, replacing ceiling fans, and hard-wiring a new oven. These are likely considered regular maintenance.

These are all things that the average homeowner can handle. A project that goes beyond that may involve having to pull building permits and having the job inspected and signed off on. In this case you will likely have to hire a licensed electrician. Always check you local code to be sure.

For example, if you are doing a kitchen remodel, there is likely to be some electrical work. Kitchens are very electric-intensive because of all the appliances. Plus, there is the issue of water and electricity. They don’t usually play well together.

Bathroom remodels face similar issues. There might not be so many appliances but the water issue is at least, if not more, critical. With kitchen and bathroom issues you will likely have to hire a licensed electrician.

Preventative Maintenance for Electrical Repairs

We never know when electrical problems will arise. Who among us has had a circuit breaker or fuse trip in the middle of the night? (It’s always at the worst possible time, right?)

Anyway, now is the time to cover your backside, before fate slaps you upside the head. The most basic thing you can do is to map electrical circuits. This way, when you do have an issue in the wee hours or you are wiring an appliance, you will know just which breaker is involved. The builder made these decisions and they don’t always follow logic.


Speaking of the circuit breaker box, I always keep a padlock on mine. Why? Well, it just happens that one of the things that would-be burglars will do is to flip the main switch to cut power to your house.

Does this qualify me as a bona fide paranoia whacko? Perhaps, but at least I’ve got my (imaginary) ducks in a row (or mallards in a queue if you are reading this across the pond).

The bottom line of this post is that you should know which electrical projects you can and should tackle from both a legal and frugal standpoint. Stay safe and enjoy your kilowatts.


Looking for more great content? Visit our partner sites:

The Green Frugal

Running Across Texas


As Featured On Ezine Articles

I offer article and blog-writing services. Interested? Hire Me!

close

Enjoy this blog? Please spread the word :)

RSS
Follow by Email
Twitter
Follow Me
Tweet
Pinterest
Pinterest
Pinterest
Instagram
LinkedIn
Share