This tutorial explains how to install a backsplash above your kitchen cabinet tops and cooking surfaces using tile, granite, stainless steel, or laminate.
Why do You Need a Backsplash?
Backsplashes on the walls above kitchen countertops or cooking surfaces will add a touch of style to your food prep area and will also protect the walls and simplify cleaning chores.
Backsplashes will protect the wall from water in your sink area and will also protect from grease splatters around the cooking surface. Even though you can employ a professional contractor to install it, a do it yourself backsplash is a very doable project for any DIYer to take on.
Cut your laminate and attach it using contact cement applied with a j-roller. Cut it with a saw blade designed for this purpose. Then simply run a small bead of latex or silicone caulk where the countertop meets the wall. Don't neglect to lightly sand any sharp edges.
Stainless Steel Backsplashes
Stainless steel is popular in commercial settings and stainless steel kitchen appliances are very trendy in the residential kitchen market. But as with any add-on it might not look quite right if it does not fit in with your kitchen's theme. For example, it fits right in with a shiny kitchen faucet.
But, if you want it, a stainless steel backsplash is easy to install. If you don’t have the equipment to cut a sheet to the proper size, have a machine shop cut it, and bend it if needed, and then apply it the same way as stated for Formica above.
Granite: Popular Elegance
Another popular counter top and backsplash material is granite or other natural stones. The benefits are its durability and elegance. It will instantly raise the equity in your property. But the downside is its high cost and even though a DIYer can install it, all cutting must be subbed out to a stone mason.
One advantage of a granite counter top is that it is available in a mind-boggling array of colors and patterns so making a match with the rest of your kitchen decor or theme is a snap! You will have to clean and seal it on a regular basis.
Engineered Stone Backsplash
Engineered stone is much like granite with a notable advantage -- it doesn't need to be sealed. This not only speeds up installation but it eliminates that pesky chore on an on-going basis. There are many brand names and some of them are even Kosher. The fact that the material is ground-up stone, glass, and other aggregates bonded together with a resin makes it more heat-resistant and keeps the cost down.
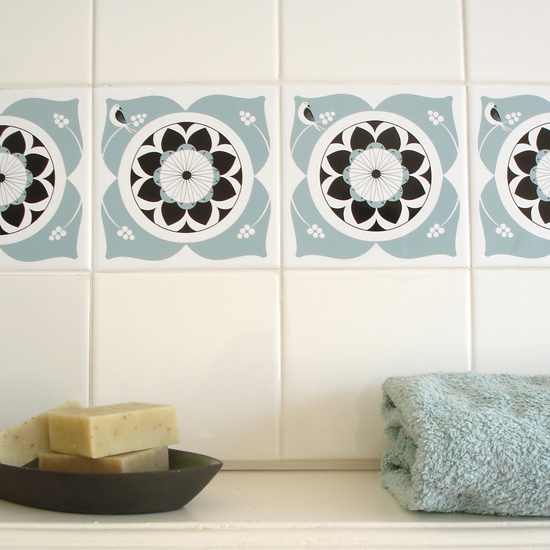
An Alternative Backsplash Choice is Ceramic Tile
A very stylish and economical type of backsplash material is tile, either glazed or glass. Tile is very reasonably priced plus it's simple to apply. If you are looking for an ideal weekend DIY project, this is it.
The smooth glazed surface of the tile ensures that it’s a breeze to clean as well as disinfect; a strong plus in your food prep area. Installing tile isn’t hard; a 3 on a scale of 1 to 10. The tile is installed the first day and then it’s grouted on the second.
Color Coordinating with Ceramic Tile
A huge plus for tile is the incredible array of sizes and colors. Consider the possibilities: a solid color, a mosaic tile pattern, or a color combination.
To ensure that the colors or pattern you like fit in with your kitchen’s look, purchase several pieces, take them to your kitchen, and give them a try. Also, you might want to get creative by mixing in theme tiles that are embossed with farm or fruit pictures.
A newer alternative to get that custom look with tile is to apply tile tattoos. These are stickers made especially for dressing up ceramic tile.
How to Install a Tile Backsplash
When installing glass tile, use thinset to bond it to your wall. When installing glazed tile, use a special tile mastic. Always place plastic tile spacers between the individual tiles when you are setting them. Just remove them after the mastic or thinset is dry before you grout.
When you cut tile be sure to use a wet saw. You can probably find a rental at your local tool rental outlet. Don’t bother with score and snap tools because you won’t get satisfactory results. At least that has been my experience.
Next Step: Grout Tyle Tile
Applying grout to your backsplash is simple. All that’s needed is a float, a sponge, and a bucket of water. Choose a grout color that looks right with the colors of the tile. Remember that the lighter colors show dirt more readily.
Finally, Use a Grout Sealer
You can now buy grout that has a sealer built in. This is a good route to take. If not, wait until the grout cures and seal it as the final step. This is a personal decision.
When the grout is cured and ready to seal, go to a tile store, not a home improvement store, to buy your grout sealer. That way you’ll have access to to good stuff that the pros use.
Well, this info is a good start on choosing and installing a kitchen backsplash. There are other options of course, but these are some of the most popular home renovation trends in 2020.
Did you find this article helpful? Thanks for supporting this free site with a small donation! We rely on our readers rather than a paywall to keep the lights on.
About the Author:
Kelly R. Smith was a commercial carpenter for 20 years before returning to night school at the University of Houston where he earned a Bachelor’s Degree in Computer Science. After working at NASA for a few years, he went on to develop software for the transportation and financial and energy trading industries. He has been writing, in one capacity or another, since he could hold a pencil. As a freelance writer now, he specializes in producing articles and blog content for a variety of clients. His personal blog is at I Can Fix Up My Home Blog where he muses on many different topics.


 Kelly R. Smith was a commercial carpenter for 20 years before returning to night school at the University of Houston where he earned a Bachelor’s Degree in Computer Science. After working at NASA for a few years, he went on to develop software for the transportation and financial and energy trading industries. He has been writing, in one capacity or another, since he could hold a pencil. As a freelance writer now, he specializes in producing articles and blog content for a variety of clients. His personal blog is at
