Carpentry Joinery for Strength and Aesthetic Appeal
|
Ads we feature have been independently selected and reviewed. If you make a purchase using the links included, we may earn a commission, which helps support the site. Thank you for your support.
There are many types of woodworking joints to choose from. Which to use on your current carpentry project? In my opinion, there are three main considerations.
- Joint strength is the most important. Some things you build will be more subject to wear and tear than others.
- Do you have the right shop tools and skills? Some joints, like the dovetail joint, can be made with a jig or with hand tools. Skills? You can always learn them.
- Aesthetics, or the beauty of a particular joint should be considered after you have satisfied the first to points.
Types of Woodworking Joints
- Pocket Hole Joinery. This is basically a butt joint with pocket hole screws.; it’s very popular for furniture building and repair. Two drilling steps are called for. First, counterbore the pocket hole itself. This is where the screw head is contained. Second, drill a pilot hole so the centerline is the same as the pocket hole. This allows the screw to go through one piece and into the adjoining piece. You use two different sized drill bits for this operation in most cases although step-bits are sometimes used. Kreg is the most popular brand of jig for this joint.
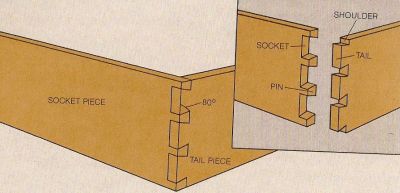
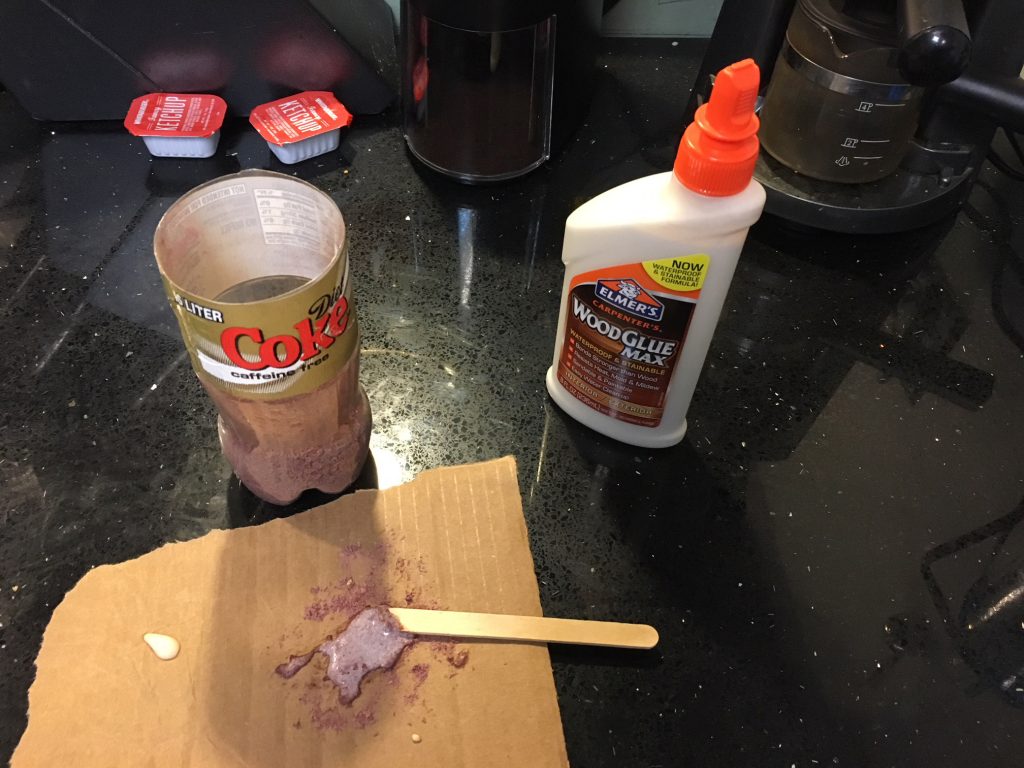
- Dovetail Joint. This is a very strong woodworking joint. It’s known for tensile strength (resistance from pulling apart). The woodworking dovetail joint is often used to connect the sides of a drawer to the front. A number of pins are cut to extend from the end of one board and lock with a number of tails cut into the end of another board. These pins tails have a trapezoidal shape and can be cut by hand or with a jig. I use a Porter Cable dovetail jig. Once glued up, your joint is permanent without any mechanical fasteners. See the video below where I show you how to make glue that matches your project wood perfectly.
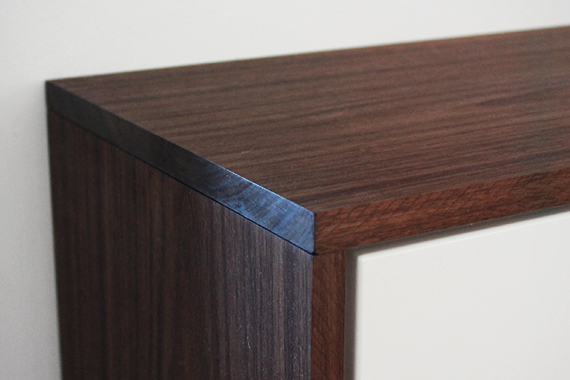
- Butt Joint. The Butt Joint is a simple woodworking joint. It joins two pieces of stock by just butting them together. The butt joint is the simplest joint to make so in that respect it might be the correct choice if you don’t have many tools at your disposal. It is also the weakest wood joint unless you use some form of reinforcement (like dowels, which can add a decorative touch). Otherwise, it depends upon glue alone to hold it together. Because of the orientation of the pieces, you have an end grain to long grain gluing surface. The resulting wood joint is weak, as you might expect because glue alone doesn’t provide much lateral strength.
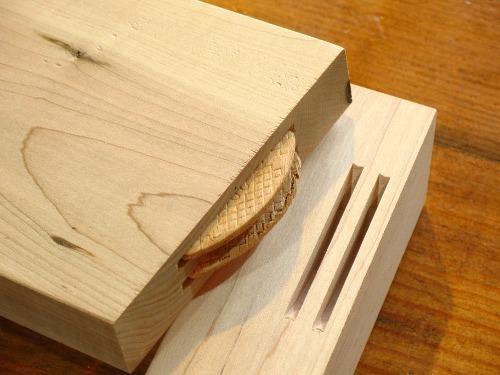
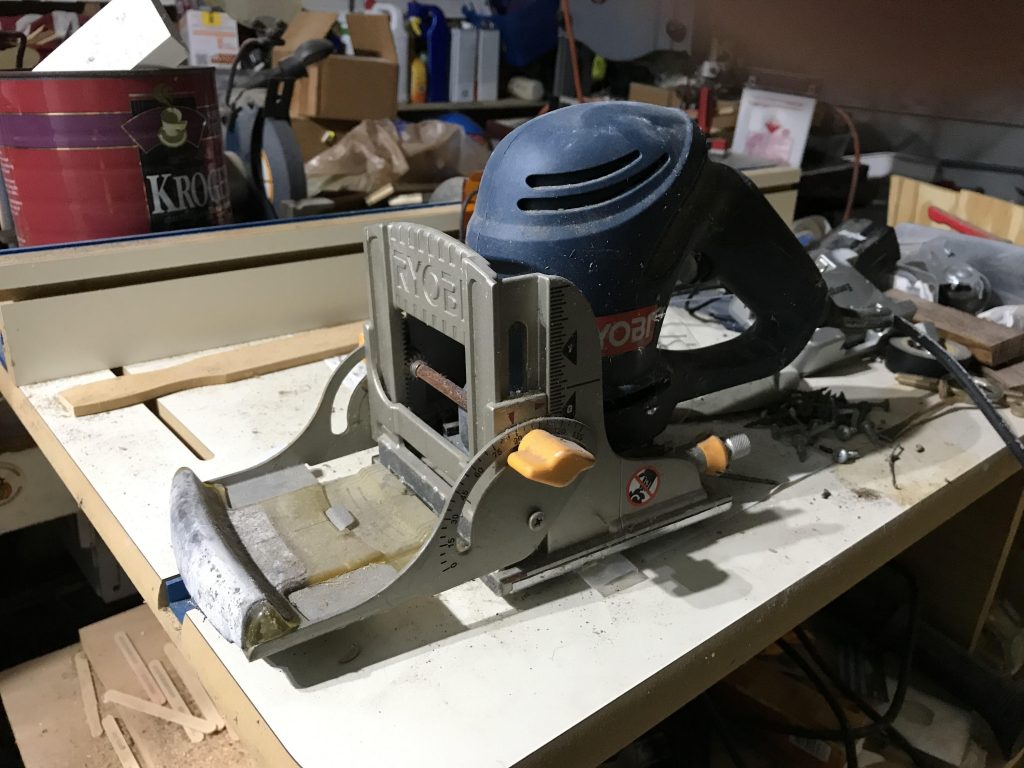
- Biscuit Joint. A biscuit joint is nothing more than a reinforced Butt joint. The biscuit is an oval-shaped piece. Typically, a biscuit is made of dried and compressed wood, such as beech. You install it in matching mortises in both pieces of the wood joint. Most people use a biscuit joiner to make the mortises. Accuracy is important for the mortises. You design the biscuit joint to allow flexibility in glue-up.
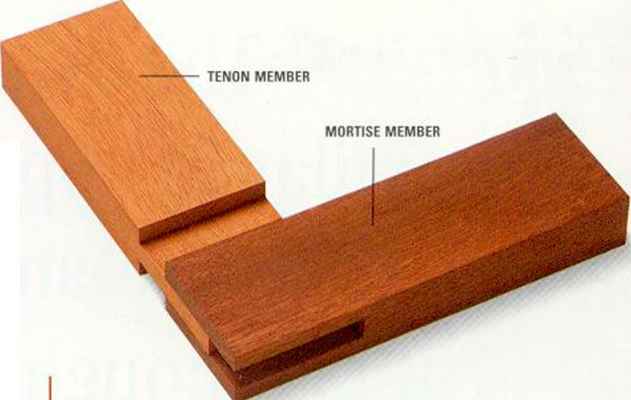
- Bridle Joint. This is similar to a mortise and tenon; just cut a tenon on the end of one piece and a mortise into the other piece to receive it. Cut the tenon and the mortise to the full width of the tenon piece. The result is only three gluing surfaces so it is imperative to use a very high-quality woodworking glue. A mechanical fastener or some sort of through-pin is required.
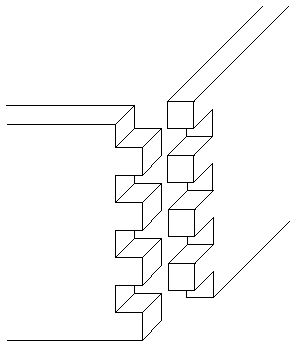
- Finger or Box Joint. This one is much like a dovetail joint except that the pins are square and not angled. It is easy to make if you know how to use a table saw or a wood router with a jig. The Porter Cable 4216 12″ Deluxe Dovetail Jig Combination Kit comes with a box joint template. This finger/box joint was invented as a better way to construct simple boxes for produce from field to market. That, my friends, is capitalist ingenuity in action.
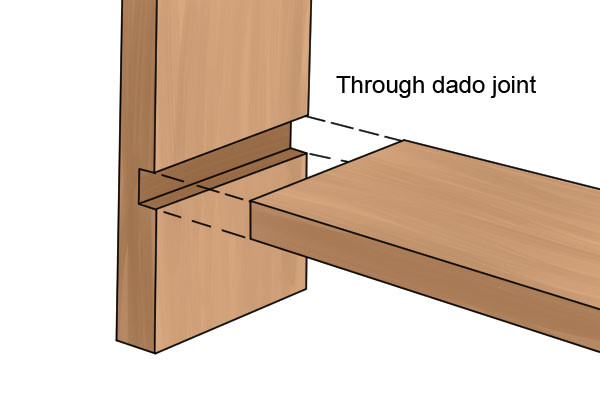
- Dado Joint. OK, funny name but a dado is simply a slot cut into the surface of a piece of wood. When seen in a cross-section, the dado has three distinct sides. Cut a dado perpendicular to the grain of the wood. Technically, it’s different from a groove, which is cut parallel to the grain. This joint is a good choice for bookcase shelves.
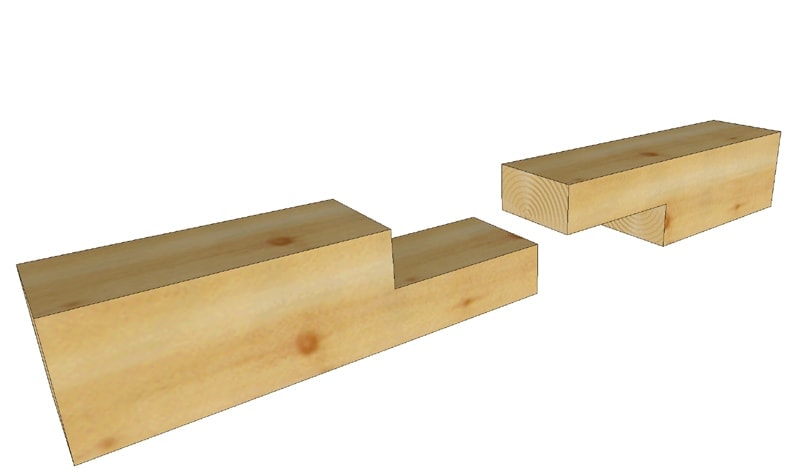
- Half Lap Joint. With the half lap joint, remove material from each piece such that the finished joint results in the thickness of the thickest piece. But in the majority of half lap joints, both pieces are of the same thickness. Just remove half the thickness of each piece.
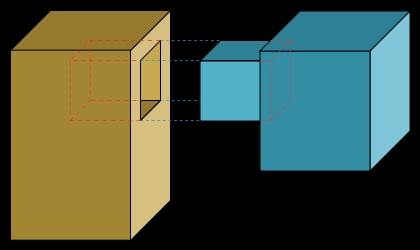
- Mortise and Tenon Joint. This is a very strong woodworking joint. In the majority of situations its used to join two pieces at a 90° angle. One end of a piece fits into a square hole in the other piece. The end of the first piece is the tenon; the hole in the second piece is the mortise. The tenon is glued in but if you require additional strength, you can also pin it. This is sometimes done for decorative reasons. It is a generally accepted practice to make the tenon about a 1/3 the thickness of the piece. The mortise can be cut by removing as much wood as possible with a plunge router then cleaning up the edges with a chisel.

- Rabbet Joint. This a recess that’s cut into the edge of a board. Seen in a cross-section, the rabbet is two-sided and open to the end of the surface. It can be used in the back edge of a cabinet to allow the back to fit flush with the sides. It can also be used to insertion of a glass pane in a picture frame.
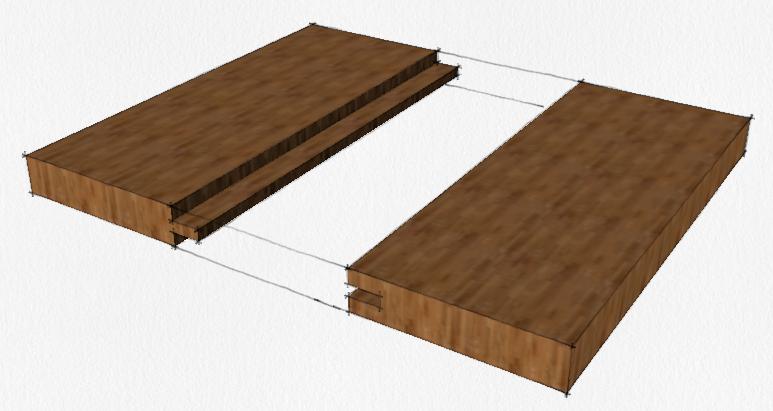
- Tongue and Groove Joint. This is another very strong joint because of all the open grain on both pieces of wood. It’s used in many applications. For example, to make wide tabletops out of solid wood. Other uses include wood flooring, parquetry, paneling, etc. You can cut the tongue and groove in a number of ways. An effective way to make this joint is on a router table.
Knowing these 11 types of woodworking joints, you’ll most likely find one or more to fit the needs of your woodworking project.
Related Content
- Top 10 Woodworking Tips for Projects
- Choose the Right Saw for Your DIY Projects
- Ryobi 18V ONE+ Power Tools Review
- Kreg K4 Pocket Hole Jig Tool Review
- How to Cut a Tight Dovetail Joint
- Tips for Glue-Up on Woodworking Projects
- Biscuit Joiner; Why You Need One for Woodworking
- Wood Joinery with a Finger or Box Joint
- Choose the Right Type of Woodworking Glue
- How to Install a Hardwood Floor
Looking for more great content? Visit our main page or partner sites:
I offer article and blog-writing services. Interested? Contact me for a quote!
Did you find this article helpful? Millions of readers rely on information on this blog and our main site to stay informed and find meaningful solutions. Please chip in as little as $3 to keep this site free for all.


 Kelly R. Smith is an Air Force veteran and was a commercial carpenter for 20 years before returning to night school at the University of Houston where he earned a Bachelor’s Degree in Computer Science. After working at NASA for a few years, he went on to develop software for the transportation, financial, and energy-trading industries. He has been writing, in one capacity or another, since he could hold a pencil. As a freelance writer now, he specializes in producing articles and blog content for a variety of clients. His personal blog is at