Easy Homemade Mac and Cheese Recipe

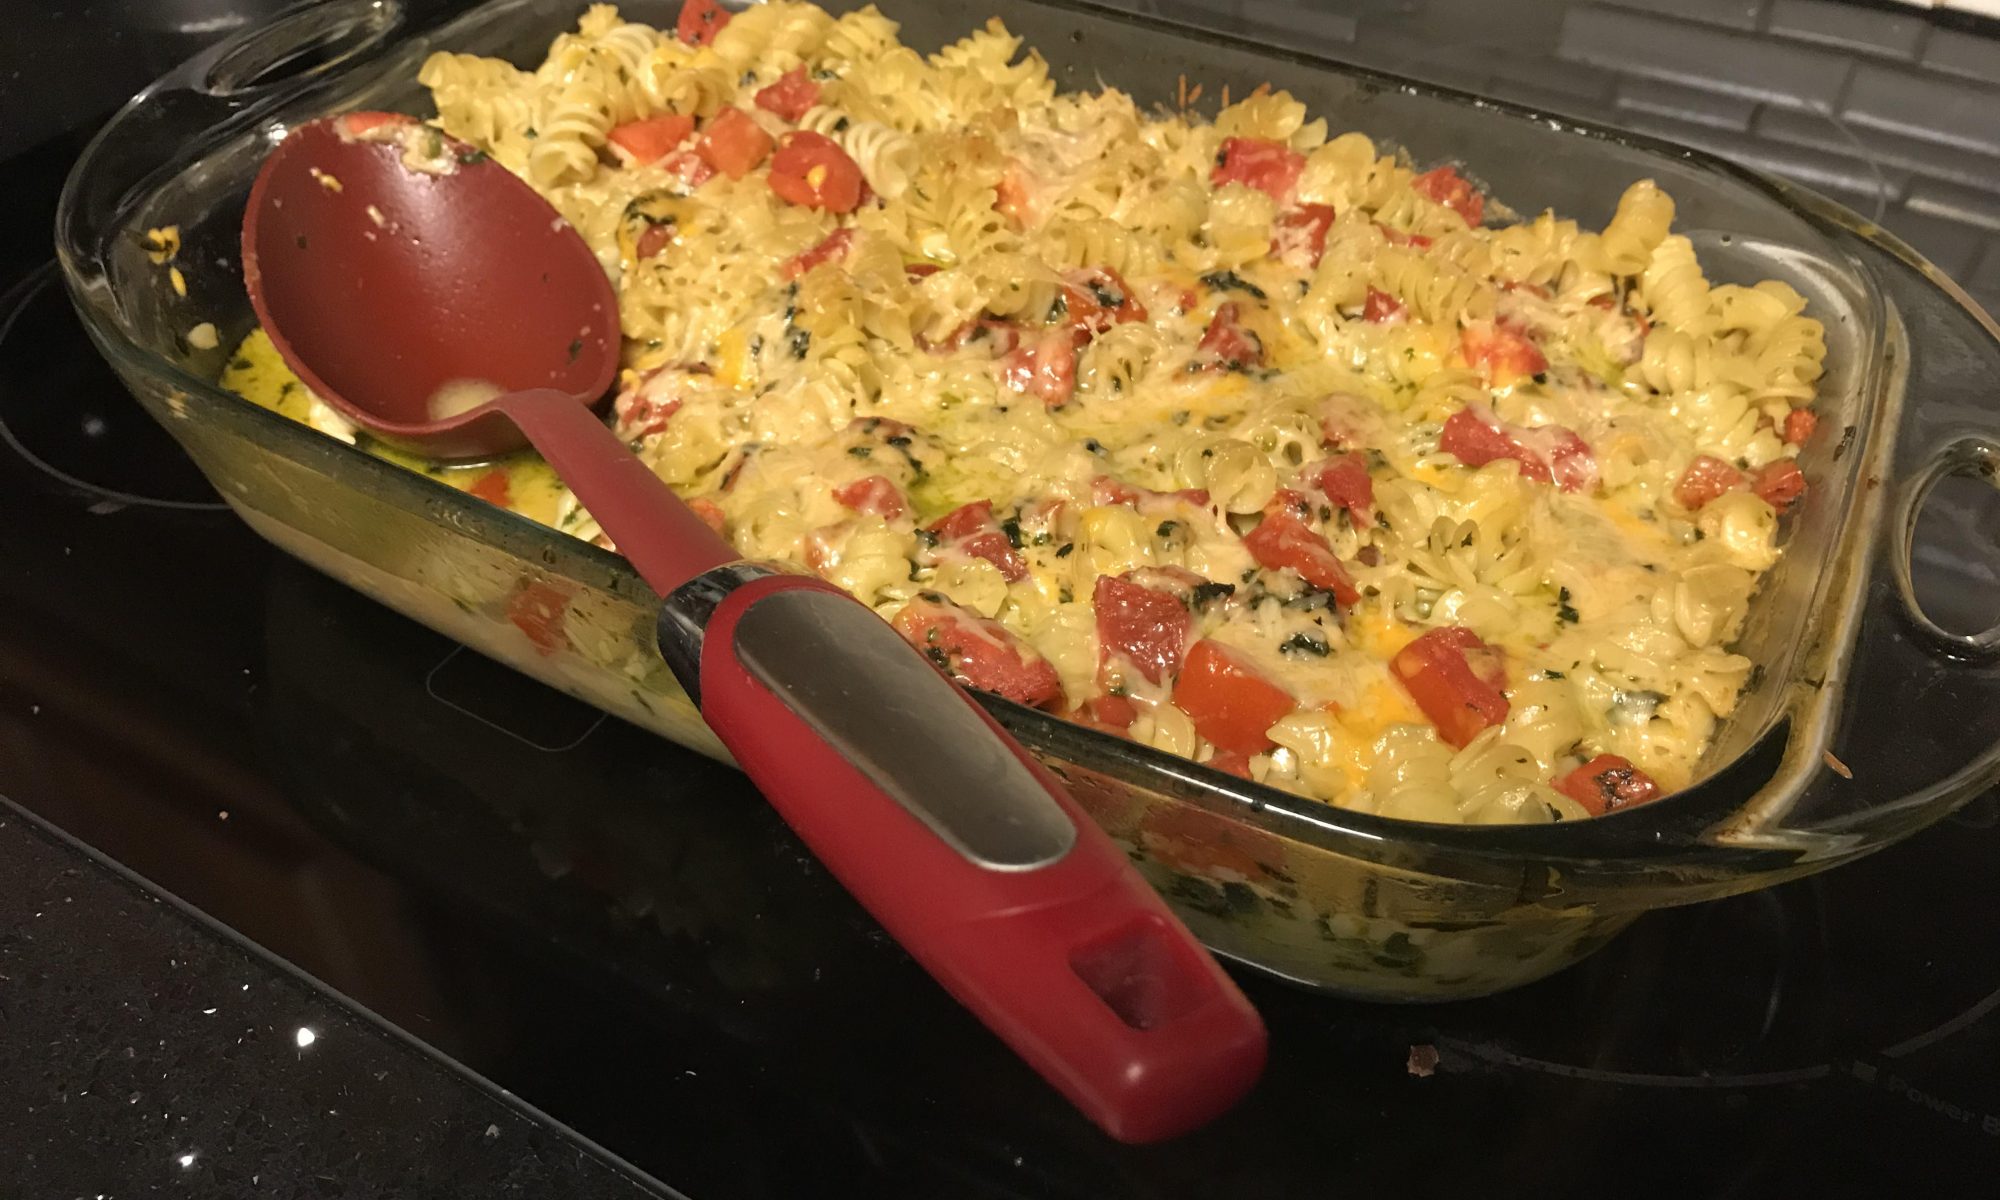
Homemade Mac and Cheese

Traditional Comfort Food Your Kids Will Eat And Beg For More
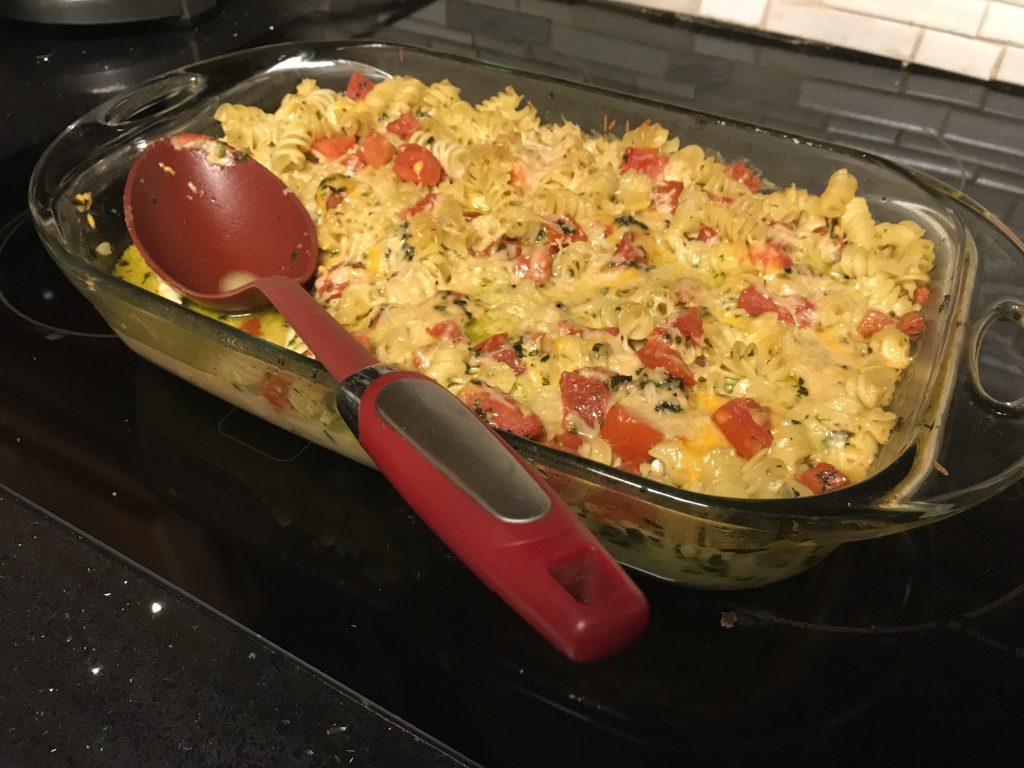
Photo of Kelly R. Smith   by Kelly R. Smith; © 2022

Homemade mac and cheese comfort food
index sitemap advanced

Ads we feature have been independently selected and reviewed. If you make a purchase using the links included, we may earn commission, which helps support the site.

This article was updated on 04/03/22.

This Homemade mac and cheese is one of the favorite comfort foods in our humble abode, right up there with my ranch dressing cheeseburger. Even picky kids love it so you can slip in some vegetables if you like (hint, hint). It takes a little longer to make than that boxed stuff, but you have to ask, what is that yellow powder anyway? Soylent yellow? As with all recipes, I use as much organic ingredients as possible, and out of my own garden when possible.

Mac and Cheese Ingredients

  • 1 lb. rigatoni or the pasta shape of your choice. I like the whole wheat variety but hey, you’ve got to get the kids to eat it, right?
  • Organic butter for your baking dish
  • 2 cups Half-and-Half
  • 1/2 lb. mozzarella cheese cut into 1/2” squares or shredded
  • Kosher or pink Himalayan salt to taste
  • Freshly-ground pepper to taste
  • 2 cups of grated Parmigiano-Reggiano cheese if you can find it + a hand-full; I sometimes substitute shredded Swiss for the Reggiano
  • 7 Roma tomatoes, diced
  • 35 organic basil leaves, cut into strips, more or less according to your taste. This is just one more reason to keep an organic spice garden. If you don’t have, or can’t find, fresh basil, use basil paste.
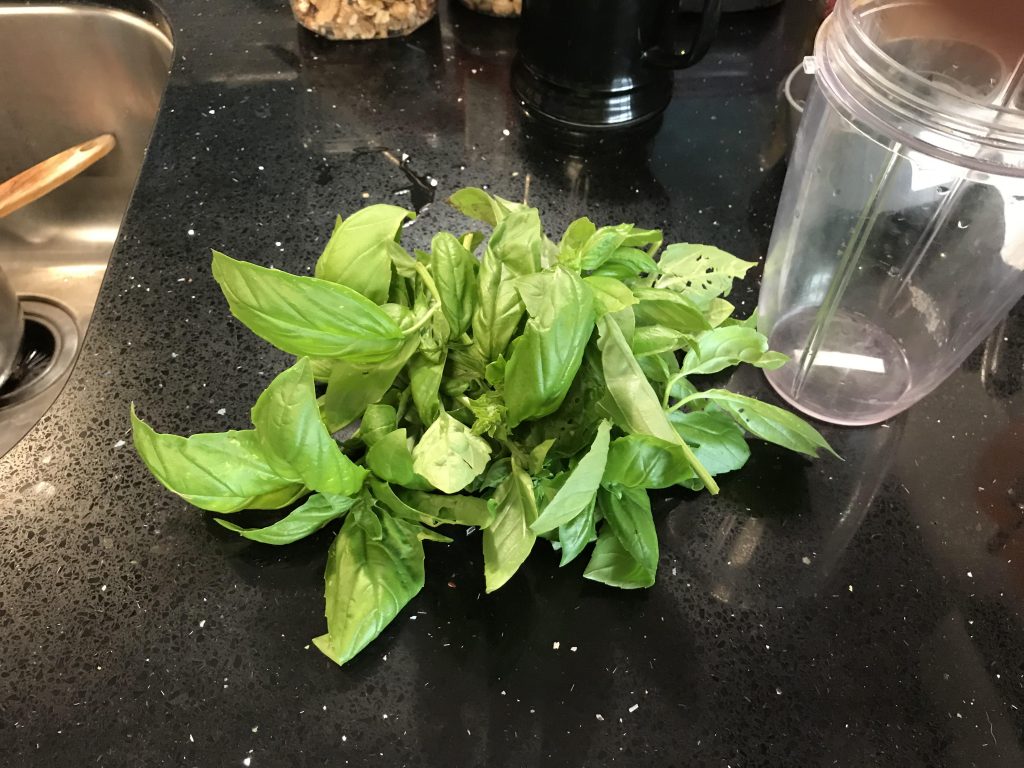
Fresh organic basil leaves


Preparation

  1. Cook your pasta to al dente texture.
  2. Preheat your oven to 375 degrees.
  3. Drain your pasta and rub organic butter liberally in a 9” X 13” Pyrex® baking dish and add the pasta.
  4. In a saucepan, combine the mozzarella, 2 cups of Parmigiano-Reggiano, and Half-and-Half.
  5. Simmer, stirring often, until it’s a nice gooey mess!
  6. Add the salt and pepper to taste. Salt with caution if you have high blood pressure.
  7. Turn off the heat; stir in the tomatoes and basil.
  8. Pour the mixture all over the pasta and mix it in.
  9. Top with the hand-full of Parmigiano-Reggiano.
  10. Bake for 18 minutes, spoon it out, and enjoy!.


One of the things I like about this recipe is the fact that there a multitude of different ways to modify your ingredients, depending on the whims of you and your family. For example, how about changing up your cheese? Adding blue cheese will give the dish a funky edge that goes well with a red wine. The shape of the pasta? Adding in your favorite spices? It’s your call with this easy homemade mac and cheese recipe.

More Recipes and Cooking Articles to Try


Did you find this article helpful? Millions of readers rely on information on this blog and our main site to stay informed and find meaningful solutions. Please chip in as little as $3 to keep this site free for all.


Visit Kelly’s profile on Pinterest.

About the Author:

Photo of Kelly R. SmithKelly R. Smith is an Air Force veteran and was a commercial carpenter for 20 years before returning to night school at the University of Houston where he earned a Bachelor’s Degree in Computer Science. After working at NASA for a few years, he went on to develop software for the transportation, financial, and energy-trading industries. He has been writing, in one capacity or another, since he could hold a pencil. As a freelance writer now, he specializes in producing articles and blog content for a variety of clients. His personal blog is at I Can Fix Up My Home Blog where he muses on many different topics.

Ranch Dressing Cheeseburger Recipe

by Kelly R. Smith

index sitemap advanced
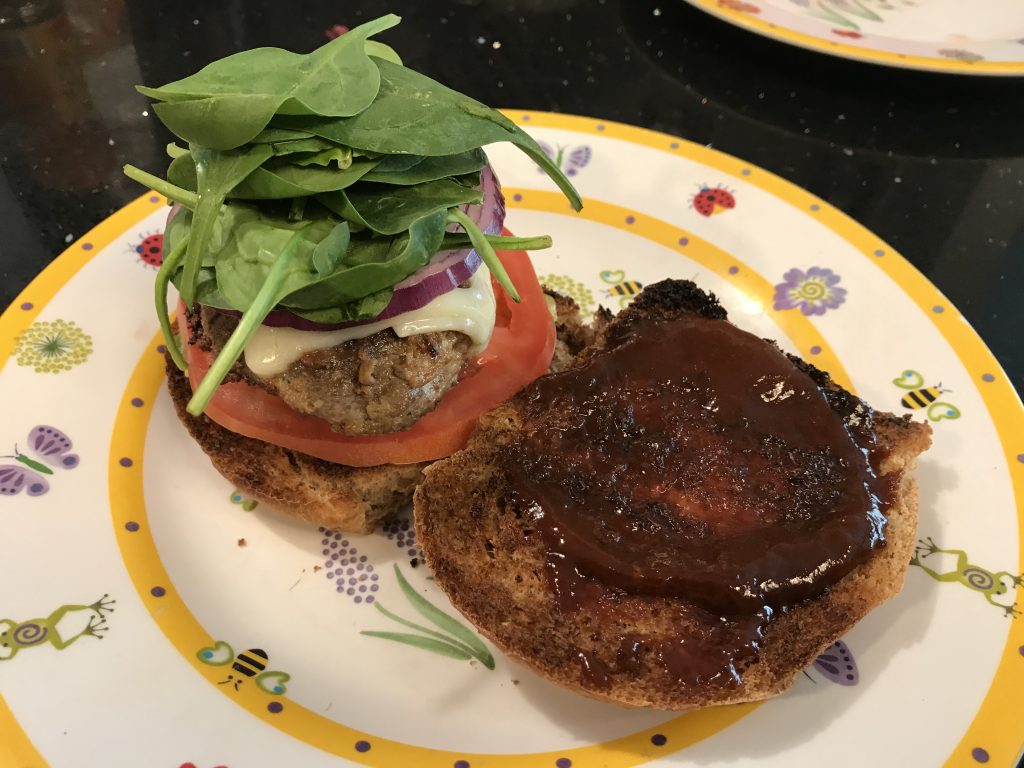
Ranch dressing chesse burger

Ads we feature have been independently selected and reviewed. If you make a purchase using the links included, we may earn commission, which helps support the site.

This recipe was updated on 12/29/20.

In our home the ranch dressing cheeseburger is the go-to sandwich when the mood hits for comfort food a la Americana. This recipe is just my humble twist on the old classic hamburger. The beauty of this dish is that the range of condiments and fixings is endless. As always, use organic ingredients whenever possible. Read on.

Ingredients

  • 1 pound ground beef. Or, ground bison if you’ve got deep pockets.
  • Buns; I prefer whole wheat.
  • Vegetables of your choice. In the photo above I used red onion, tomato, spinach, and a slathering of avocado on the bun that’s covered up.
  • Condiments of choice. That’s barbecue sauce you see in the photo. She-Who-Must-Be-Obeyed says it looks like burnt bun. Belay that misconception!
  • Cheese of choice. Mine was Swiss, hers was jalapeno jack.
  • 1 packet of ranch dressing powder. I suppose Hidden Valley is the standard but in my experience, the Kroger brand is the same thing for half the price. Dollars to donuts that it all comes out of the same factory.
  • 2 eggs
  • Salt and pepper to taste

Preparation

  1. Put the meat in a mixing bowl and crack the eggs into it. The reason for 2 eggs rather than one or none is that the ranch dressing powder will make the patties crumbly when you go to flip them. The eggs prevent that. Besides, who couldn’t use more vitamins and minerals? Just say no to nutrient deficiency.
  2. Open the packed of dressing powder and set aside within reach.
  3. Mix the meat and eggs well with your (washed) hands.
  4. Mix in the powder. Your hands are slippery by now; that’s the reason for pre-opening the packet.
  5. Form the patties. I like to make 1/3 lb. patties rather than 1/4 lb.
  6. Cook the patties in your preferred method, skillet, outdoor or countertop barbecue grill, or otherwise.
  7. Assemble your burgers and enjoy!


That’s all there is to my take on the ranch dressing cheeseburger recipe. I hope you like it. Here are a few more of my creations; I only post those that have been spouse-approved so no worries! Share with your friends.

Looking for more great content? Visit our main site I Can Fix Up My Home or our partner sites:

The Green Frugal

Running Across Texas


As Featured On Ezine Articles

I offer article and blog-writing services. Interested? Contact me for a quote!


Did you find this article helpful? Thanks for supporting this free site with a small donation! We don’t like paywalls either so we depend on our readers to keep the lights on. Support independent journalism.


Visit Kelly’s profile on Pinterest.

About the Author:

Photo of Kelly R. SmithKelly R. Smith is an Air Force veteran and was a commercial carpenter for 20 years before returning to night school at the University of Houston where he earned a Bachelor’s Degree in Computer Science. After working at NASA for a few years, he went on to develop software for the transportation, financial, and energy-trading industries. He has been writing, in one capacity or another, since he could hold a pencil. As a freelance writer now, he specializes in producing articles and blog content for a variety of clients. His personal blog is at I Can Fix Up My Home Blog where he muses on many different topics.

Shepherd’s Pie Skillet Recipe

This is a New Take on Comfort Food Pub Grub; Economical and Easy to Prepare.

Photo of Kelly R. Smith   by Kelly R. Smith

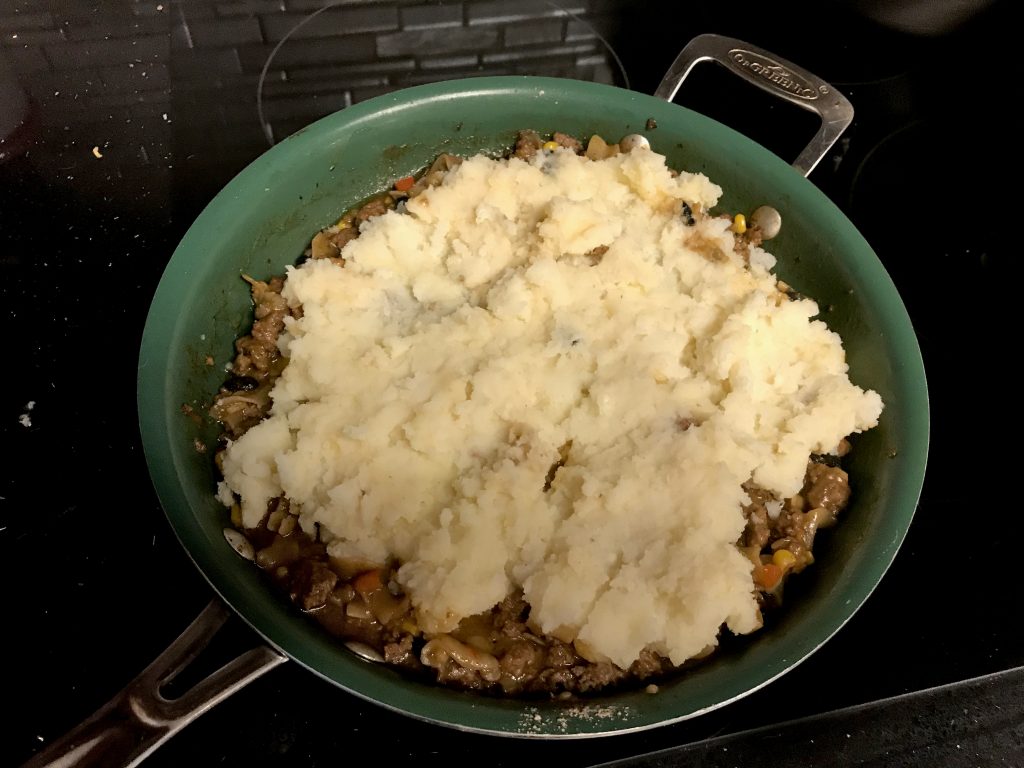
Shepherd's pie skillet style
Shepherd’s pie skillet style
index sitemap advanced

This article was updated on 10/01/2021.

Ads we feature have been independently selected and reviewed. If you make a purchase using the links included, we may earn a commission, which helps support the site. Thank you for your support.

The weather is starting to cool off and that means two things — it is time for a flu shot and comfort food is the order of the day. This recipe for shepherd’s pie fills the bill nicely. Easy, frugal meals are just what we need as we spend more time at home because of the COVID-19 pandemic or inclement weather. One good thing about this meal is its flexibility. There is any number of substitutions and additions you can make. Customize your vegetables or add hot peppers So, let’s get started.

Shepherd’s Pie Ingredients

  • 1 pound ground beef
  • 1 box Beef Pasta Hamburger Helper (or the flavor of your choice); tonight I’m going to use the “cheesy enchilda” flavor.
  • Hot water/milk called for on Hamburger Helper box
  • 1 1/2 cups frozen mixed vegetables, thawed
  • Hungry Jack mashed potatoes for 6 servings
  • Water and butter called for on mashed potatoes box for 6 servings
  • 1/2 cup shredded Cheddar cheese
  • Chopped parsley (amount to taste)

Preparation Steps

  1. Using a 10-inch skillet, cook beef over medium-high heat for 5 – 7 minutes, stirring often, until brown. Drain the grease. Stir in hot water, milk, sauce mix, uncooked pasta (from the Hamburger Helper box), and thawed vegetables. Heat to boiling, stirring frequently.
  2. Reduce the heat. Cover and simmer about 10 minutes, stirring frequently, until the pasta and vegetables are tender. As you do this, make the mashed potatoes as directed on box for 6 servings. Remove the skillet from heat.
  3. Spoon and gently spread mashed potatoes over the pasta mixture. Sprinkle with the cheese. Cover; let stand about 5 minutes or until cheese is melted. Sprinkle with parsley and serve.

That’s all there is to the shepherd’s pie skillet recipe. You can substitute a different type of cheese, type of Hamburger Helper, and add additional spices. It’s all good.

Got a blog or website? Want more revenue? Monetize it!

More Recipes From My Kitchen and Garden


Looking for more great content? Visit our main page or partner sites:

I Can Fix Up My Home

The Green Frugal

Running Across Texas


As Featured On Ezine Articles

I offer article and blog-writing services. Interested? Contact me for a quote!


Did you find this article helpful? Millions of readers rely on information on this blog and our main site to stay informed and find meaningful solutions. Please chip in as little as $3 to keep this site free for all.


Visit Kelly’s profile on Pinterest.

About the Author:

Photo of Kelly R. SmithKelly R. Smith is an Air Force veteran and was a commercial carpenter for 20 years before returning to night school at the University of Houston where he earned a Bachelor’s Degree in Computer Science. After working at NASA for a few years, he went on to develop software for the transportation, financial, and energy-trading industries. He has been writing, in one capacity or another, since he could hold a pencil. As a freelance writer now, he specializes in producing articles and blog content for a variety of clients. His personal blog is at Considered Opinions Blog where he muses on many different topics.

Teriyaki Beef Jerky Recipe

by Kelly R. Smith

index sitemap advanced
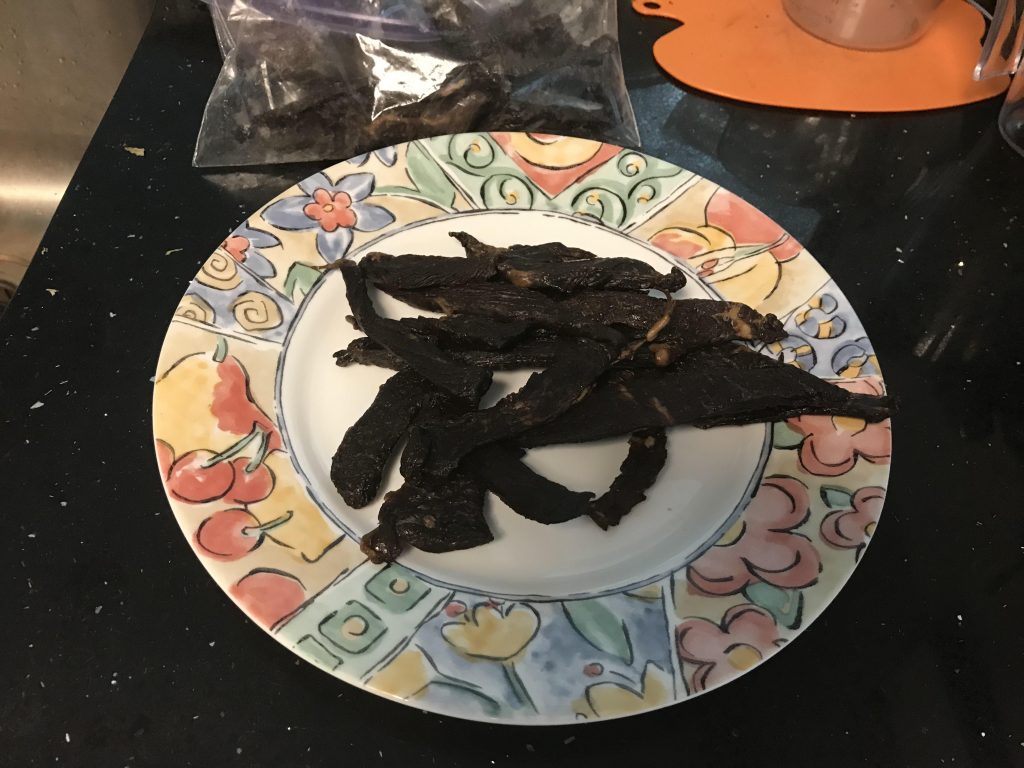
Beef jerky, ready to eat

I love beef jerky and I suspect that I am not alone in that respect. But, there are three issues that I have with the commercial variety:

  • It’s too expensive.
  • The texture tends to be to hard.
  • God only knows what kind of chemicals and preservatives are used.

And that is one reason why I invested in a food dehydrator. Now I can make my own marinades and control the texture. I made a batch yesterday so my new appliance is paying for itself already. Next, I’m going to run a batch of apples. But here is the simple jerky recipe.

Beef Jerky Ingredients

  • 1 3/4 pounds of thin round sirloin tip. Any lean cut will do. Organic grass-fed is preferable. If you’ve got deep pockets, substitute bison. I know my sister will. That woman knows her food.
  • 1 12 oz. bottle of Lawry’s Teriyaki with Pineapple juice.
  • Spices to taste. I did not add salt due to my high blood pressure.

Jerky Preparation

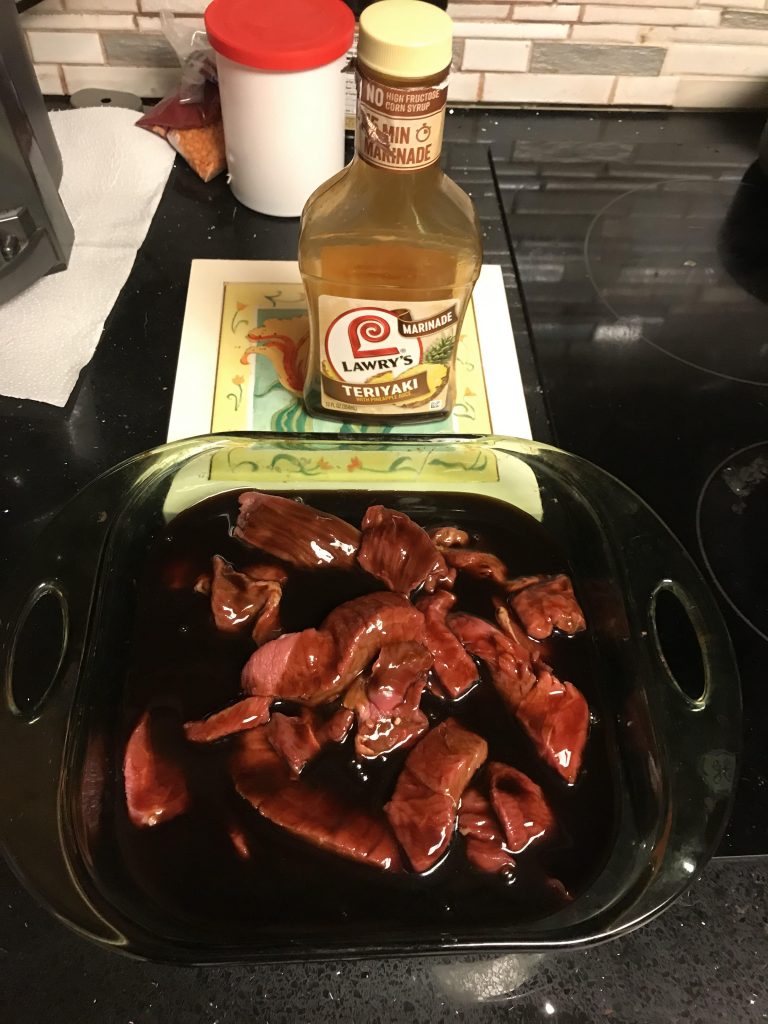
Marinating beef for jerky
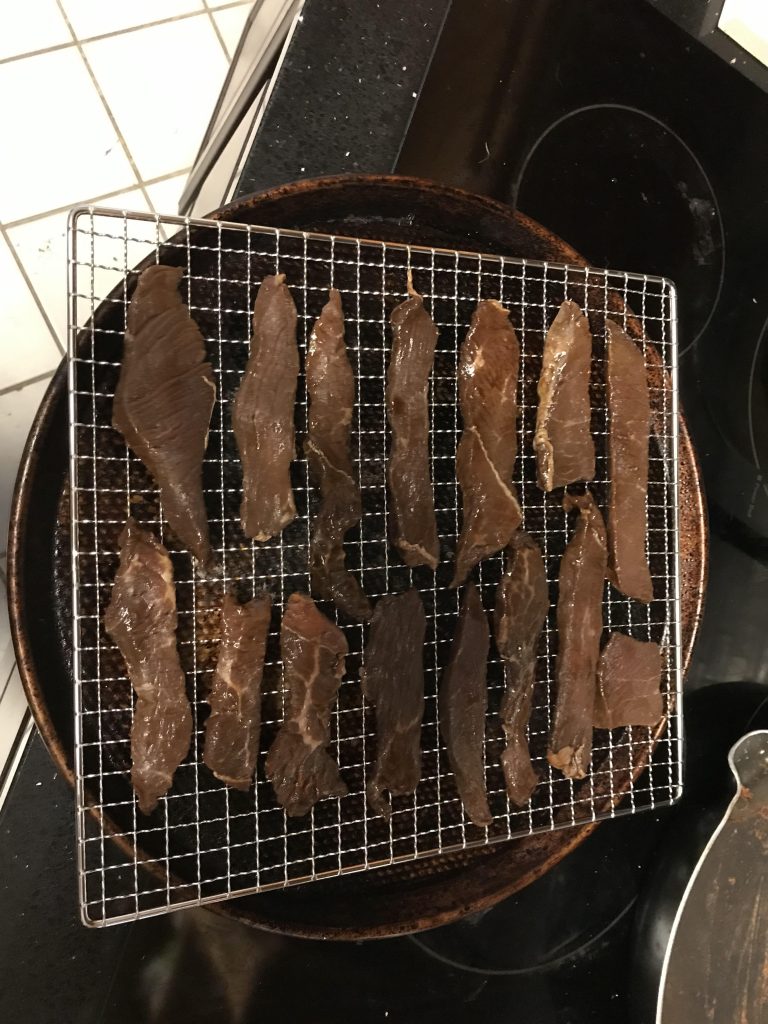
  • Slice the meat thin. I prefer about 1/4″. Remember that the meat will shrink as it cooks. As for length, about 6″ is what I like but take into account the geometry and size of your food dehydrator. You will likely end up with some irregular pieces, but that’s OK; it’s jerky after all.
  • Put the slices in a container. The Pyrex dish you see above worked well.
  • Pour the marinade over the beef and mix it up well to ensure a thorough coating.
  • Put in in the refrigerator overnight. Some recipes only call for a few hours but the way I see it, I’m already in it this far. Do it up good. I know Perry’s smokes their famous pork chops for several days. If you’ve had one you know that patience is a good habit.
  • Stir it all up every few hours. I get up sporadically during the night for a bodacious swallow of ice water so no problemo, friend.
  • Pat the slices on paper towels to remove excess marinade.
  • Arrange slices on your dehydrator trays. Allow space for air circulation.
  • Set the temperature for 160 degrees F.
  • Set the timer for 4 hours.
  • Check it every so often for your desired degree of done-ness. Mine was perfection at 3 1/2 hours. Turn off the unit.
  • Leave it in the dehydrator until it cools.
  • Enjoy!
Beef jerky properly spaced on the dehydrator tray

That’s all there is making your own teriyaki beef jerky. Of course, any other marinade works just as well. Buy your favorite or make your own.

Other Recipes You will Enjoy (I Did)


Looking for more great content? Visit our partner sites:

The Green Frugal

Running Across Texas


As Featured On Ezine Articles

I offer article and blog-writing services. Interested? Hire Me!


Did you find this article helpful? Thanks for supporting this free site with a small donation! We depend on our readers rather than a bothersome paywall to keep the lights on here in the shop.


Visit Kelly’s profile on Pinterest.


About the Author:

Photo of Kelly R. SmithKelly R. Smith is an Air Force veteran and was a commercial carpenter for 20 years before returning to night school at the University of Houston where he earned a Bachelor’s Degree in Computer Science. After working at NASA for a few years, he went on to develop software for the transportation, financial, and energy-trading industries. He has been writing, in one capacity or another, since he could hold a pencil. As a freelance writer now, he specializes in producing articles and blog content for a variety of clients. His personal blog is at I Can Fix Up My Home Blog where he muses on many different topics.

Ivation 6-Tray Food Dehydrator: a Product Review

by Kelly R. Smith

index sitemap advanced
Ivation 6-tray stainless steel food dehydrator

There are many ways to cook and preserve food. In recent years the increasing number of homesteaders and preppers have made canning and dehydrating popular again. Processing food with a food dehydrator is great for storing food in the home and keeping the nutritional value while reducing weight for campers, hikers, or just going on a road trip with family and friends.

I was motivated to buy the Ivation 6-tray dehydrator pictured above, I won’t lie, because I love beef jerky. Well, to be honest, my daughter is crazy for the jerky from Buc-ee’s. So I called her and asked, “What flavor?” She said, “Teriyaki beef jerky.” So I shopped. There are many out there but led me to choose this one was size, materials, and the fact that it’s commercial-grade. In for a dime, in for a dollar, I always say.

By the way, if you were wondering when looking at the picture above, the dehydrator is set up on one of the work benches in my wood shop. No sense in heating up the kitchen during the Texas summer.

Features of the Ivation Dehydrator

  • Six trays. These trays measure 13” X 12”. Plenty of room for processing an assortment of food.
  • Rear-mounted automatic fan. The fan circulates warm air with 600W of heating power. This ensures that the food is evenly dried from all angles.
  • Easy to clean. The 6 stainless steel trays as well as the drip tray are all removable. Just slide them out and wash as you would anything else in your kitchen.
  • Stainless steel body and trays. All parts are BPA-free, this means they are safe and durable.
  • Digital temperature and timer. The temperature range is 95ºF to 167ºF. You can set the timer to automatically shut off your unit at the time you specify. Set it in 30-minute increments for up to 24 hours.

Conclusion

Despite the fact that this Ivation 6-tray food dehydrator is a commercial-grade appliance, it is very easy to use; the controls are simple, it is easy to clean, and the heavy-duty fan is properly placed to do its job evenly. I recommend it.


Looking for more great content? Visit our partner sites:

The Green Frugal

Running Across Texas


As Featured On Ezine Articles

I offer article and blog-writing services. Interested? Hire Me!


Did you find this article helpful? Thanks for supporting this free site with a small donation!


Visit Kelly’s profile on Pinterest.


About the Author:

Photo of Kelly R. SmithKelly R. Smith is an Air Force veteran and was a commercial carpenter for 20 years before returning to night school at the University of Houston where he earned a Bachelor’s Degree in Computer Science. After working at NASA for a few years, he went on to develop software for the transportation, financial, and energy-trading industries. He has been writing, in one capacity or another, since he could hold a pencil. As a freelance writer now, he specializes in producing articles and blog content for a variety of clients. His personal blog is at I Can Fix Up My Home Blog where he muses on many different topics.

Creamy Parmesan Basil Chicken Recipe

This Satisfying Dish is a Favorite Comfort Food. Easy to Make and Nutritious, Your Whole Family Will Love It!

Photo of Kelly R. Smith   by Kelly R. Smith

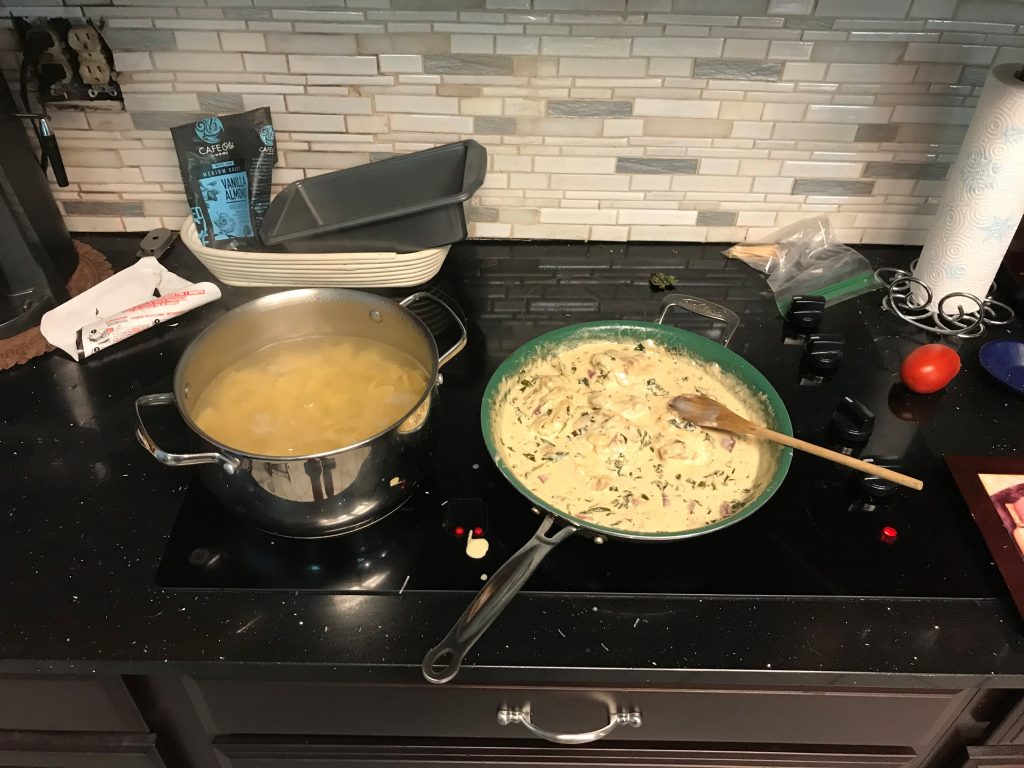
Creamy Parmesan Basil Chicken
Creamy Parmesan basil chicken being prepared
index sitemap advanced

Ads we feature have been independently selected and reviewed. If you make a purchase using the links included, we may earn commission, which helps support the site.

This article was updated on 03/26/21.

I made this tasty dish last weekend and it was a huge hit! All three of my basil plants are going gangbusters right now so if I’m not making pesto, spaghetti carbonara, or something else, I’m looking to be creative. I mention this because one of the keys to growing basil all season is to keep it trimmed back. If you let the flowers and seeds get out of hand you won’t be encouraging leaf growth.

This recipe is so easy and quick to make. I only spent about 45 minutes preparing it. It serves 4. Here’s how:

Creamy Parmesan Basil Chicken Ingredient List

  • 4 large chicken breasts (Whole, sliced in half, or cut into strips)
  • 1 box of pasta, your choice
  • 3 tablespoons butter (not margarine)
  • 4 large garlic cloves, minced
  • 1 1/2 cups heavy cream
  • 1/2 onion, finely minced (I prefer red onions but use what you like)
  • 3-4 ounces roasted red peppers, thinly sliced
  • black pepper to taste
  • salt to taste
  • 2 to 3 cups packed fresh basil leaves, cut up (quantity is a personal preference)
  • 1/4 teaspoon crushed red pepper flakes
  • 1 1/2 cups fresh grated Parmesan cheese
  • 1/2 cup white wine or chicken stock

Preparation

  • In a large non-stick pan on medium high heat, melt 2 tablespoons of the butter. Season chicken with salt and pepper, then sear, 4 to 5 minutes on each side, until just cooked. Remove the chicken from the pan and set aside.
  • Start the pasta cooking while continuing with the sauce; cook until al dente.
  • Add the remaining 1 tablespoon of butter to the pan. Toss in the onion, garlic, peppers, paprika, red chili pepper flakes, salt, and pepper. Saute for about five minutes, just until onions and peppers become soft.
  • Reduce heat to medium. Add wine or chicken stock to de-glaze the pan. Adjust heat as needed to bring to a gentle simmer until reduced by half.
  • Lower the heat to medium low. Add the cream to the pan. Stir it until a creamy sauce forms. Add in the Parmesan cheese and stir until it is melted into sauce. Stir in the basil and simmer until just wilted, 1-2 minutes.
  • Add the chicken back to the pan and allow to warm up. It’s done! Serve over the pasta.

You Might also Enjoy…

Looking for more great content? Visit our main site I Can Fix Up My Home and our partner sites:

The Green Frugal

Running Across Texas


As Featured On Ezine Articles

I offer article and blog-writing services. Interested? Hire Me!


Did you find this article helpful? Millions of readers rely on information on this blog and our main site to stay informed and find meaningful solutions. Please chip in as little as $3 to keep this site free for all.


Visit Kelly’s profile on Pinterest.

About the Author:

Photo of Kelly R. SmithKelly R. Smith is an Air Force veteran and was a commercial carpenter for 20 years before returning to night school at the University of Houston where he earned a Bachelor’s Degree in Computer Science. After working at NASA for a few years, he went on to develop software for the transportation, financial, and energy-trading industries. He has been writing, in one capacity or another, since he could hold a pencil. As a freelance writer now, he specializes in producing articles and blog content for a variety of clients. His personal blog is at I Can Fix Up My Home Blog where he muses on many different topics.

No-Fry Eggplant Parmesan Recipe

index sitemap advanced
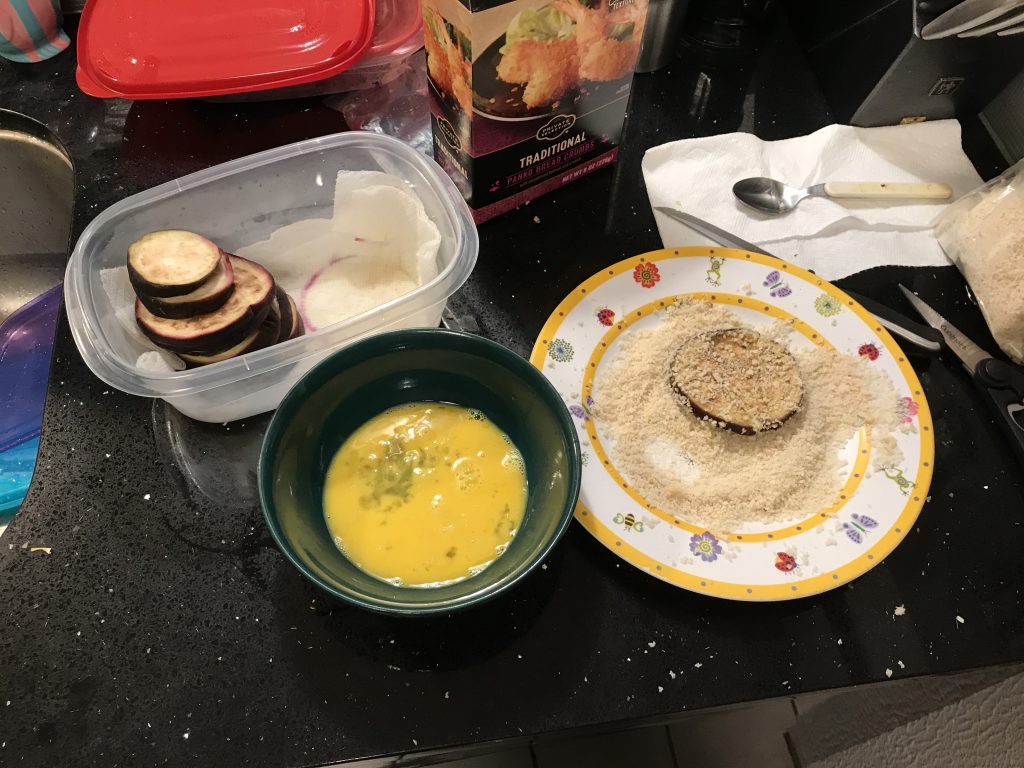
Breading Eggplant Parmesan

Although eggplant is often considered to be a vegetable, it is actually a berry by botanical definition. I know, I know; I don’t get it either. Health-wise, it’s got a lot going for it. According to naturalremediescenter.com, ” It is said that eggplant may have effects in preventing and treating high blood pressure, high blood sugar and high cholesterol. Eggplant is rich in phenols which may inhibit an enzyme tied to high blood pressure. Thus eggplant may do your body some favors in lower high blood pressure.” And it tastes great. So what’s to lose?

This recipe is a meatless dish so if you are the kind of person who opts for a soybean-based burger rather than traditional beef, you can’t go wrong here.

Ingredient List

  • 1 large eggplant, sliced 1/4 inch rounds
  • Salt
  • Freshly ground black pepper
  • 12 oz. Marinara or tomato sauce of your choice
  • 1/2 cup finely chopped fresh basil (add other herbs as desired)
  • 1 1/2 cups panko breadcrumbs, regular or your choice of flavor
  • 1 cup grated Parmesan cheese (more is fine)
  • 2 eggs, beaten
  • 1 cup shredded mozzarella cheese (more is fine)
  • Optional: hot sauce to taste, added to the tomato sauce

Eggplant Parmesan Preparation

  • The first step is to “sweat” the eggplant rounds. Since eggplant absorbs so much water by itself, it is important to remove as much moisture from the rounds as possible. Do this by salting both sides and then placing them in a colander in the sink. Two colanders should work for one eggplant. Let them sweat for at least 2 hours. More is better; just like the rising you allocate for homemade bread.
  • Rinse the salt off and press dry with paper towels.
  • Preheat the oven to 425°F.
  • Apply olive oil to a large baking sheet pan.
  • Whisk the eggs in a small bowl.
  • Spread some panko on a dish.
  • One at a time, dredge the rounds in the egg, coat both sides liberally with panko, and arrange on the baking sheet.
  • Bake 9 minutes, flip the rounds, bake another 9 minutes.
  • Remove from oven and allow them to cool.
  • Lower oven temperature to 350°F.
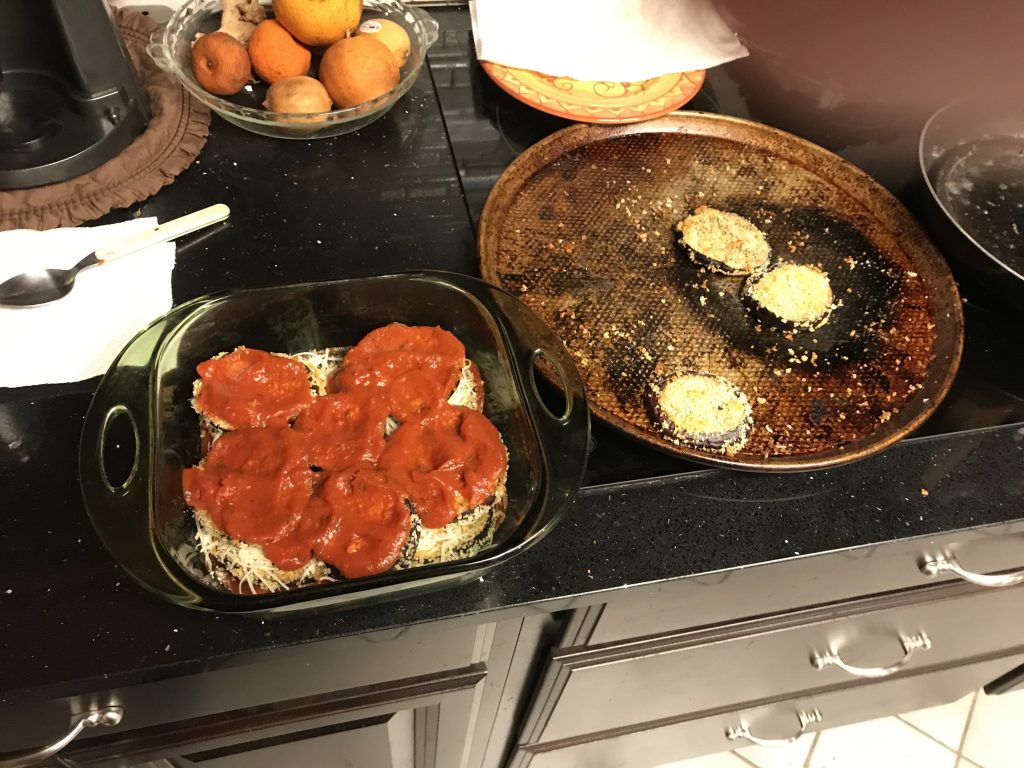
Layering Eggplant Parmesan
  • Stir the basil into the sauce.
  • Spread a thin layer of sauce on the bottom of an 8″ X 8″ Pyrex baking dish.
  • Lay out a layer of rounds in the dish. Since they are round you can cut one up to fill the “gaps.”
  • Sprinkle with both kinds of cheese; the amount is up to you.
  • Top with another layer of rounds.
  • Spread sauce and sprinkle with cheese.
  • Keep layering in this fashion until you run out of rounds. The top layer should have sauce and cheese.
  • Bake for 35 minutes.
  • Enjoy!

That’s all there is to it! Of course, you can try different kinds of cheese. This really is a bonus if you are feeding picky kids. This no-fry eggplant Parmesan is very versatile for the adventurous cook. You might pair it with a Tuscan kale salad or homemade low-carb egg noodles.

Looking for more great content? Visit our partner sites:

The Green Frugal

Running Across Texas


As Featured On Ezine Articles

I offer article and blog-writing services. Interested? Hire Me!


Did you find this article helpful? Thanks for supporting this free site with a small donation!


Visit Kelly’s profile on Pinterest.


About the Author:

Photo of Kelly R. SmithKelly R. Smith is an Air Force veteran and was a commercial carpenter for 20 years before returning to night school at the University of Houston where he earned a Bachelor’s Degree in Computer Science. After working at NASA for a few years, he went on to develop software for the transportation, financial, and energy-trading industries. He has been writing, in one capacity or another, since he could hold a pencil. As a freelance writer now, he specializes in producing articles and blog content for a variety of clients. His personal blog is at I Can Fix Up My Home Blog where he muses on many different topics.

Classic Beef Stroganoff Recipe

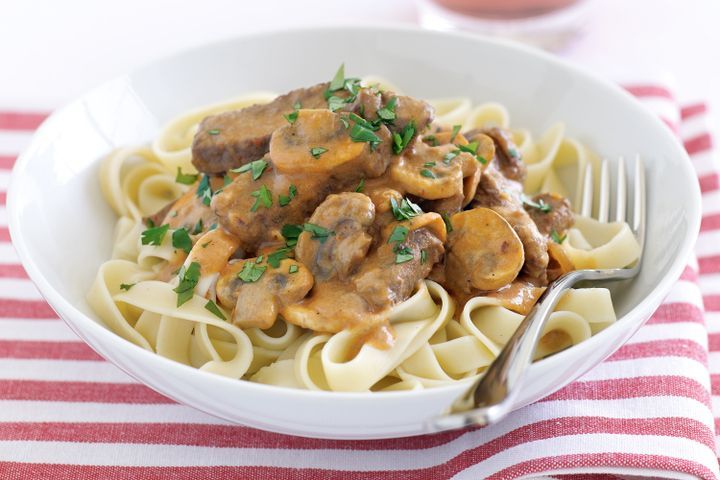
Classic Beef Stroganoff
index sitemap advanced

What’s not to like about Beef Stroganoff ? It’s a timeless dish that won’t break the budget and is easy to prepare. When I got a hankerin’ for it yesterday I did an internet search and was surprised by all the variations.

If you are on a low-carb diet but are hankerin’ for something pasta-y and this dish sounds a bit too much, I suggest trying my low-carb spaghetti carbonara recipe.

In case you are curious — the Stroganoff (or Stroganov) family in 18th century Russia is mainly associated with the popular beef dish which bears its name. The dish likely goes back to a much earlier peasant favorite, but is now usually attributed to the household of Count Pavel Stroganoff (1774-1817).

Beef Stoganoff Ingredients

  • 1 1/2 pounds of beef sirloin steak, 1/2 inch thick
  • 1 garlic clove, finely chopped
  • 8 ounces fresh mushrooms, sliced (2 1/2 cups)
  • 2 medium onions, thinly sliced
  • 1 1/2 cups Progresso™ beef flavored broth (from 32-ounce carton)
  • 1/4 cup butter (I prefer Kerrygold unsalted Irish butter but suit yourself)
  • 1 teaspoon Worcestershire sauce
  • 1/2 teaspoon salt
  • 1 1/2 cups sour cream
  • 1/4 cup all-purpose flour
  • 3 cups hot cooked egg noodles

Preparation Steps

  1. Cut the beef across the grain into roughly 1 1/2×1/2-inch strips.
  2. Cook the mushrooms, onions, and garlic in butter using a 10-inch skillet over medium heat. Stir occasionally until the onions are tender. Then, remove from skillet.
  3. Cook the beef strips in the same skillet until they’re brown. Next, stir in 1 cup of the broth, the salt, and the Worcestershire sauce. Heat to boiling; reduce heat. Cover the skillet and simmer 15 minutes.
  4. Stir the remaining 1/2 cup of broth into the flour and stir into the beef mixture. Stir in the onion mixture and heat to just boiling, stirring constantly to maintain consistency. Boil and stir for 1 1/2 minutes and reduce heat. Finally, now stir in the sour cream. Heat until hot but do not boil it. Serve over noodles and enjoy.

So that’s all there is to making classic beef Stroganoff. Like most of the recipes that I enjoy, it is very adaptable; throw in any extra ingredients or condiments that you like (I’m fond of homemade habanero hot sauce). If you like this recipe, please share the link with your friends. Enjoy!

Nutritional Information

Calories: 435Calories from fat: 295
Total Fat 23 g
Saturated Fat10 g
Cholesterol 115 mg
Sodium 620 mg
Potassium 560 mg
Total Carbohydrate 31 g
Dietary Fiber2 g
Protein 28 g
Click to learn more about revolutionary ThinMist!

Looking for more great content? Visit our partner sites:

The Green Frugal

Running Across Texas


As Featured On Ezine Articles

I offer article and blog-writing services. Interested? Hire Me!


Did you find this article helpful? Thanks for supporting this free site with a small donation!


Visit Kelly’s profile on Pinterest.


About the Author:

Photo of Kelly R. SmithKelly R. Smith is an Air Force veteran and was a commercial carpenter for 20 years before returning to night school at the University of Houston where he earned a Bachelor’s Degree in Computer Science. After working at NASA for a few years, he went on to develop software for the transportation and financial and energy trading industries. He has been writing, in one capacity or another, since he could hold a pencil. As a freelance writer now, he specializes in producing articles and blog content for a variety of clients. His personal blog is at I Can Fix Up My Home Blog where he muses on many different topics.

How to Make Sauce Cling to Your Pasta

This Cooking Tip Will Give You Enjoyable Restaurant-Style Results

Photo of Kelly R. Smith   by Kelly R. Smith

Cooking pasta with the  emulsion method.
Cooking pasta with the emulsion method
index sitemap advanced

This article was updated on 04/29/21.

Ads we feature have been independently selected and reviewed. If you make a purchase using the links included, we may earn a commission, which helps support the site. Thank you for your support.

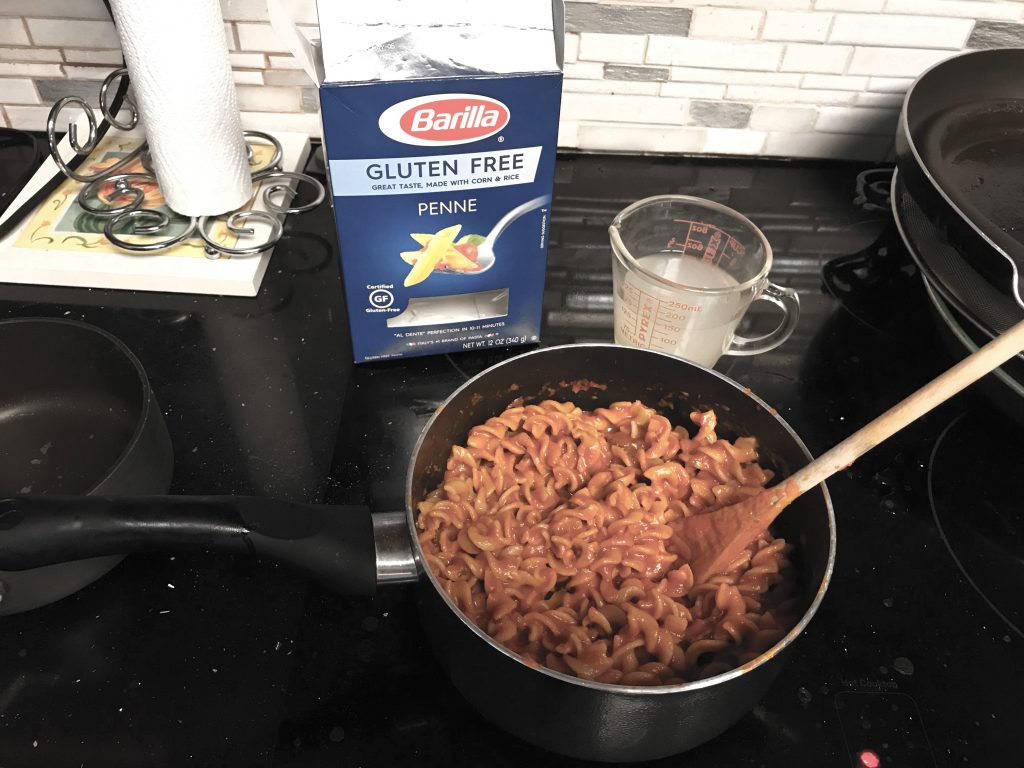
Who doesn’t like pasta? Spaghetti Carbonara, ravioli, elbow, penne, and so much more. It’s comfort food, just like tater tots and cheeseburgers. But have you ever wondered why the sauce clings so well to restaurant pasta but when you make it at home it slides right off and puddles on you plate? The secret is the concept of emulsion. The good news is that you can easily make it happen in your own kitchen!

What is this emulsion anyway? In a nutshell, it’s when two or more liquids that normally won’t mix are forced to come together. For example, mayonnaise is an oil in water emulsion that is stabilized by the lecithin in egg yolk. That’s why you don’t have to stir it up. Peanut butter is another good example (except for the kind that you do need to stir). Now let’s learn how to apply emulsion to home-cooked pasta.

Easy Steps to Making Sauce-Clinging Pasta

  • Bring heavily salted water to a boil in an appropriately-sized pot. I like using “pink” or Himalayan salt. Regular table salt has all the minerals stripped out of it.
  • Add the pasta.
  • Do not cook it to the al dente stage; leave it a bit undercooked because it will finish in the sauce.
  • When you go to drain the pasta, reserve a cup of the water. Set the pasta aside.
  • Add your sauce to the now-empty pot. For every 3 ounces of dry pasta that you cooked, use 1/2 cup of sauce.
  • Heat the sauce to a simmer.
  • Add in any extra vegetables that you enjoy.
  • Toss in 1/2 tablespoon of butter (I like Kerrygold Irish butter but it’s your call). Stir in until it melts. Repeat until you can run a spoon through it and see all the way to the bottom of the pot without the sauce quickly seeping back to fill the gap.
  • Add the drained pasta directly to the pot. Mix vigorously. This will further emulsify and thicken your sauce by grabbing bits of starch from the pasta; mixing your pasta and sauce directly in your pot instead of pouring sauce over the pasta is the key finishing step to achieve that restaurant quality. Different kinds of pasta interact with different sauces differently. Some soak up more liquid than others. If your sauce is too thick, this is where you can mix some of your reserved pasta water back in, just a wee bit at a time.
  • Serve and enjoy!

I like to serve it with a side of Tuscan kale salad. Go ahead and experiment with making sauce cling to your pasta. Different kinds of pasta, different kinds of sauce; it’s an adventure. Of course, it also works in low-carb noodles recipes.

Trending Recipes


Looking for more great content? Visit our main page or partner sites:

I Can Fix Up My Home

The Green Frugal

Running Across Texas


As Featured On Ezine Articles

I offer article and blog-writing services. Interested? Contact me for a quote!


Did you find this article helpful? Millions of readers rely on information on this blog and our main site to stay informed and find meaningful solutions. Please chip in as little as $3 to keep this site free for all.


Visit Kelly’s profile on Pinterest.

About the Author:

Photo of Kelly R. SmithKelly R. Smith is an Air Force veteran and was a commercial carpenter for 20 years before returning to night school at the University of Houston where he earned a Bachelor’s Degree in Computer Science. After working at NASA for a few years, he went on to develop software for the transportation, financial, and energy-trading industries. He has been writing, in one capacity or another, since he could hold a pencil. As a freelance writer now, he specializes in producing articles and blog content for a variety of clients. His personal blog is at Considered Opinions Blog where he muses on many different topics.

Tater Tots Cheeseburger Casserole Recipe

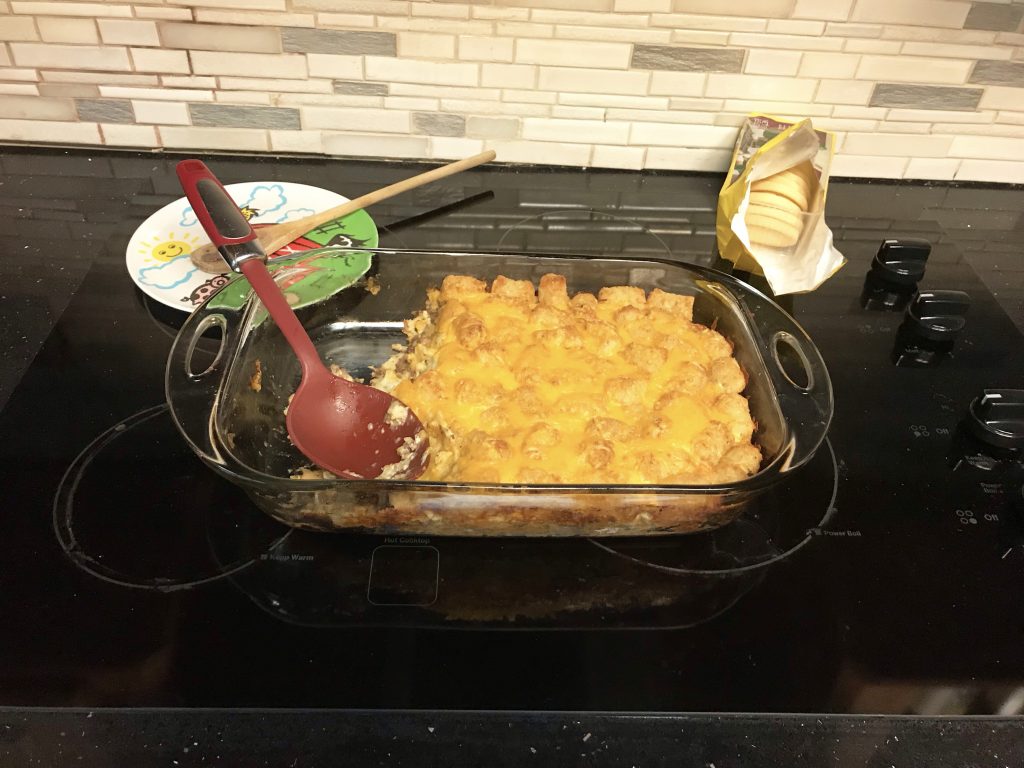
Tater Tots Cheeseburger Casserole
index sitemap advanced

There’s something to be said for All-American comfort food. What could be more representative of that culinary niche than the humble cheeseburger? Well, this recipe for Tater Tot Cheeseburger Casserole fits the bill nicely, especially on those summer days when it is raining to much to go out on the backyard deck and fire up the grill. One thing it is not is low-carb.

You’ll notice that this recipe doesn’t really go into all the possible condiments and spices that you may prefer. That is because we believe that burgers should be individually tailored; make this meal your own by throwing in what you are craving. There are things you can add after the fact as well. For example, I’m fond of shaking on some homemade habanero hot sauce.

Ingredients

  • 2 lb. lean (at least 80%) ground beef
  • 1 3/4 cups chopped onion (1 1/2 medium)
  • salt to taste
  • pepper to taste
  • 3 cups shredded Cheddar cheese (12 oz)
  • 1 cup Original Bisquick™ mix
  • 1 1/2 cups milk
  • 3 eggs, beaten
  • 1 bag (32 oz) Ore-Ida™ Tater Tots™ frozen potatoes

Meal Preparation Steps

  • Pre-heat your oven to 400°F. Spray 13×9-inch (3-quart) glass baking dish with your favorite cooking spray.
  • Use a 12-inch nonstick skillet to cook beef and onion over medium-high heat for 8 to 10 minutes. Stir the mixture frequently until beef is brown. Drain. Stir in salt and pepper and spread the mixture in the dish. Sprinkle mixture evenly with 2 cups of the cheese.
  • In a medium mixing bowl, stir Bisquick™ mix, milk, and eggs using a whisk until well-blended. Pour over the cheese layer in the baking dish. Arrange the frozen Tater Tot potatoes on top of casserole.
  • Put dish in oven and bake 40 to 45 minutes or until the potatoes begin to brown. Sprinkle the remaining 1 cup of cheese evenly on top of the casserole. Bake 3 to 5 minutes or until the cheese is melted. Finally, remove the pan from the oven and let it rest 10 minutes before serving.

Recipe Modifications

As I mentioned above, this is a bare-bones recipe yearning for your modifications. Although this is great for kids that are finicky diners, adults are more likely to tweak the basic. Here are some of the possibilities.

  • A layer of tomato slices between the cheese layer and the Bisquick™ mixture.
  • Jalapeno or Serrano peppers anywhere.
  • Powdered ranch dressing mixed into the hamburger meat.
  • Bacon (of course!).
  • And the list goes on…

Looking for more great content? Visit our partner sites:

The Green Frugal

Running Across Texas


As Featured On Ezine Articles

I offer article and blog-writing services. Interested? Hire Me!


Did you find this article helpful? Thanks for supporting this free site with a small donation!


Visit Kelly’s profile on Pinterest.


About the Author:

Photo of Kelly R. SmithKelly R. Smith is an Air Force veteran and was a commercial carpenter for 20 years before returning to night school at the University of Houston where he earned a Bachelor’s Degree in Computer Science. After working at NASA for a few years, he went on to develop software for the transportation and financial and energy trading industries. He has been writing, in one capacity or another, since he could hold a pencil. As a freelance writer now, he specializes in producing articles and blog content for a variety of clients. His personal blog is at I Can Fix Up My Home Blog where he muses on many different topics.


close

Enjoy this blog? Please spread the word :)

RSS
Follow by Email
Twitter
Follow Me
Tweet
Pinterest
Pinterest
Pinterest
Instagram
LinkedIn
Share