Ranch Dressing Cheeseburger Recipe

by Kelly R. Smith

index sitemap advanced
Ranch dressing chesse burger

Ads we feature have been independently selected and reviewed. If you make a purchase using the links included, we may earn commission, which helps support the site.

This recipe was updated on 12/29/20.

In our home the ranch dressing cheeseburger is the go-to sandwich when the mood hits for comfort food a la Americana. This recipe is just my humble twist on the old classic hamburger. The beauty of this dish is that the range of condiments and fixings is endless. As always, use organic ingredients whenever possible. Read on.

Ingredients

  • 1 pound ground beef. Or, ground bison if you’ve got deep pockets.
  • Buns; I prefer whole wheat.
  • Vegetables of your choice. In the photo above I used red onion, tomato, spinach, and a slathering of avocado on the bun that’s covered up.
  • Condiments of choice. That’s barbecue sauce you see in the photo. She-Who-Must-Be-Obeyed says it looks like burnt bun. Belay that misconception!
  • Cheese of choice. Mine was Swiss, hers was jalapeno jack.
  • 1 packet of ranch dressing powder. I suppose Hidden Valley is the standard but in my experience, the Kroger brand is the same thing for half the price. Dollars to donuts that it all comes out of the same factory.
  • 2 eggs
  • Salt and pepper to taste

Preparation

  1. Put the meat in a mixing bowl and crack the eggs into it. The reason for 2 eggs rather than one or none is that the ranch dressing powder will make the patties crumbly when you go to flip them. The eggs prevent that. Besides, who couldn’t use more vitamins and minerals? Just say no to nutrient deficiency.
  2. Open the packed of dressing powder and set aside within reach.
  3. Mix the meat and eggs well with your (washed) hands.
  4. Mix in the powder. Your hands are slippery by now; that’s the reason for pre-opening the packet.
  5. Form the patties. I like to make 1/3 lb. patties rather than 1/4 lb.
  6. Cook the patties in your preferred method, skillet, outdoor or countertop barbecue grill, or otherwise.
  7. Assemble your burgers and enjoy!


That’s all there is to my take on the ranch dressing cheeseburger recipe. I hope you like it. Here are a few more of my creations; I only post those that have been spouse-approved so no worries! Share with your friends.

Looking for more great content? Visit our main site I Can Fix Up My Home or our partner sites:

The Green Frugal

Running Across Texas


As Featured On Ezine Articles

I offer article and blog-writing services. Interested? Contact me for a quote!


Did you find this article helpful? Thanks for supporting this free site with a small donation! We don’t like paywalls either so we depend on our readers to keep the lights on. Support independent journalism.


Visit Kelly’s profile on Pinterest.

About the Author:

Photo of Kelly R. SmithKelly R. Smith is an Air Force veteran and was a commercial carpenter for 20 years before returning to night school at the University of Houston where he earned a Bachelor’s Degree in Computer Science. After working at NASA for a few years, he went on to develop software for the transportation, financial, and energy-trading industries. He has been writing, in one capacity or another, since he could hold a pencil. As a freelance writer now, he specializes in producing articles and blog content for a variety of clients. His personal blog is at I Can Fix Up My Home Blog where he muses on many different topics.

Shepherd’s Pie Skillet Recipe

This is a New Take on Comfort Food Pub Grub; Economical and Easy to Prepare.

Photo of Kelly R. Smith   by Kelly R. Smith

Shepherd's pie skillet style
Shepherd’s pie skillet style
index sitemap advanced

This article was updated on 10/01/2021.

Ads we feature have been independently selected and reviewed. If you make a purchase using the links included, we may earn a commission, which helps support the site. Thank you for your support.

The weather is starting to cool off and that means two things — it is time for a flu shot and comfort food is the order of the day. This recipe for shepherd’s pie fills the bill nicely. Easy, frugal meals are just what we need as we spend more time at home because of the COVID-19 pandemic or inclement weather. One good thing about this meal is its flexibility. There is any number of substitutions and additions you can make. Customize your vegetables or add hot peppers So, let’s get started.

Shepherd’s Pie Ingredients

  • 1 pound ground beef
  • 1 box Beef Pasta Hamburger Helper (or the flavor of your choice); tonight I’m going to use the “cheesy enchilda” flavor.
  • Hot water/milk called for on Hamburger Helper box
  • 1 1/2 cups frozen mixed vegetables, thawed
  • Hungry Jack mashed potatoes for 6 servings
  • Water and butter called for on mashed potatoes box for 6 servings
  • 1/2 cup shredded Cheddar cheese
  • Chopped parsley (amount to taste)

Preparation Steps

  1. Using a 10-inch skillet, cook beef over medium-high heat for 5 – 7 minutes, stirring often, until brown. Drain the grease. Stir in hot water, milk, sauce mix, uncooked pasta (from the Hamburger Helper box), and thawed vegetables. Heat to boiling, stirring frequently.
  2. Reduce the heat. Cover and simmer about 10 minutes, stirring frequently, until the pasta and vegetables are tender. As you do this, make the mashed potatoes as directed on box for 6 servings. Remove the skillet from heat.
  3. Spoon and gently spread mashed potatoes over the pasta mixture. Sprinkle with the cheese. Cover; let stand about 5 minutes or until cheese is melted. Sprinkle with parsley and serve.

That’s all there is to the shepherd’s pie skillet recipe. You can substitute a different type of cheese, type of Hamburger Helper, and add additional spices. It’s all good.

Got a blog or website? Want more revenue? Monetize it!

More Recipes From My Kitchen and Garden


Looking for more great content? Visit our main page or partner sites:

I Can Fix Up My Home

The Green Frugal

Running Across Texas


As Featured On Ezine Articles

I offer article and blog-writing services. Interested? Contact me for a quote!


Did you find this article helpful? Millions of readers rely on information on this blog and our main site to stay informed and find meaningful solutions. Please chip in as little as $3 to keep this site free for all.


Visit Kelly’s profile on Pinterest.

About the Author:

Photo of Kelly R. SmithKelly R. Smith is an Air Force veteran and was a commercial carpenter for 20 years before returning to night school at the University of Houston where he earned a Bachelor’s Degree in Computer Science. After working at NASA for a few years, he went on to develop software for the transportation, financial, and energy-trading industries. He has been writing, in one capacity or another, since he could hold a pencil. As a freelance writer now, he specializes in producing articles and blog content for a variety of clients. His personal blog is at Considered Opinions Blog where he muses on many different topics.

Scrambled Eggs With Miso, Onions, and Spinach Recipe

by Kelly R. Smith

index sitemap advanced
Scrambled eggs with miso, onions, and spinach

This article was updated on 09/10/20.

The miso in these scrambled eggs gives it that very creamy rather than the usual “huge curd” appearance. What is miso? Basically, it’s a traditional Japanese seasoning produced by fermenting soybeans with salt and kōji resulting in an umami-heavy paste.

This recipe serves one; if you are making it for a group, like for a potluck of Labor Day gathering, the ingredients are easy to adjust. This is a recipe that makes it is easy to stay with organic food and that’s what I suggest.

Ingredient List

  • 2 eggs
  • 1 tablespoon unsalted butter
  • 2 teaspoons white or red miso paste
  • 1/4 cup diced red onion
  • 1/2 cup finely-sliced spinach
  • 1/4 cup finely-sliced basil
  • Salt and pepper to taste
  • Amount of shredded cheese to your taste; I threw in 1/2 cup of Swiss (optional)

Update: Today I made this dish for lunch again. I added in 2 large cloves of garlic, minced, and 1 cup of red cabbage, cut up tiny. It came out great. The only drawback was when I cut up the garlic. She-who-must-be obeyed complained that it was burning her nose. But, but. it’s good for my high blood pressure!

Preparation Steps

  1. Crack the eggs into a mixing bowl.
  2. Whisk in the miso until well mixed.
  3. Whisk in the remaining ingredients (except the optional cheese; see step 8).
  4. Add the butter to a sauce pan or skillet.
  5. Heat at medium-low heat just until the butter is melted.
  6. Add the egg mixture.
  7. Use a wooden spoon to stir the mixture until just almost done.
  8. Remove the pan from the heat and add in the cheese.
  9. Continue to stir for a moment until done.
  10. Turn out onto a plate and enjoy!

Health Benefits of Miso

Most of us already know the nutrition benefits of eggs lots of protein, they raise HDL (the good cholesterol), they’re loaded with nutrients, many studies show that they lower the chance of a hemorrhagic stroke, and they offer lutein and zeaxanthin to help to keep you from getting eye diseases like cataracts. But what about miso?

  • Rich in probiotics.
  • Nervous system support.
  • Beneficial for women in early pregnancy (folate).
  • Vitamin K for bone strength.

So you can see that combining scrambled eggs with miso not only makes a great breakfast (breakfast tacos, anyone?) but a quick dinner after a long day. And the dish goes well with additional ingredients that are to your liking.

More Mouth-Watering Recipes

References:


Looking for more great content? Visit our partner sites:

The Green Frugal

Running Across Texas


As Featured On Ezine Articles

I offer article and blog-writing services. Interested? Hire Me!


Did you find this article helpful? Thanks for supporting this free site with a small donation! We depend on our readers rather than a bothersome paywall to keep the lights on here in the shop.


Visit Kelly’s profile on Pinterest.


About the Author:

Photo of Kelly R. SmithKelly R. Smith is an Air Force veteran and was a commercial carpenter for 20 years before returning to night school at the University of Houston where he earned a Bachelor’s Degree in Computer Science. After working at NASA for a few years, he went on to develop software for the transportation, financial, and energy-trading industries. He has been writing, in one capacity or another, since he could hold a pencil. As a freelance writer now, he specializes in producing articles and blog content for a variety of clients. His personal blog is at I Can Fix Up My Home Blog where he muses on many different topics.

Teriyaki Beef Jerky Recipe

by Kelly R. Smith

index sitemap advanced
Beef jerky, ready to eat

I love beef jerky and I suspect that I am not alone in that respect. But, there are three issues that I have with the commercial variety:

  • It’s too expensive.
  • The texture tends to be to hard.
  • God only knows what kind of chemicals and preservatives are used.

And that is one reason why I invested in a food dehydrator. Now I can make my own marinades and control the texture. I made a batch yesterday so my new appliance is paying for itself already. Next, I’m going to run a batch of apples. But here is the simple jerky recipe.

Beef Jerky Ingredients

  • 1 3/4 pounds of thin round sirloin tip. Any lean cut will do. Organic grass-fed is preferable. If you’ve got deep pockets, substitute bison. I know my sister will. That woman knows her food.
  • 1 12 oz. bottle of Lawry’s Teriyaki with Pineapple juice.
  • Spices to taste. I did not add salt due to my high blood pressure.

Jerky Preparation

Marinating beef for jerky
  • Slice the meat thin. I prefer about 1/4″. Remember that the meat will shrink as it cooks. As for length, about 6″ is what I like but take into account the geometry and size of your food dehydrator. You will likely end up with some irregular pieces, but that’s OK; it’s jerky after all.
  • Put the slices in a container. The Pyrex dish you see above worked well.
  • Pour the marinade over the beef and mix it up well to ensure a thorough coating.
  • Put in in the refrigerator overnight. Some recipes only call for a few hours but the way I see it, I’m already in it this far. Do it up good. I know Perry’s smokes their famous pork chops for several days. If you’ve had one you know that patience is a good habit.
  • Stir it all up every few hours. I get up sporadically during the night for a bodacious swallow of ice water so no problemo, friend.
  • Pat the slices on paper towels to remove excess marinade.
  • Arrange slices on your dehydrator trays. Allow space for air circulation.
  • Set the temperature for 160 degrees F.
  • Set the timer for 4 hours.
  • Check it every so often for your desired degree of done-ness. Mine was perfection at 3 1/2 hours. Turn off the unit.
  • Leave it in the dehydrator until it cools.
  • Enjoy!
Beef jerky properly spaced on the dehydrator tray

That’s all there is making your own teriyaki beef jerky. Of course, any other marinade works just as well. Buy your favorite or make your own.

Other Recipes You will Enjoy (I Did)


Looking for more great content? Visit our partner sites:

The Green Frugal

Running Across Texas


As Featured On Ezine Articles

I offer article and blog-writing services. Interested? Hire Me!


Did you find this article helpful? Thanks for supporting this free site with a small donation! We depend on our readers rather than a bothersome paywall to keep the lights on here in the shop.


Visit Kelly’s profile on Pinterest.


About the Author:

Photo of Kelly R. SmithKelly R. Smith is an Air Force veteran and was a commercial carpenter for 20 years before returning to night school at the University of Houston where he earned a Bachelor’s Degree in Computer Science. After working at NASA for a few years, he went on to develop software for the transportation, financial, and energy-trading industries. He has been writing, in one capacity or another, since he could hold a pencil. As a freelance writer now, he specializes in producing articles and blog content for a variety of clients. His personal blog is at I Can Fix Up My Home Blog where he muses on many different topics.

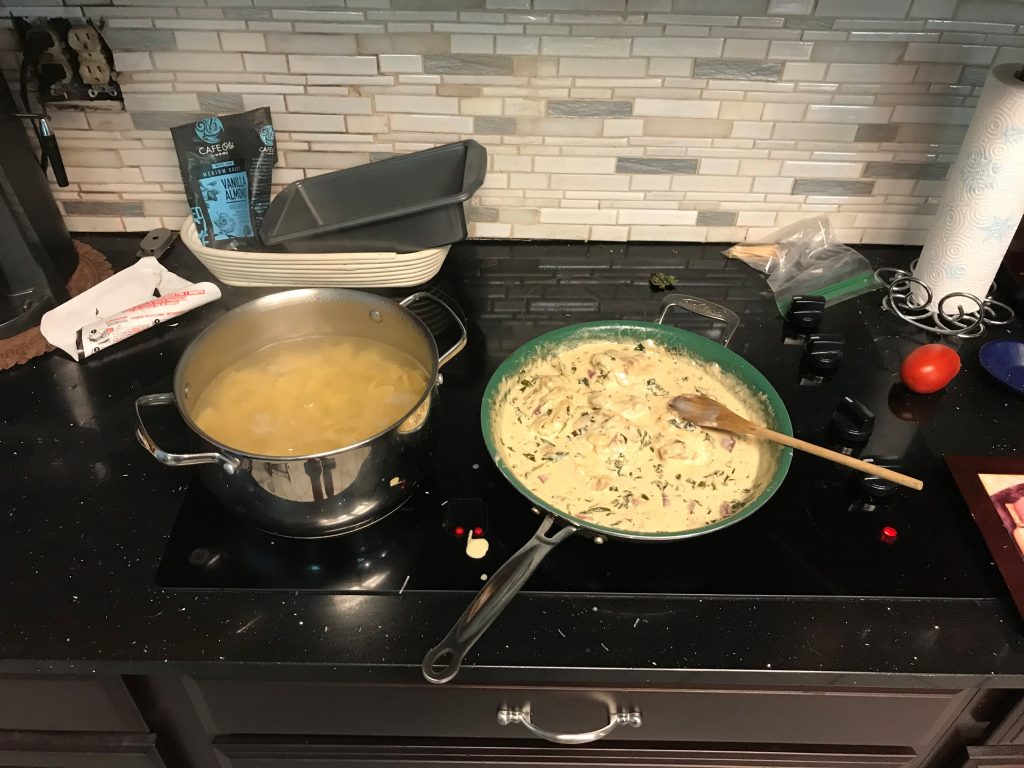
Turkey Italian Sausage and Peppers Recipe

by Kelly R. Smith

index sitemap advanced
Italian sausage and peppers

Yes, I am back in the experimental recipe zone again. So comfortable with my culinary thinking hat on; I have an affinity for Frank Zappa’s Muffin Man. This recipe combines good veggies and spices with Italian sausage but with aorta-healthier turkey rather than pork. I don’t need to further push my high blood pressure. This recipe serves 6 and is ready in about an hour.

Ingredient List

  • 3 tpsp. olive oil
  • 1 tpsp. apple cider vinegar
  • 3 cloves garlic, minced
  • 1 tsp. crushed red pepper flakes
  • 3 bell peppers, sliced and diced (why not use all the colors)
  • 1/2 large red onion, diced
  • Himalayan or pink salt to taste (it’s chock full of minerals and nutrients, unlike the regular stuff)
  • Black pepper to taste
  • 6 Italian sausages sliced thin (hot or sweet, your choice)
  • 1/4 cup fresh basil, sliced up

Preparation

  1. Preheat your oven to 400 degrees.
  2. Combine and mix the vinegar, red pepper, oil, and garlic in a mixing bowl.
  3. Mix in the onion and bell peppers.
  4. Put the mixture into a 9″ X 13″ Pyrex dish.
  5. Distribute the sausage on top.
  6. Bake until the sausage is done, about 45 minutes.
  7. Take it out and distribute the basil on top.
  8. Enjoy.

More Recipes

This turkey Italian sausage and peppers recipe is very filling which is good if you have been working out or are on an intermittent fasting routine. It also keeps well in the refrigerator and even makes a tasty sandwich.


Looking for more great content? Visit our partner sites:

The Green Frugal

Running Across Texas


As Featured On Ezine Articles

I offer article and blog-writing services. Interested? Hire Me!


Did you find this article helpful? Thanks for supporting this free site with a small donation!


Visit Kelly’s profile on Pinterest.


About the Author:

Photo of Kelly R. SmithKelly R. Smith is an Air Force veteran and was a commercial carpenter for 20 years before returning to night school at the University of Houston where he earned a Bachelor’s Degree in Computer Science. After working at NASA for a few years, he went on to develop software for the transportation, financial, and energy-trading industries. He has been writing, in one capacity or another, since he could hold a pencil. As a freelance writer now, he specializes in producing articles and blog content for a variety of clients. His personal blog is at I Can Fix Up My Home Blog where he muses on many different topics.

Zulay Cold Brew Coffee Maker – Product Review

by Kelly R. Smith

index sitemap advanced
Zulay Cold Brew Coffee Maker

This article was updated on 09/30/20.

If you’re anything like me, you like your coffee. I typically enjoy a brobdingnagian mug or two in the morning in my home office and another in the afternoon. Sure, a lot of people favor Starbucks, and there are 2 very close to me, but that’s not my style. My wife is the same way and we are going through quite a bit of coffee since we are both working from home during the COVID-19 pandemic. Sometimes I prefer my afternoon cuppa from the Zulay cold Brew coffee maker.

I like this slow brewer. I’ve been using it for about 8 months now so I’ve got it down. Joking there; you can’t make a coffee brewing mistake because it’s very easy to use. It only has the 3 components as you can see in the photo above. The carafe, the stainless steel filter, and the lid.

Key Features of the Zulay Cold Coffee Maker

  • BPA-free
  • FDA-cleared
  • Shock-proof glass, brews cold or hot coffee
  • Dual silicone seals
  • Stainless steel filter, the mesh perforations are tiny enough for fine grinds
  • Doesn’t take up too much room in the refrigerator
  • Easy to clean
  • Anti-slip silicone base

Preparing the Cold Brew Coffee

  • This is a fairly simple process. For best results, start with whole coffee beans and grind them right before using. I use Black Rifle Coffee. It’s made in small batches and isn’t roasted until you order it.
  • Stick the filter into the mouth of the carafe. Fill the filter about 3/4 of the way with the grounds. I typically layer mine — coffee, fresh mint leaves from my herb garden, crumbled cinnamon stick, more coffee.
  • Pour filtered water into the filter. I usually go above the top mark on the carafe.
  • Stick on the cap.
  • Put the carafe into your refrigerator and wait at least 12 hours.

There you have it. I highly recommend the Zulay cold brew coffee maker. It is sturdy, has high-quality components and is reasonably priced. If you are curious and want to learn more about coffee and how it has shaped culture and society, check out Caffeine: How Caffeine Created the Modern World. Here is my book review.

This site is free of course, but I would appreciate it if you would take a moment to participate in the poll on the right-hand sidebar of this page. Nothing to buy and no data-harvesting; I’m just conducting some research for a follow-up article. Thanks!


Looking for more great content? Visit our partner sites:

The Green Frugal

Running Across Texas


As Featured On Ezine Articles

I offer article and blog-writing services. Interested? Hire Me!


Did you find this article helpful? Thanks for supporting this free site with a small donation! We depend on our readers rather than a bothersome paywall to keep the lights on here in the shop.


Visit Kelly’s profile on Pinterest.


About the Author:

Photo of Kelly R. SmithKelly R. Smith is an Air Force veteran and was a commercial carpenter for 20 years before returning to night school at the University of Houston where he earned a Bachelor’s Degree in Computer Science. After working at NASA for a few years, he went on to develop software for the transportation, financial, and energy-trading industries. He has been writing, in one capacity or another, since he could hold a pencil. As a freelance writer now, he specializes in producing articles and blog content for a variety of clients. His personal blog is at I Can Fix Up My Home Blog where he muses on many different topics.

Roasted Beets with Herbs and Orange Recipe

index sitemap advanced
Roasted beets with herbs and goat cheese

This is a very easy dish to make. Some people think they don’t like beets, but be forewarned, this is not that processed stuff that old Aunt Martha plops out on Thanksgiving and Christmas along with the turkey. As a bonus, beets are super-nutritious and can help to lower blood pressure.

Buy your beets in a bunch at the grocery store. They are actually the root of the plant and so will most likely have the green leaves attached. These are also edible. Or, throw them in your compost pile. You do have a compost pile, right? Compost is just as important as mulch and you’ve already paid for the food.

Roasted Beets Ingredient List

  • 1 dozen (preferably organic) beets
  • 1 cup water
  • 1 large cinnamon stick, crumbled
  • 1 large shallot, minced
  • Finely grated zest of 1 orange
  • 1/4 cup white wine vinegar
  • 1/4 cup chopped flat-leaf parsley
  • 1/4 cup chopped tarragon
  • 1/4 cup plus 2 tablespoons extra-virgin olive oil
  • 2 – 4 oz. crumbled goat cheese (the pic above used about 3 oz. to give you an idea)
  • 1/4 cup chopped chives

Preparation

  • Preheat the oven to 375°. Cut the leaves and the roots from the beets, wash them, and arrange them in a roasting pan (I use an 8″ X 8″ Pyrex) and add the cinnamon and water. Cover tightly with foil and bake for 1 hour.
  • While it’s baking, make the dressing by pouring the vinegar in a bowl, mixing in the minced shallot, orange zest, tarragon, parsley, chives, and oil.
  • Let the beets cool a bit and cut in 1/4″ slices. Some people might want to peel the beets but I prefer to leave it alone and get the added nutrition. Arrange them overlapping on a serving plate or platter.
  • Spoon the dressing over the beet slices and sprinkle the top with the goat cheese.
  • Eat.

Health Benefits of Beets

With all the good things going on with beets, it is a wonder that people don’t eat more of them. Consider:

  • Beets can lower your blood pressure. This is because they are high in healthy nitrates, which are converted to nitric oxide inside your body. Nitric oxide can help dilate blood vessels and lower your blood pressure.
  • Beets give your energy a boost. By dilating your blood vessels it delivers more oxygen to your muscles.
  • Lots of fiber. One cup of beets contains about 3.5 grams of fiber. Regularity is a good thing, even if we don’t talk about it much.
  • Many, many antioxidants. That is why beets have that vibrant red color. One in particular is betalain, higher in fighting off free radicals than vitamin C.
  • Good for your brain power. This, because of increased blood flow.

So there you have it. There’s no reason not to make roasted beets with herbs and orange for dinner today.

Looking for more great content? Visit our partner sites:

The Green Frugal

Running Across Texas


As Featured On Ezine Articles

I offer article and blog-writing services. Interested? Hire Me!


Did you find this article helpful? Thanks for supporting this free site with a small donation!


Visit Kelly’s profile on Pinterest.

About the Author:

Photo of Kelly R. SmithKelly R. Smith is an Air Force veteran and was a commercial carpenter for 20 years before returning to night school at the University of Houston where he earned a Bachelor’s Degree in Computer Science. After working at NASA for a few years, he went on to develop software for the transportation, financial, and energy-trading industries. He has been writing, in one capacity or another, since he could hold a pencil. As a freelance writer now, he specializes in producing articles and blog content for a variety of clients. His personal blog is at I Can Fix Up My Home Blog where he muses on many different topics.

Creamy Parmesan Basil Chicken Recipe

This Satisfying Dish is a Favorite Comfort Food. Easy to Make and Nutritious, Your Whole Family Will Love It!

Photo of Kelly R. Smith   by Kelly R. Smith

Creamy Parmesan Basil Chicken
Creamy Parmesan basil chicken being prepared
index sitemap advanced

Ads we feature have been independently selected and reviewed. If you make a purchase using the links included, we may earn commission, which helps support the site.

This article was updated on 03/26/21.

I made this tasty dish last weekend and it was a huge hit! All three of my basil plants are going gangbusters right now so if I’m not making pesto, spaghetti carbonara, or something else, I’m looking to be creative. I mention this because one of the keys to growing basil all season is to keep it trimmed back. If you let the flowers and seeds get out of hand you won’t be encouraging leaf growth.

This recipe is so easy and quick to make. I only spent about 45 minutes preparing it. It serves 4. Here’s how:

Creamy Parmesan Basil Chicken Ingredient List

  • 4 large chicken breasts (Whole, sliced in half, or cut into strips)
  • 1 box of pasta, your choice
  • 3 tablespoons butter (not margarine)
  • 4 large garlic cloves, minced
  • 1 1/2 cups heavy cream
  • 1/2 onion, finely minced (I prefer red onions but use what you like)
  • 3-4 ounces roasted red peppers, thinly sliced
  • black pepper to taste
  • salt to taste
  • 2 to 3 cups packed fresh basil leaves, cut up (quantity is a personal preference)
  • 1/4 teaspoon crushed red pepper flakes
  • 1 1/2 cups fresh grated Parmesan cheese
  • 1/2 cup white wine or chicken stock

Preparation

  • In a large non-stick pan on medium high heat, melt 2 tablespoons of the butter. Season chicken with salt and pepper, then sear, 4 to 5 minutes on each side, until just cooked. Remove the chicken from the pan and set aside.
  • Start the pasta cooking while continuing with the sauce; cook until al dente.
  • Add the remaining 1 tablespoon of butter to the pan. Toss in the onion, garlic, peppers, paprika, red chili pepper flakes, salt, and pepper. Saute for about five minutes, just until onions and peppers become soft.
  • Reduce heat to medium. Add wine or chicken stock to de-glaze the pan. Adjust heat as needed to bring to a gentle simmer until reduced by half.
  • Lower the heat to medium low. Add the cream to the pan. Stir it until a creamy sauce forms. Add in the Parmesan cheese and stir until it is melted into sauce. Stir in the basil and simmer until just wilted, 1-2 minutes.
  • Add the chicken back to the pan and allow to warm up. It’s done! Serve over the pasta.

You Might also Enjoy…

Looking for more great content? Visit our main site I Can Fix Up My Home and our partner sites:

The Green Frugal

Running Across Texas


As Featured On Ezine Articles

I offer article and blog-writing services. Interested? Hire Me!


Did you find this article helpful? Millions of readers rely on information on this blog and our main site to stay informed and find meaningful solutions. Please chip in as little as $3 to keep this site free for all.


Visit Kelly’s profile on Pinterest.

About the Author:

Photo of Kelly R. SmithKelly R. Smith is an Air Force veteran and was a commercial carpenter for 20 years before returning to night school at the University of Houston where he earned a Bachelor’s Degree in Computer Science. After working at NASA for a few years, he went on to develop software for the transportation, financial, and energy-trading industries. He has been writing, in one capacity or another, since he could hold a pencil. As a freelance writer now, he specializes in producing articles and blog content for a variety of clients. His personal blog is at I Can Fix Up My Home Blog where he muses on many different topics.

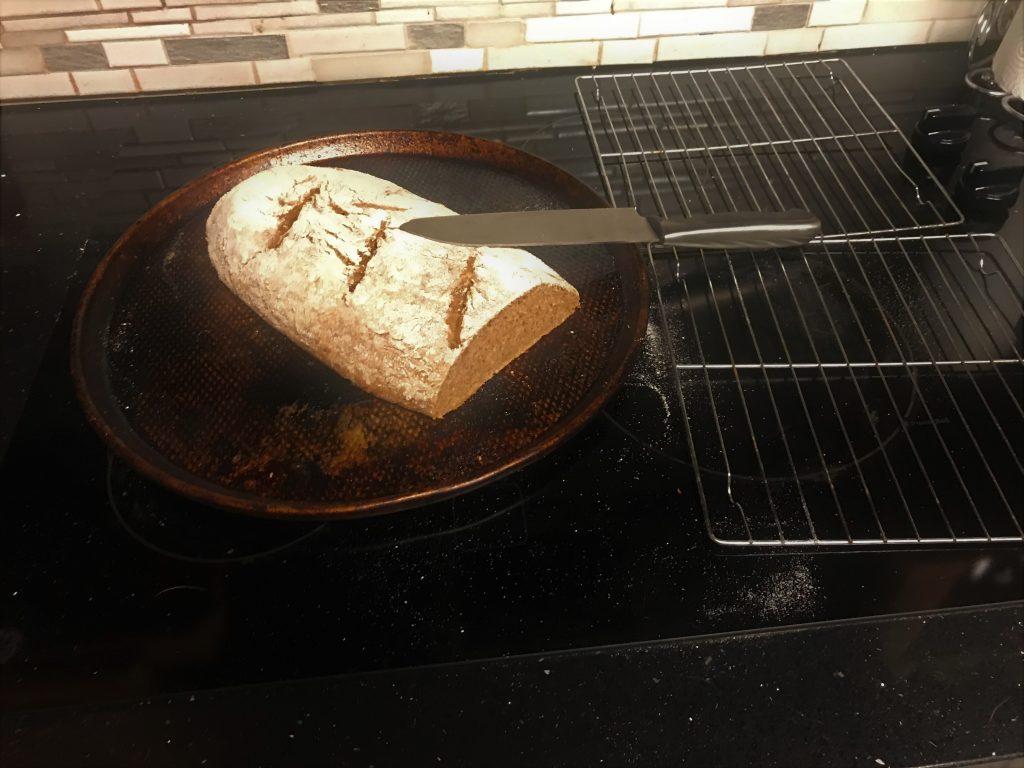
Covid-19 Lock-down Homemade Whole Wheat Bread Recipe

by Kelly R. Smith

index sitemap advanced
Loaf of bread with an oval Banneton proofing basket

It may seem strange that I called this particular recipe the Covid-19 Lock-down recipe but there’s a reason for it. Since we all began this pandemic adventure America has become a nation of bakers. Yeast is a rare commodity; I searched high and low for two weeks until I struck gold. Good whole wheat was almost as hard to come by.

Anyway, I like to experiment and this is what I came up with yesterday. It may seem an odd assortment of ingredients but it really worked. I used the oval Banneton proofing basket and a cookie sheet rather than a loaf pan.

Use organic ingredients whenever possible. You can also use this dough ingredient list when you are making homemade pizza.

Ingredient List for Covid-9 Bread

  • 1 c Quick-cooking steel-cut oatmeal
  • 1/2 c quinoa
  • Dash of Himalayan salt; I like because they don’t remove all the minerals like regular salt.
  • 3 T honey, or to taste
  • 1 Packet yeast
  • 1/2 c Wheat bran
  • 1/4 c Milled flaxseed
  • 2 T Gluten; it’s optional but gluten is the “glue” that holds the loaf together.
  • 1 T Cinnamon
  • 3 c Very warm water
  • 3-4 c Whole wheat flour; as much as you need to make the dough and knead it.
  • 1/2 c Rice flour if you are using a proofing basket.
  • Just a thought: next time I’m going to try putting in some finely-sliced basil leaves; it’s going gang-busters in my garden right now.

Preparation Steps

  • Put the oatmeal and quinoa in your mixing bowl and just cover the mixture with water. Since the mixture will absorb water, check it periodically and add water as needed. About an hour will do the trick.
  • Add the 3 c warm water.
  • Mix in the yeast well.
  • Mix in the rest of the dry ingredients; the flour is last.
  • Stir in the flour well bit by bit until it is hard to turn over.
  • Turn the dough out on a floured surface. Sprinkle some flour on top of it so sticking to your hands is minimal.
  • Commence kneading, adding flour as needed (see what I did there?). I usually fold it over 20-30 times.
  • Proofing time! If you use a proofing basket, prepare it by spraying the inside lightly with water and sprinkle rice flour. Wheat flour will NOT work. Fit the dough in and cover with a damp dish towel. If you are using a mixing bowl, lightly coat it with olive oil or cooking spray so it won’t stick. Plop the dough in and cover with a damp dish towel.
  • Let it rise for 2-3 hours or whatever your brand of yeast recommends.
  • Put a pan of water on the oven rack; the steam will keep you loaf from drying out.
  • Preheat your oven to 450 degrees.
  • Turn your dough out onto either cooking-sprayed cookie sheet if you used a proofing basket or into a buttered loaf pan. Cut 3 thin slits across the top of the loaf; I used an X-acto knife.
  • Bake it! 25 minutes was perfect for me. Use the toothpick test to be sure.
  • Turn the loaf out onto cooling racks and let it rest for at least 10 minutes.
  • Enjoy!
Hot, fresh homemade bread

Looking for more great content? Visit our partner sites:

The Green Frugal

Running Across Texas


As Featured On Ezine Articles

I offer article and blog-writing services. Interested? Hire Me!


Did you find this article helpful? Thanks for supporting this free site with a small donation!


Visit Kelly’s profile on Pinterest.

About the Author:

Photo of Kelly R. SmithKelly R. Smith is an Air Force veteran and was a commercial carpenter for 20 years before returning to night school at the University of Houston where he earned a Bachelor’s Degree in Computer Science. After working at NASA for a few years, he went on to develop software for the transportation, financial, and energy-trading industries. He has been writing, in one capacity or another, since he could hold a pencil. As a freelance writer now, he specializes in producing articles and blog content for a variety of clients. His personal blog is at I Can Fix Up My Home Blog where he muses on many different topics.

Basil: a Savory Addition to Your Herb Garden and Kitchen

index sitemap advanced
Fresh-cut basil
Fresh-cut basil from my garden

The basil pictured above is fresh-harvested from my garden in preparation for making pesto (yum). Believe it or not, it is a member of the mint family. It is also known as great basil, sweet basil, or for the scientifically-minded, Ocimum basilicum. Whatever you call it, it’s delicious and an essential part of any foodie’s herb garden.

All other things aside, consider the economics of the situation — you can buy a plant from the nursery, or even Walmart for crying out loud, for the same price or cheaper than a plastic-wrapped one-time-use bundle from the grocery store. Who knows where that came from? Mine is organic and two minutes from plant to recipe. Why is there even a comparison? I understand that even apartment-dwellers can grow it in the kitchen window or better yet, a balcony if you have one.

Health Benefits of Basil

Most of the studies that indicate that tulsi (holy basil) was used to determine benefits. Tulsi is traditionally used for religious and traditional medicine purposes, and for its essential oil. It is widely used as an herbal tea, commonly used in Ayurveda.

  • Supports liver health.
  • Fights cancer. This is due to the phytochemicals present by increasing antioxidant activity, changing gene expression, triggering cell death, and slowing cell division.
  • Supports liver health.
  • Protects against skin aging. This effect is from using basil extracts in topical skin creams to improve skin hydration and reduce roughness and wrinkling. Eating it will not provide the benefit.
  • Supports cardiovascular function. The theory is that it lowers blood pressure due to the plant’s eugenol content. This can block calcium channels in the body, lowering high blood pressure. Calcium channel blockers are a popular class of blood pressure medications.
  • Boosts mental health.
  • Reduces swelling and inflammation.
  • Fights infection. A study in 2013 as reported by the US National Library of Medicine showed that sweet basil oil was effective against E. coli bacteria. The researchers determined that certain preparations of basil oil could help treat or even prevent some varieties of infection.

Recipes for Basil

It goes without saying that basil can be added to almost any recipe but here are a few of my favorites. Try them all. These are recipes that I have either invented or morphed together from several traditional recipes and modified to my taste. When I get into the kitchen to experiment, my wife invariably says, “Oh no!” But never fear, she has approved all the ones below.

Obviously, basil can be added to a variety of dishes whether you are going for taste or the nutritional value. But to ensure freshness, availability, and organic quality, plant it in your herb garden.

Looking for more great content? Visit our partner sites:

The Green Frugal

Running Across Texas


As Featured On Ezine Articles

I offer article and blog-writing services. Interested? Hire Me!


Did you find this article helpful? Thanks for supporting this free site with a small donation!


Visit Kelly’s profile on Pinterest.

About the Author:

Photo of Kelly R. SmithKelly R. Smith is an Air Force veteran and was a commercial carpenter for 20 years before returning to night school at the University of Houston where he earned a Bachelor’s Degree in Computer Science. After working at NASA for a few years, he went on to develop software for the transportation, financial, and energy-trading industries. He has been writing, in one capacity or another, since he could hold a pencil. As a freelance writer now, he specializes in producing articles and blog content for a variety of clients. His personal blog is at I Can Fix Up My Home Blog where he muses on many different topics.

close

Enjoy this blog? Please spread the word :)

RSS
Follow by Email
Twitter
Follow Me
Tweet
Pinterest
Pinterest
Pinterest
Instagram
LinkedIn
Share