Is the Impossible Burger Better than a Beef Burger?

The plant-based impossible Burger
Meat… I mean meet the impossible Burger

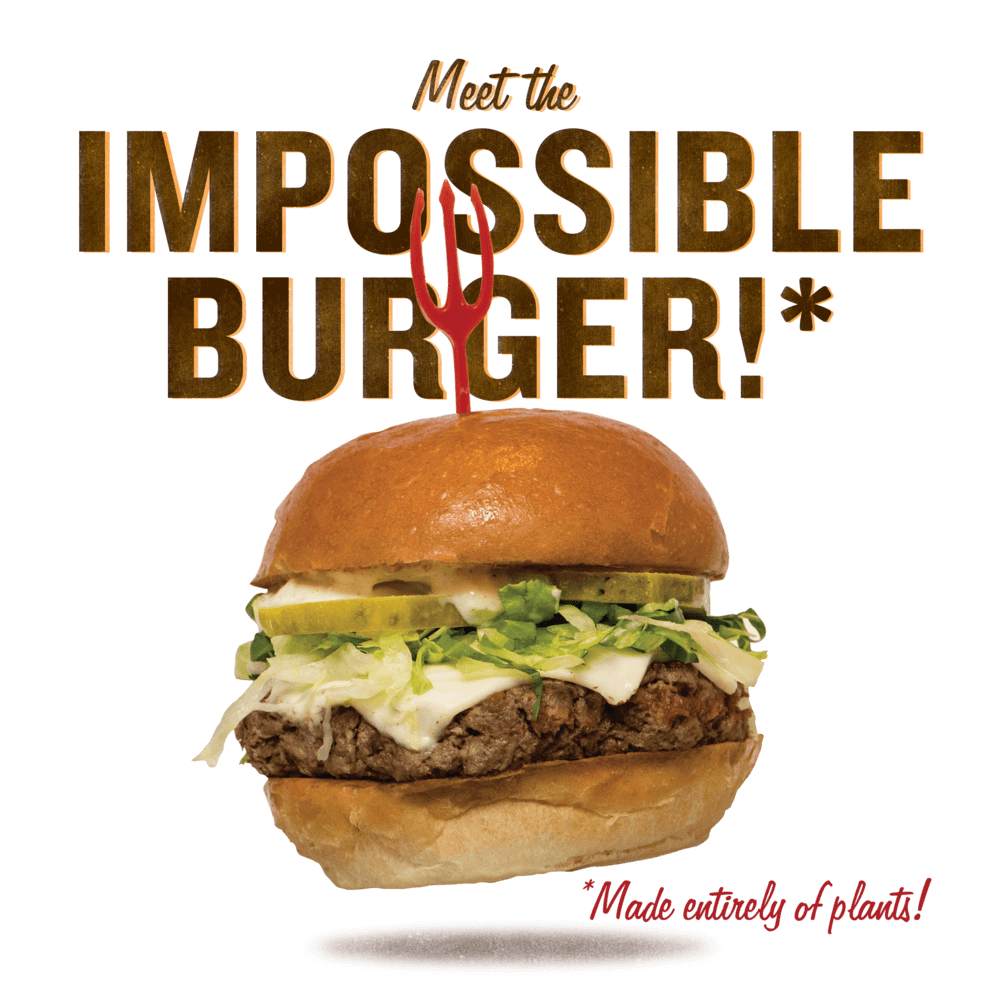
The “impossible burger” has been getting a lot of press lately. Burger King was quick to jump on it by crafting a Whopper version to capture that part of the market stricken with carnophobia (fear of meat). Undoubtedly they have met with some degree of success. After all, if a group of carnivore co-workers drag along their vegan comrade, he or she doesn’t have to settle for salad. Go for that guilt-free burger!

Before we delve into nitty-gritty of composition and nutrition, let’s try to answer the burning question: does it taste right or does it taste like a salad patty? For the purposes of answering, I made a visit to Burger King. Result? It tasted like its beef counterpart to me. As a bonus, for 10 minutes there, I was saving the planet. Karma.

The company that developed the Impossible Burger is, not surprisingly, Impossible Foods. Their mission statement reads as follows, “Animal agriculture occupies almost half the land on earth, consumes a quarter of our freshwater, and destroys our ecosystems. So we’re doing something about it: We’re making meat using plants, so that we never have to use animals again.” In all fairness I have to ask, don’t plants occupy real estate? Don’t they consume water? And how do cows destroy the ecosystem? I live in Texas where cattle is abundant and I have yet to see one of those lumbering brutes ravaging the countryside.

What Ingredients are in an Impossible Burger?

In 2016 the original Impossible Burger used texturized wheat protein. Then, this past January the company swapped it out with soy protein concentrate which has been served exclusively as of April. The soy was intended to deliver a higher-quality protein. But it also meant that the new patty was gluten-free, something the company said customers wanted.

Next, the research chefs added fats, notably coconut and sunflower oil. This was to give the burger a juicy sizzle on the grill in an attempt to more closely mimic “meat”. Additionally, they threw in fillers and binders like methylcellulose and modified food starch to hold it all together. Next they focused on additives to make the burger look, feel, and taste just right.

If that Impossible Whopper had an ingredient label on it you would see:

Water, Soy Protein Concentrate, Coconut Oil, Sunflower Oil, Natural Flavors, 2 percent or less of: Potato Protein, Methylcellulose, Yeast Extract, Cultured Dextrose, Food Starch Modified, Soy Leghemoglobin, Salt, Soy Protein Isolate, Mixed Tocopherols (Vitamin E), Zinc Gluconate, Thiamine Hydrochloride (Vitamin B1), Sodium Ascorbate (Vitamin C), Niacin, Pyridoxine Hydrochloride (Vitamin B6), Riboflavin (Vitamin B2), Vitamin B12. Well, at least there’s some vitamins in there!

The Impossible Burger also contains heme, unlike other veggie patties. Heme is an iron-containing molecule commonly found in myoglobin in muscle tissue and hemoglobin in blood. This is what what makes meat taste like meat. Plants contain it as well.

Is It Healthier than Real Beef?

In the words of Elisabetta Politi, M.P.H., R.D., L.D.N., Nutrition Director of the Duke Diet & Fitness Center in Durham, North Carolina, “No. I don’t think it’s any healthier. As a nutritionist, I tell people that if we want to find a way to address obesity and diabetes, it’s to go back to the way our grandparents ate. I’m not saying that genetic modification is wrong, but I think it’s disconcerting to make up food. I would not consider this wholesome food because it’s something that has gone through a lot of changes and was created in a lab by the food industry.”

As far as saturated fat (the bad stuff) goes, she says, “An 85 percent lean beef burger, which is what you see in restaurants, has about 6 percent saturated fat. An Impossible Burger has 8 grams of saturated fat in a four ounce patty, because it contains all that coconut oil.”

The Impossible Burger falls short on protein. A beef burger offers 29 grams while the Impossible weighs in at 19 grams. If you live with high blood pressure like I do, you should also know that the Impossible contains 370 milligrams of sodium, or about 16 percent of the recommended daily amount whereas there are only 82 milligrams in a beef burger. That’s a huge difference.

The Impossible Burger has the edge when it comes to fiber, as you might imagine. Beef has zero but the Impossible delivers 3 grams, or about 11 percent of the daily-recommended amount. Regularity is a good thing.

The Bottom Line

Both Impossible Burgers and Beef burgers have their pros and cons. As I’ve said before, the “fake meat” tastes the same as the “real meat” to me so it’s really just a matter of choice. If you’re a vegan, environmentalist, or just making a political statement you can now enjoy a burger without guilt.


Looking for more great content? Visit our partner sites:

The Green Frugal

Running Across Texas


As Featured On Ezine Articles

I offer article and blog-writing services. Interested? Hire Me!


Did you find this article helpful? Thanks for supporting this free site with a small donation!


Visit Kelly’s profile on Pinterest.


About the author:

Photo of Kelly R. SmithKelly R. Smith is an Air Force veteran and was a commercial carpenter for 20 years before returning to night school at the University of Houston where he earned a Bachelor’s Degree in Computer Science. After working at NASA for a few years, he went on to develop software for the transportation and financial and energy trading industries. He has been writing, in one capacity or another, since he could hold a pencil. As a freelance writer now, he specializes in producing articles and blog content for a variety of clients. His personal blog is at I Can Fix Up My Home Blog where he muses on many different topics.


Classic Beef Stroganoff Recipe

Classic Beef Stroganoff
index sitemap advanced

What’s not to like about Beef Stroganoff ? It’s a timeless dish that won’t break the budget and is easy to prepare. When I got a hankerin’ for it yesterday I did an internet search and was surprised by all the variations.

If you are on a low-carb diet but are hankerin’ for something pasta-y and this dish sounds a bit too much, I suggest trying my low-carb spaghetti carbonara recipe.

In case you are curious — the Stroganoff (or Stroganov) family in 18th century Russia is mainly associated with the popular beef dish which bears its name. The dish likely goes back to a much earlier peasant favorite, but is now usually attributed to the household of Count Pavel Stroganoff (1774-1817).

Beef Stoganoff Ingredients

  • 1 1/2 pounds of beef sirloin steak, 1/2 inch thick
  • 1 garlic clove, finely chopped
  • 8 ounces fresh mushrooms, sliced (2 1/2 cups)
  • 2 medium onions, thinly sliced
  • 1 1/2 cups Progresso™ beef flavored broth (from 32-ounce carton)
  • 1/4 cup butter (I prefer Kerrygold unsalted Irish butter but suit yourself)
  • 1 teaspoon Worcestershire sauce
  • 1/2 teaspoon salt
  • 1 1/2 cups sour cream
  • 1/4 cup all-purpose flour
  • 3 cups hot cooked egg noodles

Preparation Steps

  1. Cut the beef across the grain into roughly 1 1/2×1/2-inch strips.
  2. Cook the mushrooms, onions, and garlic in butter using a 10-inch skillet over medium heat. Stir occasionally until the onions are tender. Then, remove from skillet.
  3. Cook the beef strips in the same skillet until they’re brown. Next, stir in 1 cup of the broth, the salt, and the Worcestershire sauce. Heat to boiling; reduce heat. Cover the skillet and simmer 15 minutes.
  4. Stir the remaining 1/2 cup of broth into the flour and stir into the beef mixture. Stir in the onion mixture and heat to just boiling, stirring constantly to maintain consistency. Boil and stir for 1 1/2 minutes and reduce heat. Finally, now stir in the sour cream. Heat until hot but do not boil it. Serve over noodles and enjoy.

So that’s all there is to making classic beef Stroganoff. Like most of the recipes that I enjoy, it is very adaptable; throw in any extra ingredients or condiments that you like (I’m fond of homemade habanero hot sauce). If you like this recipe, please share the link with your friends. Enjoy!

Nutritional Information

Calories: 435Calories from fat: 295
Total Fat 23 g
Saturated Fat10 g
Cholesterol 115 mg
Sodium 620 mg
Potassium 560 mg
Total Carbohydrate 31 g
Dietary Fiber2 g
Protein 28 g
Click to learn more about revolutionary ThinMist!

Looking for more great content? Visit our partner sites:

The Green Frugal

Running Across Texas


As Featured On Ezine Articles

I offer article and blog-writing services. Interested? Hire Me!


Did you find this article helpful? Thanks for supporting this free site with a small donation!


Visit Kelly’s profile on Pinterest.


About the Author:

Photo of Kelly R. SmithKelly R. Smith is an Air Force veteran and was a commercial carpenter for 20 years before returning to night school at the University of Houston where he earned a Bachelor’s Degree in Computer Science. After working at NASA for a few years, he went on to develop software for the transportation and financial and energy trading industries. He has been writing, in one capacity or another, since he could hold a pencil. As a freelance writer now, he specializes in producing articles and blog content for a variety of clients. His personal blog is at I Can Fix Up My Home Blog where he muses on many different topics.

How to Make Sauce Cling to Your Pasta

This Cooking Tip Will Give You Enjoyable Restaurant-Style Results

Photo of Kelly R. Smith   by Kelly R. Smith

Cooking pasta with the  emulsion method.
Cooking pasta with the emulsion method
index sitemap advanced

This article was updated on 04/29/21.

Ads we feature have been independently selected and reviewed. If you make a purchase using the links included, we may earn a commission, which helps support the site. Thank you for your support.

Who doesn’t like pasta? Spaghetti Carbonara, ravioli, elbow, penne, and so much more. It’s comfort food, just like tater tots and cheeseburgers. But have you ever wondered why the sauce clings so well to restaurant pasta but when you make it at home it slides right off and puddles on you plate? The secret is the concept of emulsion. The good news is that you can easily make it happen in your own kitchen!

What is this emulsion anyway? In a nutshell, it’s when two or more liquids that normally won’t mix are forced to come together. For example, mayonnaise is an oil in water emulsion that is stabilized by the lecithin in egg yolk. That’s why you don’t have to stir it up. Peanut butter is another good example (except for the kind that you do need to stir). Now let’s learn how to apply emulsion to home-cooked pasta.

Easy Steps to Making Sauce-Clinging Pasta

  • Bring heavily salted water to a boil in an appropriately-sized pot. I like using “pink” or Himalayan salt. Regular table salt has all the minerals stripped out of it.
  • Add the pasta.
  • Do not cook it to the al dente stage; leave it a bit undercooked because it will finish in the sauce.
  • When you go to drain the pasta, reserve a cup of the water. Set the pasta aside.
  • Add your sauce to the now-empty pot. For every 3 ounces of dry pasta that you cooked, use 1/2 cup of sauce.
  • Heat the sauce to a simmer.
  • Add in any extra vegetables that you enjoy.
  • Toss in 1/2 tablespoon of butter (I like Kerrygold Irish butter but it’s your call). Stir in until it melts. Repeat until you can run a spoon through it and see all the way to the bottom of the pot without the sauce quickly seeping back to fill the gap.
  • Add the drained pasta directly to the pot. Mix vigorously. This will further emulsify and thicken your sauce by grabbing bits of starch from the pasta; mixing your pasta and sauce directly in your pot instead of pouring sauce over the pasta is the key finishing step to achieve that restaurant quality. Different kinds of pasta interact with different sauces differently. Some soak up more liquid than others. If your sauce is too thick, this is where you can mix some of your reserved pasta water back in, just a wee bit at a time.
  • Serve and enjoy!

I like to serve it with a side of Tuscan kale salad. Go ahead and experiment with making sauce cling to your pasta. Different kinds of pasta, different kinds of sauce; it’s an adventure. Of course, it also works in low-carb noodles recipes.

Trending Recipes


Looking for more great content? Visit our main page or partner sites:

I Can Fix Up My Home

The Green Frugal

Running Across Texas


As Featured On Ezine Articles

I offer article and blog-writing services. Interested? Contact me for a quote!


Did you find this article helpful? Millions of readers rely on information on this blog and our main site to stay informed and find meaningful solutions. Please chip in as little as $3 to keep this site free for all.


Visit Kelly’s profile on Pinterest.

About the Author:

Photo of Kelly R. SmithKelly R. Smith is an Air Force veteran and was a commercial carpenter for 20 years before returning to night school at the University of Houston where he earned a Bachelor’s Degree in Computer Science. After working at NASA for a few years, he went on to develop software for the transportation, financial, and energy-trading industries. He has been writing, in one capacity or another, since he could hold a pencil. As a freelance writer now, he specializes in producing articles and blog content for a variety of clients. His personal blog is at Considered Opinions Blog where he muses on many different topics.

Tater Tots Cheeseburger Casserole Recipe

Tater Tots Cheeseburger Casserole
index sitemap advanced

There’s something to be said for All-American comfort food. What could be more representative of that culinary niche than the humble cheeseburger? Well, this recipe for Tater Tot Cheeseburger Casserole fits the bill nicely, especially on those summer days when it is raining to much to go out on the backyard deck and fire up the grill. One thing it is not is low-carb.

You’ll notice that this recipe doesn’t really go into all the possible condiments and spices that you may prefer. That is because we believe that burgers should be individually tailored; make this meal your own by throwing in what you are craving. There are things you can add after the fact as well. For example, I’m fond of shaking on some homemade habanero hot sauce.

Ingredients

  • 2 lb. lean (at least 80%) ground beef
  • 1 3/4 cups chopped onion (1 1/2 medium)
  • salt to taste
  • pepper to taste
  • 3 cups shredded Cheddar cheese (12 oz)
  • 1 cup Original Bisquick™ mix
  • 1 1/2 cups milk
  • 3 eggs, beaten
  • 1 bag (32 oz) Ore-Ida™ Tater Tots™ frozen potatoes

Meal Preparation Steps

  • Pre-heat your oven to 400°F. Spray 13×9-inch (3-quart) glass baking dish with your favorite cooking spray.
  • Use a 12-inch nonstick skillet to cook beef and onion over medium-high heat for 8 to 10 minutes. Stir the mixture frequently until beef is brown. Drain. Stir in salt and pepper and spread the mixture in the dish. Sprinkle mixture evenly with 2 cups of the cheese.
  • In a medium mixing bowl, stir Bisquick™ mix, milk, and eggs using a whisk until well-blended. Pour over the cheese layer in the baking dish. Arrange the frozen Tater Tot potatoes on top of casserole.
  • Put dish in oven and bake 40 to 45 minutes or until the potatoes begin to brown. Sprinkle the remaining 1 cup of cheese evenly on top of the casserole. Bake 3 to 5 minutes or until the cheese is melted. Finally, remove the pan from the oven and let it rest 10 minutes before serving.

Recipe Modifications

As I mentioned above, this is a bare-bones recipe yearning for your modifications. Although this is great for kids that are finicky diners, adults are more likely to tweak the basic. Here are some of the possibilities.

  • A layer of tomato slices between the cheese layer and the Bisquick™ mixture.
  • Jalapeno or Serrano peppers anywhere.
  • Powdered ranch dressing mixed into the hamburger meat.
  • Bacon (of course!).
  • And the list goes on…

Looking for more great content? Visit our partner sites:

The Green Frugal

Running Across Texas


As Featured On Ezine Articles

I offer article and blog-writing services. Interested? Hire Me!


Did you find this article helpful? Thanks for supporting this free site with a small donation!


Visit Kelly’s profile on Pinterest.


About the Author:

Photo of Kelly R. SmithKelly R. Smith is an Air Force veteran and was a commercial carpenter for 20 years before returning to night school at the University of Houston where he earned a Bachelor’s Degree in Computer Science. After working at NASA for a few years, he went on to develop software for the transportation and financial and energy trading industries. He has been writing, in one capacity or another, since he could hold a pencil. As a freelance writer now, he specializes in producing articles and blog content for a variety of clients. His personal blog is at I Can Fix Up My Home Blog where he muses on many different topics.


Lower High Blood Pressure Naturally

There Are Many Ways to Treat Hypertension Naturally With Your Doctor’s Approval

Photo of Kelly R. Smith   by Kelly R. Smith

Omron Evolv blood pressure monitor
index sitemap advanced

Ads we feature have been independently selected and reviewed. If you make a purchase using the links included, we may earn a commission, which helps support the site. Thank you for your support.

They call high blood pressure, or hypertension if you will, the silent killer. That’s because there are no outward symptoms. If you have it you’ll only know if your doctor slaps the arm cuff on and tests it. Your dentist might do it before a procedure as well.

If you are diagnosed with high blood pressure, the first thing your doctor will do is tell you not to smoke, exercise more, and possibly lose weight. And then comes the inevitable hypertension medication. The problem with BP meds is that they all have side effects. The good news is that most of these medications are not all that expensive, even if you don’t have conventional insurance or Medicare Part D.

For example, I take Lisenopril and one of the side effects is that it makes me lethargic. I could tell you a thing or two about blood pressure meds and running. It also gives me a persistent cough. Luckily, there are some non-med things you can do to bring down your BP naturally.

Lower Blood Pressure by Slowing Your Breathing

Sounds like magic, doesn’t it? Well it’s not. The Resperate device has been proven to lower blood pressure. The idea is that using ear buds , a chest sensor strap, and the small device, it guides the user to breathe ever more slowly using guiding tones. The sensor monitors breathing and slows the tones accordingly. This has the effect of relaxing the blood vessels, thereby lowering blood pressure. Using the device over time has a cumulative effect. It is the only FDA-cleared device on the market to do this.

Foods to Lower High Blood Pressure

  • Watermelon. The important component here is citrulline . Once consumed, it’s converted to  L-arginine which is the precursor to nitric oxide. In the body nitric-oxide relaxes the blood vessels which causes the blood pressure to decrease.
  • Ginger- Cinnamon – Cardamom Tea. Ginger and cinnamon are both warming spices that improve circulation. Cardamom is an herb used to treat many conditions. In addition to high blood pressure, it is also effective with liver and gallbladder issues, bronchitis, urinary issues, and more.
  • Onions. The key ingredient is a powerful antioxidant known as quercetin. Quercetin helps lower blood pressure. It also helps to treat chest pain, and angina. It effectively lowers the risk of stroke and heart attack. The best way to get as much of this enzyme as possible is eating your onions raw or lightly cooked.
  • Hibiscus Tea. And you thought it was just a pretty flower! Tufts University conducted a study during which participants sipped three cups of a hibiscus tea daily. They lowered systolic blood pressure by 7 points in a 6 week period on average. These results are on par with many prescription medications.
Click to receive your FREE copy!
  • Pomegranate Juice. This fruit contains natural ACE inhibitors. These prevent those enzymes from damaging your circulatory system. The juice of the pomegranate performs like the medications doctors prescribe for high blood pressure.
  • Dark Chocolate. Good news for me and perhaps for you too! A Harvard study found that consuming just one small square of dark chocolate daily can assist in lowering blood pressure. The higher the cacao percentage the better. Look for over 70%. This study concurs with the growing body of research into the heart-healthy benefits of flavonoids. These compounds present in unsweetened chocolate cause dilation of the blood vessels.
  • Flaxseed. In 2013 a study was published in Hypertension that reported that flaxseed consumption lowers blood pressure in hypertensive patients. Over 100 patients that had been diagnosed with peripheral artery disease were in the study. This condition is associated with hypertension. The patients were assigned to either the flaxseed group or the placebo group. The former ate 30 grams of flaxseed every day for 6 months. There are many ways to add flaxseed to your diet. I even add it (milled of course) to my homemade hot sauce. Omelets? Oatmeal? Salad dressing? Yes, yes, yes.
  • Beetroot Juice. Although some of pressure-lowering effects are due to the minerals it contains, like potassium and magnesium, the real powerhouse here is the high concentration of nitrates. Consuming beetroot juice results in these nitrates being rapidly converted into nitrites by bacteria that live on the surface of the tongue, and in saliva. Next the nitrites are absorbed into the circulation system. Here they make a gas called nitric oxide (NO). This is a cell-signaling molecule which has a powerful relaxing effect on the small muscle fibers in your blood vessels. Consequently, the blood vessels dilate and your blood pressure falls.
  • Nuts. Who doesn’t like nuts? Pistachio nuts seem to have the strongest effect when it comes to reducing high blood pressure. According to the American Journal of Clinical Nutrition, 21 clinical trials, all carried out between 1958 and 2013 bore out this conclusion.

This list will get you started on a delicious way to control your high blood pressure. If you have been diagnosed with it (or just are interested in tracking your health, like you do your weight), it’s a good idea to monitor it on a regular basis. Personally, I use the Omron Evolv Blood Pressure Monitor

It is very accurate and eliminates all the hoses and units. It’s just the cuff that has its own readout. It communicates to your phone by a Bluetooth app if you want to keep a running record of your results.

I hope you enjoyed this article on lowering high blood pressure naturally and found it helpful. If so, please share the link with friends and social media. And if you have some related ideas please share them with our readers in the comment section below. Thanks for visiting!

Further Reading


Looking for more great content? Visit our partner sites:

The Green Frugal

Running Across Texas


As Featured On Ezine Articles

I offer article and blog-writing services. Interested? Hire Me!


Did you find this article helpful? Thanks for supporting this free site with a small donation! We stay in business by relying on our readers rather than a snarky paywall.


Visit Kelly’s profile on Pinterest.


About the author:

Photo of Kelly R. SmithKelly R. Smith is an Air Force veteran and was a commercial carpenter for 20 years before returning to night school at the University of Houston where he earned a Bachelor’s Degree in Computer Science. After working at NASA for a few years, he went on to develop software for the transportation and financial and energy trading industries. He has been writing, in one capacity or another, since he could hold a pencil. As a freelance writer now, he specializes in producing articles and blog content for a variety of clients. His personal blog is at I Can Fix Up My Home Blog where he muses on many different topics.


Companion Planting Guide for Your Veggie Garden

index sitemap advanced
Swiss Chard Garden
Swiss Chard Garden

This article was updated on 03/01/20.

Many people put in their vegetable gardens every year and do their best to do the proper fertilization, watering, and weeding. Yet, no bounty for the table. It might be that the neighboring plants are the wrong types.

Some vegetable plants will benefit their neighbors; others will hinder their growth and yield. The answer is to plant correctly paired species. Sometimes even certain flowers will provide great benefits. This applies to both traditional and raised bed gardens.

First, Plan Your Garden

To take advantage of companion agriculture in order to get more bang for your buck, you first need to choose which vegetables and then mate them up with something else you want to bring to the table.

Personally, I choose the things that I love to eat but are either hard to find or expensive. For example, so far this year I’ve put in tomatoes, basil, strawberries, Brussels sprouts, rosemary, and chocolate mint (goes great in my espresso grounds).

As a side note, it never hurts to have fruit trees. When they are blossoming, that means more bees which will also pollinate your vegetables. My “mini-orchard” contains two fig trees, a plum tree, a Republic of Texas orange, a mandarin orange, a Sam Houston peach, a mulberry tree, and an improved Meyer lemon. All organic.

Recommended Companion Plants

There are a lot of popular plants that have plant friends. Let’s look at some of the most popular.

Asparagus. Good with basil, tomatoes, and parsley. Asparagus in the home garden is a good investment, it is low-maintenance, less expensive than at the store, and a bed will produce for years.

Basil. Good for most garden crops except rue. It improves the growth and flavor of many vegetables, especially tomatoes and lettuce.

Beets. Plant with broccoli, Brussels sprouts, cabbage bush beans, onions, cauliflower, chard, and kohlrabi.

Bush Beans. They like cauliflower, cucumbers, corn, beets, potatoes, carrots, cabbage, strawberries, catnip, marigolds, and savory. Why catnip if you don’t own a cat? It repels flea beetles.

Brussels Sprouts and Broccoli. Good friends of thyme, mint, chamomile, dill, hyssop, beets, buckwheat, onions, rosemary, sage, wormwood, marigolds, nasturtiums, calendula, carrots. But not strawberries.

Cantaloupe. Likes sunflowers and corn, but not potatoes.

Carrots. Plant near cabbage, chives, early potatoes, leeks, salsify, wormwood, peas, radishes, rosemary, lettuce, onions, and sage.

Corn. Compatible with early potatoes, melons, beans, cucumbers, soybeans, squash, peas, and pumpkins .

Cucumbers. Plant near cabbage, corn, radishes, sunflowers, early potatoes, and beans. Not compatible with late potatoes.

Eggplant. Pair up with beans and marigold. Avoid potatoes as companions.

Onions. They like the companionship of beets, carrots, strawberries, tomatoes, summer savory, and cabbage. Avoid beans and English peas.

Parsley. Great with asparagus and tomatoes.

Soybeans. The ideal plant. They work with and help anything.

Squash. Good with corn, radishes, marigolds, and nasturtium. Not friendly with Irish potatoes.

Tomatoes. Works well with onions, marigold, asparagus, cucumbers, basil, carrots, and parsley.

Use marigold flowers for pest control
Use marigold flowers for pest control and beneficial companionship

More gardening tips

There are many other things to tip a generous harvest in your favor. This spring I took up rainwater harvesting for garden and tree watering. There are two main reasons that this is a good idea in my humble opinion. First, rainwater is free. Secondly, plants prefer the Ph in rainwater as compared to tap water.

Another good tip is to apply beneficial nematodes to your lawn and garden during the spring. On your lawn they will eliminate fleas without using pesticides. In your garden they will organically control sod webworms, cutworms, maggots, various types of ants, and many more. Pesticides are a bad idea; they kill beneficial ladybugs. They will also kill the earthworms that keep your garden soil aerated. Also, pesticides are taken up by the plant roots and kill the microscopic microbes that keep the roots healthy. Eventually, those toxins will make their way to your dining room table.

Did this post on companion planting for your garden help you? If so, feel free to share the link with your friends and your social media contacts.


Looking for more great content? Visit our partner sites:

The Green Frugal

Running Across Texas


As Featured On Ezine Articles

I offer article and blog-writing services. Interested? Hire Me!


Did you find this article helpful? Thanks for supporting this free site with a small donation!


Visit Kelly’s profile on Pinterest.


About the author:

Photo of Kelly R. SmithKelly R. Smith is an Air Force veteran and was a commercial carpenter for 20 years before returning to night school at the University of Houston where he earned a Bachelor’s Degree in Computer Science. After working at NASA for a few years, he went on to develop software for the transportation and financial and energy trading industries. He has been writing, in one capacity or another, since he could hold a pencil. As a freelance writer now, he specializes in producing articles and blog content for a variety of clients. His personal blog is at I Can Fix Up My Home Blog where he muses on many different topics.


How to Build a Raised Garden Bed

index sitemap advanced
Raised Garden Bed
Raised Garden Bed

A raised garden bed (or raised bed garden if you prefer) is a great way to grow your own organic produce. It’s a simple weekend DIY project. The picture above shows the one I just built. It still needs a bit of tightening up but the basics are there.

Types of Raised Bed Gardens

The one I built was made using cinder blocks. The benefits are low cost of materials and the ability to expand easily. Kits are also available but they cost a bit more and not all are expandable. They can also be built using wood (cedar is a good choice) and stakes.

Height is also a consideration. The cinder block height works well for me but people with back problems do better with elevated garden kits. It’s all a matter of convenience and personal preference.

Preparing the Garden

A garden laid directly on the ground, like mine, will benefit from a layer of newspaper laid on the grass surface. This will inhibit grass and weeds from making their way up through the dirt.

On top of this goes your dirt with compost added in. It’s easy to mix using a hoe. What type of dirt? I have heard some gardeners swear by rose soil but in my experience regular garden soil works fine. If you already know what you are going to plant this is a good time to test the soil pH and adjust it using the appropriate soil amendments.

Planting Time!

You’ve got two choices–start your plants from seed or buy bedding plants. Seeds are less expensive but using plants will mean you can harvest sooner. I prefer plants. Just plant them at the recommended depth and water them in well.

Next add a couple of inches of mulch to the surface. There many varieties available. I prefer hardwood mulch because of the way it decomposes over time and feeds the soil. Whatever you do, do not use dyed mulch. That dye is chemical and you certainly don’t want roots to be taking it up!

Now toss out some organic fertilizer and some agricultural dried molasses. The molasses stimulates all the beneficial microbes and earthworms, both of which are important for the health of your soil. Microbes share a symbiotic relationship with plants. Worms will keep your soil aerated which helps in water distribution and root growth. Another consideration is spraying out some beneficial nematodes to control fleas and many other pests.

I hope you found this article on building a raised garden bed helpful. If so, please pass it along to your friends. Comments or ideas? Add them in the comment section below. Thanks for visiting and happy gardening!

About the Author:

Kelly R. Smith
Kelly R. Smith

Kelly R. Smith is an Air Force veteran and was a commercial carpenter for 20 years before returning to night school at the University of Houston where he earned a Bachelors Degree in Computer Science. After working at NASA for a few years, he went on to develop software for the transportation and financial and energy trading industries. He has been writing, in one capacity or another, since he could hold a pencil. As a freelance writer now, he specializes in producing articles and blog content for a variety of clients.


Looking for more great content? Visit our partner sites:

The Green Frugal

Running Across Texas


As Featured On Ezine Articles

I offer article and blog-writing services. Interested? Hire Me!


Did you find this article helpful? Thanks for supporting this free site with a small donation!


Visit Kelly’s profile on Pinterest.


Endure: Mind, Body, and the Curiously Elastic Limits of Human Performance

A Book Review

index sitemap advanced

At first glance, this book by Alex Hutchinson would seem to be just another running book. After all, that’s what the cover photo shows. But in reality the book examines the slippery nature of endurance by looking not only at running, but also mountain climbers, skiers, cyclists, free diving, and more. Regardless of the activity, the boldest among us continue to push the known boundaries of endurance.

Is There a Limit to Endurance?

This is the central question of the book. It turns out that endurance is analogous to nutrition; every day it seems some “qualified person” comes up with the latest and greatest theory. Case closed; mystery solved. Well, until the next day. Then someone comes along and changes the game; moves the marker.

New records are constantly being set, from 25-year-old medical student Roger Bannister’s 4-minute mile to Eliud Kipchoge of Kenya setting a new world marathon record in Berlin. He ran an amazing time of 2:01:39. Ask anyone who is a distance runner; this time is phenomenal under any circumstance. Kipchoge says, “It’s not about the legs; it’s about the heart and the mind.”

He’s on to something there and that is precisely what this book explores. We can talk about physiology all day long but there is something else going on here. The real issue is that the “something” is so hard to quantify.

This book is a must-read (or in all honesty a must-listen since I listened to the audible.com release on my long runs) for any of us weekend warriors who are looking for a little bit more inspiration. The latest nutritional supplement may give us an edge or not but is it real or a placebo effect? Does it matter? You decide.


Looking for more great content? Visit our partner sites:

The Green Frugal

Running Across Texas


As Featured On Ezine Articles

I offer article and blog-writing services. Interested? Hire Me!


Did you find this article helpful? Thanks for supporting this free site with a small donation!


Visit Kelly’s profile on Pinterest.


Should Runners and Others Supplement with CoQ10?

by Kelly R. Smith

Health Benefits of CoQ10
index sitemap advanced

This article was updated on 11/01/20.

To use fitness supplements or not to use fitness supplements; that is the question. Like nutritional needs, the definitive answer seems to flip-flop periodically depending on the most recent studies. Sometimes these “studies” are actually funded by a supplement manufacturer and that is certainly a red flag.

But many times they are conducted independently by reputable sources — these should be taken more seriously. Look for researchers from universities or sports  research labs for the most reliable results.

Do Athletes Have a Special Need for CoQ10?

The general consensus to this question is “yes,” CoQ10 supplements are key. Although sedentary people also need it, runners and other fitness enthusiasts have special needs to satisfy. As the image at the top of this article shows, it helps in areas such as energy, inflammation, cardiovascular, and soreness (think 
DOMS or Delayed Onset Muscle Soreness).

Another area of benefit is the antioxidant CoQ10 provides. Antioxidants protect us from the damaging effects of free radicals. These are produced in our bodies when we are exposed to things like sunlight, chemicals, and airborne pollutants such as vehicle exhaust fumes. So if you are out running the roads in the daytime…

The Problem with CoQ10 Supplements

There’s always a catch, right? Well, there are many brands on the market but they are not all created equal. The ones you want to avoid are the synthetic ones that are made from tobacco leaves; they are fairly ineffective. These are referred to as the “cis form.” 

The type that really delivers is the “trans form.” This is identical to the CoQ10 produced naturally within the body. The label may say trans form or Ubiquinone USP Grade. Further, absorption can be an issue. Personally I take the Qunol Ulra CoQ110 which boasts 3 times the absorption of regular products because it is both water and fat soluble.

Two More Considerations

First, you should know that the natural amount of CoQ10 present in your body drops as you age. By the time your 50th birthday rolls around the depletion really begins to accelerate.

Secondly, statins, which are prescribed to lower cholesterol, severely deplete your body’s natural levels of CoQ10, which can be very dangerous. A Columbia University study found that within 30 days, your levels of CoQ10 can be decreased by half!

So the bottom line? If you work out, or are approaching 50 years of age, or are prescribed a statin drug, you should seriously consider supplementing with CoQ10.


Related Trending Articles


Did you find this article helpful? Millions of readers rely on information on this blog and our main site to stay informed and find meaningful solutions. Please chip in as little as $3 to keep this site free for all.


About the Author:

Photo of Kelly R. SmithKelly R. Smith is an Air Force veteran and was a commercial carpenter for 20 years before returning to night school at the University of Houston where he earned a Bachelor’s Degree in Computer Science. After working at NASA for a few years, he went on to develop software for the transportation, financial, and energy-trading industries. He has been writing, in one capacity or another, since he could hold a pencil. As a freelance writer now, he specializes in producing articles and blog content for a variety of clients. His personal blog is at I Can Fix Up My Home Blog where he muses on many different topics.

10 Common Turkey Cooking Mistakes: Thanksgiving and Christmas Dinner Tips

by Kelly R. Smith

Turkey for Thanksgiving Dinner
Turkey for Thanksgiving Dinner; YUM!
index sitemap advanced

This article was updated on 11/14/20.

It’s fair to say that there is nothing quite as emblematic of Thanksgiving and Christmas dinner as that prince of birds — the turkey. It didn’t make it to be the national bird though Ben Franklin lobbied for it, but it did make it to being the savory symbol of two of our favorite national holidays.

That said, the preparation can cause severe anxiety just as holiday season loneliness can. It’s far too easy to get it wrong; too dry, undercooked, or overcooked. Let’s look at 10 common turkey cooking mistakes.

Not Thawing the Turkey Long Enough

This is a very common mistake, especially for those first-timers. This mistake will lead to forehead slapping and a mad attempt to finish the thawing process in a sink full of warm or cool water. Now which was it again?

As a rule of thumb, allow one day in the refrigerator for each 4 pounds of turkey. Using this rule it is easy to determine approximately how long you need to let it defrost before getting busy cooking your turkey. Taking this into consideration, be sure you have enough room in your fridge before you go shopping.

Over-Brining the Bird

Many recipes call for brining — soaking in a solution of salt and spice which is a snap to do with an herb brine kit. However, many of the most available commercially-produced turkeys, such as frozen Butterball birds, have already been pre-treated with a solution of salt and spices. This is done in order to stretch out the shelf life, not necessarily to please your palate. That’s why the brine kit is a better idea; it’s specially prepared for flavor, not storage.

If you do this again (just because the recipe says so), you will end up with a salty bird indeed. Just check the label before you proceed. On the one hand, if the producers have already done it, you have less work to do albeit while sacrificing some flavor. On the other hand, it’s a real chore hand-pick your favorite spices.

Not Drying the Turkey Sufficiently

If your aim is a crispier skin on the outside you’ll want to thoroughly pat the bird down using paper towels before it goes in the oven. Drying the inside cavity of the turkey is also important but not doing so is also a common mistake. Generally speaking, having a well dried turkey inside and outside will yield a more evenly-cooked and flavorful bird.

Cooking the Stuffing Inside the Cavity

Whatever Grandma told you, this is not the best of ideas. The main problem here is that to cook the stuffing through fully and guarantee that all of the bacteria inside the raw bird has been eliminated, you will need to cook the turkey for a longer period of time. The result? Dry, overcooked meat. Embarrassing, Chef.

The obvious answer is to make the stuffing from scratch or use one of those basic boxed delicacies. I like to bake a loaf using my oatmeal flax seed bread recipe ahead of time and make it from that. Super healthy. Either way, cook it outside the bird. We won’t tell if you don’t.

Trussing the Legs too Tightly

It makes sense when you think about it; closing off the cavity means longer roasting time and possibly uneven cooking. Your only real limitation is the width of your roasting pan. If you are going to buy one of those disposable roasting pans at the store, buy it at the same time that you buy your turkey to be sure you have a good fit.

Not Investing in a Real Meat Thermometer

Sure, it’s tempting to rely on that little pop-up button thingamajiggy that the poultry farmers embed in the bird’s hide, but these are notoriously unreliable. These may be faulty and pop up when the meat is already overcooked. Since you’ve only got one shot at this, go ahead and invest in a real meat thermometer. You will get more accurate results and as a bonus, you dinner guests will regard you as a professional. 

Cooking at the Wrong Oven Temperature

We all know some cooks that recommend blasting the turkey at high heat (425°F) for about 30 minutes first and then lower the temperature. However, a low, steady temperature of  325°F from beginning to end is preferable.

Certainly, the initially high-heat method may take 30 to 90 minutes off your total cooking time, but remembering to reduce the temperature  is just one more thing to remember on what is already very busy day.

Not Allowing Your Bird to Rest

No, we’re not talking about letting the turkey take a break. Resting simply means taking it out of the oven when it’s done and simply letting it sit there. This should be done with all meats actually. With a turkey the recommended resting time is 15 minutes.

Why do we do this you might ask? Resting time allows the juices inside the turkey to soak back into the meat, instead of dripping out as soon as you you slice into it. This results in a moister bird. More bang for your buck. It’s still important to keep the turkey warm so tent it with foil until carving time arrives.

Not Preparing the Surface of the Turkey Properly

It’s not clear whether the Pilgrims did this step (some history revisionists even claim that there wasn’t even a turkey present) or not but things have changed since then. It’s not a difficult step; just rub the turkey all over with olive oil or melted clarified butter. The main reason for this is to ensure that the turkey browns evenly. Aesthetics is important; just ask any chef.

Not Inserting the Thermometer in the Correct Spot

You can’t just spear the bird willy-nilly and expect to get the result that you want. Your target is in the thickest part of the thigh, right smack-dab in the crease where it meets the breast. If your bird weighs in at 18 pounds or less, monitor the temperature beginning at 2.5 hours and every 15 minutes following that. For a turkey above 18 pounds, start checking at 3 hours.

Avoid these 10 common turkey cooking mistakes and you and your guests won’t have to be confronted with a foul fowl.


It’s true that stuffing is the most traditional side dish and that’s fine. But if you like to step out of the box and add a very non-traditional dish, you won’t go wrong with Spaghetti Carbonara.

If you are worried that your guests are getting too hungry due to the extra preparation time it takes to do it just right, why not put out an appetizer? I’ve found that Panamanian-Style Ceviche hits the mark rather well.

More Recipes You Will Like


Looking for more great content? Visit our main site I Can Fix Up My Home or our partner sites:

The Green Frugal

Running Across Texas


As Featured On Ezine Articles

I offer article and blog-writing services. Interested? Contact me for a quote!


Did you find this article helpful? Millions of readers rely on information on this blog and our main site to stay informed and find meaningful solutions. Please chip in as little as $3 to keep this site free for all.


Visit Kelly’s profile on Pinterest.

About the Author:

Photo of Kelly R. SmithKelly R. Smith is an Air Force veteran and was a commercial carpenter for 20 years before returning to night school at the University of Houston where he earned a Bachelor’s Degree in Computer Science. After working at NASA for a few years, he went on to develop software for the transportation, financial, and energy-trading industries. He has been writing, in one capacity or another, since he could hold a pencil. As a freelance writer now, he specializes in producing articles and blog content for a variety of clients. His personal blog is at I Can Fix Up My Home Blog where he muses on many different topics.

close

Enjoy this blog? Please spread the word :)

RSS
Follow by Email
Twitter
Follow Me
Tweet
Pinterest
Pinterest
Pinterest
Instagram
LinkedIn
Share