

|
This article was updated on 06/20/20.
Rainwater harvesting or rainwater collection as some call it has been gaining in popularity. There was a time when folks didn’t think much about using water. After all, it is inexpensive and flows from the tap; in our society hauling it home from a well or stream is the stuff of nostalgic folklore.
But that is not the case in many parts of the world. And since we now revel in global awareness, the availability of potable water has become a push-button issue among the green conscious folks among us.
In some parched parts of India men take on an additional spouse whose duty is to transport water from the source to the dwelling–it is a full time job. These “water wives” are often widows or single mothers wishing to “regain respect” in their communities. He notes that they usually do not share the marital bed and often live in separate apartments.
Minimizing Our Use of Potable Water
In our efforts to lower out consumption of tap water we have already trended towards the new normal; in the mid-’90s water conservation laws came into effect, creating the much-dreaded “low-flow” toilet. We also now have low-flow showers (dang it).
Still, it does seem wasteful to expend processed, fluoridated tap water to do things like water the lawn and flower beds. Besides, plants prefer the pH of rain over tap water. Win, win. That is where rainwater harvesting comes in. For residential use it is fairly straightforward. All you really need is a barrel with a screen on top. The water comes from the gutters on the roof line.
How to Install a Water Harvesting Barrel
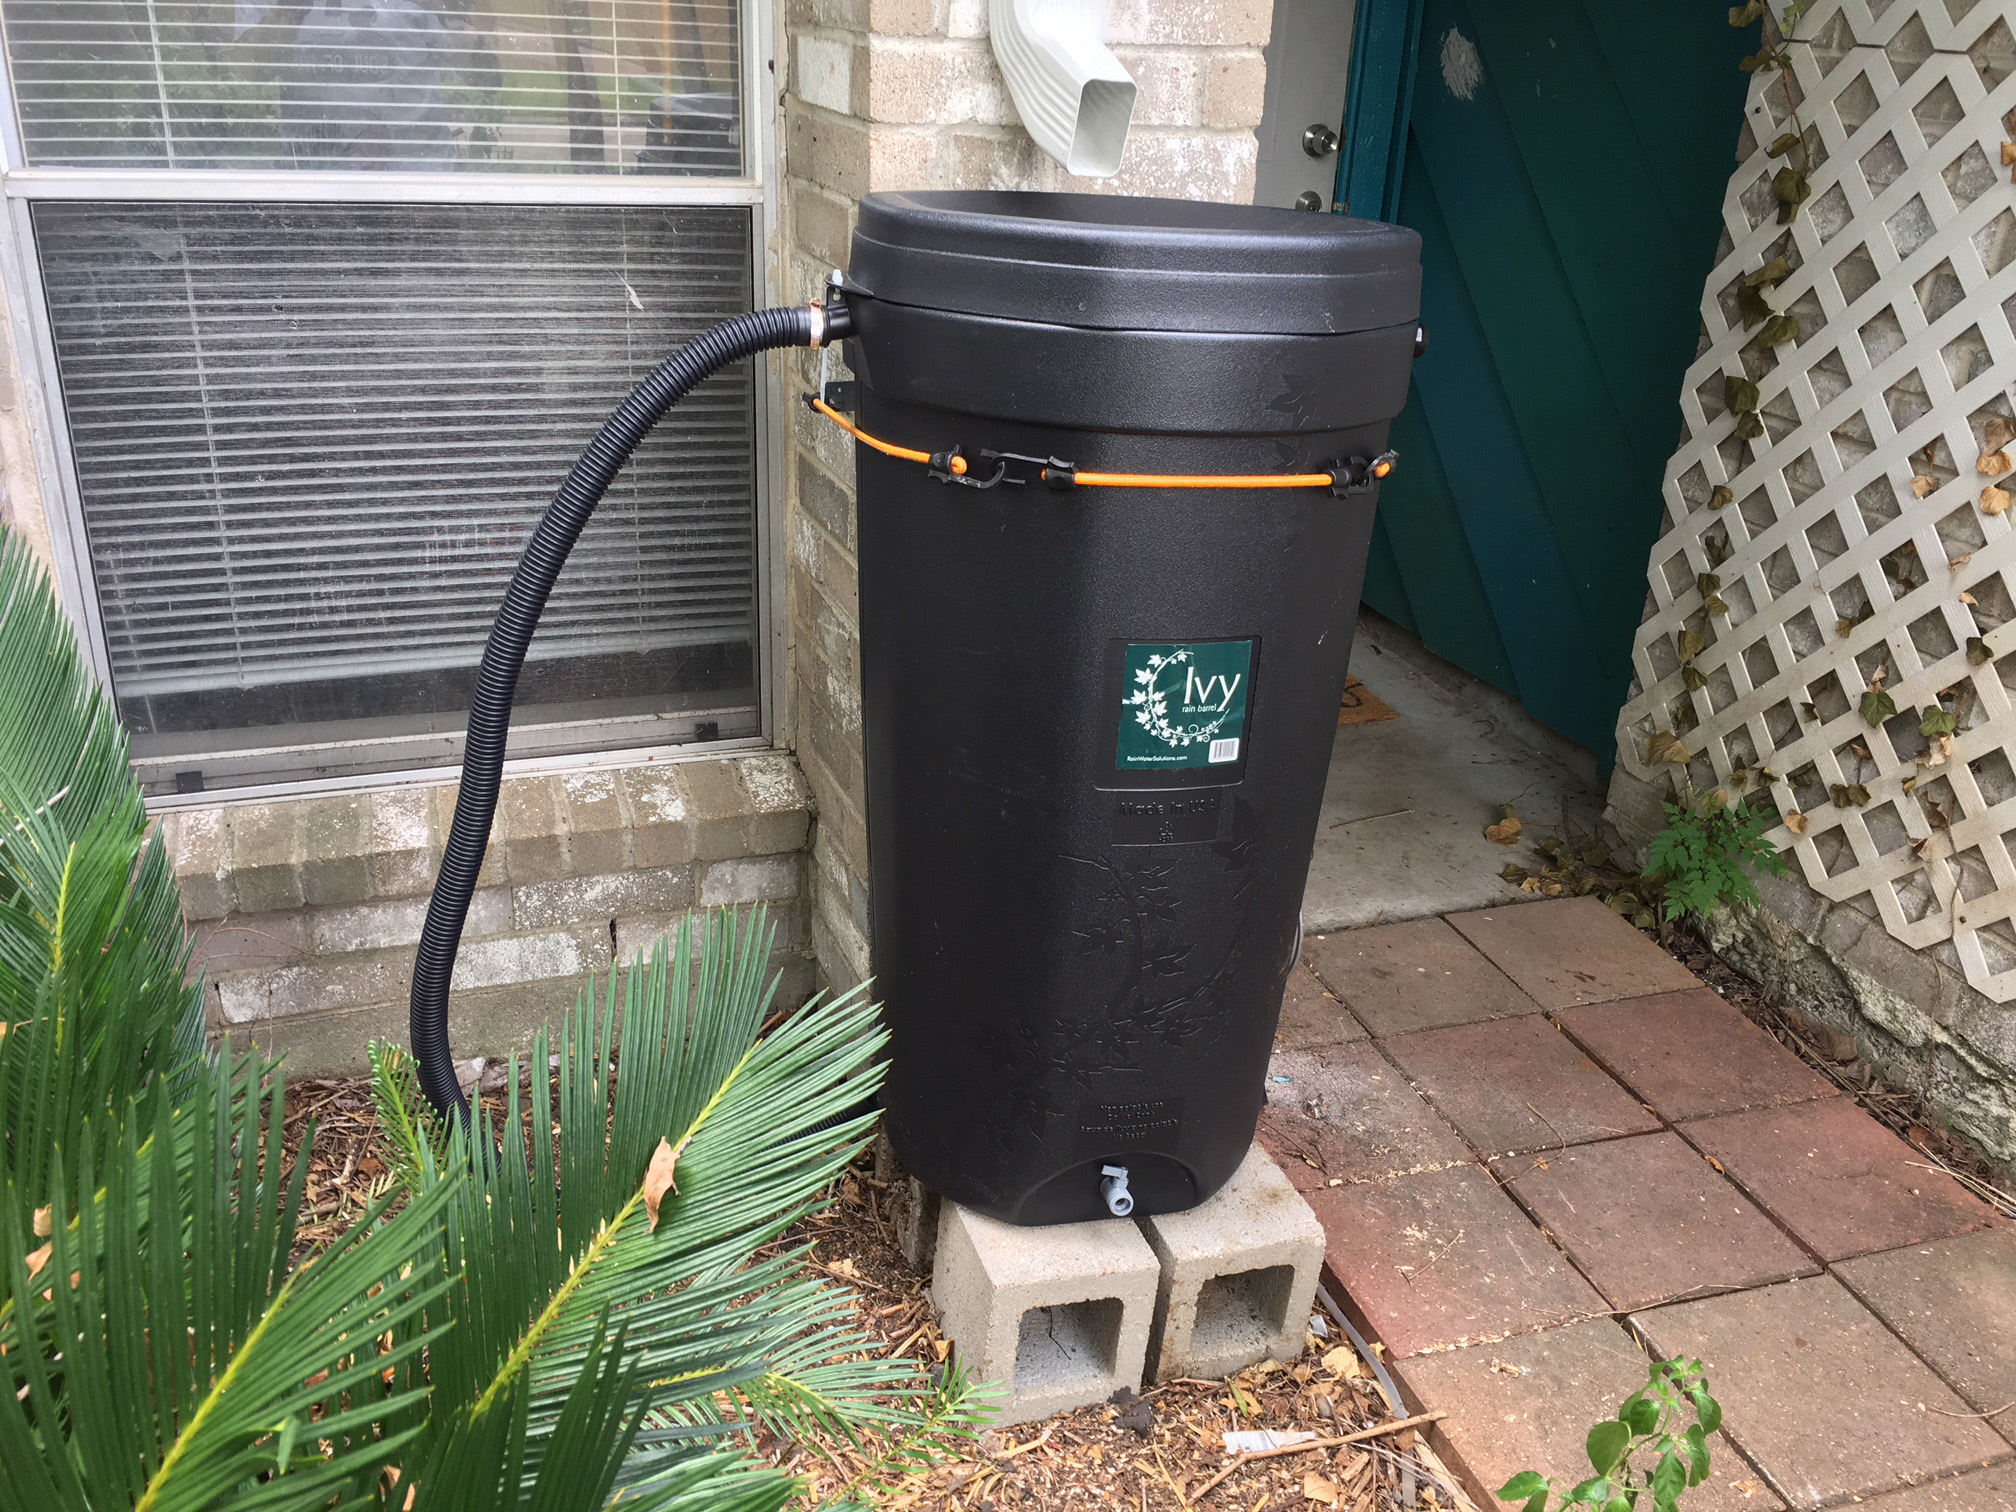
The good news for homeowner is that installing the system is simple and calls for few tools. The one pictured above is an Ivy 50 gallon barrel that I installed at my home this week. Online it lists for $89 but the small city that I live in teamed up with them for a bulk order for a deep discount.
The installation only took about 2 hours. The steps were as follows:
- Grade the ground level under the rain gutter downspout.
- Place 4 cinder blocks where the barrel will reside.
- Place the barrel on the blocks and measure up on the downspout approximately 8 inches from the lip of the barrel lid and use a square to mark a line on the front and sides of the downspout.
- Cut it off at this line. You can use a hacksaw but I used a small Dremel saw with a metal-cutting blade. It’s prettier and easier.
- Install the diverter (not included in the kit but just a few bucks at Home Depot) on the end of the now cut-off downspout. I used self-tapping screws and a cordless drill with a #2 Phillips bit.
- Place the barrel on the cinder blocks so that the diverter is over the lid of the barrel. Secure the lid to the barrel with zip-ties.
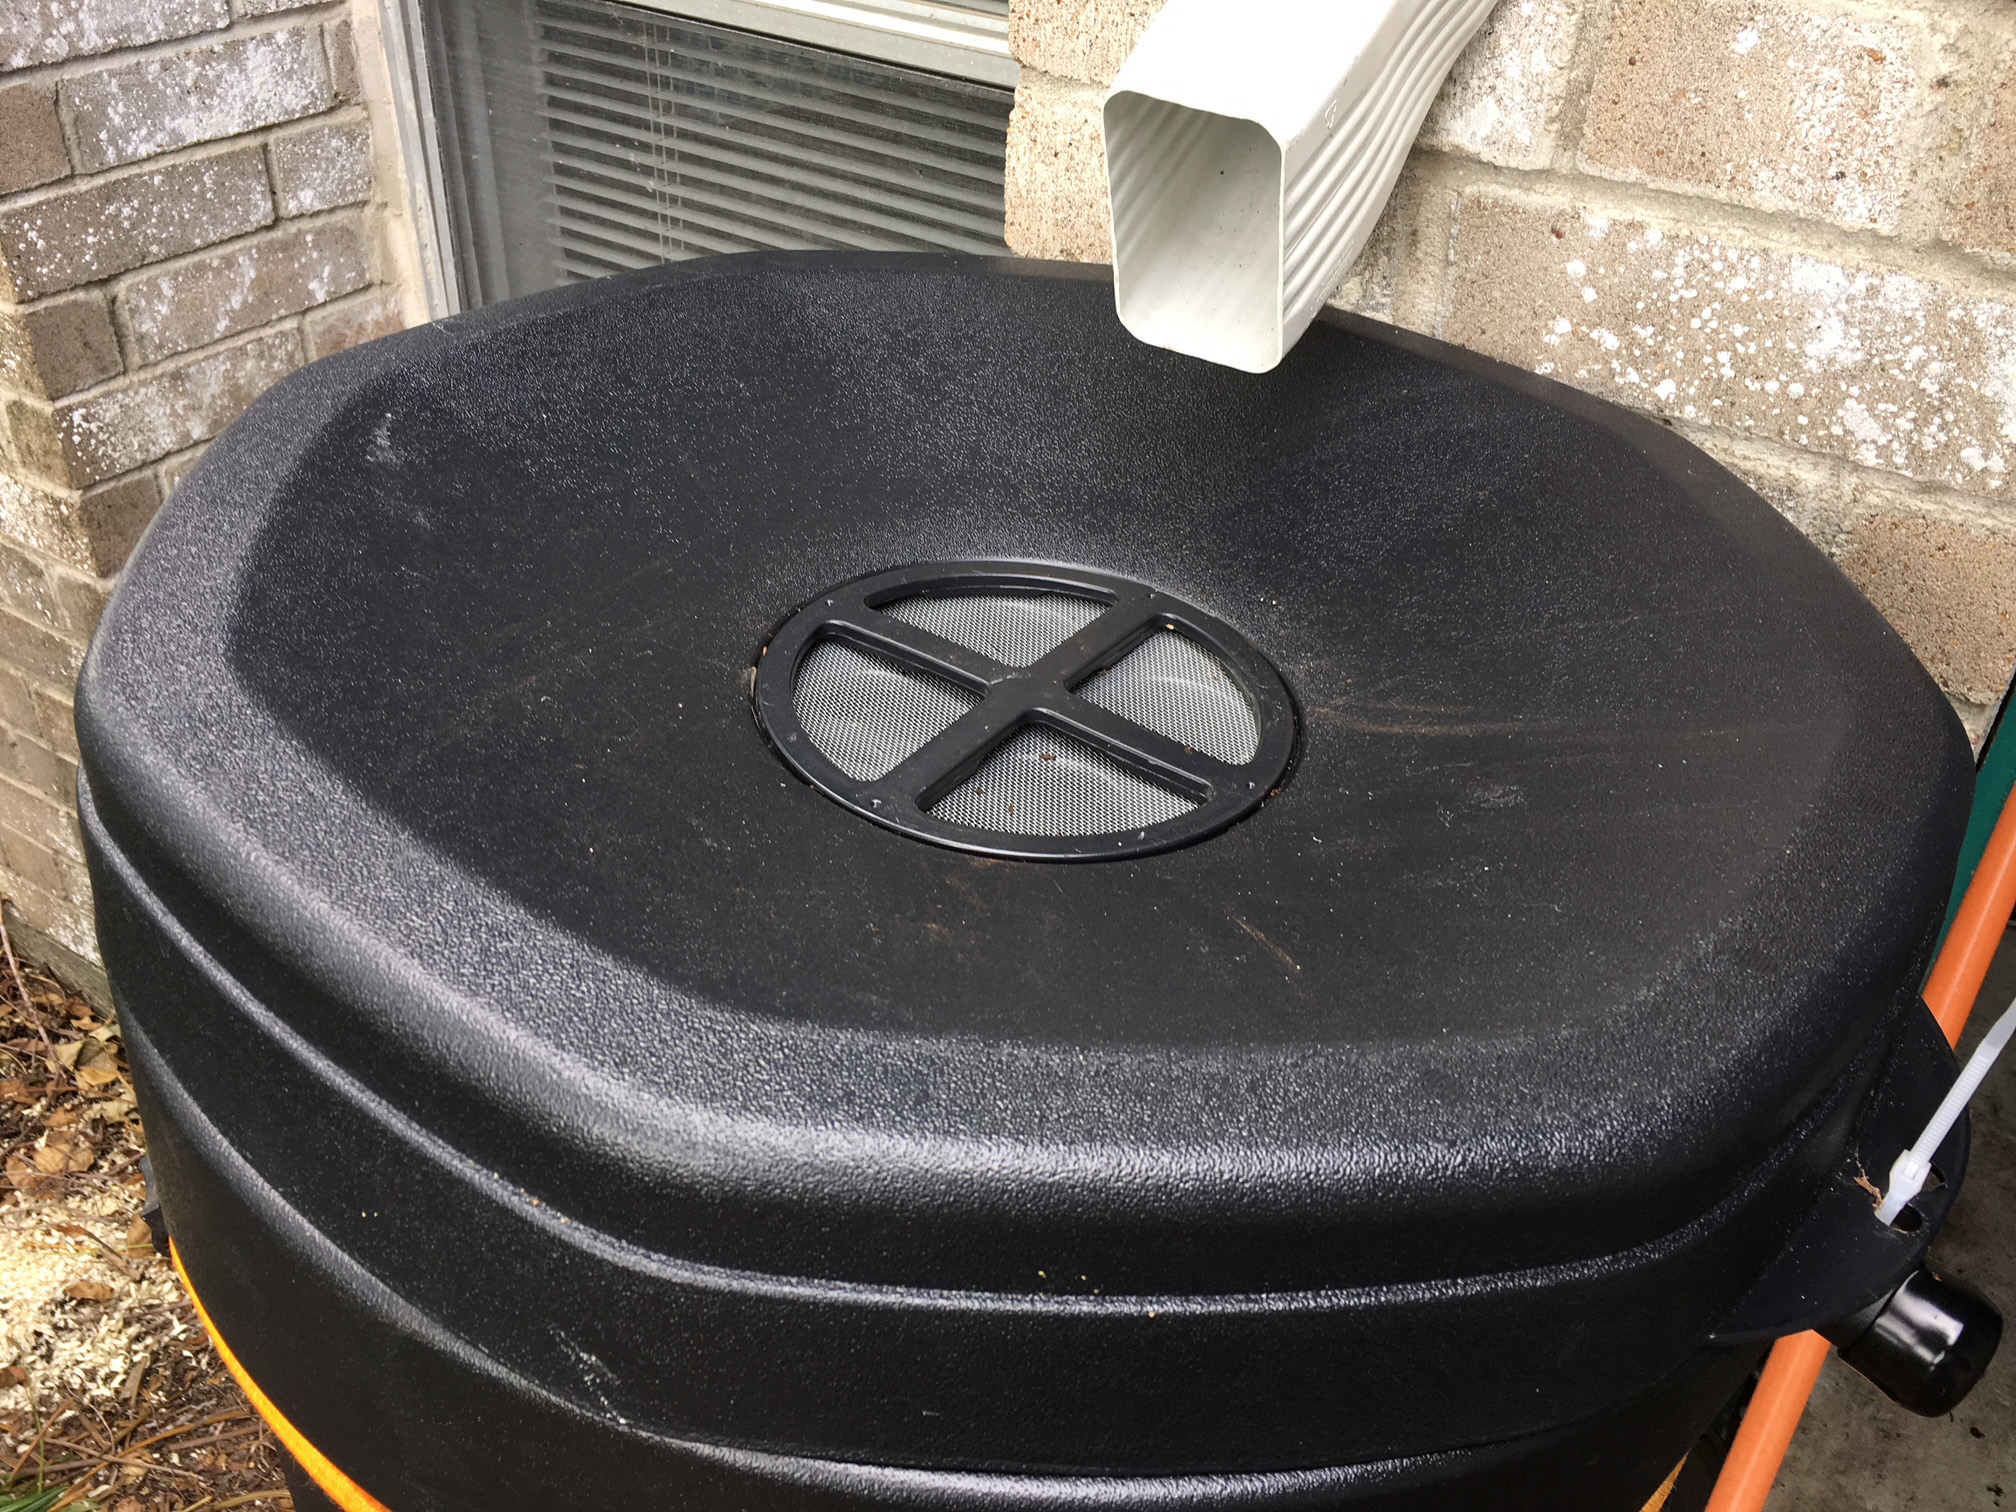
- Install the plastic cap on one side of the barrel and the overflow tube on the other side. These access ports are just under the lid sticking out from the barrel.
- Screw the tap into the bottom front of the barrel being careful not to cross thread it.
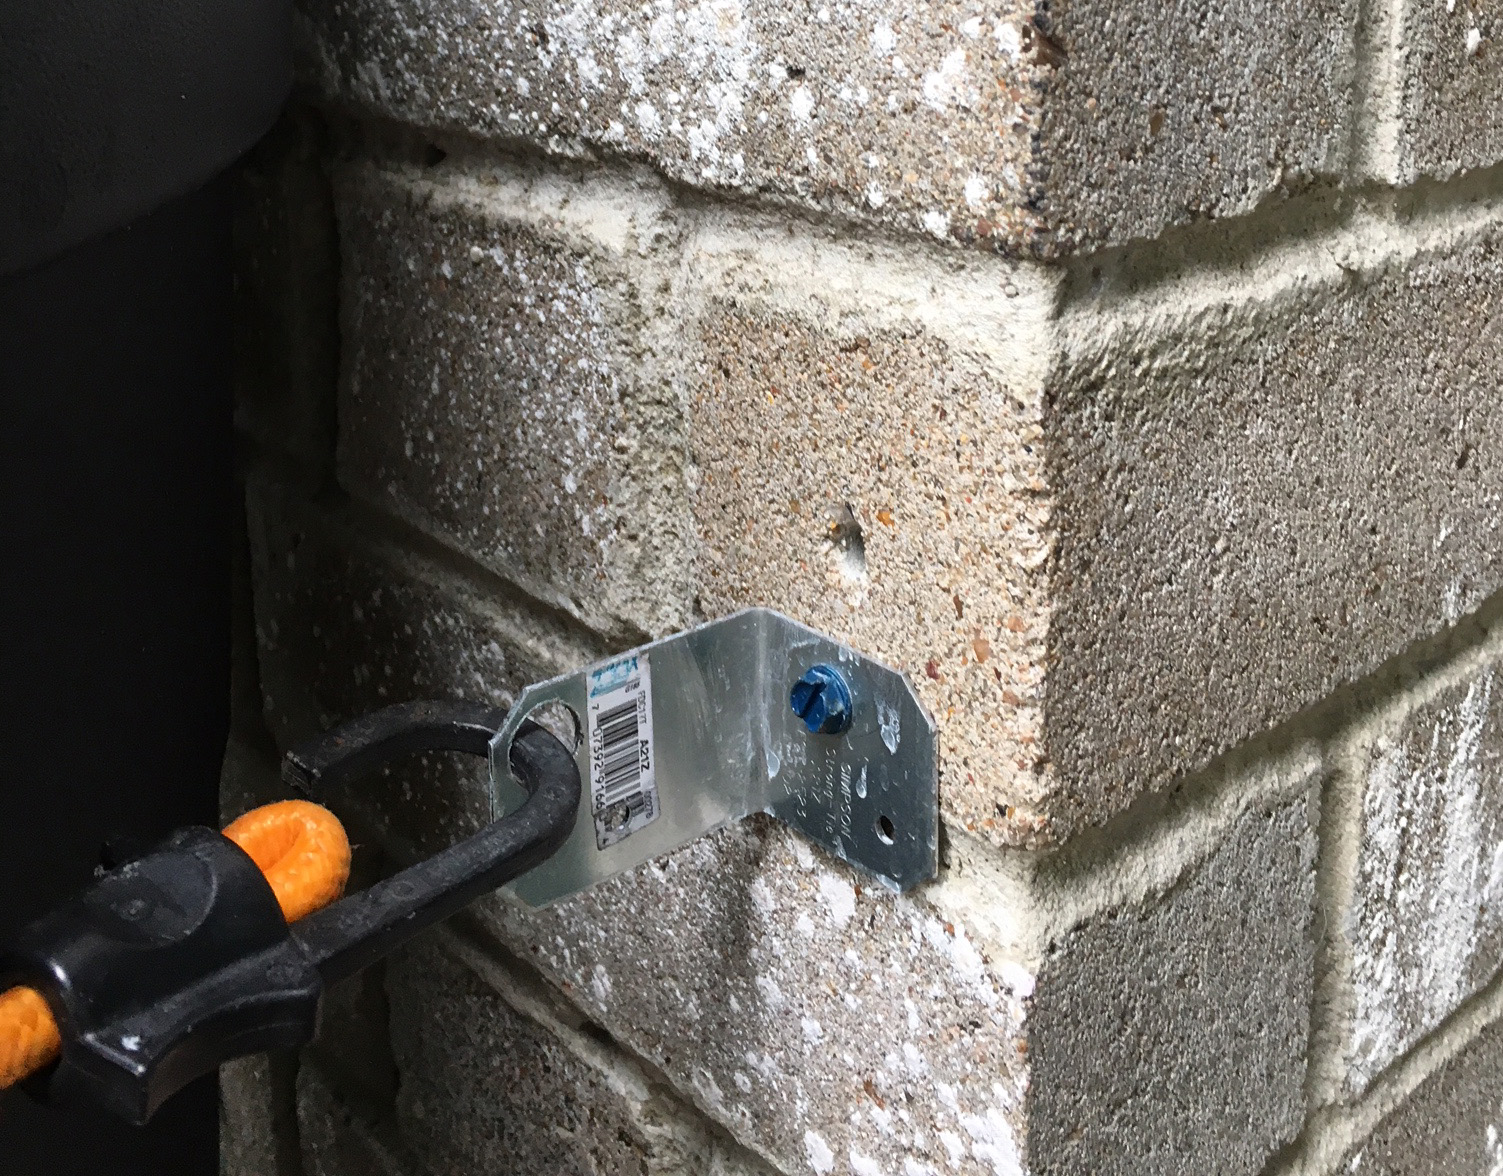
- The barrel must be secured to the exterior wall of your home or braced up somehow to prevent it from falling over. In the designer’s wisdom the barrel is wider at the top than it is at the bottom. In the image below you can see how I used Tapcon screws to secure a metal angle bracket to the brick. I had to drill the existing holes in the bracket bigger to accommodate the screw on one side and the bungee cord on the other. If we get some really bad weather (like a hurricane) I will add some heavy wire to back up the bungee cord.
Where you live and how much collected water that you use makes a huge impact on how you set up your rainwater harvesting system. A 50 gallon barrel will do me just fine here in South Texas. But if you live in, say, the Pacific Northwest you can expand your system. Just add another barrel and connect it to the side where you placed the plastic cap on the port in step 7.

Looking for more great content? Visit our partner sites:

I offer article and blog-writing services. Interested? Hire Me!
Did you find this article helpful? Thanks for supporting this free site with a small donation!
Visit Kelly’s profile on Pinterest.
About the Author:
 Kelly R. Smith is an Air Force veteran and was a commercial carpenter for 20 years before returning to night school at the University of Houston where he earned a Bachelor’s Degree in Computer Science. After working at NASA for a few years, he went on to develop software for the transportation, financial, and energy-trading industries. He has been writing, in one capacity or another, since he could hold a pencil. As a freelance writer now, he specializes in producing articles and blog content for a variety of clients. His personal blog is at I Can Fix Up My Home Blog where he muses on many different topics.
