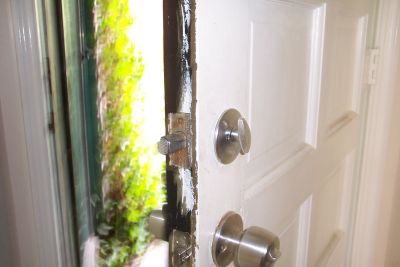
Beef Up Your Deadbolt Lock
07/29/08

Home security systems are always one of my big priorities, and I bet it’s one of yours too. One
of the worst kinds of home break-ins is the kind where the bad guy just kicks in the front or back door.
It doesn’t really matter that your deadbolt is engaged; it only extends a couple of inches at most
and the door jamb doesn't take much to splinter.
Home Alarms Help… After the Fact
Home alarm systems are great for alerting the security company monitors. But in the time it takes
for a police response team to arrive, a crook might have time to take not only belongings, but life.
As mentioned above, popular break-in technique is to kick in the front door. A conventionally
installed deadbolt lock might not stand up.But with a little effort you can greatly enhance its
holding power.
When the wall is framed and the door rough opening is made, the opening is actually an inch or two
wider than the door jamb requires. This allows for plumbing the jamb
when door installation
takes palce. Wooden shims are inserted between the framing studs and the jambs.
Bottom line? All the bolt is engaging is 3/4 inches of wood.
A Deadbolt Extension
So this is what you do -
- Remove the trim (deadbolt strike plate) screwed to the jamb that receives the deadbolt.
- Cut a piece of rigid metal electrical conduit about six inches long.
- Use a paddle bit the same size as the O.D. of the conduit and drill through the jamb
and framing studs.
- Squirt a bit of glue inside the hole.
- Insert the conduit into the hole and tap it with a rubber mallet until it’s flush. Now
re-install the trim.
Now, it’s not just the jamb holding the deadbolt, you've got the strength of the stud working
for you!

