4 Types of Sink Faucets

by Kelly R. Smith

index sitemap advanced
Disassembling a sink faucet for repair

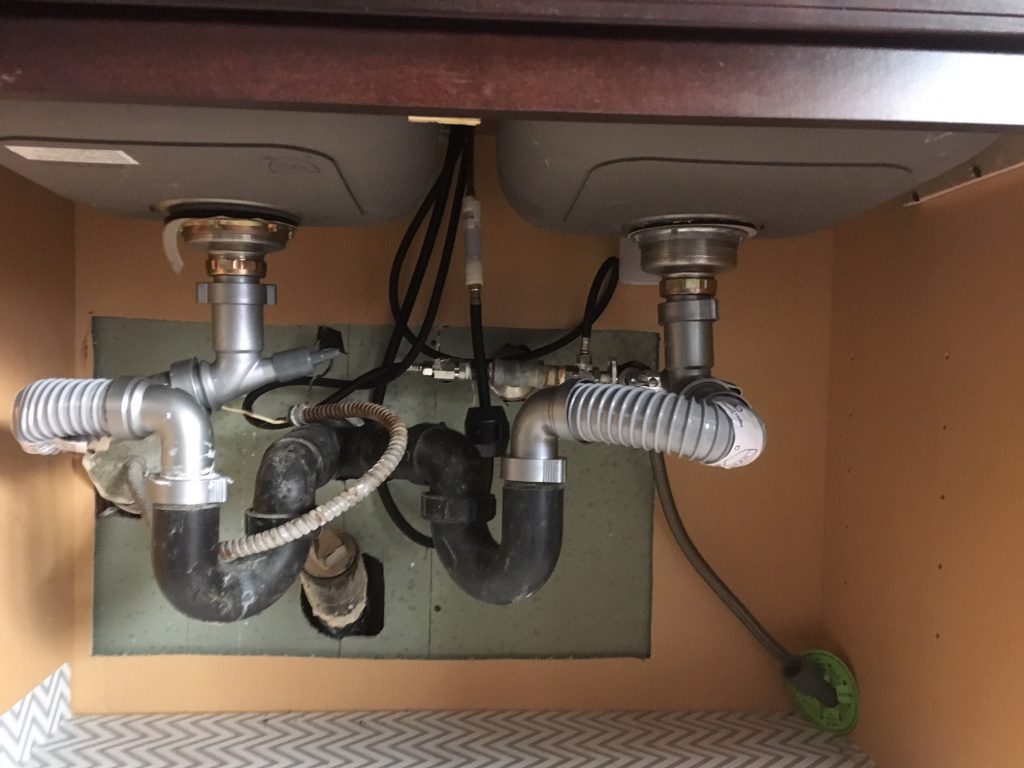
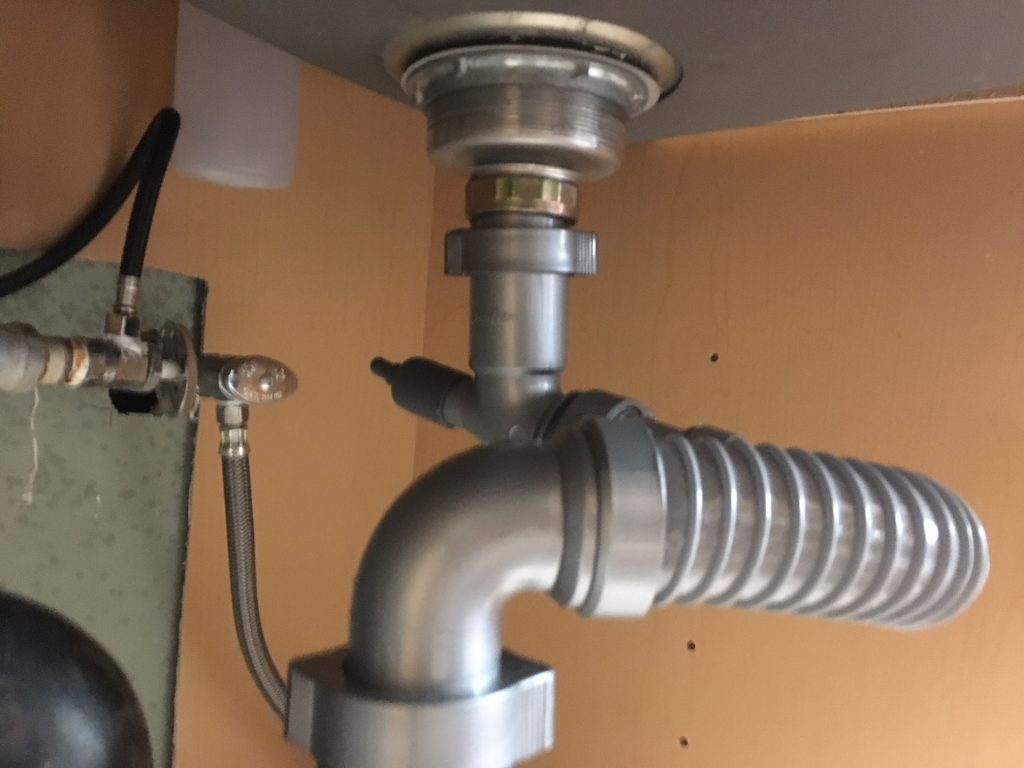
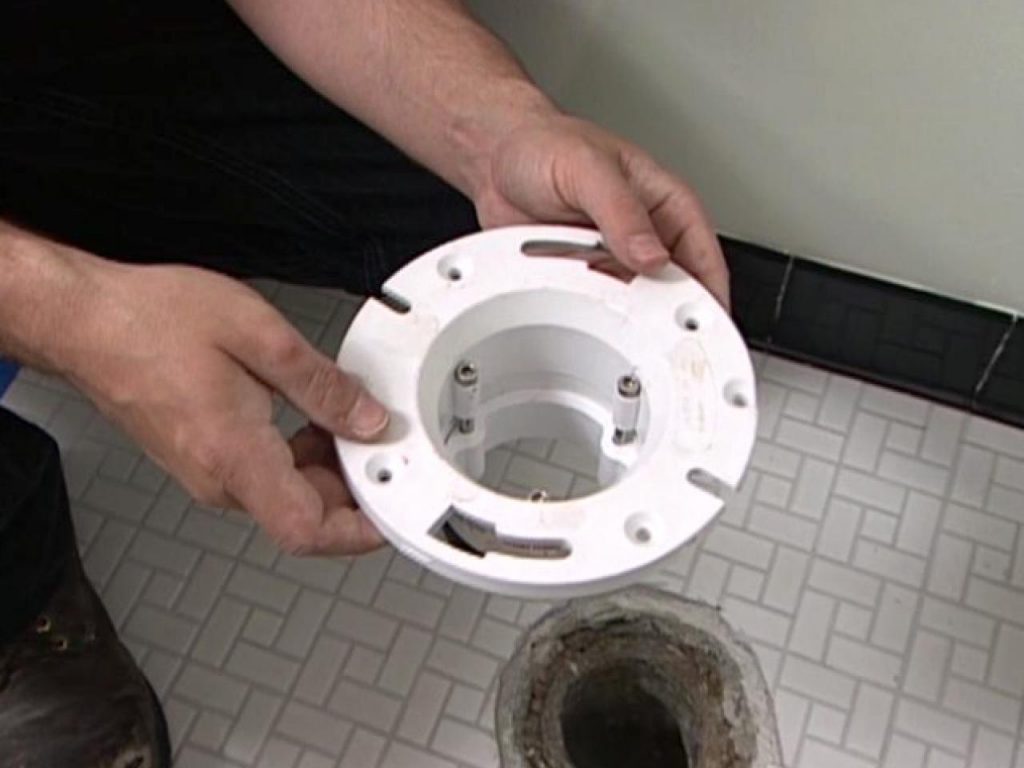
Sink faucets — are they functional or decorative? A bit of both actually. But keep in mind that when purchasing a new one, don’t scrimp on the price. For one thing, if you want real long-lasting brass components, you are going to have to pay for it. Secondly, you want a big name brand so that replacement parts are easily accessible. There are 4 types of sink faucets to consider. If you are also installing a new sink/s, the drain may not match up with the sewage pipe. Here’s how I fixed a misaligned sink.

4 Types of Faucets to Consider

  • Ball faucets. This is considered a washerless faucet because of the absence of rubber or neoprene washers in its construction. It has a single handle that moves over a rounded ball-shaped cap that is right above the base of the faucet’s spout. The faucet has a single handle that controls a special plastic or metal ball inside the body of the faucet. The ball has chambers or slots in it, as well as rubber O-rings and spring-loaded rubber seals. Depending upon the ball’s position, the ball/lever assembly controls the flow and mixing temperature of the water coming out of the faucet. Because of the number of parts which make up this type of faucet, ball faucets tend to leak more than other washerless faucets such as the cartridge faucet or disc faucet. See my faucet repair article.
  • Disc (or disk, if you prefer) faucets. Another washerless type, ceramic disk faucets are the most recent development in emerging faucet technology. They are known by their single lever lording over a wide cylindrical body. This faucet mixes hot and cold water inside a mixing chamber that is referred to as a pressure balance cartridge. 2 ceramic disks located at the bottom of the chamber are engineered to raise and lower to control the volume of the water flow. The temperature is controlled by a side-to-side rotation of the handle. These faucets are known to be high-quality, very reliable, and do not need to be repaired often. That’s a good thing.
  • Cartridge faucet with 2 handles. Yet another washerless faucet, this one looks quite like a compression washer faucet. But, you can tell the difference by how the handles feel when they are operated. The compression faucet requires tightening down (or compress) the washer in order to staunch the water flow. With a cartridge faucet, the action is very smooth and consistent. With just a half turn, the handle goes from the off to the on position. It turns off without added pressure being required as with a compression faucet.
  • Compression washer faucet. This type has been with us since the beginning of on-demand indoor plumbing. You will find them in older properties, and updated versions are still found installed in utility sinks in newer homes to this very day. They are typically the cheapest to purchase but are the most prone to leaks and maintenance. Compression washer faucets are identified by their separate hot and cold water handles (H and C) and their action requiring you to tighten the handles down to close off the water flow. They work using a compression stem. This is a type of glorified screw with a washer at the end of it pressing against a valve seat.

So those are your choices of the 4 types of sink faucets. This article has described their functionality; it is up to you to choose the wow factor of the style. For the kitchen, I prefer a gooseneck style with a spray attachment, but hey, that’s just me.


Looking for more great content? Visit our partner sites:

The Green Frugal

Running Across Texas


As Featured On Ezine Articles

I offer article and blog-writing services. Interested? Hire Me!


Did you find this article helpful? Thanks for supporting this free site with a small donation! We depend on our readers rather than a bothersome paywall to keep the lights on here in the shop.


Visit Kelly’s profile on Pinterest.


About the Author:

Photo of Kelly R. SmithKelly R. Smith is an Air Force veteran and was a commercial carpenter for 20 years before returning to night school at the University of Houston where he earned a Bachelor’s Degree in Computer Science. After working at NASA for a few years, he went on to develop software for the transportation, financial, and energy-trading industries. He has been writing, in one capacity or another, since he could hold a pencil. As a freelance writer now, he specializes in producing articles and blog content for a variety of clients. His personal blog is at I Can Fix Up My Home Blog where he muses on many different topics.

How to Repair a Toilet Flange

index sitemap advanced
A toilet flange being set

The toilet flange is the interface between your sewer line and your toilet. It serves a double purpose:

  • It is slotted to secure the bolts that hold your toilet down securely.
  • It accepts the toilet wax ring to form a waterproof barrier and a means of keeping those sewer gasses out of your bathroom.

Like anything else, they will go bad at some point. Flanges, and the sewer lines they go into, are available in two different materials — modern plastic and old-style cast iron. How you repair a toilet flange depends on what what material you are working with. The first thing you will have to do, you guessed it, is pull the toilet to diagnose the problem. While you are at it, it doesn’t matter if it is an old commode or a newer low-flow toilet, this is a good time to replace other parts like the tank-to-bowl gasket and the filling mechanism.

Repairing Plastic Toilet Flanges

  • Eared Reinforcement Ring. If you have a plywood subfloor that has some rot around the flange and one or more of the securing flange-to-subfloor screws won’t hold because of it, this may be your solution. The “ears” simply extend further. This is also a viable solution for concrete slabs if part has chipped away.
  • Two-Part Repair Ring. Some flanges are composed of plastic with the outer ring (with the bolt slots and screw holes) made of steel. Eventually, this steel will rust. A repair ring is a good solution. Two versions are available — hinged or two-part. Your choice.
  • Stainless Steel Repair Ring. Solid plastic flanges (as opposed to the steel ring above) work well until they happen to break or bend. The easy fix is to screw a repair ring over your plastic flange.

Repairing Cast Iron Toilet Flanges

  • Repair Brackets. Older cast iron flanges often break. This can occur on one or both sides. If the broken area contains a bolt slot, slipping a repair bracket under the cast iron lip will do the trick.
  • Repair Flange. If the flange is too badly damaged to use repair brackets, a repair flange is your best bet. This is a plastic flange that is inserted into the mouth of the old cast iron flange. You may need to clean up and break away remaining parts of the old flange with a hammer and cold chisel.

These tips on how to repair a toilet flange will cover most situations. In addition to the repair materials here, you may find additional ones on the market. New ones are being invented all the time, which is a good thing for us. In fact, plumbing innovations are popping up all the time, driven by style, materials, and the effort to conserve water.

Toilet trivia: When you heard some one say, “I’ve got to go spend a penny,” when going to the bathroom, did you ever wonder where that came from? Well, when public toilets became popular in the Victorian days, they cost a penny to use.

Looking for more great content? Visit our partner sites:

The Green Frugal

Running Across Texas


As Featured On Ezine Articles

I offer article and blog-writing services. Interested? Hire Me!


Did you find this article helpful? Thanks for supporting this free site with a small donation!


Visit Kelly’s profile on Pinterest.

About the Author:

Photo of Kelly R. SmithKelly R. Smith is an Air Force veteran and was a commercial carpenter for 20 years before returning to night school at the University of Houston where he earned a Bachelor’s Degree in Computer Science. After working at NASA for a few years, he went on to develop software for the transportation, financial, and energy-trading industries. He has been writing, in one capacity or another, since he could hold a pencil. As a freelance writer now, he specializes in producing articles and blog content for a variety of clients. His personal blog is at I Can Fix Up My Home Blog where he muses on many different topics.

Tankless Water Heater Maintenance Tips

Routine Appliance Care Saves Money and Extends Service Life

Photo of Kelly R. Smith   by Kelly R. Smith

Typical tankless water heater anatomy
index sitemap advanced

This article was updated on 04/15/21.

Ads we feature have been independently selected and reviewed. If you make a purchase using the links included, we may earn a commission, which helps support the site. Thank you for your support.

Tankless water heaters have long been a staple in Europe and Asia and are becoming more common in the US. There are many good reasons for this; the primary one is economic. Unlike a typical tank water heater, it only delivers hot water upon demand. Why store it in a bulky tank when you don’t have to? It’s one more way to increase your home’s energy efficiency.

It’s not a complete panacea though. Like any other appliance it requires periodic maintenance to operate effectively. Here are the top tankless water heater maintenance tips that the homeowner can do; make it a periodic DIY project. These generic instructions will work for most units but be sure to check your manual for any proprietary details.

Clean the Air Filter

  • Turn off and unplug the heater or isolate power by flipping the circuit breaker.
  • Find the air filter; remove it.
  • Inspect it carefully; a dirty filter will reduce performance.
  • Clean it with a soft-bristled brush using a mild solution of dish soap and warm water.
  • Rinse it well with clean water and dry it using a lint-free towel, and reinstall.

Clean the In-Line Water Filter

  • Find the in-line water filter at the cold-water inlet.
  • Close the cold-water supply valve to turn off the water supply to the unit.
  • Remove the filter.
  • Clean the filter by tapping it to dislodge sediment, run it under clean, clear water, and wipe it with a cotton swab.
  • Reinstall the filter.
  • Reopen the cold-water supply valve.
  • Check for leaks; tighten as needed.

Flush the Heater

  • Close the shutoff valves on both the hot and cold water lines.
  • Connect a hose from the outlet of a circulation pump to the cold-water service valve. Connect a drain hose to the hot-water service valve.
  • Pour 4 gallons of undiluted food-grade white vinegar into a clean 5-gallon bucket. Place both the drain hose from the hot water service valve and the pump supply hose (connected to the pump’s inlet) into the vinegar bucket.
  • Open the service valves on the hot and cold-water lines.
  • Turn on your pump allowing the vinegar to circulate throughout the heater at a rate of 4 gallons per minute.
  • Let it run an hour and then flush the system with clean, cold water to remove the vinegar and any loose minerals. To do this step, first remove the free end of your drain hose from your bucket, and then run it either to a convenient drain or to the outside. Next, close the cold-water service valve, open the cold-water supply valve, and then let the water flow through your heater for a minimum of five minutes. Next, close the cold-water supply valve, and clean the in-line water filter at the cold-water inlet on the heater to remove any loose deposits the filter picked up during the above process. Again, clean the filter by tapping it, running it under clean water and wiping it with a cotton swab. Finally, replace the filter.
  • Close your hot-water service valve, and then open both the cold and hot-water supply valves.
  • Disconnect all of the hoses, restore power to the heater, and turn it on.

These steps for tankless water heater maintenance should help you to keep your unit running efficiently and save you money by not having to hire a contractor. If you agree, please share with your friends and social media.


Looking for more great content? Visit our partner sites:

The Green Frugal

Running Across Texas


As Featured On Ezine Articles

I offer article and blog-writing services. Interested? Hire Me!


Did you find this article helpful? Thanks for supporting this free site with a small donation!


Visit Kelly’s profile on Pinterest.


About the Author:

Photo of Kelly R. SmithKelly R. Smith is an Air Force veteran and was a commercial carpenter for 20 years before returning to night school at the University of Houston where he earned a Bachelor’s Degree in Computer Science. After working at NASA for a few years, he went on to develop software for the transportation, financial, and energy-trading industries. He has been writing, in one capacity or another, since he could hold a pencil. As a freelance writer now, he specializes in producing articles and blog content for a variety of clients. His personal blog is at Considered Opinions Blog where he muses on many different topics.


Best Way to Install a Misaligned Sink Drain During Remodeling


Snappy Trap sink drain

During new construction installing sink drains is easy-everything is configured to work together. During a kitchen or bathroom remodeling project it can be a completely different story. You can bet that things will not line up using new components.

Case in point: in the course of re-building in the aftermath of the flood due to Hurricane Harvey we’ve got new cabinets and sinks.  I needed to match up with the existing wall drainpipe. It came as no surprise that the hook-up was not the straight shot that the original was. I needed a solution.

A Flexible Solution for Connecting Drain Lines

After looking at a number of solutions I settled on the Snappy Trap. It seemed like the easiest to install and the price was right. It comes in several configurations-single sink, double-sink, etc.

In my case I used two single-sink kits since I have two drainpipe p-traps that converge into one drain. Of course, in a situation with a double-sink and one  drainpipe, the Snappy Trap 1 1/2″ all-in-one-drain kit for double bowl kitchen sinks will give the best results.

In any case, one of the important benefits over other systems is that with this product the flexible tube has a smooth interior. This prevents build-up and excessive odor.

The System is Dishwasher-Friendly

The elbow that connects to the sink strainer tailpipe has a dishwasher drain connection nipple that points up at an angle so that there will not be any back flow up into the sink (see the picture below).

Snappy Trap sink drain with dishwasher connector

This is a convenient option but if you don’t plan on connecting a dishwasher, simply leave the cap on and you’re good to go.

Installing a misaligned sink drain during remodeling without hiring an expensive plumber is a thing of the past. If you’ve got some basic tools and some DIY common sense, dive right in. The hardest part is crawling in the cabinet.


Looking for more great content? Visit our partner sites:

The Green Frugal

Running Across Texas


As Featured On Ezine Articles

I offer article and blog-writing services. Interested? Hire Me!


Did you find this article helpful? Thanks for supporting this free site with a small donation!


Visit Kelly’s profile on Pinterest.


Widget is loading comments…


close

Enjoy this blog? Please spread the word :)

RSS
Follow by Email
Twitter
Follow Me
Tweet
Pinterest
Pinterest
Pinterest
Instagram
LinkedIn
Share