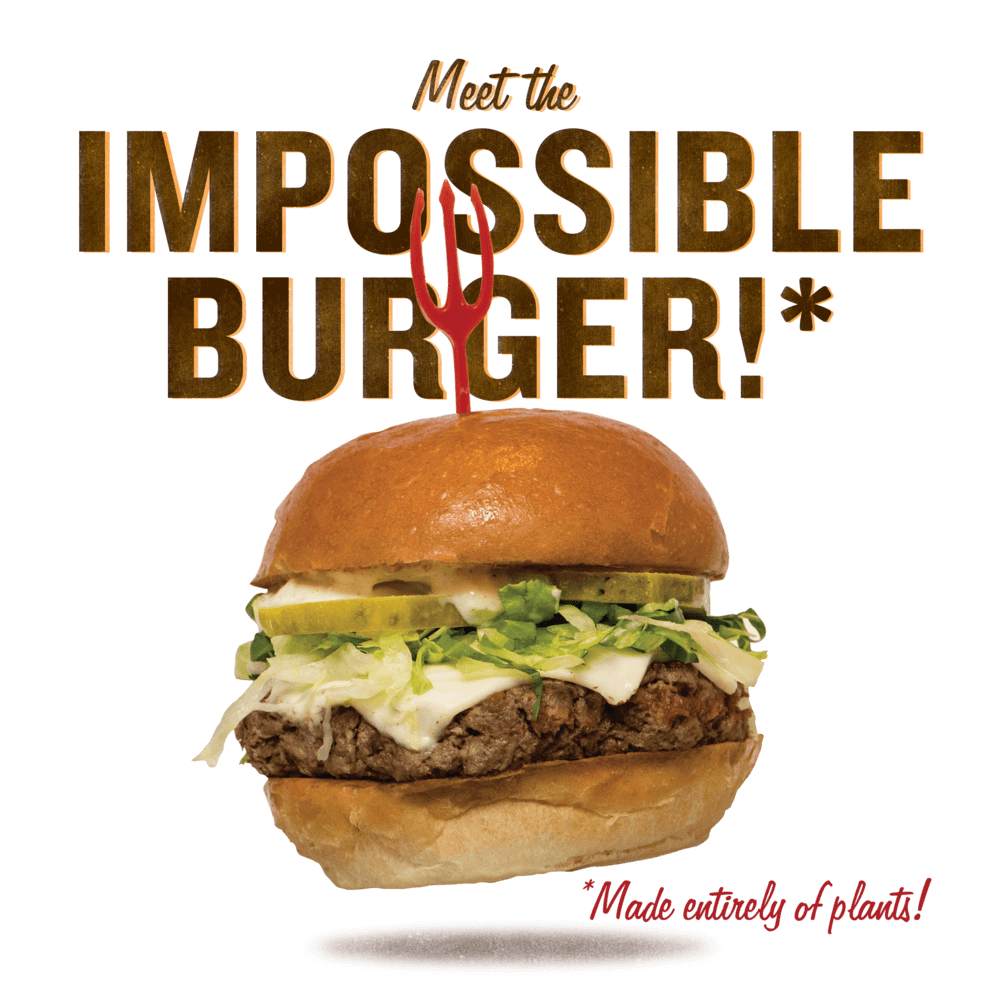
Is the Impossible Burger Better than a Beef Burger?

The plant-based impossible Burger
Meat… I mean meet the impossible Burger

The “impossible burger” has been getting a lot of press lately. Burger King was quick to jump on it by crafting a Whopper version to capture that part of the market stricken with carnophobia (fear of meat). Undoubtedly they have met with some degree of success. After all, if a group of carnivore co-workers drag along their vegan comrade, he or she doesn’t have to settle for salad. Go for that guilt-free burger!

Before we delve into nitty-gritty of composition and nutrition, let’s try to answer the burning question: does it taste right or does it taste like a salad patty? For the purposes of answering, I made a visit to Burger King. Result? It tasted like its beef counterpart to me. As a bonus, for 10 minutes there, I was saving the planet. Karma.

The company that developed the Impossible Burger is, not surprisingly, Impossible Foods. Their mission statement reads as follows, “Animal agriculture occupies almost half the land on earth, consumes a quarter of our freshwater, and destroys our ecosystems. So we’re doing something about it: We’re making meat using plants, so that we never have to use animals again.” In all fairness I have to ask, don’t plants occupy real estate? Don’t they consume water? And how do cows destroy the ecosystem? I live in Texas where cattle is abundant and I have yet to see one of those lumbering brutes ravaging the countryside.

What Ingredients are in an Impossible Burger?

In 2016 the original Impossible Burger used texturized wheat protein. Then, this past January the company swapped it out with soy protein concentrate which has been served exclusively as of April. The soy was intended to deliver a higher-quality protein. But it also meant that the new patty was gluten-free, something the company said customers wanted.

Next, the research chefs added fats, notably coconut and sunflower oil. This was to give the burger a juicy sizzle on the grill in an attempt to more closely mimic “meat”. Additionally, they threw in fillers and binders like methylcellulose and modified food starch to hold it all together. Next they focused on additives to make the burger look, feel, and taste just right.

If that Impossible Whopper had an ingredient label on it you would see:

Water, Soy Protein Concentrate, Coconut Oil, Sunflower Oil, Natural Flavors, 2 percent or less of: Potato Protein, Methylcellulose, Yeast Extract, Cultured Dextrose, Food Starch Modified, Soy Leghemoglobin, Salt, Soy Protein Isolate, Mixed Tocopherols (Vitamin E), Zinc Gluconate, Thiamine Hydrochloride (Vitamin B1), Sodium Ascorbate (Vitamin C), Niacin, Pyridoxine Hydrochloride (Vitamin B6), Riboflavin (Vitamin B2), Vitamin B12. Well, at least there’s some vitamins in there!

The Impossible Burger also contains heme, unlike other veggie patties. Heme is an iron-containing molecule commonly found in myoglobin in muscle tissue and hemoglobin in blood. This is what what makes meat taste like meat. Plants contain it as well.

Is It Healthier than Real Beef?

In the words of Elisabetta Politi, M.P.H., R.D., L.D.N., Nutrition Director of the Duke Diet & Fitness Center in Durham, North Carolina, “No. I don’t think it’s any healthier. As a nutritionist, I tell people that if we want to find a way to address obesity and diabetes, it’s to go back to the way our grandparents ate. I’m not saying that genetic modification is wrong, but I think it’s disconcerting to make up food. I would not consider this wholesome food because it’s something that has gone through a lot of changes and was created in a lab by the food industry.”

As far as saturated fat (the bad stuff) goes, she says, “An 85 percent lean beef burger, which is what you see in restaurants, has about 6 percent saturated fat. An Impossible Burger has 8 grams of saturated fat in a four ounce patty, because it contains all that coconut oil.”

The Impossible Burger falls short on protein. A beef burger offers 29 grams while the Impossible weighs in at 19 grams. If you live with high blood pressure like I do, you should also know that the Impossible contains 370 milligrams of sodium, or about 16 percent of the recommended daily amount whereas there are only 82 milligrams in a beef burger. That’s a huge difference.

The Impossible Burger has the edge when it comes to fiber, as you might imagine. Beef has zero but the Impossible delivers 3 grams, or about 11 percent of the daily-recommended amount. Regularity is a good thing.

The Bottom Line

Both Impossible Burgers and Beef burgers have their pros and cons. As I’ve said before, the “fake meat” tastes the same as the “real meat” to me so it’s really just a matter of choice. If you’re a vegan, environmentalist, or just making a political statement you can now enjoy a burger without guilt.


Looking for more great content? Visit our partner sites:

The Green Frugal

Running Across Texas


As Featured On Ezine Articles

I offer article and blog-writing services. Interested? Hire Me!


Did you find this article helpful? Thanks for supporting this free site with a small donation!


Visit Kelly’s profile on Pinterest.


About the author:

Photo of Kelly R. SmithKelly R. Smith is an Air Force veteran and was a commercial carpenter for 20 years before returning to night school at the University of Houston where he earned a Bachelor’s Degree in Computer Science. After working at NASA for a few years, he went on to develop software for the transportation and financial and energy trading industries. He has been writing, in one capacity or another, since he could hold a pencil. As a freelance writer now, he specializes in producing articles and blog content for a variety of clients. His personal blog is at I Can Fix Up My Home Blog where he muses on many different topics.


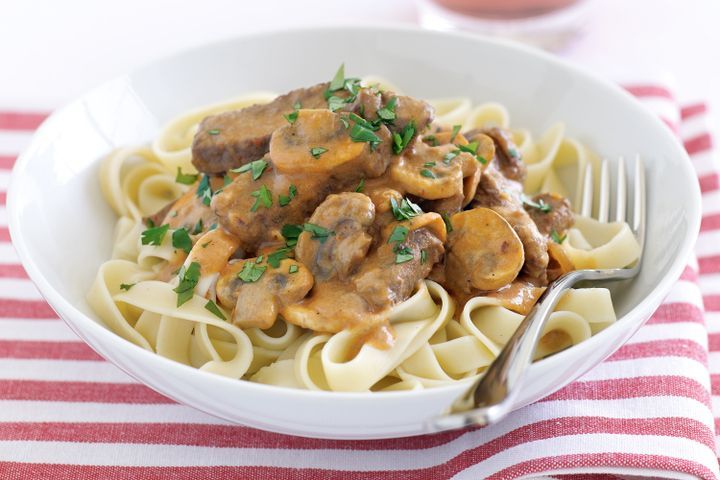
Classic Beef Stroganoff Recipe

Classic Beef Stroganoff
index sitemap advanced

What’s not to like about Beef Stroganoff ? It’s a timeless dish that won’t break the budget and is easy to prepare. When I got a hankerin’ for it yesterday I did an internet search and was surprised by all the variations.

If you are on a low-carb diet but are hankerin’ for something pasta-y and this dish sounds a bit too much, I suggest trying my low-carb spaghetti carbonara recipe.

In case you are curious — the Stroganoff (or Stroganov) family in 18th century Russia is mainly associated with the popular beef dish which bears its name. The dish likely goes back to a much earlier peasant favorite, but is now usually attributed to the household of Count Pavel Stroganoff (1774-1817).

Beef Stoganoff Ingredients

  • 1 1/2 pounds of beef sirloin steak, 1/2 inch thick
  • 1 garlic clove, finely chopped
  • 8 ounces fresh mushrooms, sliced (2 1/2 cups)
  • 2 medium onions, thinly sliced
  • 1 1/2 cups Progresso™ beef flavored broth (from 32-ounce carton)
  • 1/4 cup butter (I prefer Kerrygold unsalted Irish butter but suit yourself)
  • 1 teaspoon Worcestershire sauce
  • 1/2 teaspoon salt
  • 1 1/2 cups sour cream
  • 1/4 cup all-purpose flour
  • 3 cups hot cooked egg noodles

Preparation Steps

  1. Cut the beef across the grain into roughly 1 1/2×1/2-inch strips.
  2. Cook the mushrooms, onions, and garlic in butter using a 10-inch skillet over medium heat. Stir occasionally until the onions are tender. Then, remove from skillet.
  3. Cook the beef strips in the same skillet until they’re brown. Next, stir in 1 cup of the broth, the salt, and the Worcestershire sauce. Heat to boiling; reduce heat. Cover the skillet and simmer 15 minutes.
  4. Stir the remaining 1/2 cup of broth into the flour and stir into the beef mixture. Stir in the onion mixture and heat to just boiling, stirring constantly to maintain consistency. Boil and stir for 1 1/2 minutes and reduce heat. Finally, now stir in the sour cream. Heat until hot but do not boil it. Serve over noodles and enjoy.

So that’s all there is to making classic beef Stroganoff. Like most of the recipes that I enjoy, it is very adaptable; throw in any extra ingredients or condiments that you like (I’m fond of homemade habanero hot sauce). If you like this recipe, please share the link with your friends. Enjoy!

Nutritional Information

Calories: 435Calories from fat: 295
Total Fat 23 g
Saturated Fat10 g
Cholesterol 115 mg
Sodium 620 mg
Potassium 560 mg
Total Carbohydrate 31 g
Dietary Fiber2 g
Protein 28 g
Click to learn more about revolutionary ThinMist!

Looking for more great content? Visit our partner sites:

The Green Frugal

Running Across Texas


As Featured On Ezine Articles

I offer article and blog-writing services. Interested? Hire Me!


Did you find this article helpful? Thanks for supporting this free site with a small donation!


Visit Kelly’s profile on Pinterest.


About the Author:

Photo of Kelly R. SmithKelly R. Smith is an Air Force veteran and was a commercial carpenter for 20 years before returning to night school at the University of Houston where he earned a Bachelor’s Degree in Computer Science. After working at NASA for a few years, he went on to develop software for the transportation and financial and energy trading industries. He has been writing, in one capacity or another, since he could hold a pencil. As a freelance writer now, he specializes in producing articles and blog content for a variety of clients. His personal blog is at I Can Fix Up My Home Blog where he muses on many different topics.
How to Make Sauce Cling to Your Pasta

This Cooking Tip Will Give You Enjoyable Restaurant-Style Results

Photo of Kelly R. Smith   by Kelly R. Smith

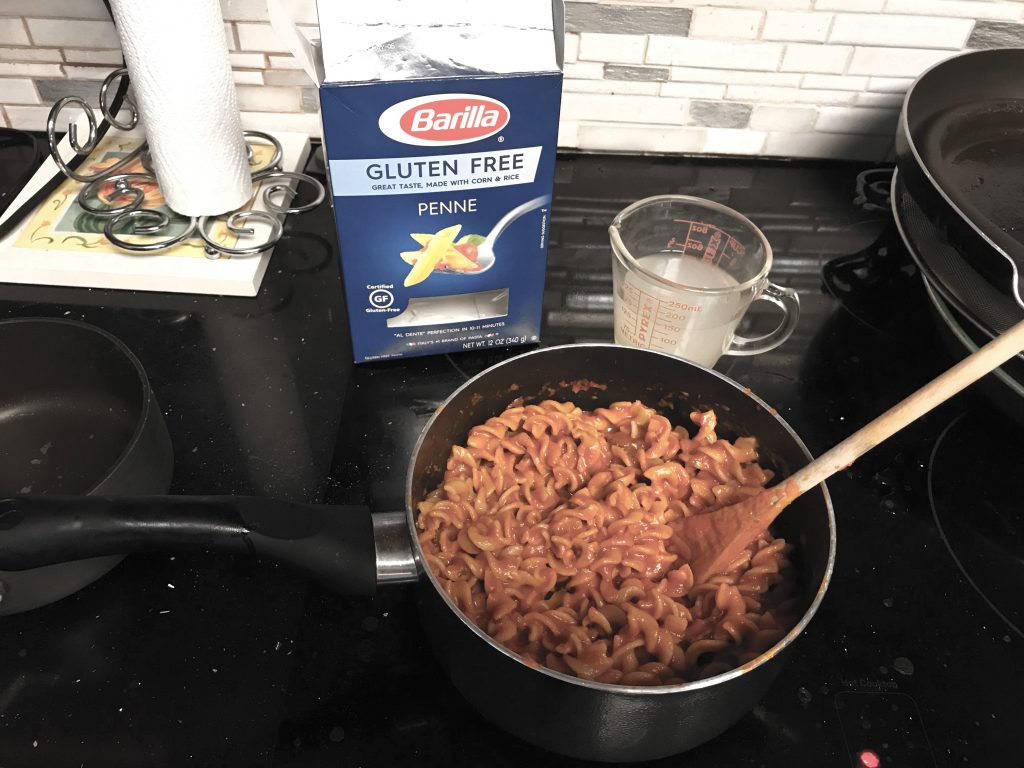
Cooking pasta with the  emulsion method.
Cooking pasta with the emulsion method
index sitemap advanced

This article was updated on 04/29/21.

Ads we feature have been independently selected and reviewed. If you make a purchase using the links included, we may earn a commission, which helps support the site. Thank you for your support.

Who doesn’t like pasta? Spaghetti Carbonara, ravioli, elbow, penne, and so much more. It’s comfort food, just like tater tots and cheeseburgers. But have you ever wondered why the sauce clings so well to restaurant pasta but when you make it at home it slides right off and puddles on you plate? The secret is the concept of emulsion. The good news is that you can easily make it happen in your own kitchen!

What is this emulsion anyway? In a nutshell, it’s when two or more liquids that normally won’t mix are forced to come together. For example, mayonnaise is an oil in water emulsion that is stabilized by the lecithin in egg yolk. That’s why you don’t have to stir it up. Peanut butter is another good example (except for the kind that you do need to stir). Now let’s learn how to apply emulsion to home-cooked pasta.

Easy Steps to Making Sauce-Clinging Pasta

  • Bring heavily salted water to a boil in an appropriately-sized pot. I like using “pink” or Himalayan salt. Regular table salt has all the minerals stripped out of it.
  • Add the pasta.
  • Do not cook it to the al dente stage; leave it a bit undercooked because it will finish in the sauce.
  • When you go to drain the pasta, reserve a cup of the water. Set the pasta aside.
  • Add your sauce to the now-empty pot. For every 3 ounces of dry pasta that you cooked, use 1/2 cup of sauce.
  • Heat the sauce to a simmer.
  • Add in any extra vegetables that you enjoy.
  • Toss in 1/2 tablespoon of butter (I like Kerrygold Irish butter but it’s your call). Stir in until it melts. Repeat until you can run a spoon through it and see all the way to the bottom of the pot without the sauce quickly seeping back to fill the gap.
  • Add the drained pasta directly to the pot. Mix vigorously. This will further emulsify and thicken your sauce by grabbing bits of starch from the pasta; mixing your pasta and sauce directly in your pot instead of pouring sauce over the pasta is the key finishing step to achieve that restaurant quality. Different kinds of pasta interact with different sauces differently. Some soak up more liquid than others. If your sauce is too thick, this is where you can mix some of your reserved pasta water back in, just a wee bit at a time.
  • Serve and enjoy!

I like to serve it with a side of Tuscan kale salad. Go ahead and experiment with making sauce cling to your pasta. Different kinds of pasta, different kinds of sauce; it’s an adventure. Of course, it also works in low-carb noodles recipes.

Trending Recipes


Looking for more great content? Visit our main page or partner sites:

I Can Fix Up My Home

The Green Frugal

Running Across Texas


As Featured On Ezine Articles

I offer article and blog-writing services. Interested? Contact me for a quote!


Did you find this article helpful? Millions of readers rely on information on this blog and our main site to stay informed and find meaningful solutions. Please chip in as little as $3 to keep this site free for all.


Visit Kelly’s profile on Pinterest.

About the Author:

Photo of Kelly R. SmithKelly R. Smith is an Air Force veteran and was a commercial carpenter for 20 years before returning to night school at the University of Houston where he earned a Bachelor’s Degree in Computer Science. After working at NASA for a few years, he went on to develop software for the transportation, financial, and energy-trading industries. He has been writing, in one capacity or another, since he could hold a pencil. As a freelance writer now, he specializes in producing articles and blog content for a variety of clients. His personal blog is at Considered Opinions Blog where he muses on many different topics.

Tater Tots Cheeseburger Casserole Recipe

Tater Tots Cheeseburger Casserole
index sitemap advanced

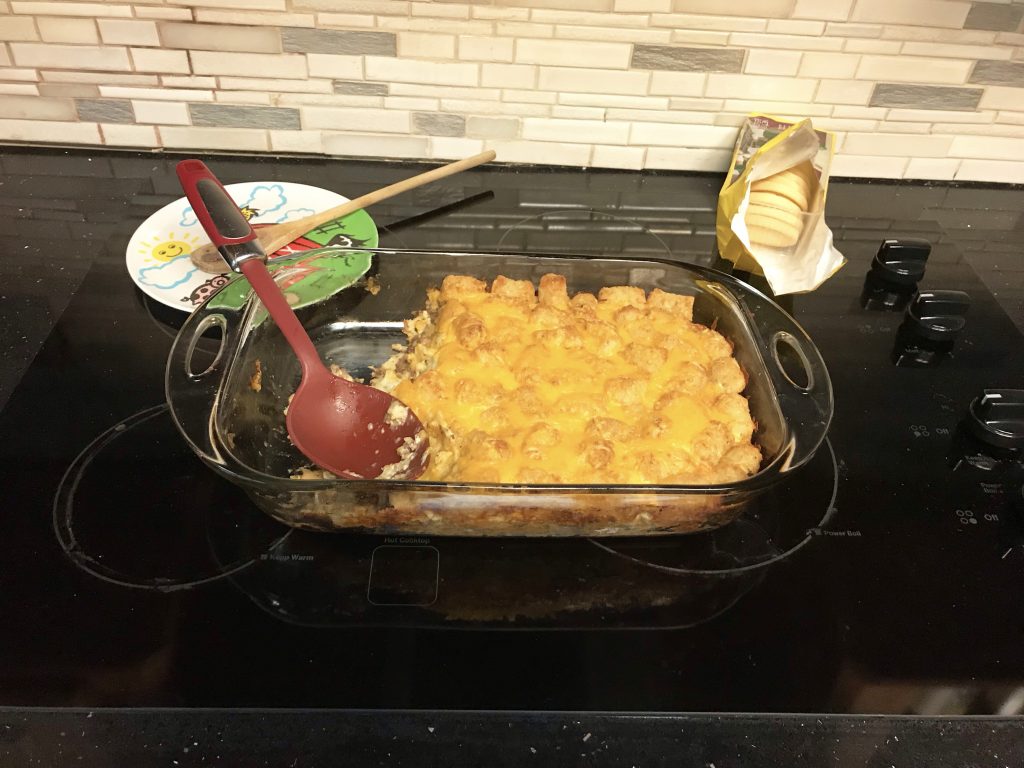
There’s something to be said for All-American comfort food. What could be more representative of that culinary niche than the humble cheeseburger? Well, this recipe for Tater Tot Cheeseburger Casserole fits the bill nicely, especially on those summer days when it is raining to much to go out on the backyard deck and fire up the grill. One thing it is not is low-carb.

You’ll notice that this recipe doesn’t really go into all the possible condiments and spices that you may prefer. That is because we believe that burgers should be individually tailored; make this meal your own by throwing in what you are craving. There are things you can add after the fact as well. For example, I’m fond of shaking on some homemade habanero hot sauce.

Ingredients

  • 2 lb. lean (at least 80%) ground beef
  • 1 3/4 cups chopped onion (1 1/2 medium)
  • salt to taste
  • pepper to taste
  • 3 cups shredded Cheddar cheese (12 oz)
  • 1 cup Original Bisquick™ mix
  • 1 1/2 cups milk
  • 3 eggs, beaten
  • 1 bag (32 oz) Ore-Ida™ Tater Tots™ frozen potatoes

Meal Preparation Steps

  • Pre-heat your oven to 400°F. Spray 13×9-inch (3-quart) glass baking dish with your favorite cooking spray.
  • Use a 12-inch nonstick skillet to cook beef and onion over medium-high heat for 8 to 10 minutes. Stir the mixture frequently until beef is brown. Drain. Stir in salt and pepper and spread the mixture in the dish. Sprinkle mixture evenly with 2 cups of the cheese.
  • In a medium mixing bowl, stir Bisquick™ mix, milk, and eggs using a whisk until well-blended. Pour over the cheese layer in the baking dish. Arrange the frozen Tater Tot potatoes on top of casserole.
  • Put dish in oven and bake 40 to 45 minutes or until the potatoes begin to brown. Sprinkle the remaining 1 cup of cheese evenly on top of the casserole. Bake 3 to 5 minutes or until the cheese is melted. Finally, remove the pan from the oven and let it rest 10 minutes before serving.

Recipe Modifications

As I mentioned above, this is a bare-bones recipe yearning for your modifications. Although this is great for kids that are finicky diners, adults are more likely to tweak the basic. Here are some of the possibilities.

  • A layer of tomato slices between the cheese layer and the Bisquick™ mixture.
  • Jalapeno or Serrano peppers anywhere.
  • Powdered ranch dressing mixed into the hamburger meat.
  • Bacon (of course!).
  • And the list goes on…

Looking for more great content? Visit our partner sites:

The Green Frugal

Running Across Texas


As Featured On Ezine Articles

I offer article and blog-writing services. Interested? Hire Me!


Did you find this article helpful? Thanks for supporting this free site with a small donation!


Visit Kelly’s profile on Pinterest.


About the Author:

Photo of Kelly R. SmithKelly R. Smith is an Air Force veteran and was a commercial carpenter for 20 years before returning to night school at the University of Houston where he earned a Bachelor’s Degree in Computer Science. After working at NASA for a few years, he went on to develop software for the transportation and financial and energy trading industries. He has been writing, in one capacity or another, since he could hold a pencil. As a freelance writer now, he specializes in producing articles and blog content for a variety of clients. His personal blog is at I Can Fix Up My Home Blog where he muses on many different topics.


Delicious Pizza Margherita Recipe

This Classic Pizza Boasts Minimal Ingredients and Classic Taste

Photo of Kelly R. Smith   by Kelly R. Smith © 2022

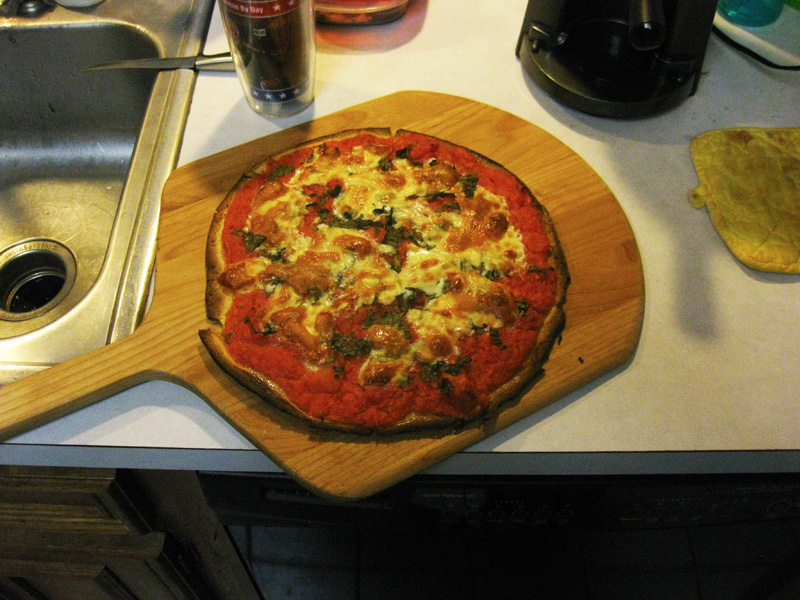
A homemade pizza Margherita baked and ready
index sitemap advanced

This article was updated on 02/18/22.

Ads we feature have been independently selected and reviewed. If you make a purchase using the links included, we may earn a commission, which helps support the site.

The pizza Margherita is something of a minimalist pizza pie (in my opinion). That doesn’t mean you can’t tweak it by adding anything that floats your boat.  Word has it that in June of 1889 Neapolitan pizzamaker Raffaele Esposito created it to honor the Queen consort of Italy, Margherita of Savoy. He garnished it with tomatoes, mozzarella, and basil to represent Italy’s national colors as they are on the Italian flag. In case you wanted that bit of trivia.

Despite the simplicity of the recipe, there are a number of variations. For example, some recipes call for the basil to be added after the pie is done. I prefer to put it under the cheese before baking so the herbs’ flavor cooks into the cheese and sauce. Your option; no judgment here.

Optional Pizza Making Equipment

If you really get into making your own pizzas, I recommend:

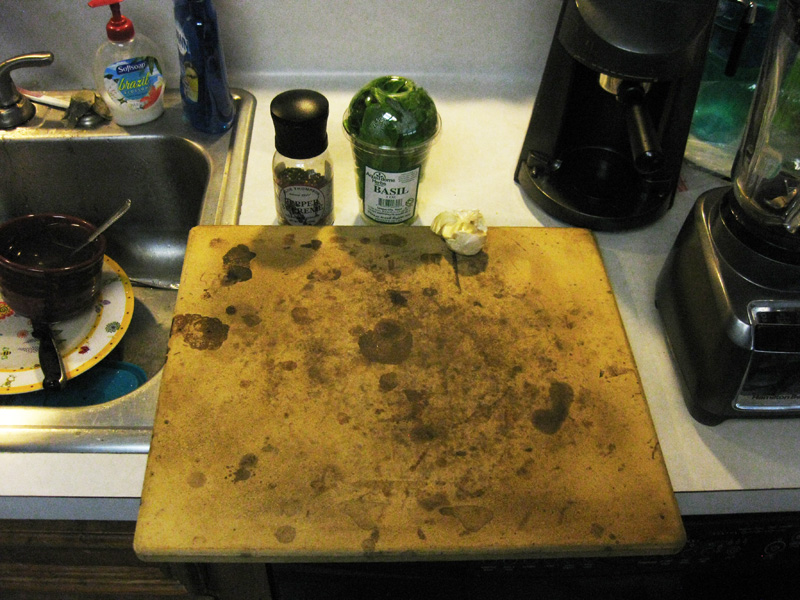
My well-used pizza stone
  • A pizza stone. This is essential if you want top-notch pizza. A good pizza stone does wonders for your crust development because, unlike a baking sheet, it’s completely heated before the pizza is placed upon it. and that, my friend, is how you achieve a crisp and chewy crust that you can’t get out of a box. As you can see above, mine has some serious mileage on it.
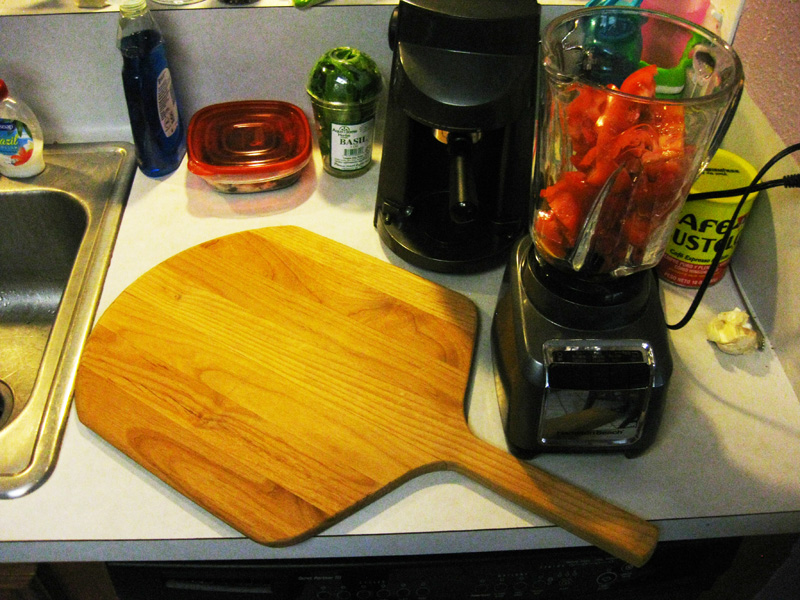
  • A pizza peal. This is one of your best friends when using a stone. The one in the image below is typical. You build the pie on it, you transport the pie on it, and you can cut the pie on it. No muss, no fuss.
My pizza peal
My pizza peal

Pizza Crust Considerations

You basically have two choices. If you have the time and inclination, make your own. Check out this pizza crust recipe. If you are pressed for time, simply buy a crust in the grocery store. Don’t go for the really cheap ones. You get what you pay for.

The good thing about making your own crust is that you can add in just about anything—herbs, flax seeds, you name it. Use organic ingredients whenever possible. If you don’t have issues with glutin, toss in a teaspoon. Glutin is a wheat protein that holds breads together.

Pizza Topping Ingredients

  • 7 roma tomatoes. You can use the big slicers but the romas are much more economical. Slice ’em or dice ’em, or blend ’em.
  • Mozzarella cheese. How much you use is up to you. Slice it about 1/8 to 1/4 inch thick and place it randomly (see the video in the link below under Preparation to see what I like).
  • 1/2 cup chopped basil.

That’s pretty much it for the basic ingredient list. Have fun with it and throw on anything that suits your fancy.


Preparation

This is very easy. Spread the tomatoes out evenly leaving about 1/2 inch around the edge “naked.” Add the basil. Add the cheese randomly. Watch the video. Have patience; it takes a while to load.

Bake that Baby

Preheat your oven (with the pizza stone on an oven rack) to 500 degrees. Slide your pie off the peal onto the stone. Bake it until the dough is crisp and browned and the cheese is golden and bubbling in spots. This will usually be from 13 to 16 minutes; just keep an eye on it.  Let it rest for about 5 minutes and then slice and enjoy!

Looking for more great content? Visit our main page or partner sites:

I Can Fix Up My Home

The Green Frugal

Running Across Texas


As Featured On Ezine Articles

I offer article and blog-writing services. Interested? Contact me for a quote!


Did you find this article helpful? Millions of readers rely on information on this blog and our main site to stay informed and find meaningful solutions. Please chip in as little as $3 to keep this site free for all.


Visit Kelly’s profile on Pinterest.

About the Author:

Photo of Kelly R. SmithKelly R. Smith is an Air Force veteran and was a commercial carpenter for 20 years before returning to night school at the University of Houston where he earned a Bachelor’s Degree in Computer Science. After working at NASA for a few years, he went on to develop software for the transportation, financial, and energy-trading industries. He has been writing, in one capacity or another, since he could hold a pencil. As a freelance writer now, he specializes in producing articles and blog content for a variety of clients. His personal blog is at Considered Opinions Blog where he muses on many different topics.
close

Enjoy this blog? Please spread the word :)

RSS
Follow by Email
Twitter
Follow Me
Tweet
Pinterest
Pinterest
Pinterest
Instagram
LinkedIn
Share