10 Popular Home Renovation Trends

Photo of Kelly R. Smith   by Kelly R. Smith

Home floor and walls renovations.
Home floor and walls renovations
index sitemap advanced

This article was updated on 01/24/22.

Ads we feature have been independently selected and reviewed. If you make a purchase using the links included, we may earn a commission, which helps support the site. Thank you for your support.

Remodeling, whether done for contemporary style, preparation for sale, or just general repairs continues as usual. The most popular home renovation trends vary from year to year depending on a number of factors. Renovation budgets are always high on the list. Going green not only lowers your bills but helps the environment. Other factors can influence decisions but let’s look at some home renovation trends that stand the test of time.

Note: There are some specific requirements for disabled homeowner remodeling. These came about as a result of the Americans with Disabilities Act of 1990.

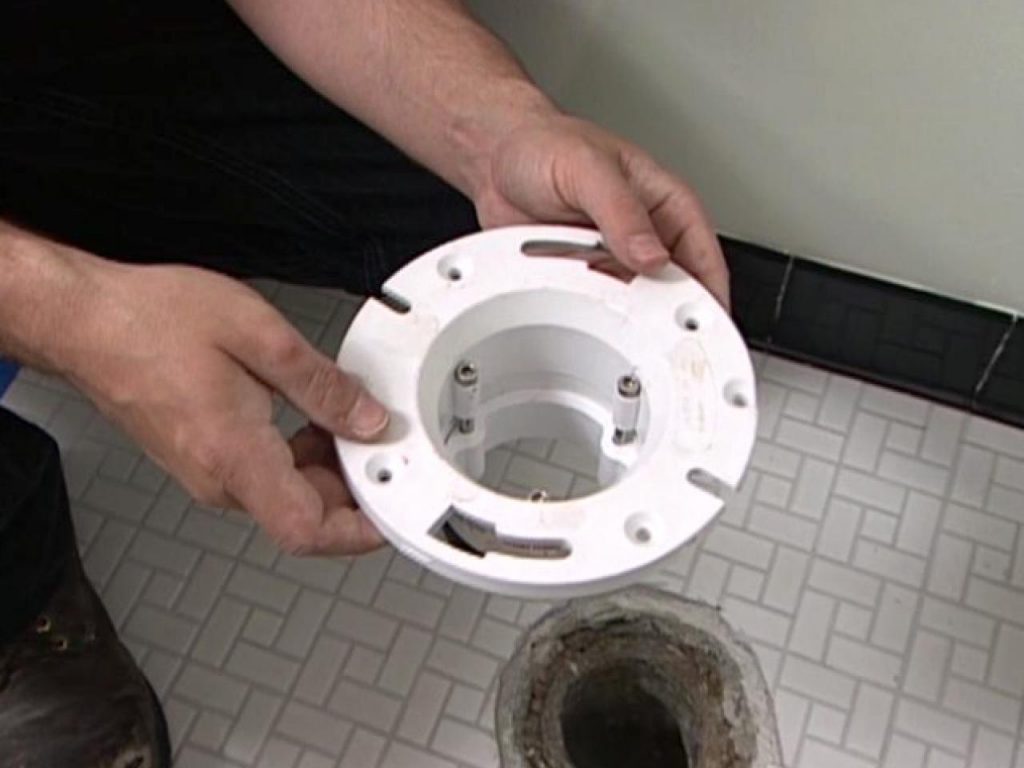
  • Floors, ceilings, and walls. Traditionally, these surfaces get a lot of attention and 2020 – 2022 is no exception. The Joint Center for Housing For Housing Studies says homeowners average $3,282 per year on these surfaces. Check out these 5 ways to refresh your walls on a budget.
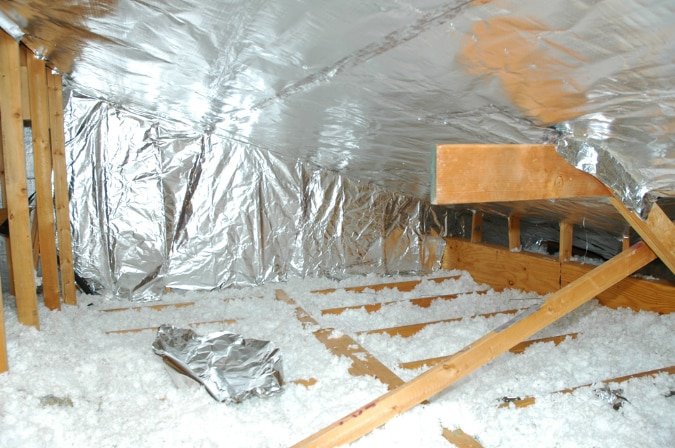
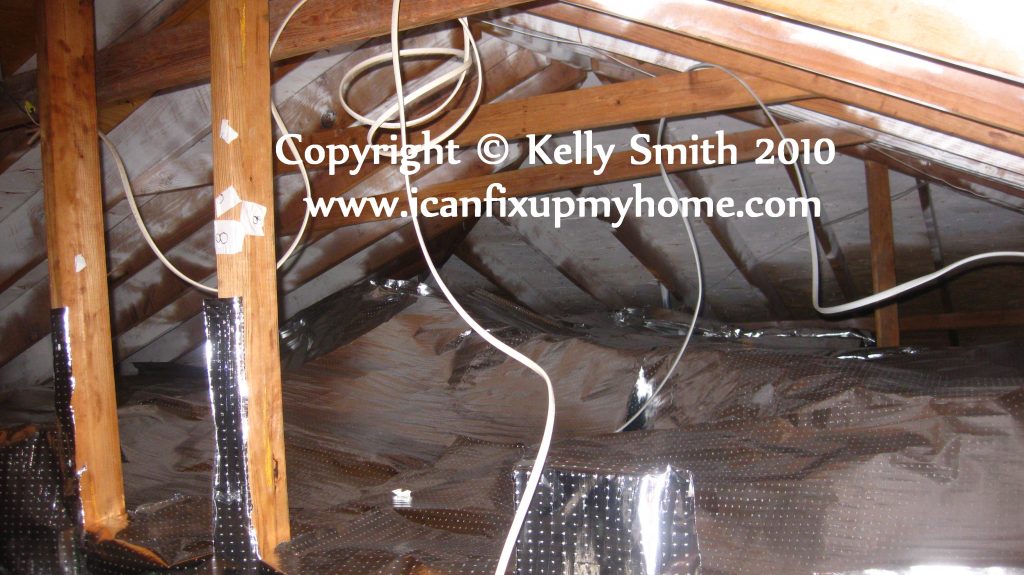
  • Prioritizing on saving money. This trend is not specifically tied to aesthetics. Rather, it is focused on frugality. Migrating to lower operating-cost lighting like LED bulbs, for one. Beefing up attic insulation and adding radiant barrier foil may not boost curb appeal, but oh, what a difference when the power bills come due each and every month. Our electric bill averages $130/month during the dog days of summer here in South Texas (high 90℉ during the dog days of summer.
  • Slapping on another coat of paint. This is always one of the most popular weekend DIY projects. The cost of paint is reasonable and the outlay of cash for tools is minimal. You can even employ paint illusions to make a room look larger. Learn how to paint like a pro.
  • Be a DIY weekend warrior. This is the best way to stretch your budget. Plus, who doesn’t love that sense of pride? DIY varies in the level of difficulty but with the help of sites like this one, I Can Fix Up My Home, you might be surprised at what you can accomplish. The Senior Director of Customer Insights at Lowe’s, Amy Anthony, says, “Seventy-four percent [of consumers] do research to get as much information as possible before making a purchase.”
  • Preparing for climate change. Whether you are an ardent believer in global warming (now called climate change) or believe Al Gore is just out to make a buck preaching about it, there’s no doubt that the preparation steps saves money. So, apply weatherstrip, caulk, upgrade your windows; all home improvements are cumulative.
  • Home sanitation and wellness is moving up. This is understandable and goes hand in hand with many other home improvements because the topic of off-gassing is more well-known that ever. Forbes.com puts it this way, “Wellness-focused changes can include paint, flooring or cabinetry with non-toxic materials, touchless faucets that reduce germ spread, circadian lighting that improves sleep, water and air purification systems, bidet style toilets for enhanced hygiene, and many others.” Many people are now using UV lights on surfaces to guard against the COVID-19 virus. And all its unruly spawn.
  • Focus on lower budgets, bigger consequences. Smaller projects encompassing a big wow factor are becoming more popular and are expected to continue. For example, instead of gutting the bathroom and re-doing it, why not have your tub re-finished, update all faucets, put in a new recessed medicine cabinet, and re-paint?
  • Smaller brand names are becoming more competitive by adding luxury features. Kitchen cabinets are a good example of this. After Hurricane Harvey, when our home flooded, one of the things we needed to replace were our cabinets and granite countertops. Home Depot gave us a lot of modular options with freebies like self-closing doors and stainless steel sinks thrown in.
  • Home automation is going mainline. Once the purview of science fiction novels, it’s coming at us fast and furious now. I recently installed a Ring Doorbell. It not only responds when someone rings it, but also when someone just approaches it.
  • More services are becoming negotiable. When emergency repairs are called for instead of long thought out projects, it would seem that the repair person has you over the barrel. Not always the case. Since our economy has shifted to being service-based (some hands-on crafts still can’t be outsourced to China), the competition for your business has become fiercer. Good news for the homeowner.


These 10 popular home renovation trends for 2020 are likely to continue as the COVID-19 lock-down continues. It’s just the new-new. Many employers are not only accepting work-from-home staff, but embracing it. It saves on the overhead. And I might say, as a writer I am used to working from home but it has been really nice having my wife working from home rather than in her downtown high-rise office.

References:

Looking for more great content? Visit our partner sites:

The Green Frugal

Running Across Texas


As Featured On Ezine Articles

I offer article and blog-writing services. Interested? Hire Me!


Did you find this article helpful? Thanks for supporting this free site with a small donation! We stay in business from the generosity of our readers, not a paywall.


Visit Kelly’s profile on Pinterest.


About the Author:

Photo of Kelly R. SmithKelly R. Smith is an Air Force veteran and was a commercial carpenter for 20 years before returning to night school at the University of Houston where he earned a Bachelor’s Degree in Computer Science. After working at NASA for a few years, he went on to develop software for the transportation, financial, and energy-trading industries. He has been writing, in one capacity or another, since he could hold a pencil. As a freelance writer now, he specializes in producing articles and blog content for a variety of clients. His personal blog is at Considered Opinions Blog where he muses on many different topics.

Checklist of Must-Have Tools for Living Off the Grid

by Kelly R. Smith

index sitemap advanced
An urban homestead with vegetable garden.
An urban homestead with vegetable garden

Ads we feature have been independently selected and reviewed. If you make a purchase using the links included, we may earn commission, which helps support the site.

This article was updated on 10/06/20.

Homesteading has become a buzzword du juor and an increasingly-popular lifestyle. But what is it exactly? Dictionary.com gives this somewhat legal definition, “a dwelling with its land and buildings, occupied by the owner as a home and exempted by a homestead law from seizure or sale for debt.”

More popular usage means living in a self-sufficient manner as much as possible. This means growing your own food, keeping livestock and fowl, and living off-the-grid in as many ways as you can. This includes generating your own electricity with wind turbines or solar panels, etc. This also means acquiring some must-have tools and supplies for living off the grid. Here are some essentials.

General Repair Tools

  • Duct tape. You already know — a million different uses. My Grandpappy swore by Scotch tape but I prefer to go industrial-grade.
  • Heavy-duty scissor car jack. Not just for changing flats anymore. This all-around tool will be a willing helper that won’t talk back or complain.
  • Belt sander. When building or repairing/refinishing furniture this is an invaluable tool.
  • An assortment of rope and tie-down straps. These will find a use on a day-to-day basis on your homestead.
  • Cordless drill, sawzall, circular saw, etc. Cordless is the way to go because you won’t always be working where an outlet is available. Just be sure to buy all your cordless tools from the same family (manufacturer) of tools so the batteries are interchangeable and you only have to keep up with one charger. I use and recommend Ryobi but Milwaukee and Makita are good as well. I literally use my Ryobi cordless drill at least 3 times a week.
  • Chainsaw. Useful for clearing brush, cutting up firewood, and heck, your artistic endeavors, if you are into that kind of thing.

Gardening/Farming Tools

  • A set of gardening tools. This comprehensive set should ideally be kept in a container that can be transported to to the garden/field as one unit so you won’t be making multiple trips. It should contain at least a kneeling mat if you use one, a shovel, gloves, limb trimmer, a basket to carry your daily harvest, and pruning shears.
  • Rotary tiller. If you have a good sized plot of land to work, this tool is essential for good root growth. You can rent one but it will be more cost-effective to buy your own in the long run.
  • A bucket or two. This is a multiple use tool, as simple as it is. I usually use one for mixing soil and amendments when planting.
  • Rain barrels. While a rain harvesting system might not technically thought of as a “tool,” it is essential for irrigating your crops close to the house. In general, plants prefer the pH (a figure expressing the acidity or alkalinity) of rainwater to tap water. And what would happen if your public water supply is cut off or contaminated? Get a rain harvesting barrel, or better still, two. The can daisy chain.

Health-Related Tools and Supplies

  • Tweezers. Handy for close work and removing splinters. Keep one in your medicine cabinet and another in the glove box of your truck.
  • Antiseptics. You will need to apply this lickety-split, quick, and in a hurry when you get any cut or abrasion.
  • Bandaids. Keep an assortment of sizes and shapes on hand.
  • Moleskin. Take care of those inevitable blisters on your feet.
  • Safety glasses. This is one that many people ignore but do yourself a favor. The good Lord only gave you two eyes; replacements not currently available.
  • Soap. Yes, we’ve all got some but do we use it often enough? It should be a habit with the onset of COVID-19 pandemic or the Coronavirus as it is also called, but you can also pick up undesirable things in your soil and mulch in your vegetable garden.
  • Hearing protection. Save your hearing! The ones I use are headphones with a built-in AM/FM radio.
  • Fire extinguishers. Keep one in the kitchen, one in your pantry, one in your wood shop (next to your wood shop dust collector is a good spot), and one in your truck. They are cheap; there’s no excuse.

Self-defense and protecting your homestead, family, and possessions is a critical issue. I won’t go into the thorny issue of supporting the 2nd amendment or not; that is a topic for another article. But grasp reality, my friend. When things go sideways and you are well-prepared and others are not, you WILL be targeted. Be armed. I recommend at least a shotgun and at least one handgun. I have the Glock .40 caliber because of the stopping power. A shotgun is also great for small game. A 410 is great.

This is not an exhaustive list of must-have tools for living off the grid in the homesteading mode but it’s a good start. When the SHTF you will be glad that you prepared in advance. And you don’t have to live out in the country; we have a modest 1,200 square foot home but over the years I’ve surrounded us with fruit trees and my vegetable garden and my herbs for cooking and medicinal purposes. My latest addition is a Don Juan Avocado tree.

References:

Looking for more great content? Visit our partner sites:

The Green Frugal

Running Across Texas


As Featured On Ezine Articles

I offer article and blog-writing services. Interested? Hire Me!


Did you find this article helpful? Millions of readers rely on information on this blog and our main site to stay informed and find meaningful solutions. Please chip in as little as $3 to keep this site free for all.


Visit Kelly’s profile on Pinterest.

About the Author:

Photo of Kelly R. SmithKelly R. Smith is an Air Force veteran and was a commercial carpenter for 20 years before returning to night school at the University of Houston where he earned a Bachelor’s Degree in Computer Science. After working at NASA for a few years, he went on to develop software for the transportation, financial, and energy-trading industries. He has been writing, in one capacity or another, since he could hold a pencil. As a freelance writer now, he specializes in producing articles and blog content for a variety of clients. His personal blog is at I Can Fix Up My Home Blog where he muses on many different topics.

Ring Video Doorbell and Chime Review

index sitemap advanced
Ring doorbell from Amazon.com

The Ring Video Doorbell and Chime (sold separately) are riding the wave of home automation and all things connected. As such, this is one more component of your home security. DIY setup is fast and easy. The doorbell has a rechargeable battery that’s connected via the included USB wire. The chime simply plugs into an outlet. Everything is controlled by an app on your phone.

Ring Doorbell Features

  • It senses when there is movement at the door and the chime rings.
  • When mounted 4 feet off the ground it provides 155 degree field of view.
  • 1080p HD view.
  • Pleasant chime sound.
  • Adjustable motion zones (5 feet – 30 feet)
  • Standard video capture. Don’t you want to know when Antifa comes calling?
  • Customizable motion zones.
  • 2.4 GHz Wifi connectivity.
  • Powered by rechargeable battery or can be hardwired.

Although setup is straightforward, the documentation leaves a little to be desired (isn’t that typical nowadays?). For example it references a green and red light on the battery to display charging status. I couldn’t find either. I had to call Ring HQ and was informed, “Oh, that’s for a model with a removable battery.” Welllllll, why didn’t it say so in the first place?

My chime setup was easy as well but it didn’t make any sound at first. It was turned off by default and I fixed it by going into the settings on my iPhone app. All in all I give the Ring Video Doorbell and Chime a rating of 9 out of 10. It would have been a 10 but for the documentation issues.

Looking for more great content? Visit our partner sites:

The Green Frugal

Running Across Texas


As Featured On Ezine Articles

I offer article and blog-writing services. Interested? Hire Me!


Did you find this article helpful? Thanks for supporting this free site with a small donation!


Visit Kelly’s profile on Pinterest.

About the Author:

Photo of Kelly R. SmithKelly R. Smith is an Air Force veteran and was a commercial carpenter for 20 years before returning to night school at the University of Houston where he earned a Bachelor’s Degree in Computer Science. After working at NASA for a few years, he went on to develop software for the transportation, financial, and energy-trading industries. He has been writing, in one capacity or another, since he could hold a pencil. As a freelance writer now, he specializes in producing articles and blog content for a variety of clients. His personal blog is at I Can Fix Up My Home Blog where he muses on many different topics.

7 Common Drywall-Taping Problems

index sitemap advanced
Drywall in new home construction

Drywall finishing, or taping and floating, is hardly rocket science. But it is more of an art and things can go wrong. The upside is that most of these things are easily corrected. The key thing is to prevent issues right from the get-go with this DIY project. Here are 7 common drywall-taping problems and how to deal with them.

Drywall Finishing Problems

  • Concave and crowned seams. The seams are where the drywall panels meet. There are tapered edges on the long side of the panel and square edges on the short side. Square seams are called butt-joints. Obviously tapered edges accommodate your drywall tape. Crowned seams happen when taping compound (mud) is applied too heavily and the center of the seam is left higher than the surface of the panels. This is more common on butt-joints. When light shines across the seams on your walls, they crowned seams are apparent. Catch these before painting, and sand them down with 120-grit or 150-grit paper or just use your widest floating knife to float it out wide. Concave seams are the opposite of crowned seams. To correct this just float the joint again.
  • Photographing. This happens when you apply glossy paint. The drywall and the joints and screws show up differently because they have different textures. To prevent this, either skim the entire surface with mud (drywall compound) or paint it with a sealer/primer. Applying a drywall texture with thinned-out joint compound will also help.
  • Bubbled tape. This happens when you have a poor bond between the tape and the mud. If the tape isn’t embedded well in the mud, it can easily loosen and form a bubble. It might be a round spot as small as 1/2 inch in diameter, or it may encompass the whole length of a seam. The solution? Smaller bubbles may be cut out with a utility knife and re-taped. For larger areas, you can remove the entire section of tape and embed new tape. Finally, apply a second and a third coat of mud. To avoid bubbled or loose tape to begin with, apply a thick enough layer of joint compound before you embed the tape and apply sufficient pressure with your taping knife to embed it properly. Or as I do, use mesh tape rather than paper; it’s much easier to work with.
  • Pitting. This looks like a number of small pits on the taped finished surface. They are small air bubbles that were either not properly filled or were exposed in the sanding process. Usually they are the result of over-mixing or under-mixing your mud or if insufficient pressure is applied when smoothing your mud. Much of your pitting can be covered up with these drywall texturing techniques.
  • Loose or cracked corner bead. When this happens, remove any cracked mud and re-apply. Be sure that there is a 1/2 inch gap between the bottom of the bead and the floor. If you use metal corner bead, reinforce the border with paper tape. This will reduce the chance of cracks developing.
  • Popped screws or nails. These don’t always show up until a few months or even years after the taping and floating, but they can show up before you paint your drywall. When you sand over screws or nails, your pole sander can apply a lot of pressure against the drywall panel. If the fastener hasn’t pulled the panel tight against your studs, the pressure can push the panel tight and pop the fasteners. This raises a bump on the surface or exposing the fastener head. Popped screws or nails are more likely with warped wood framing. Secure with new fasteners and re-float. I like to place screws or nails at 12 inch centers. Nails should be applied in pairs; one being a “helper” nail.
  • Shrinking or cracked drywall seams. Seams can develop drywall cracks during your taping process. This is most likely when your mud dries too quickly. This can happen because of direct high heat or sunlight. If your tape and mud are still solid, just re-tape the bad spots. Be sure that your seam is completely dry; use enough pressure to force the mud completely into the crack. If the tape is cracked or the compound is loose, you’ll have to remove the affected areas. Avoid this problem by keeping the heat low to extend your drying time. If the outdoor temperature is high, above 80°F, close the windows so the airflow won’t dry the compound too quickly.

These are the most common drywall-taping problems you are likely to encounter. The best approach is to take your time and prevent issues before they develop.

Looking for more great content? Visit our partner sites:

The Green Frugal

Running Across Texas


As Featured On Ezine Articles

I offer article and blog-writing services. Interested? Hire Me!


Did you find this article helpful? Thanks for supporting this free site with a small donation!


Visit Kelly’s profile on Pinterest.

About the Author:

Photo of Kelly R. SmithKelly R. Smith is an Air Force veteran and was a commercial carpenter for 20 years before returning to night school at the University of Houston where he earned a Bachelor’s Degree in Computer Science. After working at NASA for a few years, he went on to develop software for the transportation, financial, and energy-trading industries. He has been writing, in one capacity or another, since he could hold a pencil. As a freelance writer now, he specializes in producing articles and blog content for a variety of clients. His personal blog is at I Can Fix Up My Home Blog where he muses on many different topics.

How to Repair a Toilet Flange

index sitemap advanced
A toilet flange being set

The toilet flange is the interface between your sewer line and your toilet. It serves a double purpose:

  • It is slotted to secure the bolts that hold your toilet down securely.
  • It accepts the toilet wax ring to form a waterproof barrier and a means of keeping those sewer gasses out of your bathroom.

Like anything else, they will go bad at some point. Flanges, and the sewer lines they go into, are available in two different materials — modern plastic and old-style cast iron. How you repair a toilet flange depends on what what material you are working with. The first thing you will have to do, you guessed it, is pull the toilet to diagnose the problem. While you are at it, it doesn’t matter if it is an old commode or a newer low-flow toilet, this is a good time to replace other parts like the tank-to-bowl gasket and the filling mechanism.

Repairing Plastic Toilet Flanges

  • Eared Reinforcement Ring. If you have a plywood subfloor that has some rot around the flange and one or more of the securing flange-to-subfloor screws won’t hold because of it, this may be your solution. The “ears” simply extend further. This is also a viable solution for concrete slabs if part has chipped away.
  • Two-Part Repair Ring. Some flanges are composed of plastic with the outer ring (with the bolt slots and screw holes) made of steel. Eventually, this steel will rust. A repair ring is a good solution. Two versions are available — hinged or two-part. Your choice.
  • Stainless Steel Repair Ring. Solid plastic flanges (as opposed to the steel ring above) work well until they happen to break or bend. The easy fix is to screw a repair ring over your plastic flange.

Repairing Cast Iron Toilet Flanges

  • Repair Brackets. Older cast iron flanges often break. This can occur on one or both sides. If the broken area contains a bolt slot, slipping a repair bracket under the cast iron lip will do the trick.
  • Repair Flange. If the flange is too badly damaged to use repair brackets, a repair flange is your best bet. This is a plastic flange that is inserted into the mouth of the old cast iron flange. You may need to clean up and break away remaining parts of the old flange with a hammer and cold chisel.

These tips on how to repair a toilet flange will cover most situations. In addition to the repair materials here, you may find additional ones on the market. New ones are being invented all the time, which is a good thing for us. In fact, plumbing innovations are popping up all the time, driven by style, materials, and the effort to conserve water.

Toilet trivia: When you heard some one say, “I’ve got to go spend a penny,” when going to the bathroom, did you ever wonder where that came from? Well, when public toilets became popular in the Victorian days, they cost a penny to use.

Looking for more great content? Visit our partner sites:

The Green Frugal

Running Across Texas


As Featured On Ezine Articles

I offer article and blog-writing services. Interested? Hire Me!


Did you find this article helpful? Thanks for supporting this free site with a small donation!


Visit Kelly’s profile on Pinterest.

About the Author:

Photo of Kelly R. SmithKelly R. Smith is an Air Force veteran and was a commercial carpenter for 20 years before returning to night school at the University of Houston where he earned a Bachelor’s Degree in Computer Science. After working at NASA for a few years, he went on to develop software for the transportation, financial, and energy-trading industries. He has been writing, in one capacity or another, since he could hold a pencil. As a freelance writer now, he specializes in producing articles and blog content for a variety of clients. His personal blog is at I Can Fix Up My Home Blog where he muses on many different topics.

5 Benefits of a Wood Shop Dust Collector

index sitemap advanced
A Shopsmith wood shop dust collector

When most beginning woodworkers are setting up shop or experienced ones are upgrading, what first comes to mind? Tools, benches, and fixtures. But here’s a woodworking tip for you; it pays to first consider an investment in a wood shop dust collector system. Here are 10 of the most important reasons.

  • Sawdust is a royal pain. Shavings, dust, and chips accumulate very quickly. Fine dust fills the air until it settles somewhere, such as the surface of your current project that you are putting a finish coat on, applying putty to, or gluing up. And it goes without saying that you won’t make any points with your spouse when you inevitably track it into the house.
  • Sawdust is a definite fire hazard. It only takes one spark from your grinder to get things going. And if you are not storing your flammables properly you are compounding the problem. Even fine dust that sifts on top of lighting fixtures and electrical boxes has the potential to light up your day — and not in a good way!
  • Sawdust is a great candidate for recycling. Having the dust collector consolidate it while you work on your table saw, band saw, or other piece of equipment takes half the effort out of the process. It can be used to make sweeping compound (which you can use or barter). Hardwood is a great soil amendment for your garden because as it breaks down it feeds the soil with beneficial nutrients.
  • Fine sawdust is a health hazard without a dust collector. It can hover in the air for hours where it enters your sinuses and lungs. You can end up with allergy issues and congestion. The effects accumulate over time meaning that they can build up over the course of years even if you don’t notice a problem for a while. Exotic woods can be outright toxic. I had an x-ray several years ago and they picked up a spot in one lung. Turns out it was a “calcified nodule” which results when you breath something in and your lung isolates it by coating it, much as an oyster creates a pearl from a grain of sand over time. Was it from woodworking? Quite possible after 20 years as a carpenter.
  • Dust collection extends the life of your power tools. If chips or even dust is removed immediately, friction on moving parts is reduced greatly. When sanding, your paper will take longer to clog, saving time and money. It figures that sawdust from any wood containing moisture or sap will gum up a heated machine fairly quickly.

These are just 5 important benefits of a wood shop dust collection system. Yes, it is an expense but in the long run it will save you time, money, and your health.

Looking for more great content? Visit our partner sites:

The Green Frugal

Running Across Texas


As Featured On Ezine Articles

I offer article and blog-writing services. Interested? Hire Me!


Did you find this article helpful? Thanks for supporting this free site with a small donation!


Visit Kelly’s profile on Pinterest.

About the Author:

Photo of Kelly R. SmithKelly R. Smith is an Air Force veteran and was a commercial carpenter for 20 years before returning to night school at the University of Houston where he earned a Bachelor’s Degree in Computer Science. After working at NASA for a few years, he went on to develop software for the transportation, financial, and energy-trading industries. He has been writing, in one capacity or another, since he could hold a pencil. As a freelance writer now, he specializes in producing articles and blog content for a variety of clients. His personal blog is at I Can Fix Up My Home Blog where he muses on many different topics.

Top 10 Woodworking Tips for Projects

Various woodworking tools
index sitemap advanced

This article was updated on 01/12/21.

Ads we feature have been independently selected and reviewed. If you make a purchase using the links included, we may earn commission, which helps support the site.

Whether you’re a professional carpenter or a hobbyist woodworker in the evenings or on the weekends, one thing is certain. You can’t have too many woodworking tips. They might make completion of your project easier, or more precise, or just save time. In this sense, tips are a lot like woodworking jigs. Let’s take a look at some of these tips.

  1. Make your own wood putty. Using wood putty is often inevitable. The problem with store-bought products is that it is difficult to get a good color match. The manufacturers can only replicate so many shades and the store can only dedicate so much shelf space. The solution for a perfect match at almost zero cost is surprisingly simple. Check out how to make homemade wood putty.
  2. Keep your work bench clean with wax paper. We’ve all done it — glued up and begin clamping all or part of a project only to see glue oozing out and dripping on your work surface. Clean-up will not be fun. The solution? Put wax paper under your project before you start. It’s cheap and disposable.
  3. Invest in a pneumatic nailer or two. There will be times when these tools come in handy. Say, if you are doing a repetitive task that requires fastening with nails, either 2″ ones or very small 23 – gauge pins this is much easier than the hammer-and-nail set approach. In fact, driving the smallest with a hammer is impractical. They bend; you curse. The solution is a battery-operated pin nailer.
  4. Know your lumber grades. Every project is somewhat unique. Most people go shopping for lumber and base their selection on straightness, no warping, no checking, no knots, etc. They don’t also evaluate by National Hardwood Lumber Association lumber grades and so sometimes overbuy. For example, if only one side of the project is going to be visible, your best choice might be FAS 1F or F1F.
  5. Select the right finish. Varnish or “polyurethane varnish” is only for interior use. It will not stand up to outdoor elements. Spar varnish on the other hand is excellent for for outdoor furniture, boats and exterior doors. It dries slowly and so it stays more supple. Because of this it accommodates the movement of the wood so it is not likely to crack and fail. Tung oil is also suitable for exterior use.
  6. Draw a line on a long board with your combination square. Drill a 1/16″ hole in the middle of your combination square at the 1″ mark. Now you can set your square so that the hole lines up with where you want the line to be. Insert a sharpened pencil tip into the hole and draw down the length of the board.
  7. Use the 3-4-5 method for squaring. There will be times when laying out large projects and it is not practical or accurate to use small tools. In this case you can use the 3-4-5 method for squaring. It’s quite simple and accurate as it’s based on the Pythagorean Theorem. Remember that from math class?
  8. Hassle-free screw insertion. In many cases it is a good idea to pre-drill screw holes to minimize the chance of splitting the wood. However, the further the screw has to penetrate, the higher the possibility that the screw will stall or the slot (standard or Phillips) will strip out. My favorite solution is to rub the screw threads on a bar of soap first. This lubrication minimizes insertion issues.
  9. Remove the plug from a holesaw with ease. The holesaw is a great invention. The drawback is getting that darn plug out after you cut the hole. Here’s a workaround. First, drill a pilot hole completely through the work piece with a twist bit the same size as the diameter of your holesaw’s drill bit. Next, insert your holesaw’s bit into that hole and cut more than halfway through the work piece. Next, pull out your holesaw, flip over your work piece, and saw the hole from this side, using the pilot hole to guide your second cut. After completing the cut and pulling out your holesaw, the plug will be sticking halfway out of the saw, giving you something to hold onto, making it a snap to remove.
  10. Cutting small pieces on your tablesaw. This can be a major hassle at a minimum. Altogether too often the piece either flies away or splinters up. Save yourself the hassle. Set you blade just shy of the thickness of the wood so you don’t saw all the way through. Now just finish the cut using your chisel.

Looking for more great content? Visit our partner sites:

The Green Frugal

Running Across Texas


As Featured On Ezine Articles

I offer article and blog-writing services. Interested? Hire Me!


Did you find this article helpful? Millions of readers rely on information on this blog and our main site to stay informed and find meaningful solutions. Please chip in as little as $3 to keep this site free for all.


Visit Kelly’s profile on Pinterest.

About the Author:

Photo of Kelly R. SmithKelly R. Smith is an Air Force veteran and was a commercial carpenter for 20 years before returning to night school at the University of Houston where he earned a Bachelor’s Degree in Computer Science. After working at NASA for a few years, he went on to develop software for the transportation, financial, and energy-trading industries. He has been writing, in one capacity or another, since he could hold a pencil. As a freelance writer now, he specializes in producing articles and blog content for a variety of clients. His personal blog is at I Can Fix Up My Home Blog where he muses on many different topics.

Beat the Heat this Summer and Cold this Winter with Radiant Barrier

by Kelly R. Smith

Radiant barrier staple-up foil and loose fill insulation
index sitemap advanced

This article was updated on 12/14/20.

Ads we feature have been independently selected and reviewed. If you make a purchase using the links included, we may earn commission, which helps support the site.

The cost to air-condition you home in the summer and heat your home in the winter is absolutely insane, even if you have your HVAC sized perfectly. But what can you do? For one thing, you can install a spray-on and/or aluminum foil radiant barrier.

These are the two major distinct heat-reduction methods on the market today. And they really work. NASA uses it, as do other commercial and residential properties. And, although it is touted for summer savings, it works in the winter as well. Think of a thermos bottle. It doesn’t care if the contents are hot or cold; it just does a splendid job of insulating.

Which is Best: Spray or Foil?

This is really up to you; it really depends on your situation. But, and this is a huge but, spray-on is more versatile. It’s simply a powder mixed with paint so you can use any color latex paint you want and roll it or spray it on your walls, interior or exterior but white is recommended.

When I sprayed my attic, I used the bottom inch or two in the bucket that my Graco airless paint sprayer didn’t pick up to roll on my garage walls. And what a difference that has made! The garage is my woodworking shop and it is now much more comfortable.

How Much does Radiant Barrier Cost?

Uhmm, that’s a good question. There is no denying it; it can be expensive. When I did my home (about 12 years ago) it was $0.50 USD per square foot for foil and about $40.00 USD per gallon for the pre-mixed spray-on product. I did the labor myself. You think that’s bad? Check out your last electricity bill. Multiply it by 12. It’s all relative in the grand scheme of things.

How Does this Insulation Technology Work?

The spray-on method generally combines microscopic porcelain beads with aluminum flakes which are mixed into a latex paint base to reflect the heat. The foil is typically an aluminum product with tiny perforations to allow the material to breathe. The 2-ply versions are recommended because that provides a “dead” area that insulates much like fiberglass batt insulation does.

Common Questions About Radiant Barriers

Is it too expensive? No! This is one of the cheapest things you can do to lower the burden on your central air conditioner over the long term. Of course the initial cost may seem steep, but after it pays for itself you keep saving. Smart investment. I installed mine over ten years ago and our electric bill has been about 35% lower since then. You can’t control the rates but you can control consumption.

Is it hard to install? No! If you go with the foil, you basically need a tape measure, a utility knife, and a stapler. If you use the spray you will need to buy or rent a paint sprayer with the proper size spray tip. The only hard part is getting in tight spots. So, as I found out, patience is required, especially if you don’t have a helper available.

Are there any precautions? Yes. If you use spray-on, you must use a high quality respirator (not a COVID-19 type dust mask) when spraying or boxing the paint and powder, as well as when you spray. You don’t want to inhale any of that.

When is the best time to install it? Generally speaking, I recommend spring or fall. Attics get too hot in the summer months, at least here in South Texas. For example, I installed ours in March and it was already hot. Winter is good but I prefer not to do this kind of work with work gloves.

Concerns about Cell Phone Reception

Radiant barrier foil and spray for double-effectiveness

Well, this is everybody’s favorite question in our hooked-up and connected world. This question is still way out there as far as the responses go. From my spray radiant barrier experience, I can say that there was little or no change.

But, as far as the foil staple-up barrier is concerned (which I did not do in my home), I’ve found that the yes/no response from others is about equal. Logic dictates that it would make a difference from cell interception arriving vertically, but horizontally? Who knows? In any event, I know people that use cell phone signal boosters with great results.

When I added the foil to the attic floor over the rafters and the fiberglass batt insulation I did notice some cell reception degradation. But then I upgraded my cable modem/WiFi and the signal was perhaps better than it ever was.

So is radiant barrier insulation right for your home? From my experience I would say yes, absolutely. It lowers utility bills in the fiercest summer heat and the most shivering of winter weather. It will pay for itself over time if you are there for the long term and if you put your home on the market it’s a great selling point. Win-win.


Recommended Reading

Looking for more great content? Visit our main site I Can Fix Up My Home or our partner sites:

The Green Frugal

Running Across Texas


As Featured On Ezine Articles

I offer article and blog-writing services. Interested? Contact me for a quote!


Did you find this article helpful? Millions of readers rely on information on this blog and our main site to stay informed and find meaningful solutions. Please chip in as little as $3 to keep this site free for all.


Visit Kelly’s profile on Pinterest.

About the Author:

Photo of Kelly R. SmithKelly R. Smith is an Air Force veteran and was a commercial carpenter for 20 years before returning to night school at the University of Houston where he earned a Bachelor’s Degree in Computer Science. After working at NASA for a few years, he went on to develop software for the transportation, financial, and energy-trading industries. He has been writing, in one capacity or another, since he could hold a pencil. As a freelance writer now, he specializes in producing articles and blog content for a variety of clients. His personal blog is at I Can Fix Up My Home Blog where he muses on many different topics.

2020 National Electrical Code Changes

National Electrical Code
index sitemap advanced

The National Electrical Code (NEC), or NFPA 70, is a regionally adoptable standard for the safest installation of electrical wiring and equipment, only in the United States, although of course other countries can follow it if they wish. The NEC is a part of the National Fire Code series published by the National Fire Protection Association (NFPA), which is a private trade association. Despite the use of the term “national”, it is not a federal law. It can be adopted as is by any state or municipality or adapted.

The 2020 version of the National Electric Code includes requirement updates in the following four significant areas: firemen’s disconnect, solar power, surge protection, and GFCI protection . To ensure providing the best, safest work possible, become familiar with the official NEC codes mandated by your state. Whether you are a professional or a DIY project person, a knowledge of electrical safety requirements is important.

Emergency Disconnects

  • Must function from outside dwellings
  • Applies to generators and energy storage systems (ESS)
  • Required for all single- and two-family dwellings
  • Must be readily accessible
  • Generators must be marked with one of the following: EMERGENCY DISCONNECT, METER DISCONNECT, NOT SERVICE EQUIPMENT, EMERGENCY DISCONNECT, SERVICE DISCONNECT, or EMERGENCY DISCONNECT, NOT SERVICE EQUIPMENT

Surge Protection

  • Must be part of service equipment or adjacent to it
  • New article (242) includes service lines to dwelling units
  • May be located at each level of downstream distribution as needed
  • As of 2020 applies to: replacements and service upgrades and line side and load side services 

Solar (Applies to California)

  • Solar panels on new construction (California requires solar photovoltaic systems for newly constructed healthcare facilities starting January 1, 2020)
  • Outdoor disconnect required for all energy storage units

Articles Removed from NEC 2017

  • Article 553 Floating Building
  • Article 285 SPDs 1,000V or less
  • Article 280 SPDs over 1,000V
  • Article 328 MV Cable Type MV

New Articles Added

  • Article 800 General Requirements for Communication Systems: consolidates the previous contents of 2017 NEC chapter 8 into one articles and addresses requirements for communication circuits, to include television and radio distribution antennae as well as network powered broadband systems.
  • Article 242 Overvoltage Protection: combines the two articles 280 and 285 and addresses surge protective requirements, devices and arresters.
  • Article 337 Type P Cable: covers 600V Type P cables that are used in industrial and hazardous areas and specifications.
  • Article 311 MV Connectors and Cable: Expands on the deleted article 328 and goes on to address medium voltage conductors and cables, their use, and their specifications.

Look for Updates Every 3 Years

The National Fire Protection Agency continues to publish official updates to the NEC every three years. These updates have run like clockwork since 1897, when the code was first introduced. 2020 NEC is the end result of more than 5,000 public inputs and comments, 18 panels, the annual NFPA meeting, and more than 2,000 revisions. Get ahead of the curve by learning about the 2020 National Electrical Code changes.

Looking for more great content? Visit our partner sites:

The Green Frugal

Running Across Texas


As Featured On Ezine Articles

I offer article and blog-writing services. Interested? Hire Me!


Did you find this article helpful? Thanks for supporting this free site with a small donation!


Visit Kelly’s profile on Pinterest.


About the Author:

Photo of Kelly R. SmithKelly R. Smith is an Air Force veteran and was a commercial carpenter for 20 years before returning to night school at the University of Houston where he earned a Bachelor’s Degree in Computer Science. After working at NASA for a few years, he went on to develop software for the transportation, financial, and energy-trading industries. He has been writing, in one capacity or another, since he could hold a pencil. As a freelance writer now, he specializes in producing articles and blog content for a variety of clients. His personal blog is at I Can Fix Up My Home Blog where he muses on many different topics.

Tankless Water Heater Maintenance Tips

Routine Appliance Care Saves Money and Extends Service Life

Photo of Kelly R. Smith   by Kelly R. Smith

Typical tankless water heater anatomy
index sitemap advanced

This article was updated on 04/15/21.

Ads we feature have been independently selected and reviewed. If you make a purchase using the links included, we may earn a commission, which helps support the site. Thank you for your support.

Tankless water heaters have long been a staple in Europe and Asia and are becoming more common in the US. There are many good reasons for this; the primary one is economic. Unlike a typical tank water heater, it only delivers hot water upon demand. Why store it in a bulky tank when you don’t have to? It’s one more way to increase your home’s energy efficiency.

It’s not a complete panacea though. Like any other appliance it requires periodic maintenance to operate effectively. Here are the top tankless water heater maintenance tips that the homeowner can do; make it a periodic DIY project. These generic instructions will work for most units but be sure to check your manual for any proprietary details.

Clean the Air Filter

  • Turn off and unplug the heater or isolate power by flipping the circuit breaker.
  • Find the air filter; remove it.
  • Inspect it carefully; a dirty filter will reduce performance.
  • Clean it with a soft-bristled brush using a mild solution of dish soap and warm water.
  • Rinse it well with clean water and dry it using a lint-free towel, and reinstall.

Clean the In-Line Water Filter

  • Find the in-line water filter at the cold-water inlet.
  • Close the cold-water supply valve to turn off the water supply to the unit.
  • Remove the filter.
  • Clean the filter by tapping it to dislodge sediment, run it under clean, clear water, and wipe it with a cotton swab.
  • Reinstall the filter.
  • Reopen the cold-water supply valve.
  • Check for leaks; tighten as needed.

Flush the Heater

  • Close the shutoff valves on both the hot and cold water lines.
  • Connect a hose from the outlet of a circulation pump to the cold-water service valve. Connect a drain hose to the hot-water service valve.
  • Pour 4 gallons of undiluted food-grade white vinegar into a clean 5-gallon bucket. Place both the drain hose from the hot water service valve and the pump supply hose (connected to the pump’s inlet) into the vinegar bucket.
  • Open the service valves on the hot and cold-water lines.
  • Turn on your pump allowing the vinegar to circulate throughout the heater at a rate of 4 gallons per minute.
  • Let it run an hour and then flush the system with clean, cold water to remove the vinegar and any loose minerals. To do this step, first remove the free end of your drain hose from your bucket, and then run it either to a convenient drain or to the outside. Next, close the cold-water service valve, open the cold-water supply valve, and then let the water flow through your heater for a minimum of five minutes. Next, close the cold-water supply valve, and clean the in-line water filter at the cold-water inlet on the heater to remove any loose deposits the filter picked up during the above process. Again, clean the filter by tapping it, running it under clean water and wiping it with a cotton swab. Finally, replace the filter.
  • Close your hot-water service valve, and then open both the cold and hot-water supply valves.
  • Disconnect all of the hoses, restore power to the heater, and turn it on.

These steps for tankless water heater maintenance should help you to keep your unit running efficiently and save you money by not having to hire a contractor. If you agree, please share with your friends and social media.


Looking for more great content? Visit our partner sites:

The Green Frugal

Running Across Texas


As Featured On Ezine Articles

I offer article and blog-writing services. Interested? Hire Me!


Did you find this article helpful? Thanks for supporting this free site with a small donation!


Visit Kelly’s profile on Pinterest.


About the Author:

Photo of Kelly R. SmithKelly R. Smith is an Air Force veteran and was a commercial carpenter for 20 years before returning to night school at the University of Houston where he earned a Bachelor’s Degree in Computer Science. After working at NASA for a few years, he went on to develop software for the transportation, financial, and energy-trading industries. He has been writing, in one capacity or another, since he could hold a pencil. As a freelance writer now, he specializes in producing articles and blog content for a variety of clients. His personal blog is at Considered Opinions Blog where he muses on many different topics.


close

Enjoy this blog? Please spread the word :)

RSS
Follow by Email
Twitter
Follow Me
Tweet
Pinterest
Pinterest
Pinterest
Instagram
LinkedIn
Share