How to Build a Fence Gate
Use an Adjust-a-Gate Kit
© 2017 by Kelly Smith; all rights reserved; content may not be copied, rewritten, or republished without written permission.

Recently I broke down and rebuilt my fence gate leading into the backyard. This project had been on hold for some time (sound familiar?) but when the dachshund dog started using it as an escape portal there was no more procrastinating.
I’ve built gates from scratch before but that can be a tricky process. It’s awkward because on a replacement project the 4’X4’ posts on either side are rarely plumb anymore. Looking for a better solution, I found the Adjust-A-Gate Steel Frame No Sag Gate Building Kit and decided to give it a try.
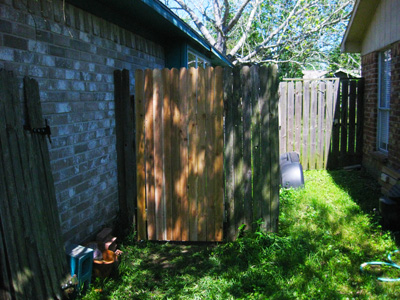
You might notice in the picture above that the gate latch offers no access from the outside, only the inside. This works for me for security reasons. If you need to open the latch from the outside it is an easy fix.
I was very impressed with this kit. It’s simple, sturdy, and easy to adjust (as the name implies). It turned out to be a quick job as well; it took me only two hours to demo the old gate, assemble the new one, and attach the pickets. If I were to do another one it would go faster because of lessons learned.
With that in mind, I took the following pictures and noted tips that installers will find helpful.

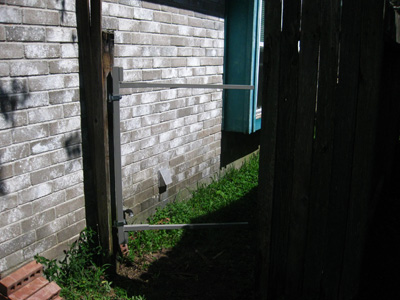
This is how your post hinges should look. It takes a bit of elbow grease to get these babies in. The instructions recommend using an adjustable wrench but I had a lot more luck with large vise-grips.

This is what it should look like with the telescoping bars in position. It feels fairly sloppy but that’s OK.

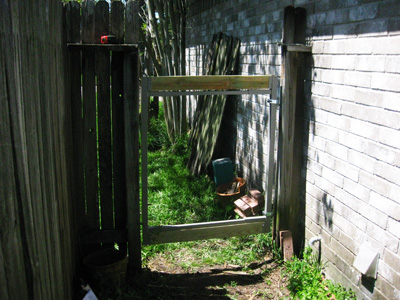
The latch side is installed. The telescoping bars allow for you to compensate for an out-of-plumb post. Note that the pressure treated 2"X4’s should be carefully selected. Get the straightest ones available.
Finishing up with Fence Gate Installation
The final steps include installing the striker bar for the latch. Even though the supplied self-tapping screws are of a good quality, the steel is so tough that I ended up pre-drilling with a bit just smaller than the screws. That made the job easy.
The only thing left is attaching the pickets. Nails can be used but I went with coarse-thread drywall screws given that the gate will be in movement. I hope this article has been of some help to your project. Do you have any more tips? Feel free to tell our readers in the comment section below.