Drywall Texturing Made Easy
DIY Paint Roller and Knockdown Texture Methods
© 2008 by Kelly R. Smith all rights reserved; content may not be copied, rewritten, or republished without author’s written permission.
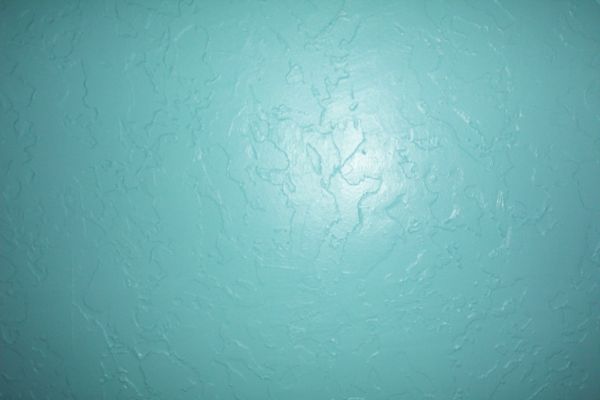
 A drywall knockdown texture that looks something like a map.
This article was updated on 09/21/20.
Want to create a dramatic effect on your home’s walls and ceiling? These basic
drywall texturing
techniques get you started in developing your own creative style.
Many people look at a professionally textured wall or ceiling and wonder how it’s done and how
difficult it must be. Actually, there are methods that are simple for the DIY’er to tackle that only
take a few moments to master.
In other words, it is a perfect weekend DIY project that you can do yourself or get the family involved. Doing it yourself also has the benefit of saving money on labor. And, if you happen to get any texture spatters on your tile floors, just clean them up with a commercial tile floor cleaning machine.
The purpose of this tutorial is to teach the homeowner just two of the many easy ways to texture
sheetrock. You can use these to apply texture to a sheetrock wall or ceiling without
the hassle of a hopper texture sprayer.
Why texture? One reason is to cover up any imperfections from warped studs or drywall finishing. The higher the sheen of your paint, the more important this is. Another reason is that it gives your living space more character.
Method One: The Roller Sheetrock Texturing Method
This is the easiest of the two wall and ceiling texturing methods outlined in this tutorial.
You’ll need:
- Paint roller handle with cover and extension pole
- Paint roller pan
- Electric drill; use a heavy-duty tool rather than a budget model
- Ribbon mixer (found in drywall taping tool area of the home improvement store)
- Drop cloths
- 5 gallon bucket(s) of pre-mixed sheetrock mud (drywall compound)or powder that you will have to add water to and mix

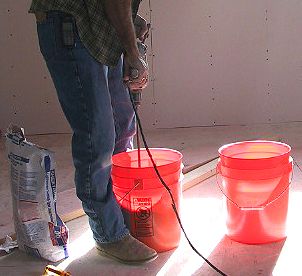
Begin by thinning out the mud with water. Transfer half the mud to a sturdy plastic bucket. Add a cup of
water to the remaining mud and mix it in well using the ribbon mixer with your electric drill. You might
have to add some more water or mud. Ideally, it should have a consistency of a milk shake.
Apply the Texture
First, spread out the drop cloths in the work zone. Pour some thinned mud in the roller pan. There
are two factors that determine how pronounced the finished texture will be — the nap of the roller used
and the speed with which you roll the wall.
Play around with this with the first area before it dries until you get it where you like it.
As you roll the nap will lift the mud off the wall in peaks. The slower you go, the higher the
peaks will be.
Start rolling up and down in one corner and work your way around the room. For a more erratic pattern,
roll back over it at random angles. Set your internal artist free!
Method Two: The Knockdown Sheetrock Texture Method

This method is a great way to refresh your walls. For this Method you’ll need:
- Everything from the previous list except for the painting tools
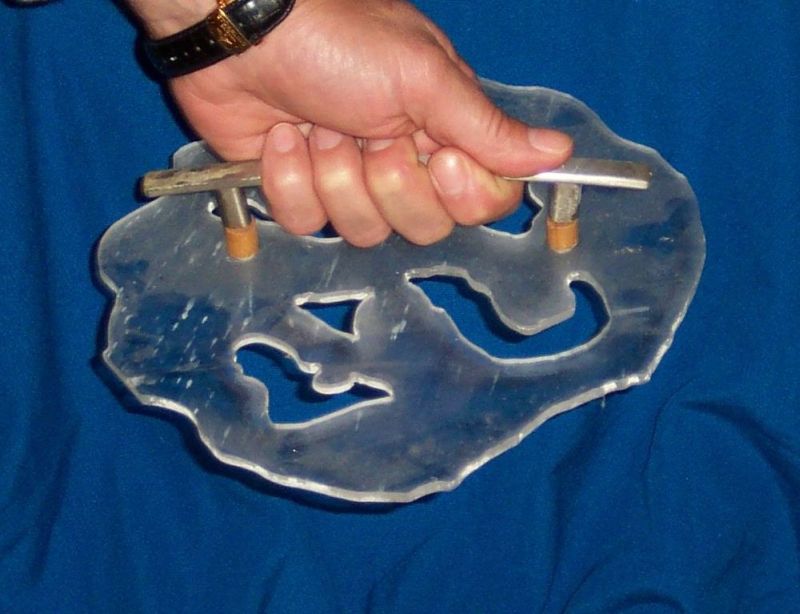
- Crow’s foot stomp brush or this
homemade knockdown texture tool
- Wide (about 10”) taping knife
- Narrow taping knife and perhaps a putty knife for those tight spots
- Mud pan
Thin out the mud as before but leave it a bit thicker. You’ll get a feel for your personal preference
by trial and error.
Apply the Texture
For the knockdown texturing method, you still want to raise peaks in the mud on your drywall.
The difference here is that rather than rolling the mud, the crow’s foot brush or the
homemade knockdown texture tool is dipped in the mud (not submerged), pushed onto the sheetrock, and pulled off.
Overlap a bit. Do a section that you can conveniently reach and then knock it down and do another
section.
Knock Down the Texture
This is the step that gives this texture its character. What you want to do here is lightly drag
the knife at about a 45 degree angle across the peaks in the mud to flatten them off (think plateau).
As mud accumulates on the knife scrape the excess into the mud pan.
The knockdown takes a little practice (it really is a creative process driven by your personal style) but you can re-stomp anywhere as long as the mud is still wet.

A knockdown texture painted turquoise
Take a close look at this photo and the one at the top of this article. This is a bathroom I
just textured.
And in Summary...
As you can see, neither of these techniques is set in stone; they are jumping off points for your
personal decorating style. For example, with the roller texturing method, a heavy, slow nap can be used
and knocked down for a semi-corduroy effect.
With the crow’s foot or the homemade tool, you might try a slight swirling movement while pulling off.
The point is, experiment and have fun!
These drywall texturing techniques are good examples of how you can reap major improvements with a surprisingly low remodeling budget. Do you have any innovative texturing techniques? Feel free to share with our readers in the comment area below.
Do you need an article or blog post written? I offer that service at a competitive rate. Contact me for a quote!